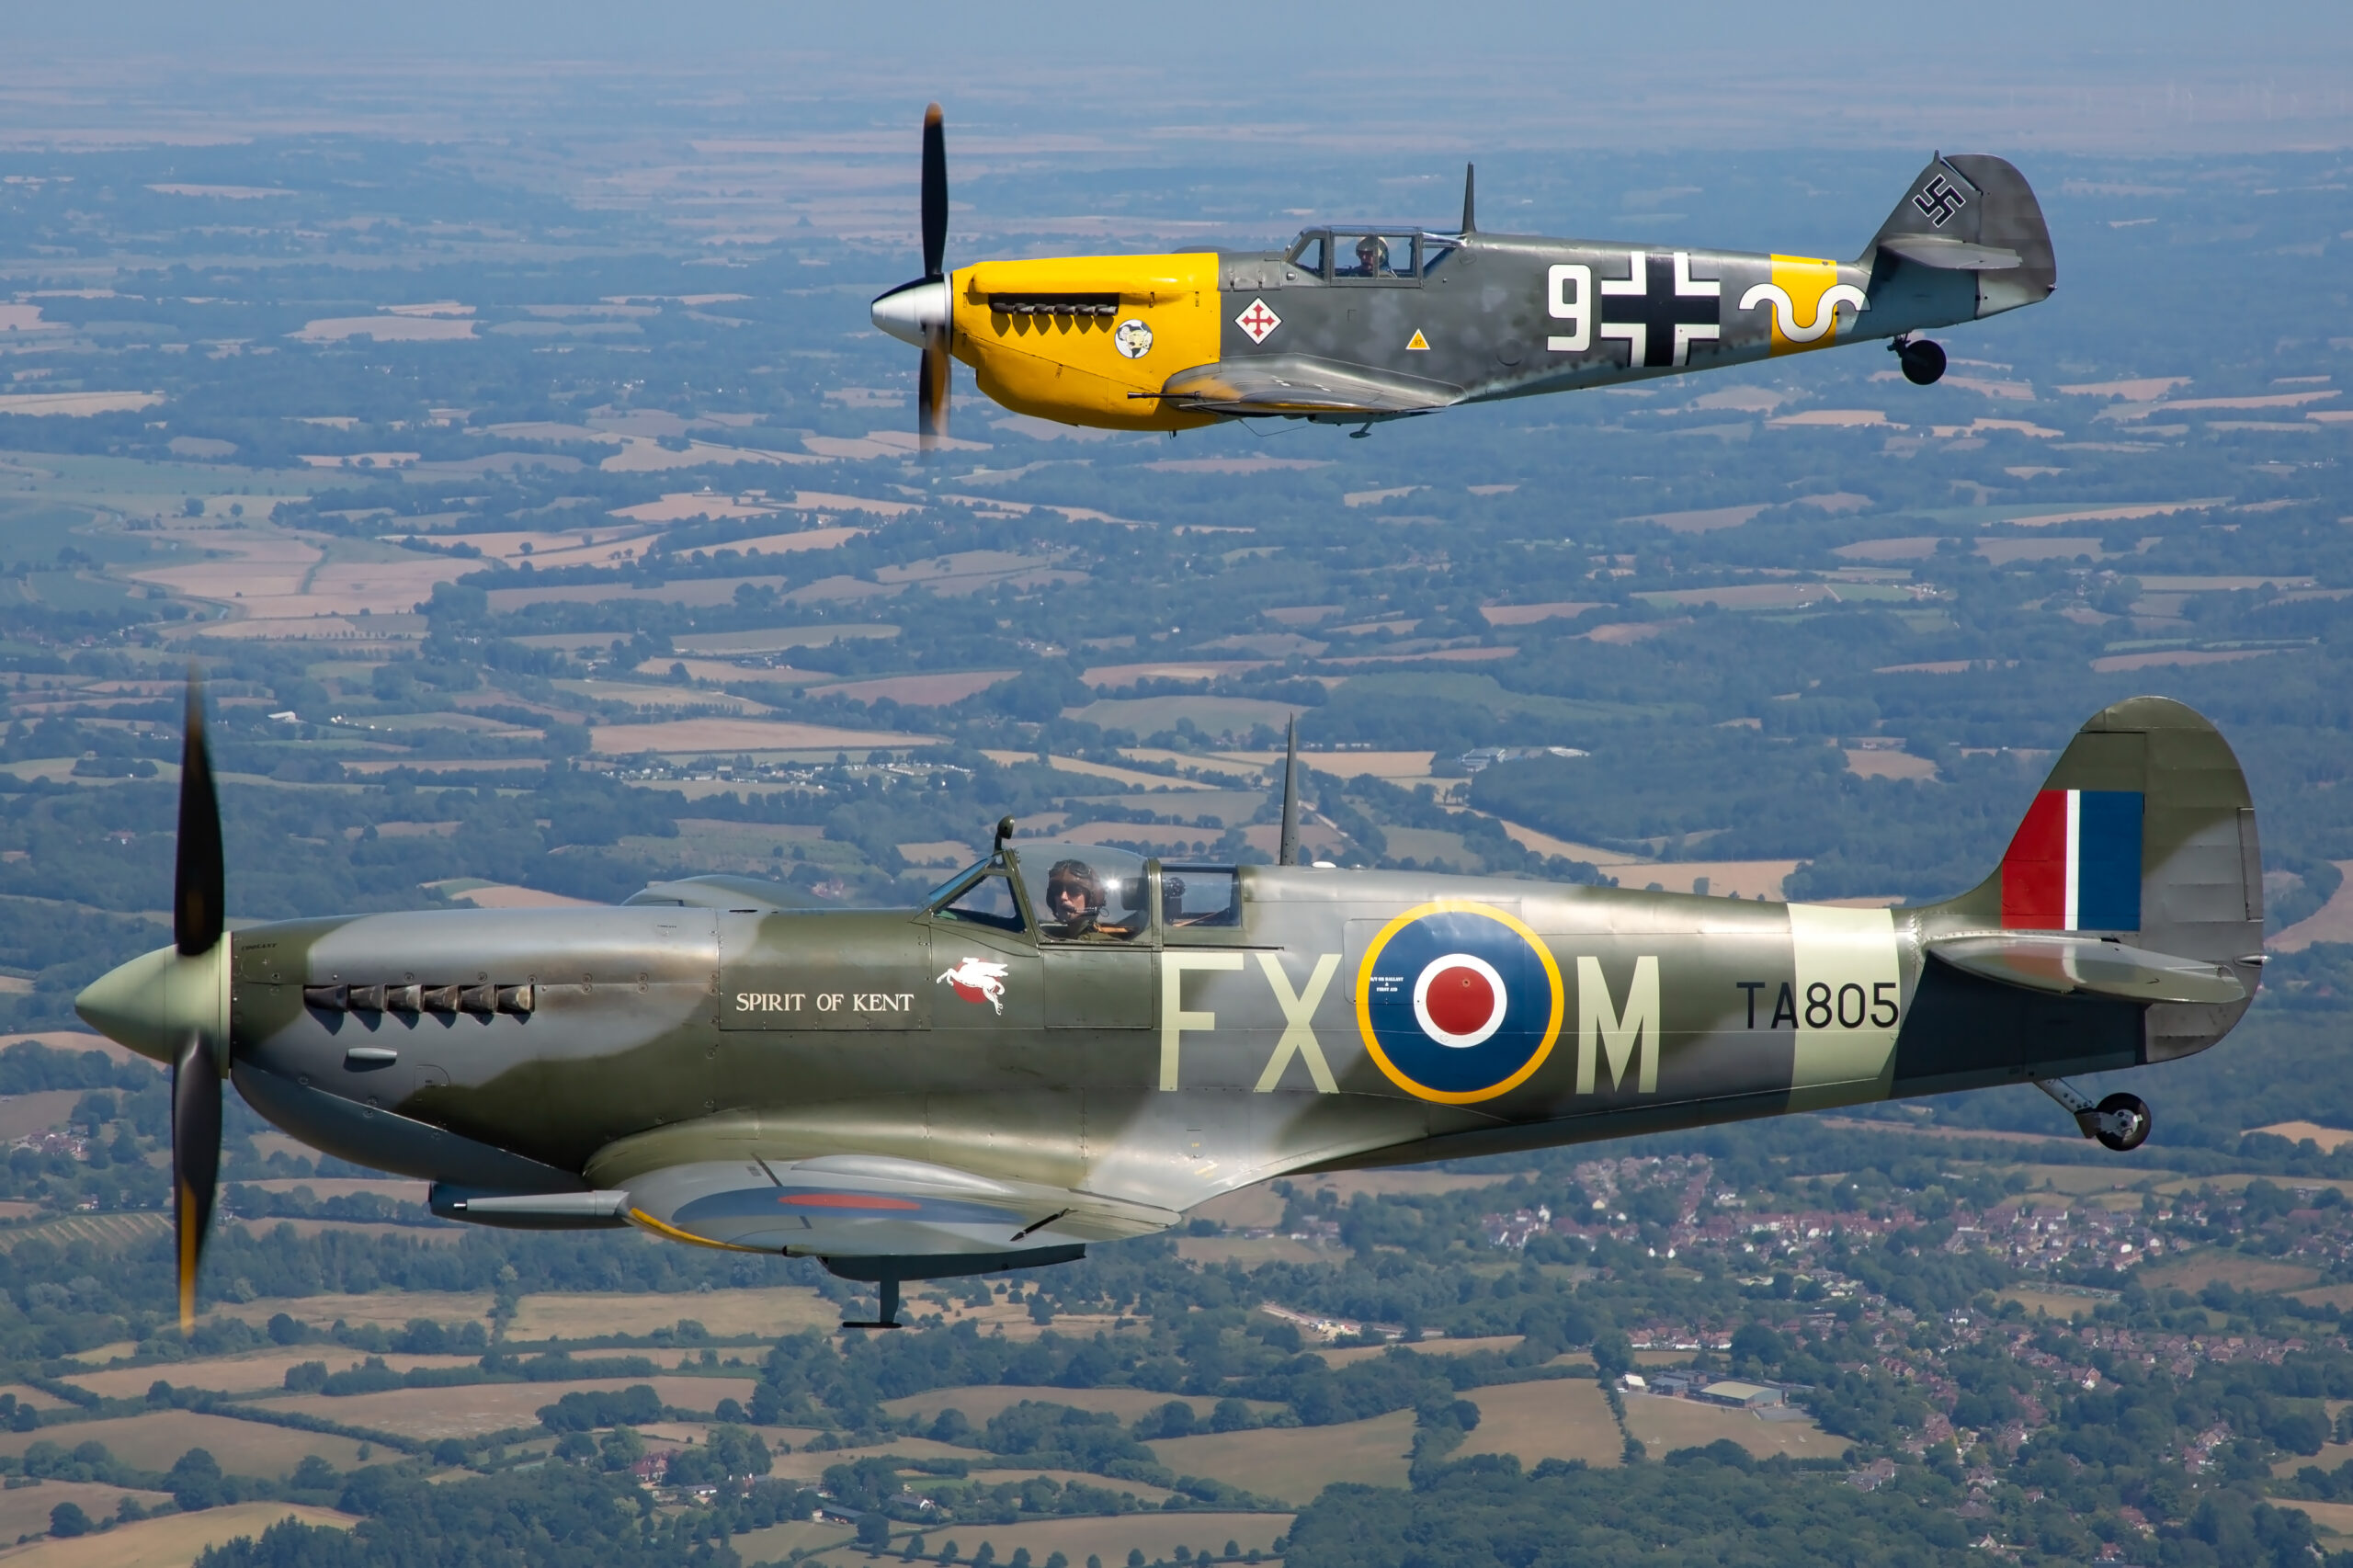
A warbird in the air does something no modern jet quite manages. Photographing warbirds well comes down to a few core decisions: a slower shutter speed to blur the propeller, smooth panning to keep the aircraft sharp, and shooting in good light from the right position. The engine note carries across the crowd, the propeller throws a disc of blur in front of a polished nose, and seventy or eighty years of history banks into the light. Photographing one well is a different job from shooting a fast jet. The aircraft is slower, the propeller demands a slow shutter speed, the paint catches light in ways that reward patience, and the margin for error on focus and panning is small. This guide covers the whole craft, from the settings that turn a dead prop into a living arc, through panning and autofocus, to light, composition and the UK shows where these aircraft still fly.
It is written for the photographer who already turns up at airshows with a telephoto lens and wants to come home with warbird frames that look the way the aircraft felt on the day. You do not need to fly to make these images. Almost everything here is shot from the ground, from a crowd line, with kit that most enthusiasts already own. If you have read our guide to propeller blur and the right shutter speed, some of the groundwork will be familiar. Here we take it further and apply it to the specific problem of WWII fighters and bombers in display flight.
What this guide covers
- What counts as a warbird
- Why warbirds are different to photograph
- The gear that actually works
- Shutter speed and the propeller disc
- Exposure and metering against bright sky
- Autofocus and tracking
- Panning a warbird cleanly
- Light and time of day
- Composition and framing
- Shooting warbirds on the ground
- Scenario by scenario
- Common mistakes and how to fix them
- Where to photograph warbirds in the UK
- A short note on processing
- Frequently asked questions
What counts as a warbird
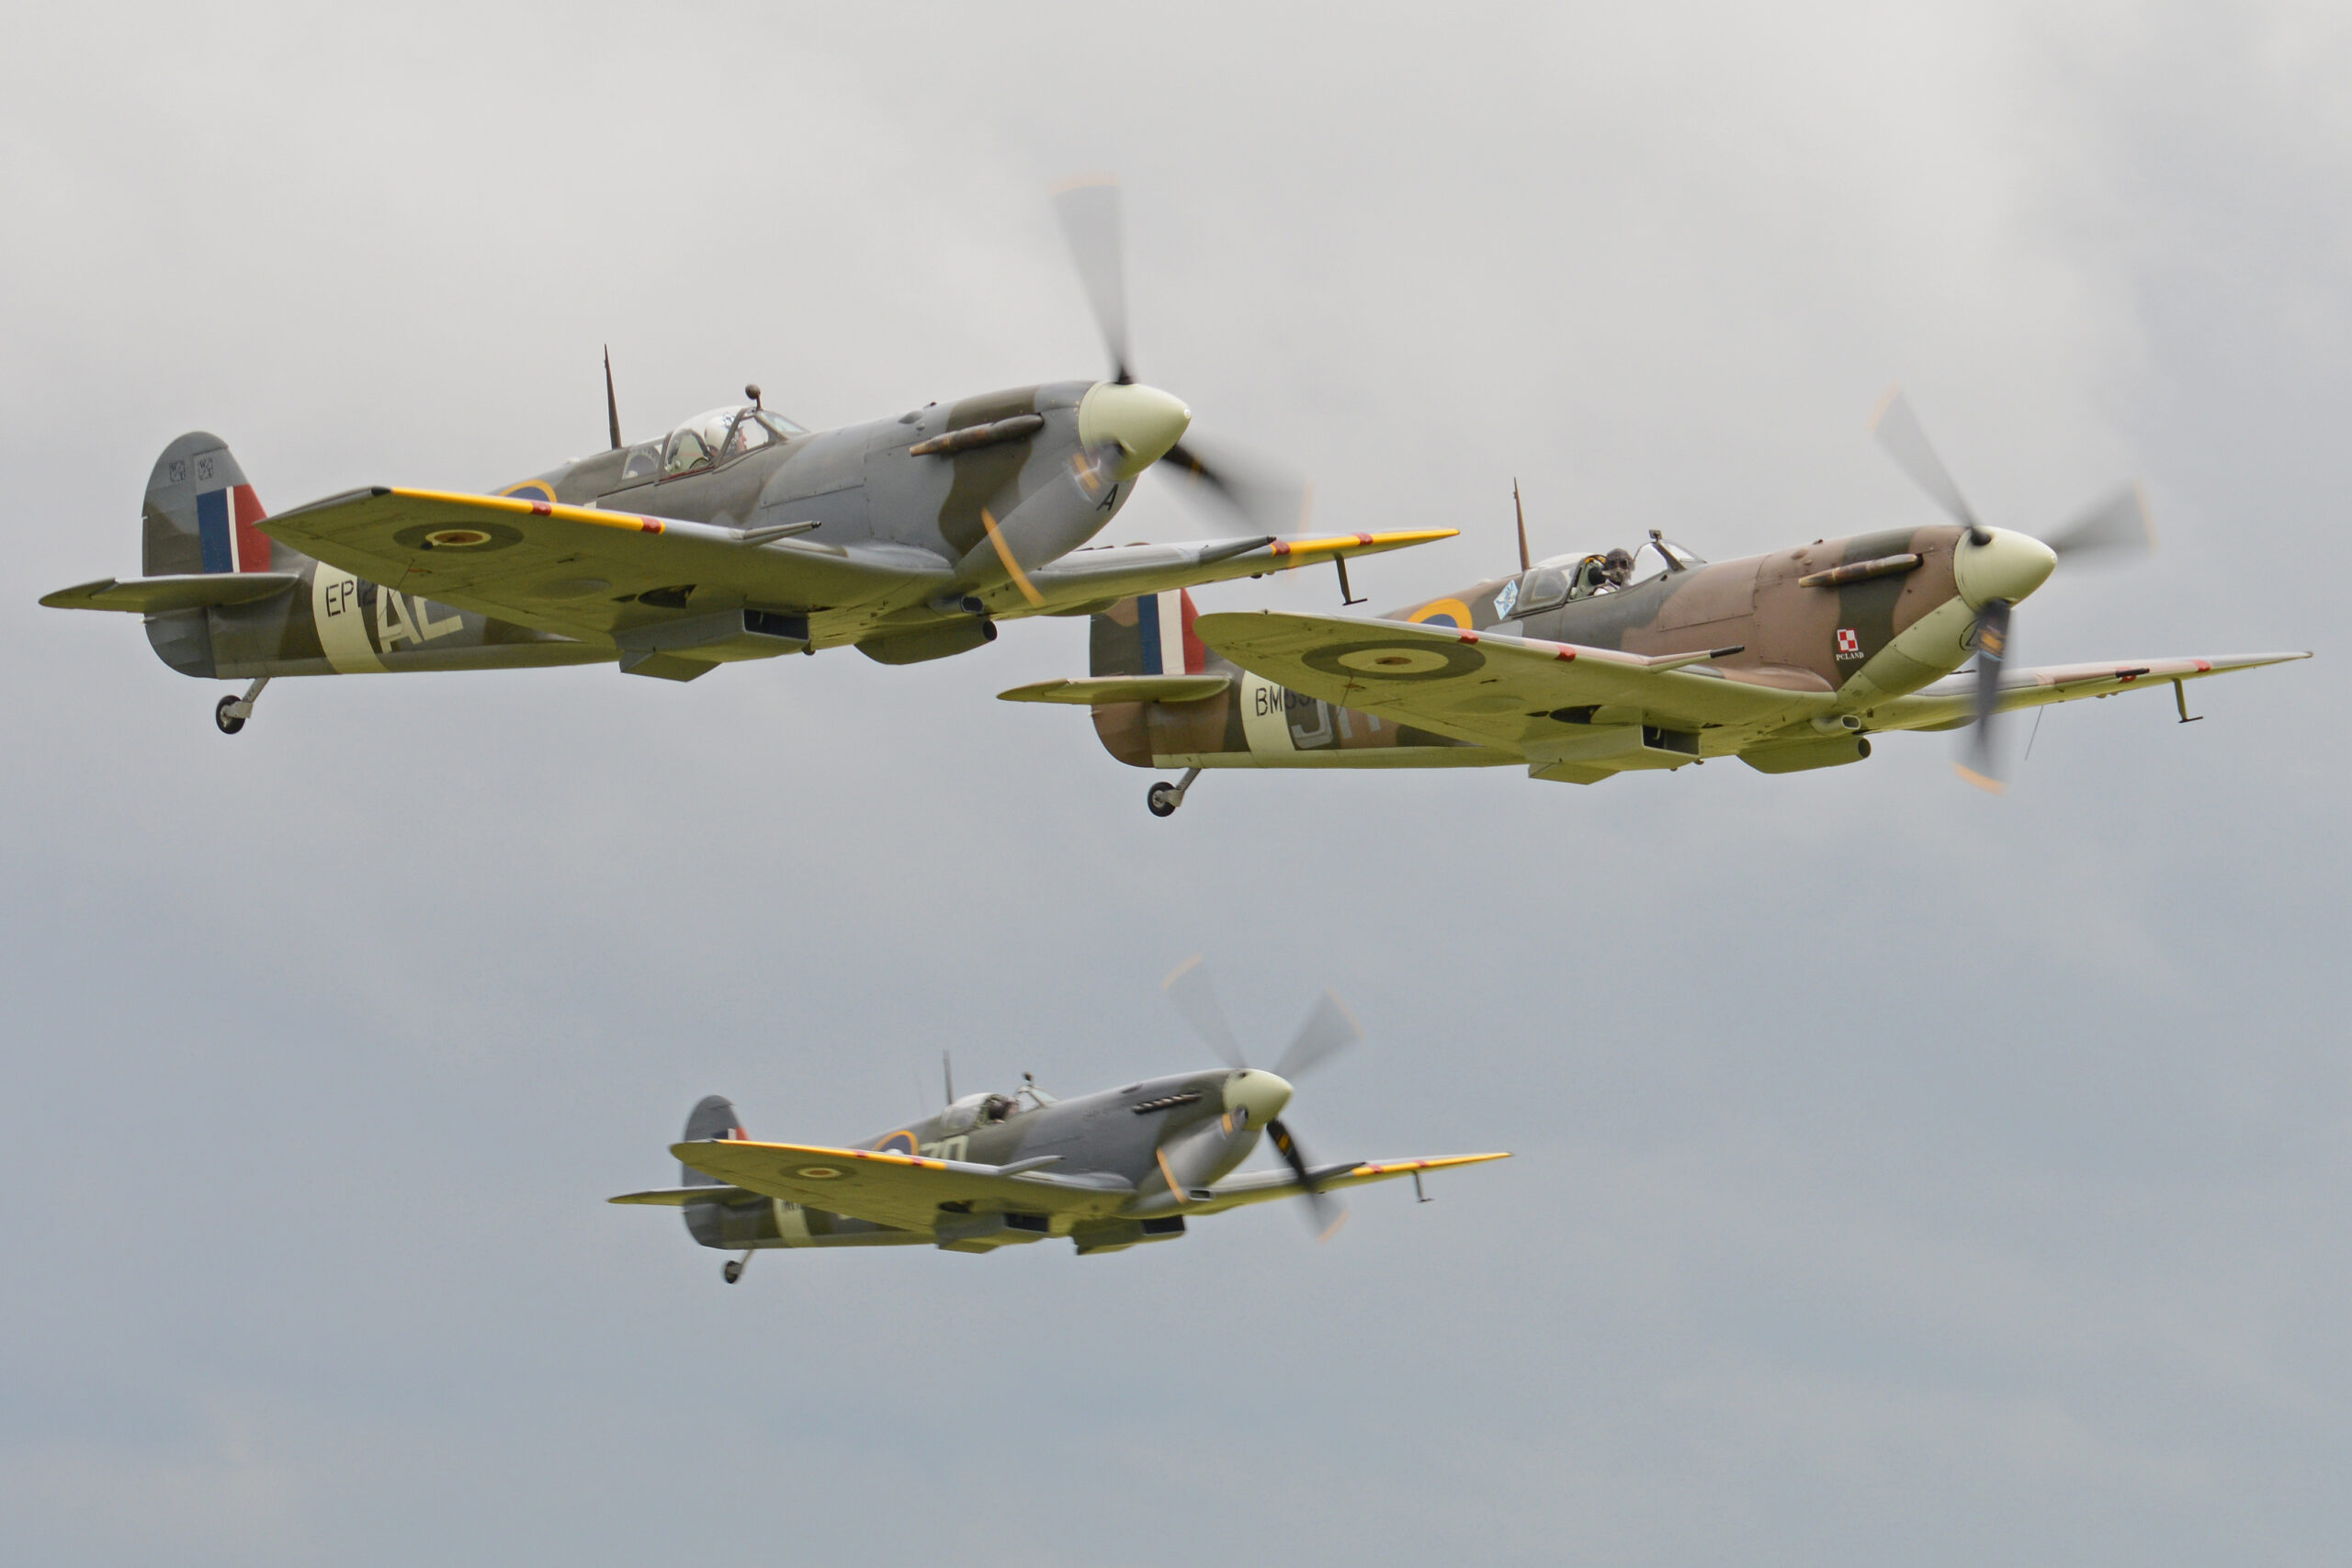
The word warbird is used loosely, and it helps to be clear about what we mean. In everyday airshow language a warbird is a former military aircraft, usually piston engined, kept in flying condition long after its service life ended. The heart of the category is the Second World War: Spitfires, Hurricanes, Mustangs, Corsairs, the heavy bombers like the Lancaster and the B-17, and the trainers that fed pilots into all of them. People stretch the word to cover First World War types, interwar biplanes and early jets such as the Meteor and Vampire, but the classic warbird image is a WWII fighter with a piston engine and a spinning propeller.
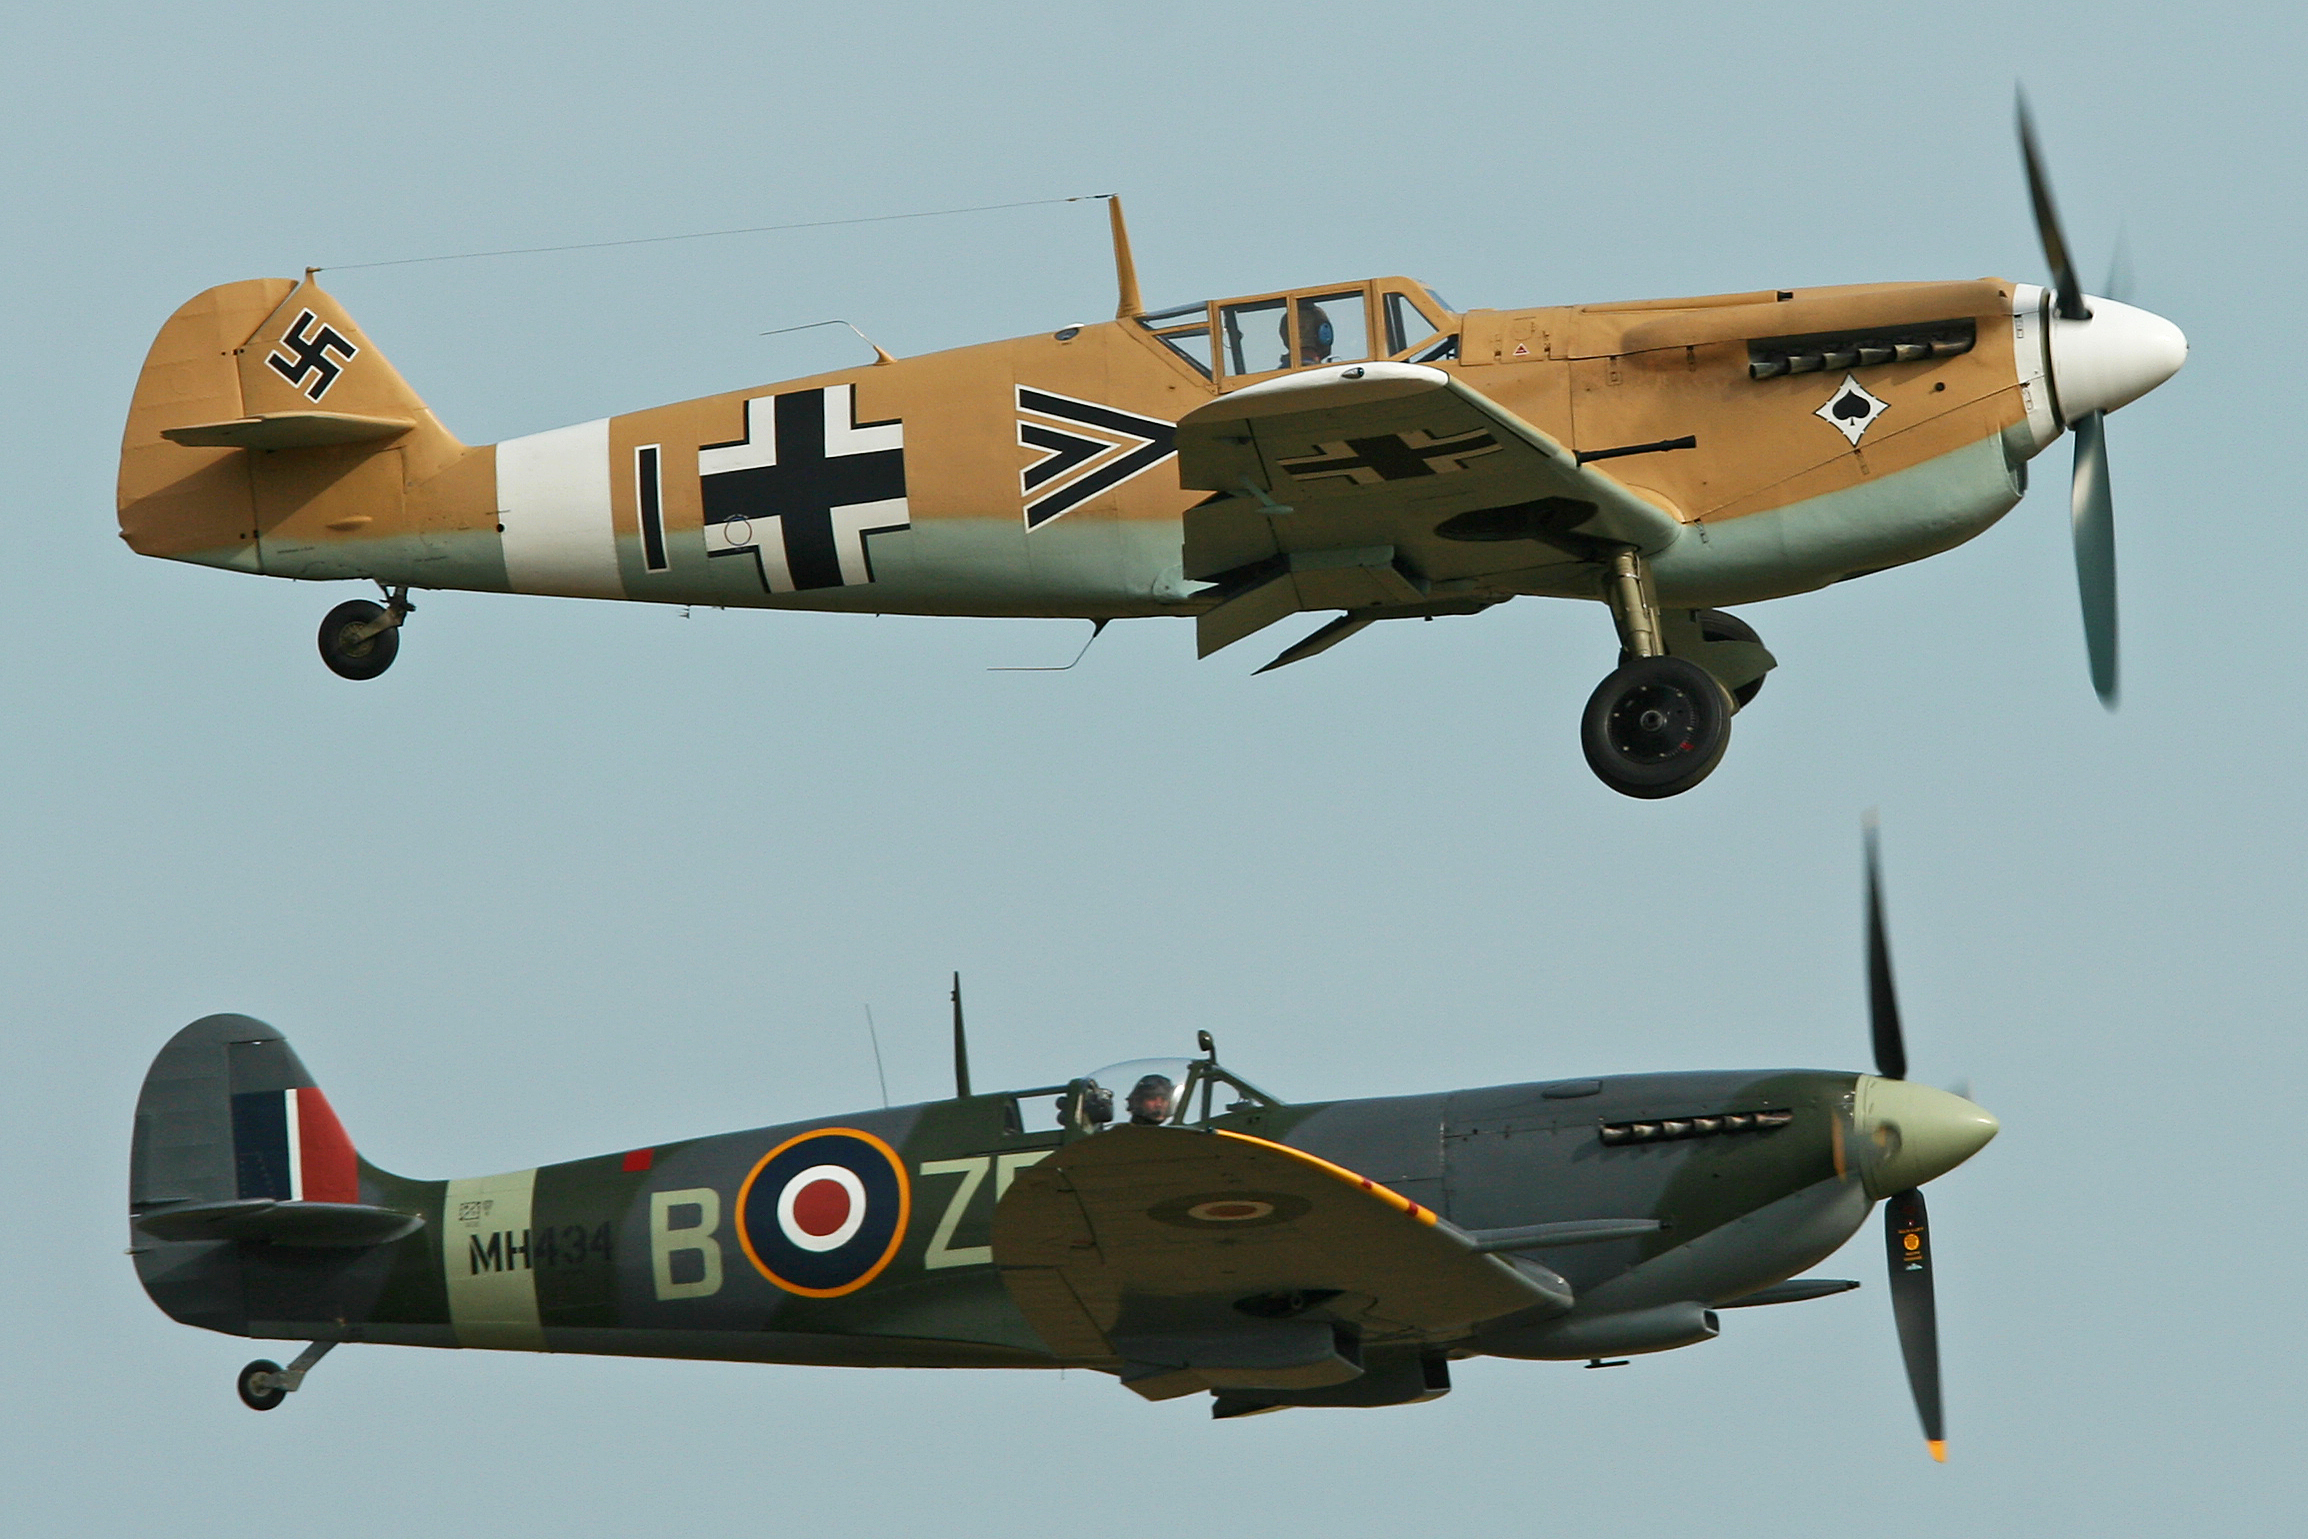
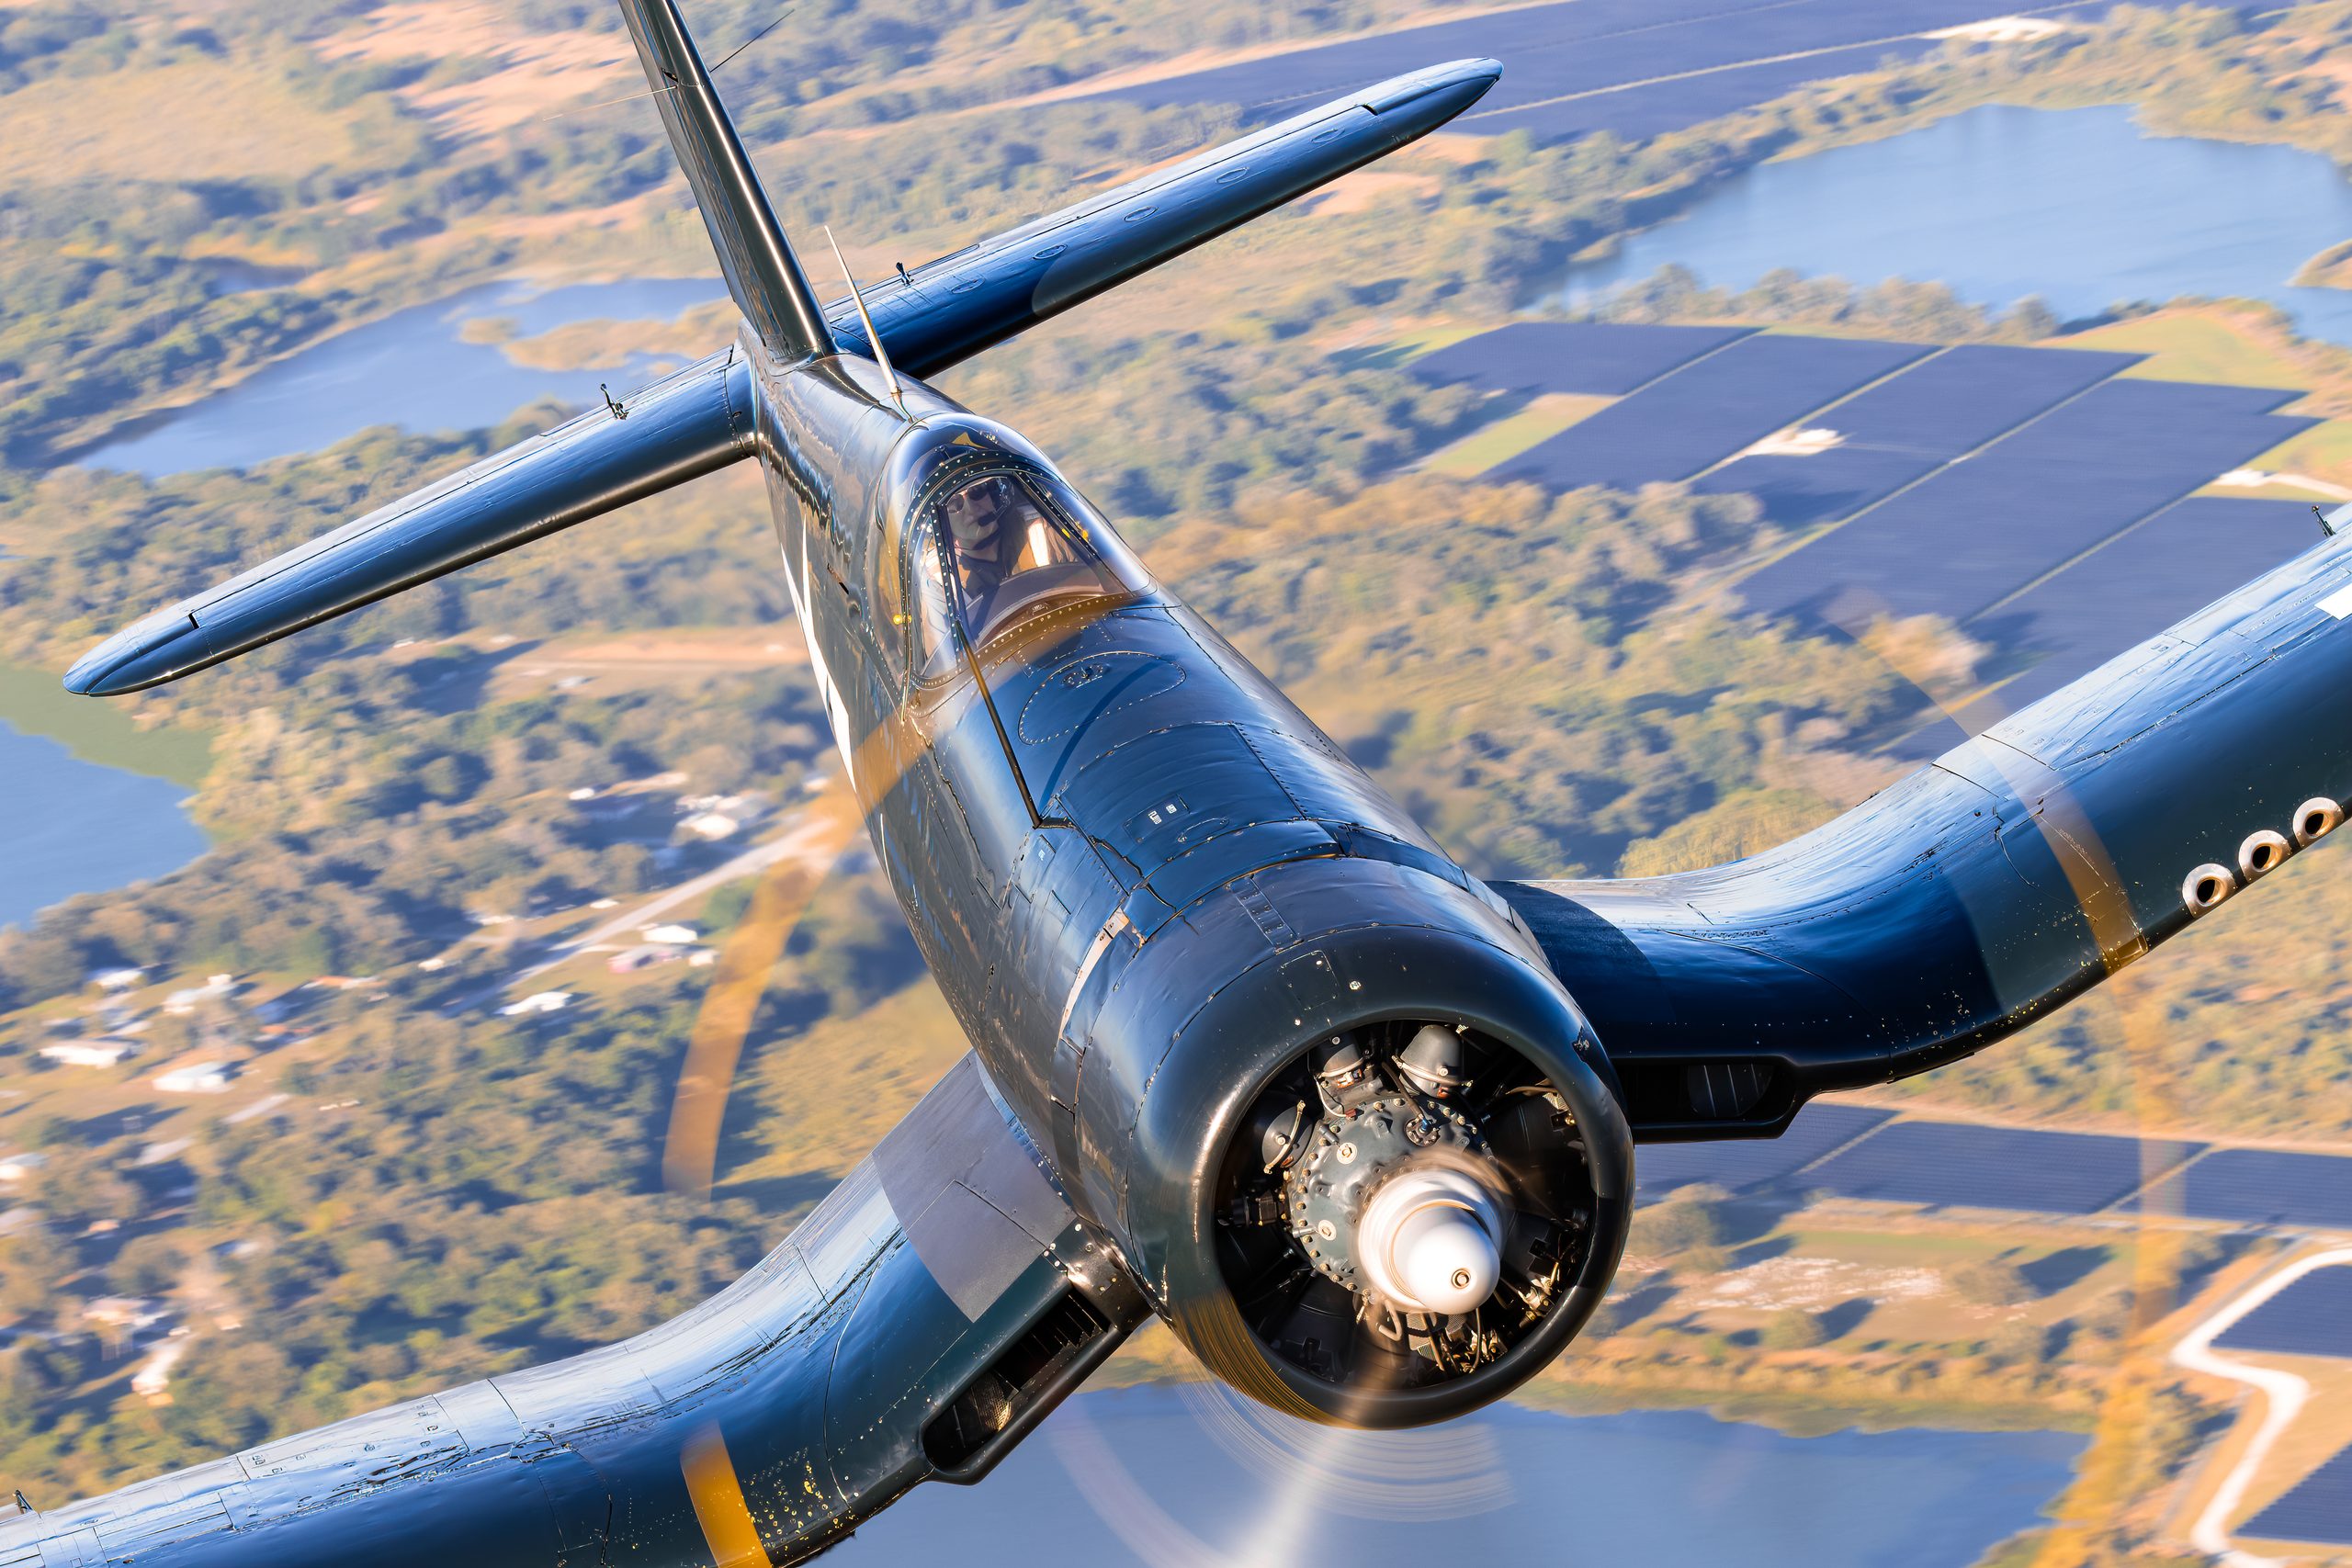
That propeller is the reason warbird photography has its own rulebook. A jet can be frozen sharp at a high shutter speed and it still looks like it is moving, because the eye reads the shape and the heat haze and the speed. Freeze a propeller aircraft at 1/2000 and you stop the blades dead. The result looks like a model hanging on a wire. The aircraft has to show a moving propeller to look alive, and showing that movement means working at shutter speeds far slower than most people use for anything else with a long lens. Everything else in this guide flows from that single constraint.
Why warbirds are different to photograph
Before the settings, it is worth understanding what you are up against, because the differences shape every decision you make on the day.
The propeller forces a slow shutter
This is the big one. To show a pleasing arc of blur you are working somewhere between 1/100 and 1/250 second for most single-engine fighters, and slower still if you want a full disc. At those speeds, any movement of the camera that is not matched perfectly to the aircraft will smear the whole frame. Sharpness becomes a panning problem rather than a shutter problem, and your hit rate drops. A run that gives ten sharp frames at 1/1000 might give two at 1/125. That is normal and expected.
Display lines are slower but tighter
A warbird display is flown at lower speed than a fast jet routine, which sounds easier and in some ways is. The aircraft fills the frame for longer and you have more time to react. But the lower speed also means the pilot can pull the aircraft into tight turns and present a lot of different angles quickly, and a Spitfire rolling into a topside pass changes its shape against the sky in a second. You have to read the display and anticipate where the aircraft will be, not chase where it just was.
The aircraft are rare and the paint is special
Most warbirds are one of a handful left flying, sometimes the only airworthy example of a type. The owners and display pilots fly them carefully, and the aircraft are often beautifully finished in authentic schemes. That polished metal, the roundels, the invasion stripes and the nose art all reward light that rakes across the surface. A warbird in flat midday light looks ordinary. The same aircraft in low evening light, with the sun picking out the rivets and the curve of the cowling, looks like the photograph everyone wants. Patience with light pays off more here than almost anywhere in aviation photography.
Sound and smoke are part of the subject
A Merlin at full chat, a radial barking on start up, the puff of smoke as a big engine catches. These are part of the warbird experience, and the still photographer can use them. The start up sequence on the ground, with exhaust smoke and a cold engine coughing into life, often makes a stronger frame than another clean flypast. Keep shooting on the ground as well as in the air.
The gear that actually works
You do not need exotic equipment to photograph warbirds, but a few things make the job much easier. The good news is that warbirds are slower and often display closer than fast jets, so you can get away with shorter and cheaper lenses than a Typhoon routine would demand.
Camera body
Almost any modern interchangeable lens camera will do the job. What helps is good continuous autofocus, a decent frame rate so you can pick the moment the propeller is in a clean position, and in-body or in-lens stabilisation that supports slow shutter speeds. A camera that lets you customise back button focus and assign a button to switch drive modes quickly will save you fumbling while an aircraft is in front of you. Crop sensor bodies are popular for the extra reach they give a given focal length, and they work very well for warbirds.
Lenses
A telephoto zoom is the single most useful warbird lens. Something in the 100-400mm class covers most display passes, and a 150-600mm gives you reach for distant tail chases and high topside passes. The zoom matters more than the absolute reach, because warbird display lines move and you need to reframe fast as the aircraft turns from a distant dot into a banking pass right in front of you. A fixed 500mm or 600mm prime is razor sharp but leaves you stranded when the aircraft fills the frame. For a fuller look at the options, our guide to the best lenses for aviation photography goes into specific models and trade-offs.
A short telephoto, around 70-200mm, earns its place too. It is ideal for formations, for aircraft taxiing past close, and for the start up and shut down on the ground. Many warbird photographers carry one body with a long zoom and a second with a 70-200mm so they can switch without changing lenses in dusty conditions.
Support
A monopod takes the weight of a long lens through a long day and helps steady the slow shutter speeds that warbirds demand. It is not essential, and many photographers hand hold all day, but if you struggle to hold a clean pan at 1/125 a monopod can lift your hit rate noticeably. Set the head loose enough to swing freely. A locked head fights your pan.
Cards, batteries and the small stuff
Warbird displays are short, often six to ten minutes per aircraft, and you will shoot in bursts. Fast cards clear the buffer between passes. Bring more memory and battery than you think you need, because a full flying day of multiple warbird slots fills cards quickly when you are firing bursts at slow shutter speeds and culling later. A rain cover, a lens cloth and a folding stool for the long gaps round out the kit. There is a fuller list in our airshow photography gear checklist.
Shutter speed and the propeller disc
This is the core skill, so it gets the most space. Get the shutter speed right and a warbird looks alive. Get it wrong in either direction and you have either a frozen blade or a smeared airframe.
What the propeller is doing
A piston fighter propeller turns at roughly 1,200 to 2,000 rpm in display flight, depending on the type and what the pilot is doing. A four-blade propeller on a Merlin-engined fighter passes a blade in front of the spinner many times a second. To turn those discrete blades into a smooth arc, the shutter has to stay open long enough for each blade to travel a useful distance across the frame. The slower the shutter, the further each blade travels, and the fuller the arc becomes until, at very slow speeds, the blades merge into a complete disc.
The working range
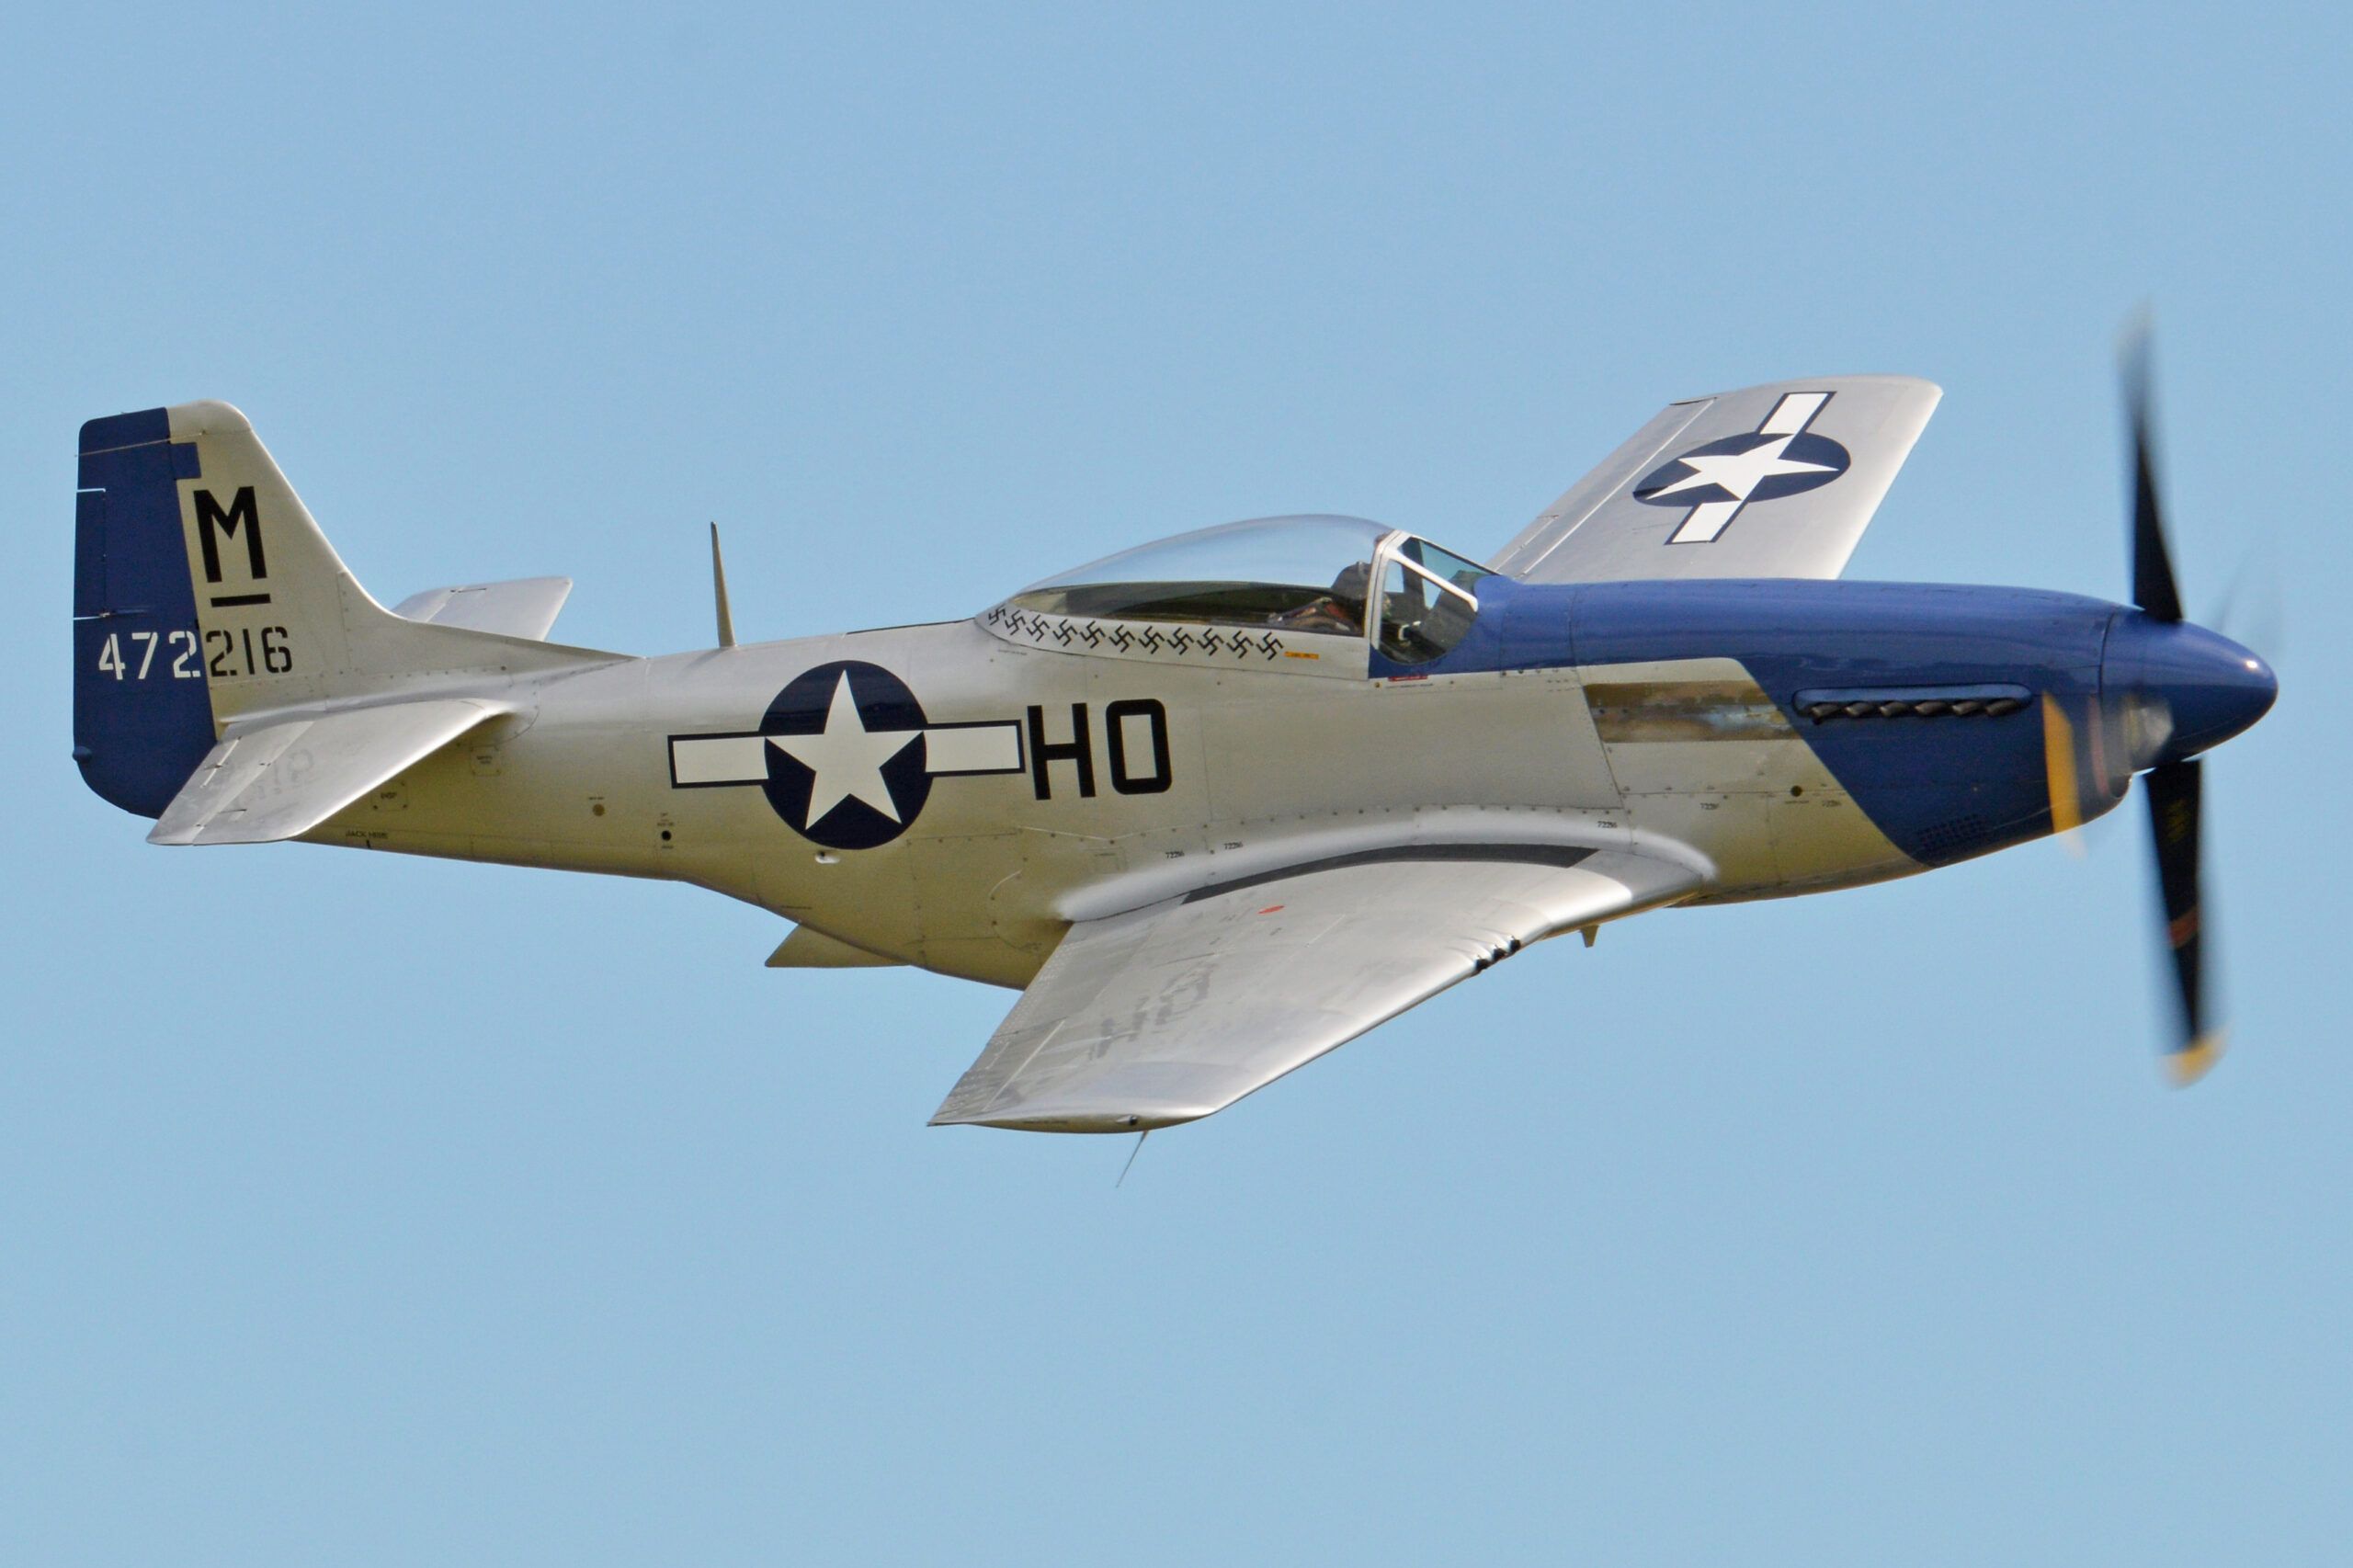
For a single-engine WWII fighter such as a Spitfire, Hurricane, Mustang or Corsair, a sensible starting point is 1/200 second. That gives a clear arc of blur that reads as a turning propeller while keeping a high proportion of sharp airframes. Drop to 1/160 and 1/125 and the arc fills out and looks better, at the cost of more motion-blurred rejects. Push down to 1/100 or below and you are chasing the full disc, with a keeper rate that can fall into single figures per pass. None of these is wrong. You choose the speed for the effect you want and the hit rate you can live with.
Multi-engine bombers and large transports turn their propellers more slowly and have larger diameter blades, so they read as blurred at faster shutter speeds. A Lancaster or a B-17 looks right around 1/250 to 1/320. Use the same slow speed you would for a Spitfire and the bomber can come out looking like it has stopped one engine, because the slower-turning props blur unevenly. Match the shutter speed to the propeller, not to a single number for the day.
A reference table
| Subject | Starting shutter speed | For a fuller disc | Notes |
|---|---|---|---|
| Single-engine fighter (Spitfire, Mustang, Corsair) | 1/200 | 1/125 to 1/100 | Highest reward, lower hit rate as you slow down |
| Trainer or biplane (Harvard, Stearman, Tiger Moth) | 1/160 | 1/100 to 1/80 | Slower props, blur comes more easily |
| Twin-engine (Mitchell, Mosquito) | 1/250 | 1/160 | Keep both discs even; watch sync between engines |
| Four-engine bomber (Lancaster, B-17) | 1/320 | 1/250 | Large slow props blur at higher speeds |
| Aircraft on the ground, engine running | 1/125 | 1/60 to 1/30 | You are static, so very slow speeds become possible |
| Static aircraft, engine off | 1/250 or faster | n/a | No prop to blur; prioritise sharpness |
Treat these as starting points, not commandments. Light, your panning ability, the aircraft and the look you are after all shift the numbers. The habit to build is to start at the faster end of the range early in a display, check your results on the back of the camera, and then push slower as your confidence with that aircraft on that day grows.
Shutter priority or manual
Many warbird photographers shoot in shutter priority, set the speed they want for the prop, and let the camera pick the aperture while they hold ISO low. That works well when the background is a fairly even sky. The moment the background swings between bright cloud and dark trees, though, the camera changes aperture and exposure shifts frame to frame. In that situation manual exposure with auto ISO, or full manual, gives more consistent results. Set the shutter for the prop, set an aperture that keeps the whole aircraft sharp, around f/7.1 to f/9, and manage brightness with ISO or compensation. Our best camera settings for airshows guide has a quick reference you can keep on your phone.
Exposure and metering against bright sky
The second big problem after the propeller is the sky. A warbird against bright cloud or open blue is a small dark subject in a large bright field, and the camera meter, which wants to make the whole scene an average grey, pulls the exposure down to protect the bright sky. The aircraft ends up as a silhouette with no detail in the airframe.
Why it happens
Matrix or evaluative metering averages the whole frame. When most of the frame is bright sky, the average is bright, so the camera shortens the exposure. The aircraft, which is darker than the sky, goes dark. The brighter the sky and the smaller the aircraft in the frame, the worse the effect. On a hazy white day it is at its worst.
The fix: add light back
The straightforward solution is exposure compensation. Dial in positive compensation to tell the camera to brighten the scene. Against a bright overcast sky you often need plus one to plus two stops to bring the aircraft up to a natural brightness. Against deep blue sky you might need less, around plus one third to plus one stop. The aircraft is what matters, so expose for it and let the sky look after itself.
Read the histogram, not the screen
The image on the back of the camera looks bright outdoors even when the file is dark, so trust the histogram instead. For a warbird against the sky you want the data for the aircraft to sit in the middle of the histogram, which usually means the bright sky pushes well to the right, sometimes touching the edge. That is fine. A blown patch of empty sky costs you nothing, while a blocked-up dark airframe is hard to recover. If the aircraft has detail, the shot is usable.
Spot metering for backlit aircraft
When an aircraft comes between you and the sun, or banks so its shaded underside faces you, the contrast is extreme. Switching to spot metering and reading off the aircraft itself gives a more reliable exposure than averaging the whole bright frame. It takes practice to keep the spot on a moving aircraft, so many photographers prefer manual exposure set from a test frame at the start of a pass, then left alone. Once the light is fixed in manual, the aircraft is exposed the same whether it is against cloud, blue or treeline.
Watch the changing background
A single pass can take the aircraft from bright sky to a dark hillside to a cluttered crowd line. In any automatic mode the exposure shifts with the background and your aircraft brightness wanders. This is the strongest argument for manual exposure in warbird work. Set it once for the light on the aircraft and every frame matches, which also makes editing a batch far quicker.
Autofocus and tracking
Slow shutter speeds make sharp focus and a clean pan more important, not less, because there is no fast shutter to hide small errors. Good autofocus technique is what separates a folder of soft frames from a folder of keepers.
Continuous autofocus
Use continuous autofocus, called AF-C on Nikon and Sony or AI Servo on Canon, so the camera keeps adjusting focus as the aircraft moves towards or away from you. Single autofocus locks once and is useless on a moving aircraft. This is the single most important autofocus setting for any aircraft work, warbird or jet.
Back button focus
Separating focus from the shutter button, so a button on the back of the camera drives autofocus while the shutter only fires, gives you control that pays off with warbirds. You can hold focus on the aircraft, stop and start the autofocus without firing, and fire a burst without the camera trying to refocus on a cluttered background at the wrong moment. It feels strange for a day or two and then becomes second nature. Our air-to-air photography guide covers the same focus habits in the air-to-air context, and they carry straight across to ground-based warbird work.
Focus area
A small or medium dynamic area or zone works well against the sky, where there is nothing to distract the camera. Place the active area on the cockpit or the engine and let the surrounding points help if the aircraft moves off your chosen spot. Against a busy background such as trees or the crowd, a smaller area helps the camera stay on the aircraft rather than jumping to the background. Modern aircraft or subject detection autofocus can hold a warbird well, but it sometimes hunts on a propeller disc or grabs a wingtip, so be ready to fall back to a manually placed zone if it misbehaves.
Where to focus on the aircraft
Aim for the cockpit or the engine cowling, the part of the aircraft you most want sharp. With a fighter coming towards you the nose and spinner are closest and the tail will fall outside the depth of field, so focusing on the cockpit keeps the most important area crisp. An aperture around f/8 gives enough depth of field to hold the whole aircraft sharp on a side-on pass while still letting in plenty of light.
Panning a warbird cleanly
At 1/125 second the difference between a sharp aircraft and a soft one is almost entirely your panning. Panning is the act of swinging the camera to follow the aircraft so it stays still relative to the sensor while the background streaks. Done well, the aircraft is pin sharp, the propeller is a smooth arc and the background has a hint of motion. Done badly, the whole frame is soft.
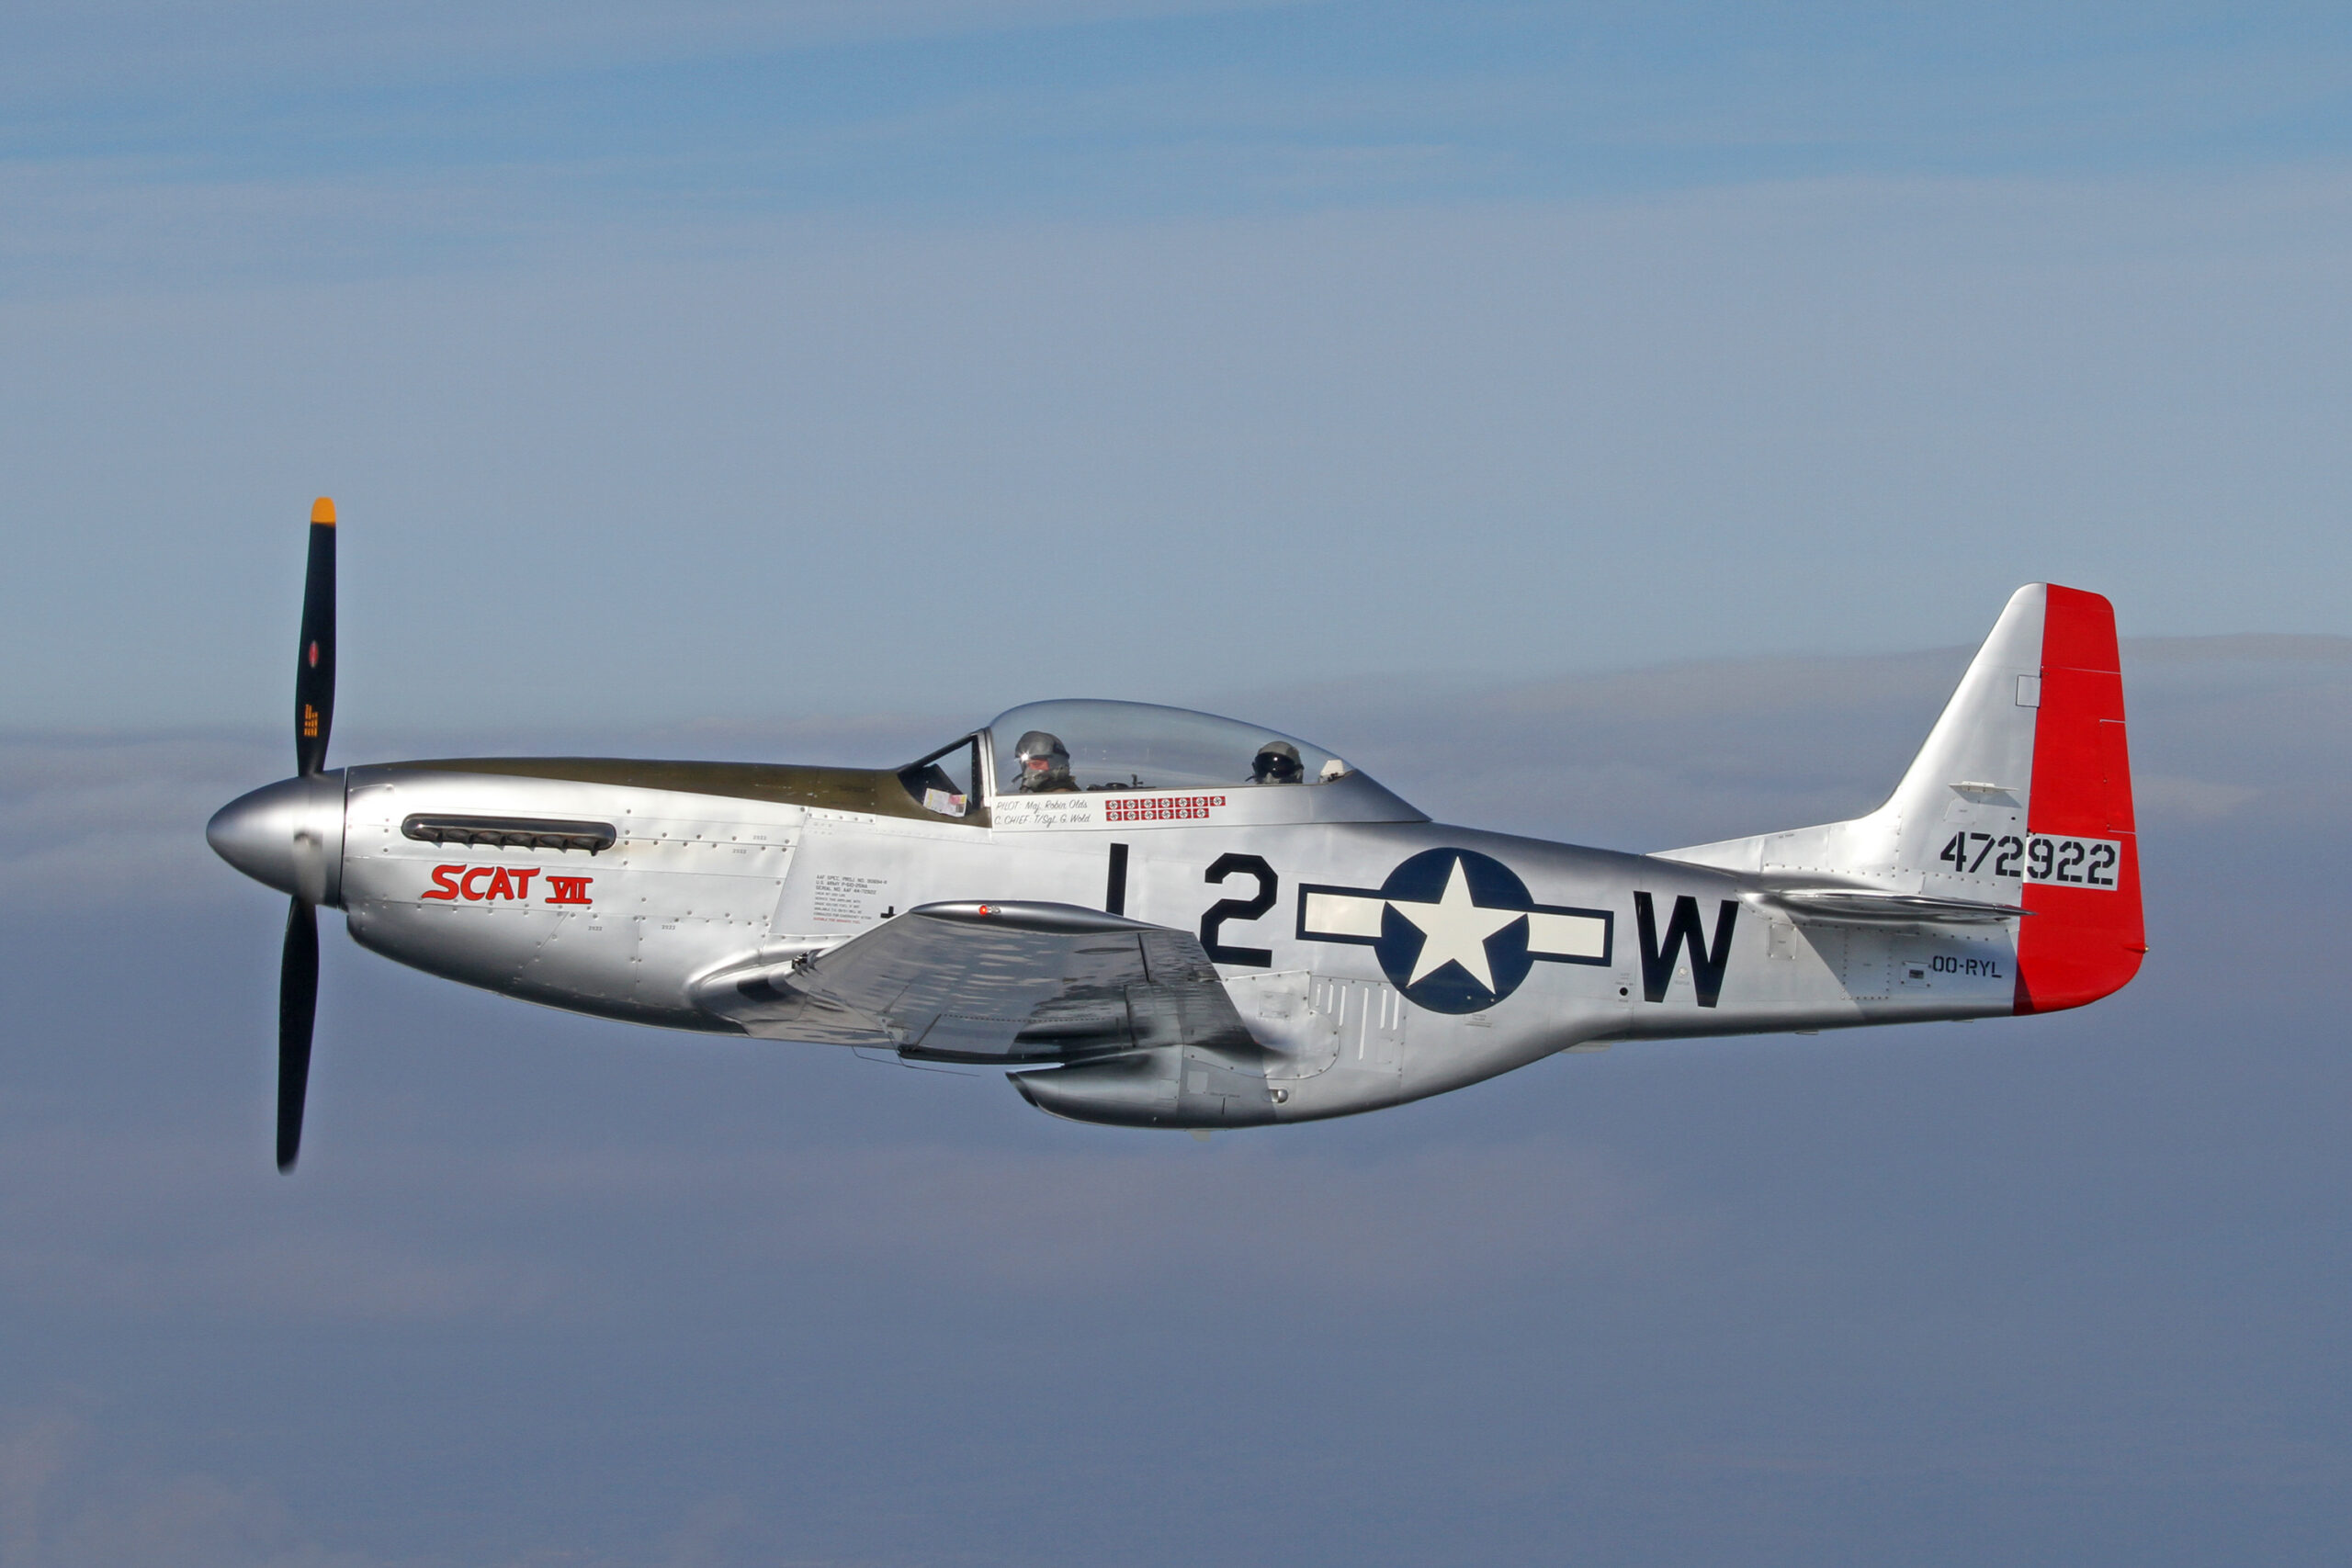
Stance and movement
Plant your feet shoulder width apart and turn from the hips, not the arms. Your upper body becomes a single unit that rotates smoothly. Pick the aircraft up early, before it reaches the part of the sky where you want to shoot, and start tracking it so the camera is already matched to its speed by the time you press the shutter. Follow through after the burst, the way a golfer follows through a swing, rather than stopping dead on the shutter press. Stopping the pan is the most common cause of soft warbird frames.
Track smoothly, fire in bursts
Keep the pan continuous and let the aircraft sit in the same place in the viewfinder throughout. Fire short bursts rather than single frames, because at slow shutter speeds your hit rate per frame is low and a burst of five gives you a better chance that one lands during a steady part of the swing and with the propeller in a clean position. Cull hard afterwards. Three good frames from a pass is a good return at 1/125.
Use stabilisation correctly
Image stabilisation helps with the up and down wobble while you pan side to side. Many lenses have a panning mode, sometimes called mode 2, that stabilises only the vertical axis and leaves the horizontal pan free. If your lens has it, use it for warbird passes. If it does not, normal stabilisation is usually still a help at these speeds. In-body stabilisation on mirrorless bodies generally detects the pan and behaves sensibly.
Vertical and topside passes
Not every warbird pass is a flat horizontal run. A topside pass, where the pilot banks the aircraft so you see the upper surface, needs you to pan and tilt at once, and a vertical climb or a loop needs a smooth vertical pan. The same rules apply: pick it up early, move smoothly, follow through. These dynamic moments often make the best images because they show the aircraft as a flying machine rather than a side-on record shot.
Light and time of day
Warbirds reward good light more than almost any other aviation subject, because their surfaces are made to catch it. Polished aluminium, glossy paint, roundels and invasion stripes all come alive when the light rakes across them at a low angle.
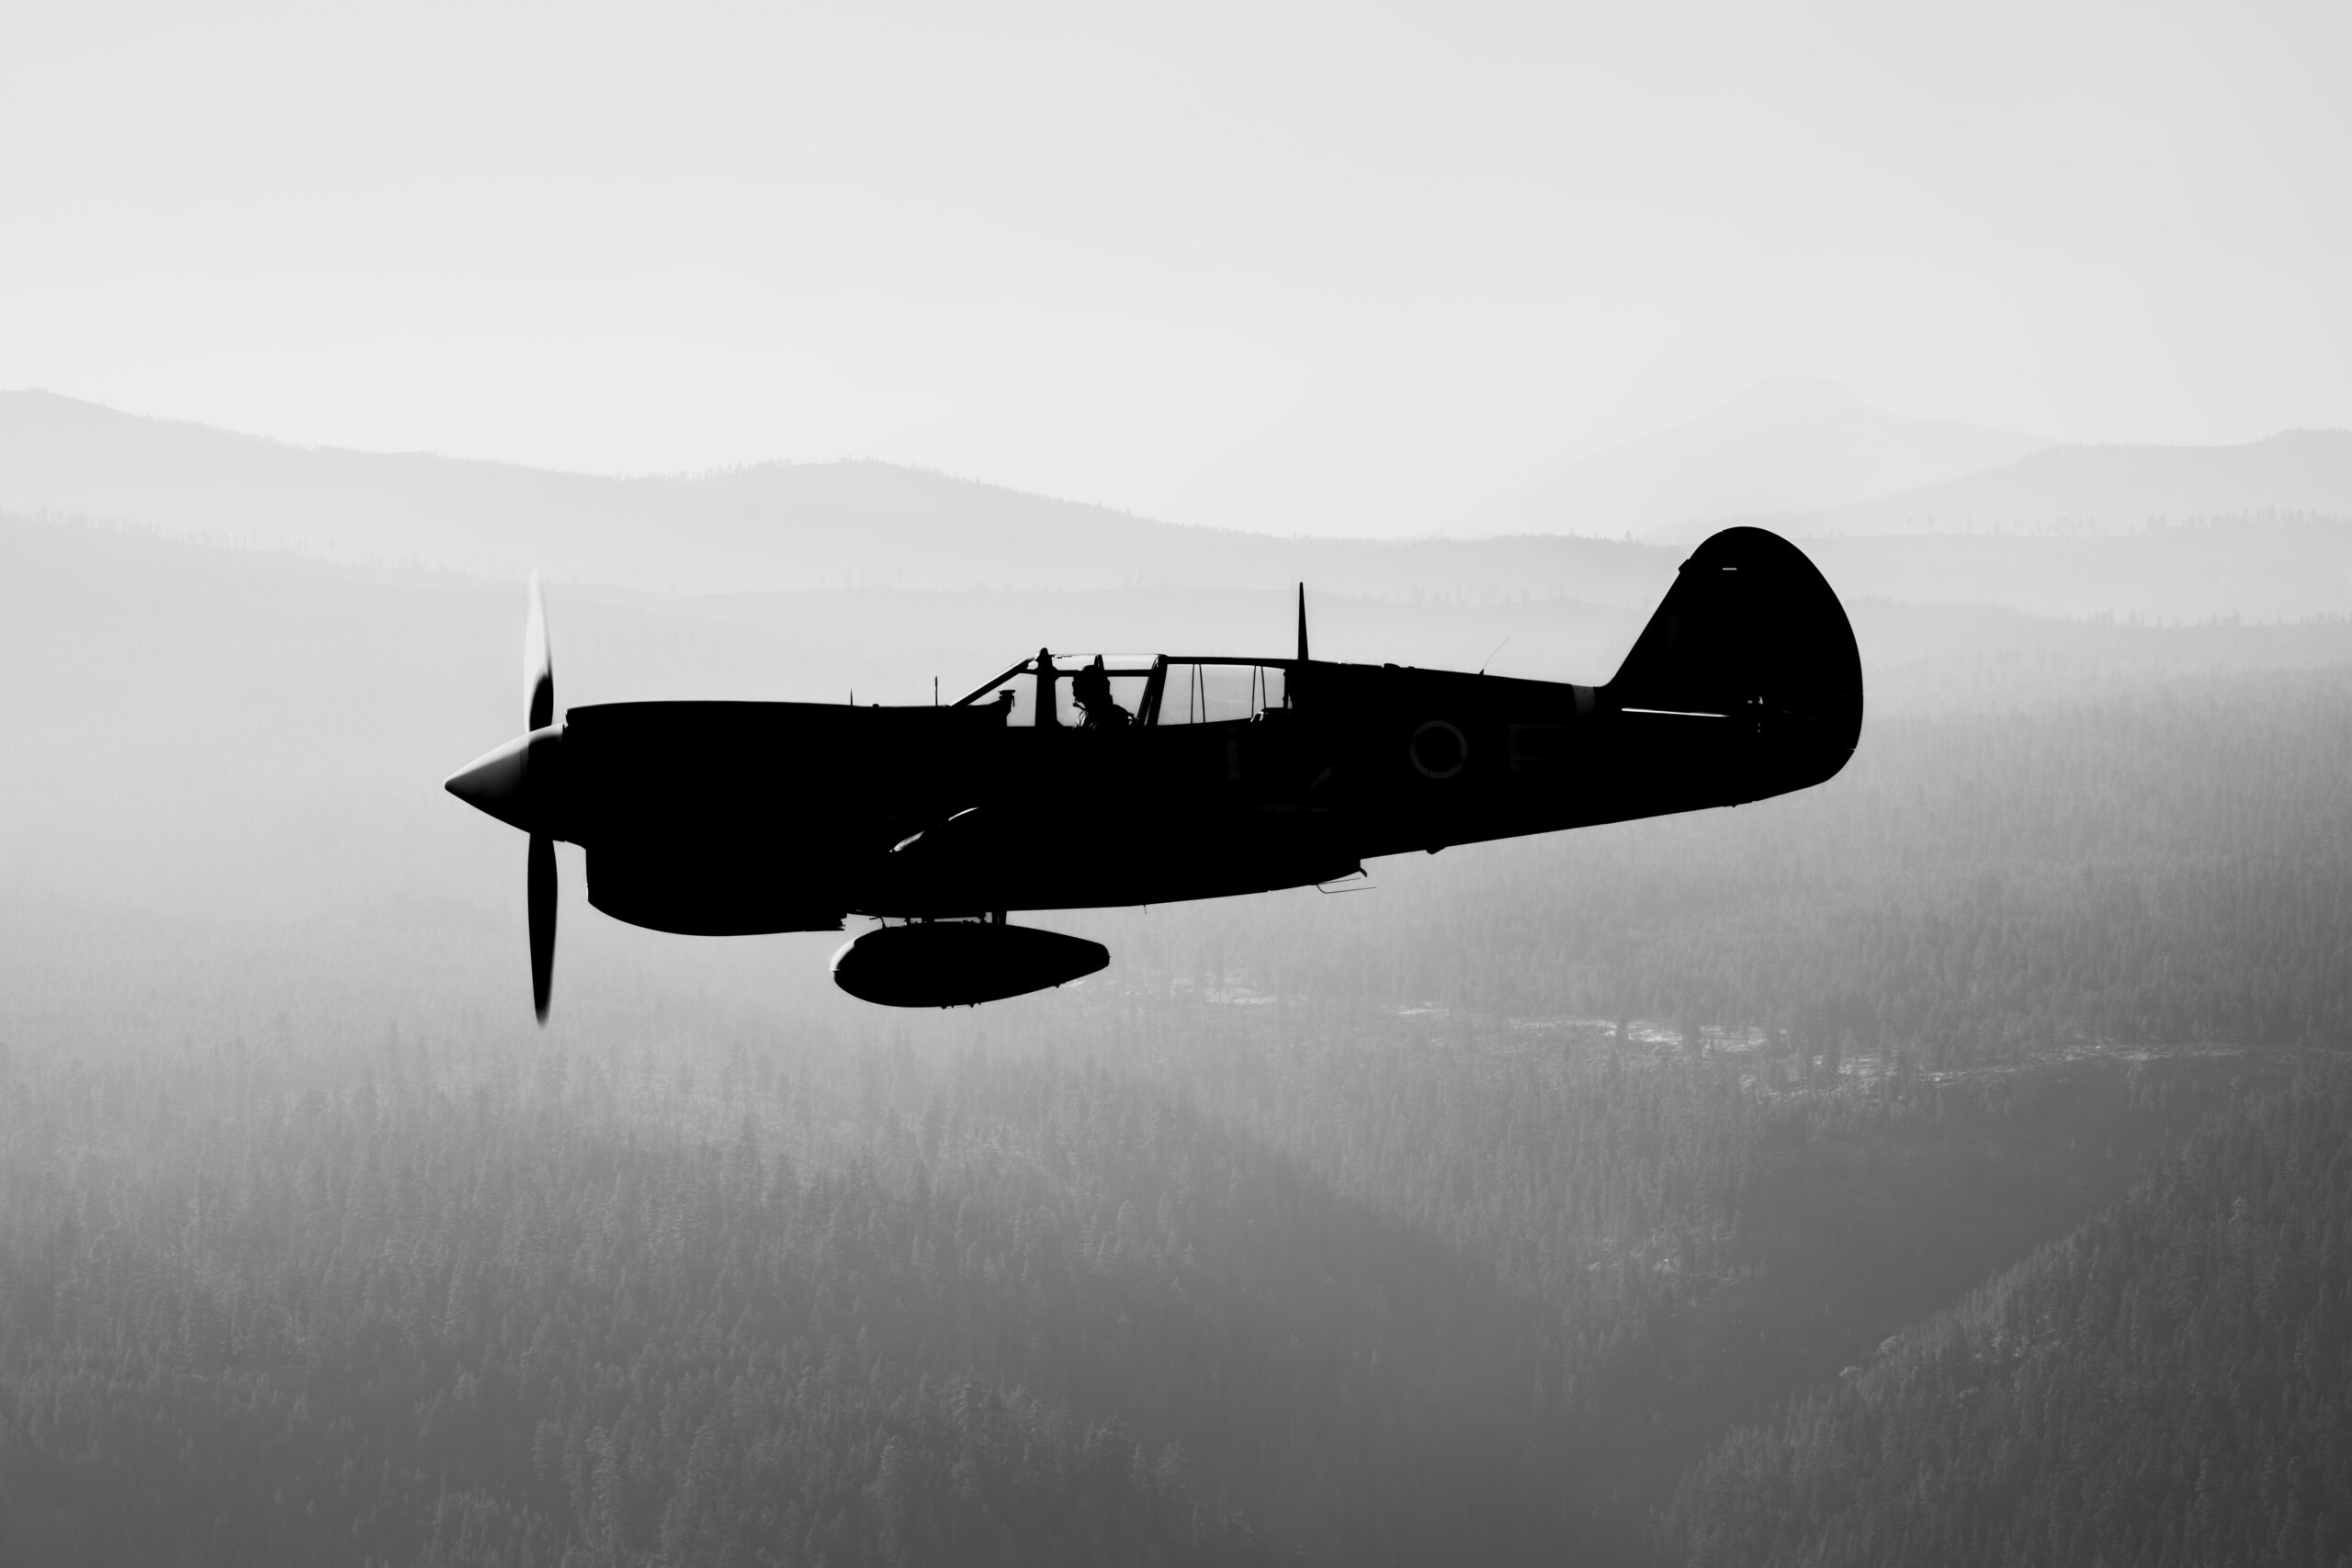
The golden hours
The first hour after sunrise and the last two hours before sunset give low, warm, directional light that models the shape of an aircraft and lights up the side facing the sun. A Spitfire banking in evening light, the sun catching the curve of the cowling and the underside of the wing, is the classic warbird photograph for a reason. Many of the best evening airshow slots are timed for exactly this light, so plan to stay to the end rather than leaving after the headline act. If you want to dig deeper into shooting in this light, see our guide to camera settings for airshows, which covers the exposure side in low light.
The position of the sun
For most of the day you want the sun behind you or over your shoulder so it falls on the side of the aircraft facing you. At many UK airshows the crowd line faces broadly south, which means the sun is in front of you for much of the day and aircraft on the far side of the display are lit from behind. Learn the orientation of the show you are at and work out when the light will be best on your side. Sometimes the answer is to shoot the topside passes when the aircraft banks towards you and the sun lights the upper surface, even if the straight passes are backlit.
Backlight and haze
Backlight is not always a problem. A warbird flying directly away with the low sun behind it can give a rim-lit silhouette with light glowing through the propeller disc, which is a strong image in its own right. Heat haze, on the other hand, is a genuine enemy on hot days, softening distant aircraft no matter how good your technique. The fix is to shoot aircraft when they are closer and higher, above the worst of the haze, and to accept that the long, distant shots will be soft. Early in the day, before the ground heats up, haze is at its least.
Flat light days
On a grey, flat day the light does nothing for the aircraft and the white sky tempts you into silhouettes. These are the days to concentrate on banking passes that put the aircraft against a darker background, on topside passes where you see the colourful upper surfaces, and on ground shots where you control the framing. A flat day is also a good day to practise your panning and slow-shutter technique without the pressure of perfect light.
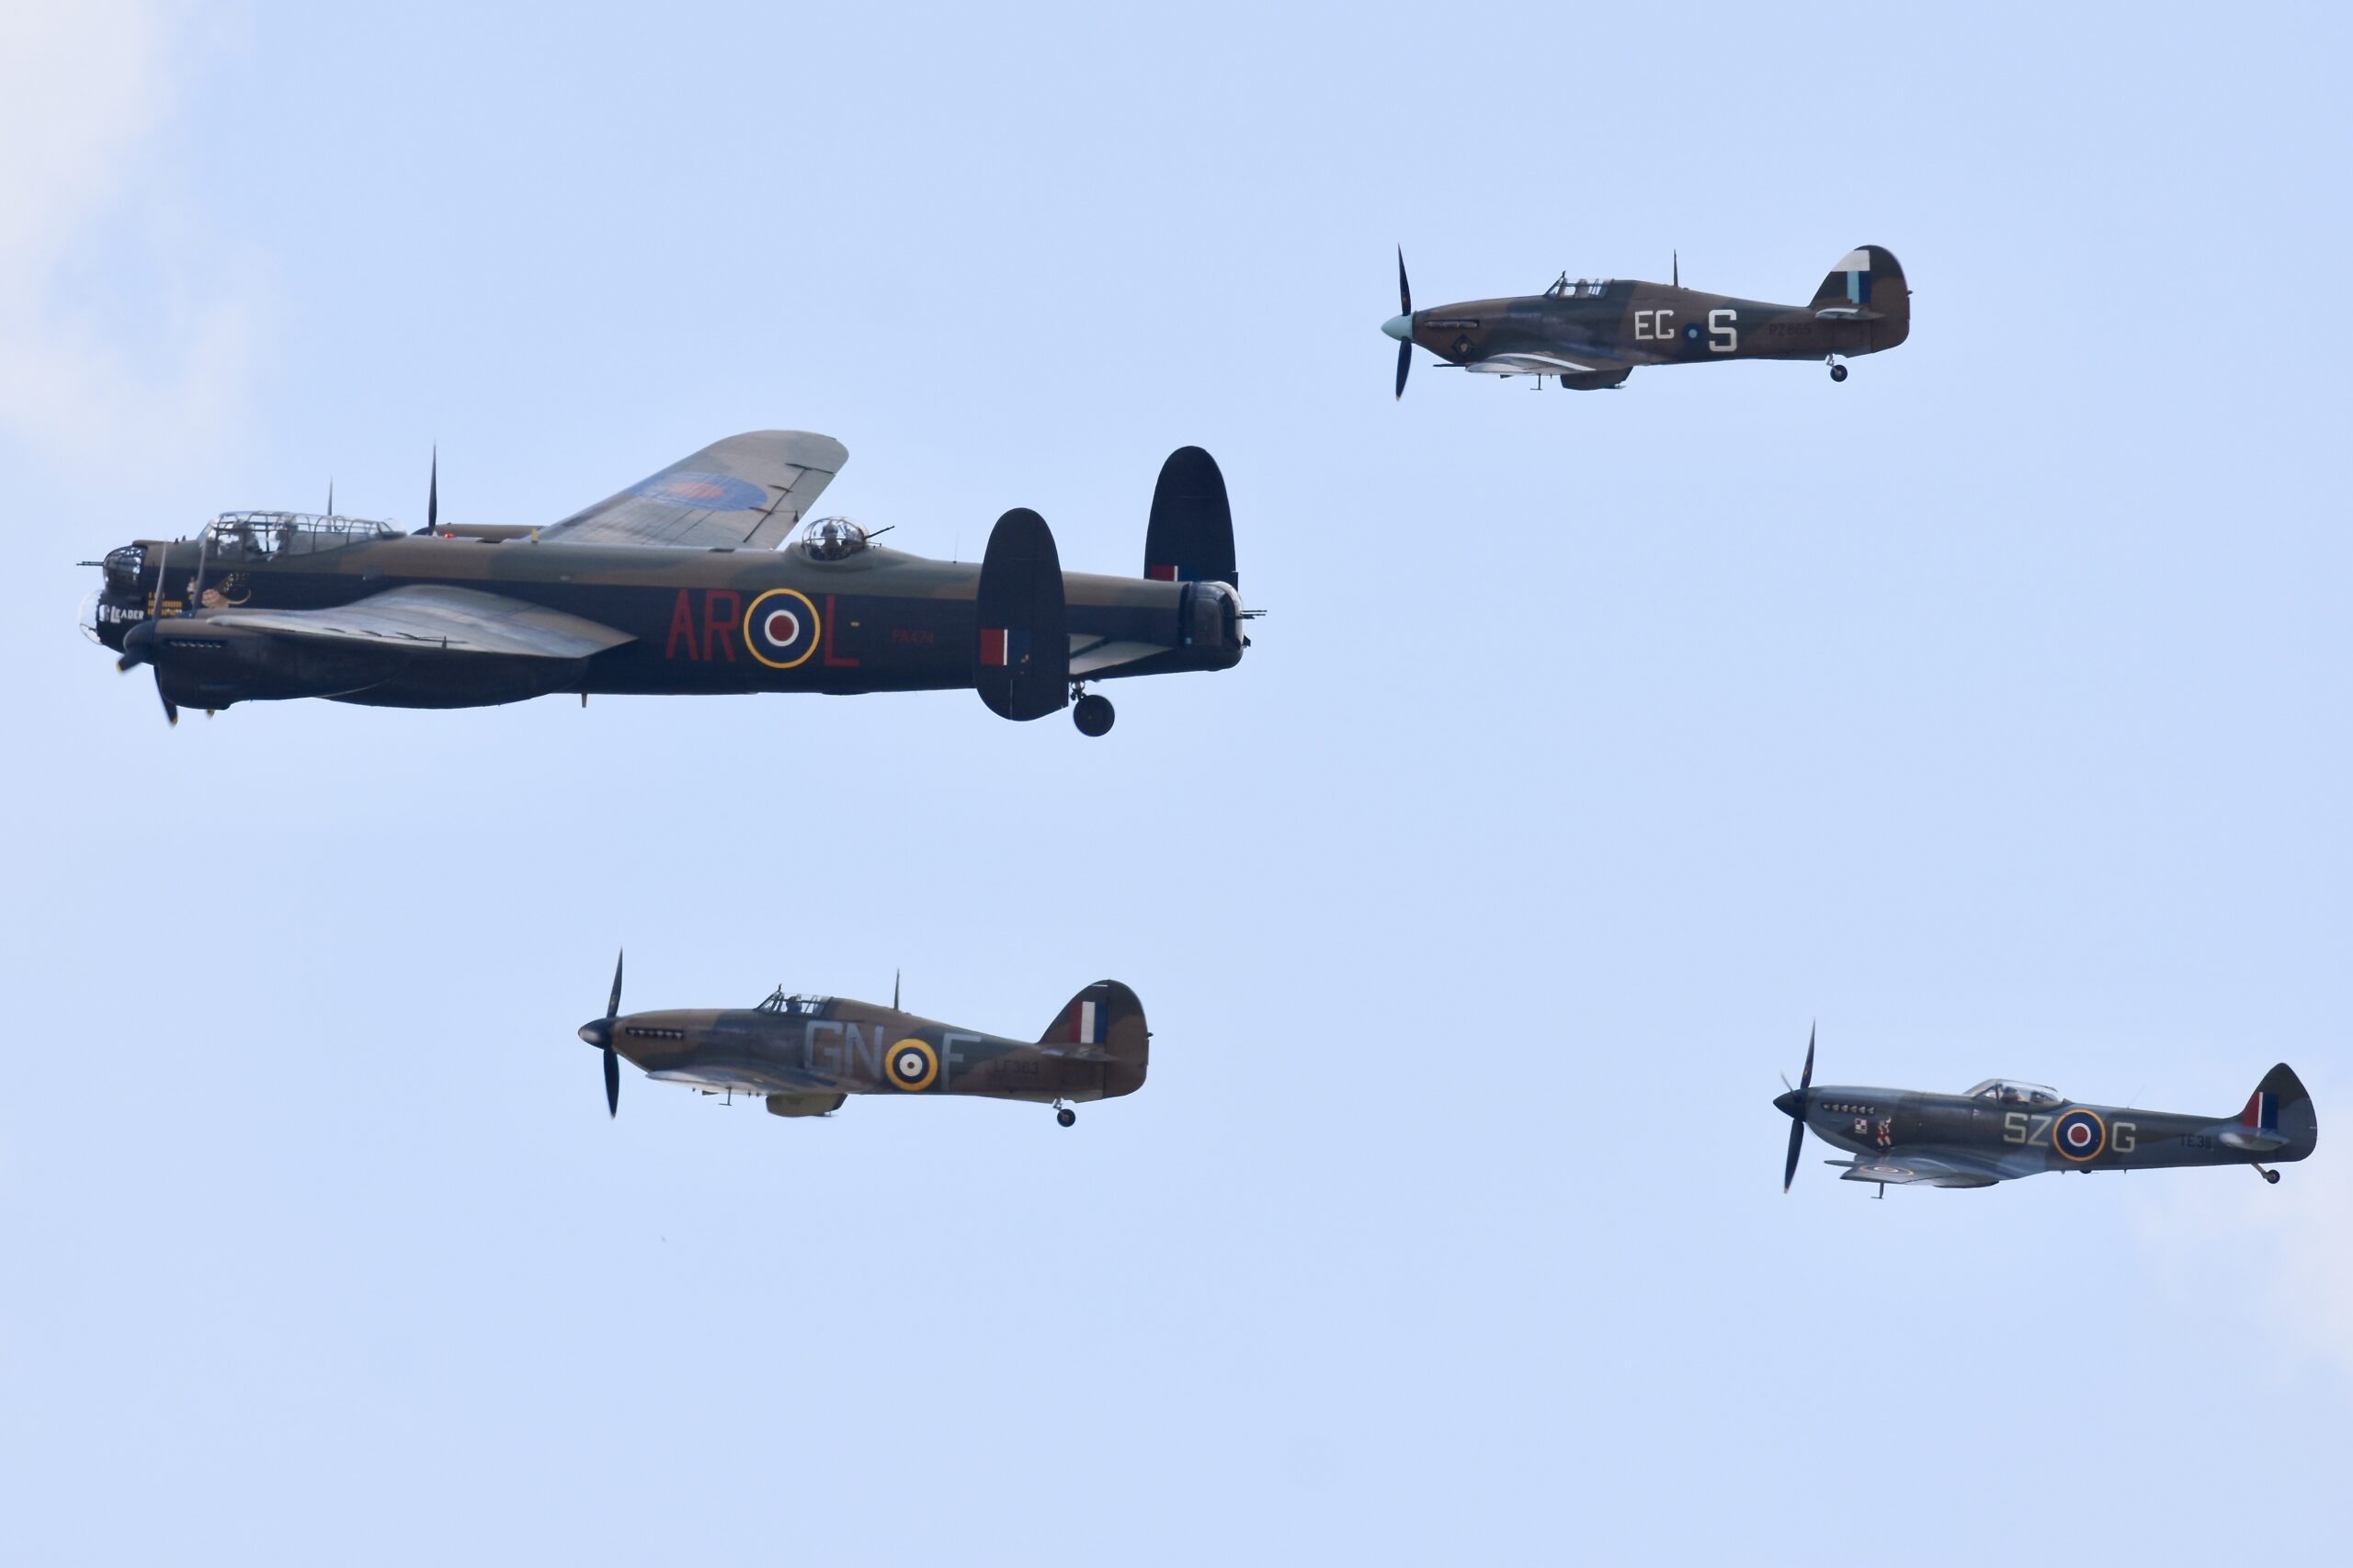
Composition and framing
Settings get you a sharp aircraft with a blurred propeller. Composition is what makes that sharp aircraft into a photograph people want to look at.
Leave room in the direction of travel
An aircraft needs space to fly into. Place it so there is more room ahead of the nose than behind the tail, and the image feels like it is going somewhere. Fill the frame with the aircraft hard against the leading edge and it feels cramped and about to fly out of shot. This is the single most useful compositional habit for moving aircraft. With a zoom you can leave a little room while shooting and refine the exact crop later.
Fill the frame, but not too much
Reach matters because a small aircraft in a big empty sky is a weak image. You want the aircraft large enough to show detail, the markings, the pilot, the exhaust stains down the fuselage. But leave enough air around it to breathe and to allow for the crop. A good rule is to frame so the aircraft occupies a clear majority of the longest dimension while still leaving space ahead of it. If you are consistently too tight and clipping wingtips, zoom out a touch and crop later.
Angles that work
A flat side-on pass is the record shot, useful and clean but not exciting. The frames that lift a set are the banking passes that show the planform, the topside passes that reveal the upper surfaces and markings, the head-on runs that show the spinner and the menace of a fighter coming towards you, and the going-away shots with the low sun behind. Watch a display and you will see the pilot present all of these. Anticipate them and be ready, rather than firing at the easy straight passes and missing the dramatic ones.
Backgrounds
The sky is the cleanest background and the easiest to expose, but a plain blue or white sky can be dull. A warbird against cloud with texture, against a distant treeline or hill, or low over the airfield with hangars behind it, all give a sense of place and scale. The risk with a busy background is that the autofocus and the eye both get distracted, so use a background that supports the aircraft rather than competing with it. A banking aircraft photographed against a darker land background also solves the bright-sky exposure problem at the same time.
Formations
Two or more warbirds in formation are a gift. A pair of Spitfires, a Spitfire and a Hurricane, a fighter escorting a bomber, all tell a story the single aircraft cannot. For formations, frame a little wider to hold the whole group with space around it, keep the shutter speed appropriate to the slowest-turning propeller in the group, and focus on the lead aircraft. The same panning rules apply, just with a larger subject to keep steady. Our piece on photographing the Red Arrows covers formation timing in detail, and although the Red Arrows are jets, the principles of reading a formation and picking the moment carry across to warbird pairs and balbos.
Shooting warbirds on the ground
The flying display is only part of the day. Warbirds on the ground offer some of the best and most controllable photography, and many photographers neglect it.
Start up and taxi
The start up of a big piston engine is a moment of drama. A radial coughing into life throws a cloud of smoke and a stab of flame from the exhaust, and a cold Merlin catches with a bark and a puff. Be in position before the scheduled start, focus on the engine and the exhaust stubs, and fire a burst as it catches. Taxi shots, with the tail down and the prop turning, the pilot visible in the cockpit and the aircraft framed against the airfield, are full of character. Slow your shutter to 1/60 or below on the ground, because you are not panning a fast subject and you can show a lovely full disc on a taxiing aircraft.
Detail and texture
Up close, a warbird is a feast of detail. The exhaust staining down the fuselage, the worn paint on a wing root where crews have walked, the rivets, the nose art, the squadron codes, the polished spinner. A short telephoto or a standard zoom lets you isolate these. Shoot the cockpit, the instrument panel through the canopy, the gunports, the wheels and oleo legs. These detail frames round out a warbird set and often sell well as stock because they are harder to get than another flypast.
Working the static line
Static aircraft are parked for the public, which means people, barriers and clutter. Shoot early before the crowds build, or late as they thin. Use a longer lens to compress and isolate the aircraft from its neighbours, get low to put the aircraft against the sky rather than a sea of heads, and look for angles that hide the barriers. A three-quarter front view from a low angle, with the propeller and spinner prominent, gives a static aircraft a sense of purpose.
Scenario by scenario
Different warbirds present different problems. Here is how to approach the types you are most likely to meet on a UK flying day.
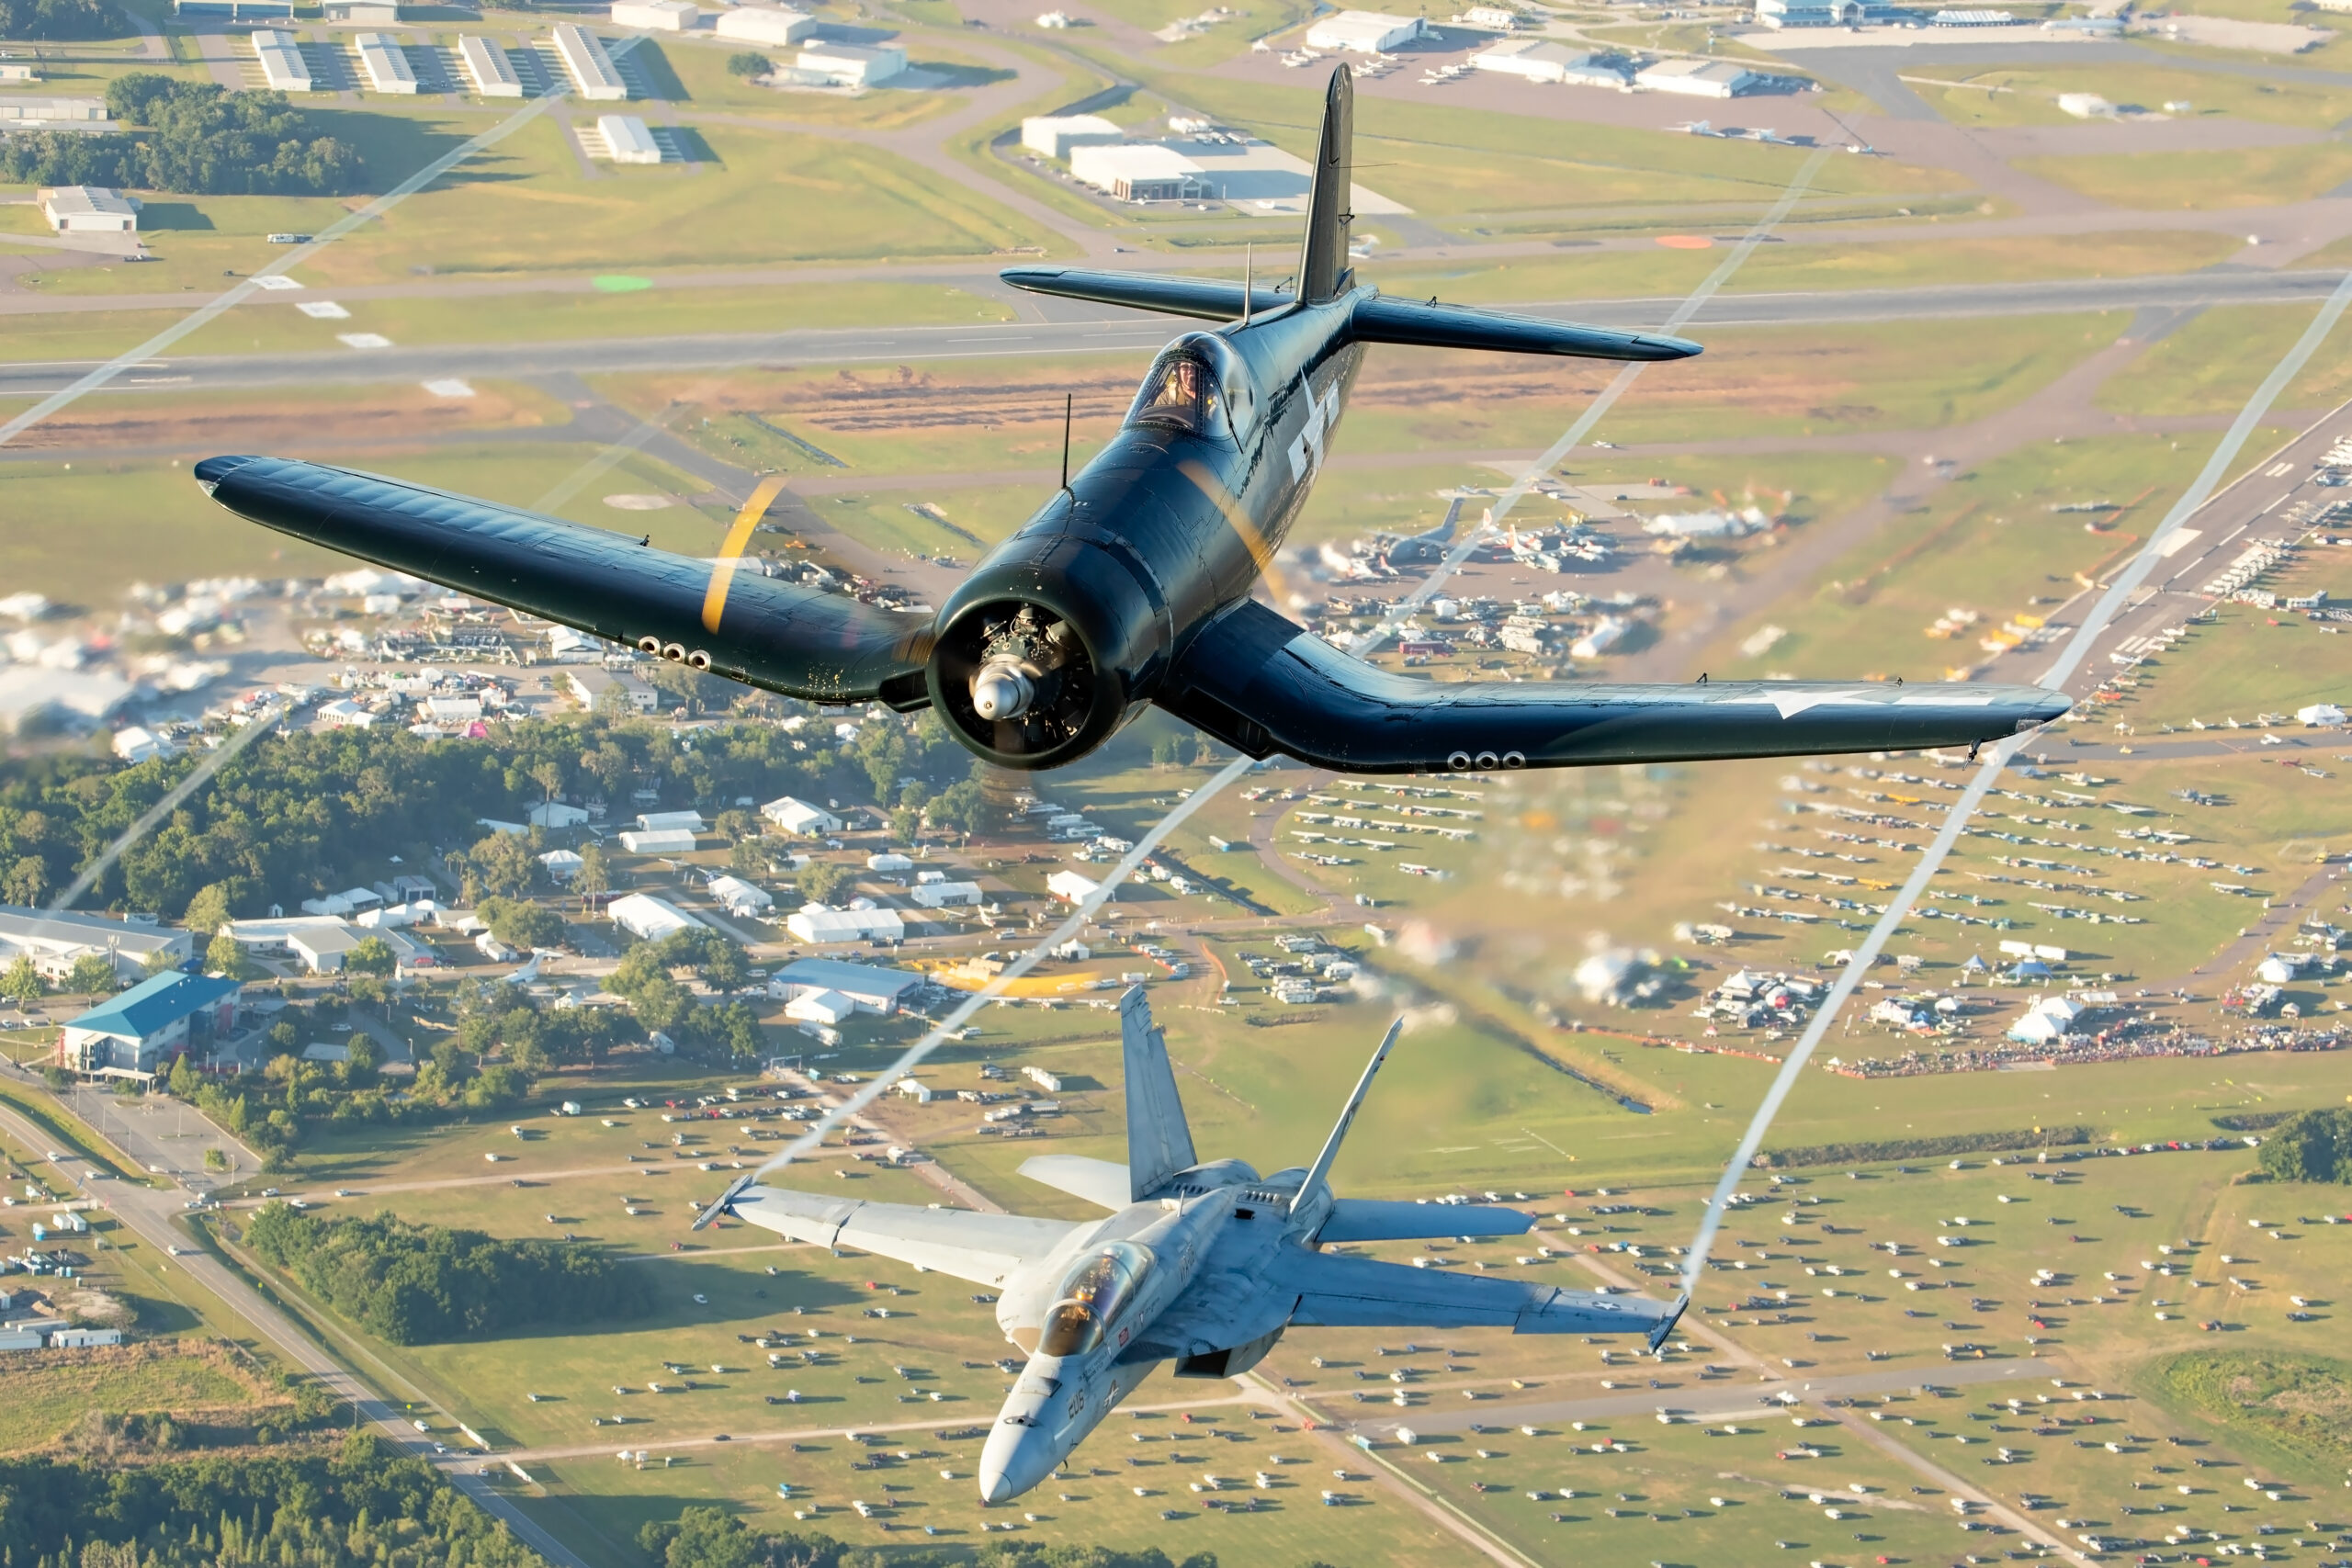
The Spitfire
The Spitfire is the warbird most people come to photograph, and it is a wonderful subject. Merlin-engined Spitfires drive a three or four blade propeller through a reduction gear, turning the prop more slowly than the engine, which means a clear arc of blur appears at sensible shutter speeds. Start at 1/200 and work down to 1/125 for a fuller disc. The Spitfire displays beautifully, with tight banking turns that show the famous elliptical wing, so be ready for topside passes that reveal the planform. The low evening light on a polished Spitfire is the photograph to chase. If you want the history behind the aircraft you are shooting, our complete history of the Supermarine Spitfire is worth a read before a show.
The P-51 Mustang
The Mustang is a different shape and a different challenge. The definitive P-51D is powered by a Packard-built Rolls-Royce Merlin V-1650-7, producing around 1,490 horsepower, turning a four-blade Hamilton Standard propeller of about 11 feet 2 inches diameter. That big four-blade prop blurs into a lovely arc, and the bubble canopy and polished natural-metal finish on many airframes catch the light superbly. Mustangs are often flown fast and clean, so they fill the frame quickly and demand good anticipation. Watch for the topside passes where the sun lights the bare metal. For more on the aircraft, see our feature on the North American P-51 Mustang.
Multi-engine bombers
A Lancaster, a B-17 or a Mitchell turns slower, larger propellers, so they read as blurred at a faster shutter speed than a fighter. Start around 1/320 and watch that all the propeller discs blur evenly. A bomber filling the frame is a large subject, so frame wide and keep the whole aircraft sharp with an aperture around f/8. Bombers fly more sedately, which makes the panning easier, but their size and the number of engines mean there is more to get right in the frame. They look magnificent low and banking, with all engines blurred and the wartime markings clear.
Trainers and biplanes
Harvards, Stearmans, Tiger Moths and the like turn slower props and fly slower display lines, so blur comes easily and you can drop to 1/100 or below for a full disc without too much pain. These aircraft are often flown in tight formation teams, which makes for strong group images. The slower speed gives you time to compose carefully, so use it to work on framing and on catching the moment a formation crosses.
Tail chases and pairs
When two aircraft fly a tail chase or a synchro pair, the photography becomes about timing the moment they cross or sit in a pleasing relationship. Frame wide enough to hold both, focus on the lead, and fire bursts as they converge. These passes happen fast and you often get one chance, so know the display sequence if you can and be ready.
Common mistakes and how to fix them
Most warbird photography problems come down to a handful of repeated errors. Knowing them shortens the learning curve.
Shutter speed too high
The beginner mistake is to use 1/1000 or faster because it feels safe, and to come home with sharp aircraft and frozen, dead propellers. The aircraft looks like a model. The fix is to commit to slow shutter speeds and accept the lower hit rate. Frozen blades are the clearest sign of an inexperienced warbird photographer.
Stopping the pan
Jabbing the shutter and stopping the camera dead smears the aircraft at slow speeds. Keep the pan smooth and follow through after the burst. If a whole pass is soft, this is almost always the cause.
Silhouetted aircraft
Trusting the meter against a bright sky gives dark, detail-free airframes. Add positive exposure compensation or switch to manual exposure set off the aircraft, and read the histogram rather than the bright screen.
Clipping wingtips and tails
Framing too tight with a prime lens, or zoomed in too far, clips the aircraft just as it does something interesting. Leave a little room, shoot slightly wider than you think you need, and crop later. A zoom helps you react.
Leaving before the good light
The crowd thins after the headline act, but the last hour often has the best light and sometimes a dedicated evening flying slot. Stay. The Spitfire in golden light at the end of the day is frequently the best frame of the show.
Ignoring the ground
Shooting only the flying display means missing the start ups, the taxi shots and the detail frames that give a set depth and often sell better as stock. Work the whole day, not just the flypasts.
Where to photograph warbirds in the UK
The UK is one of the best places in the world to photograph WWII aircraft in the air. A handful of venues and events stand out.
IWM Duxford
Duxford, run by the Imperial War Museum in Cambridgeshire, is the centre of UK warbird flying. It was a Battle of Britain fighter station and later an American base, and that history runs through its airshows. For 2026 the Duxford Summer Air Show takes place on Saturday 4 and Sunday 5 July, with a strong warbird element, and the announced participants include the Flying Bulls bringing a group of types such as the P-38 Lightning, F4U Corsair, Bearcat, B-25 Mitchell and P-51 Mustang. The Duxford Battle of Britain Air Show follows on Saturday 12 and Sunday 13 September, traditionally the most warbird-heavy show of the British calendar, with mass Spitfire launches that are a highlight of the year for any aviation photographer. Always check the IWM site for the current flying list before you travel, as line-ups change.
Old Warden and the Shuttleworth Collection
Old Warden in Bedfordshire, home of the Shuttleworth Collection, flies vintage and wartime types from a grass airfield in intimate conditions. The aircraft display close and low, often in beautiful evening light at the season finale shows, and the relaxed setting and small crowd line make it a favourite for photographers who want something quieter than the big jet shows. The collection includes rare interwar and early types alongside wartime aircraft.
Battle of Britain Memorial Flight
The RAF Battle of Britain Memorial Flight, based at RAF Coningsby in Lincolnshire, operates Spitfires, Hurricanes, a Lancaster and a Dakota, though the Lancaster is undergoing deep maintenance at Duxford and is off the 2026 display circuit and commemorative events across the country through the summer. A Spitfire or Hurricane from the flight turning up at a county show or a seaside event is a chance to photograph a genuine wartime aircraft without travelling to a dedicated warbird show.
Seaside and county airshows
Many summer airshows around the UK coast and countryside include at least one warbird, often a Spitfire or a Hurricane, in their flying programme. These shows are less crowded with warbirds than Duxford but offer different backgrounds, sea and coastline rather than airfield, and are a good place to practise. Check each show’s flying programme in advance so you know what to expect.
A short note on processing
Warbird files need a light touch in editing. The aim is an aircraft that looks the way it did on the day, not an over-cooked poster.
Start by setting exposure and recovering any detail in the shadowed underside of the aircraft, lifting shadows gently rather than crushing the file flat. Pull back the bright sky if you exposed to protect the airframe, and a graduated adjustment can balance a blown sky against a correctly exposed aircraft. Add contrast and a little clarity to bring out the rivets and panel lines, but go carefully, because too much clarity gives a harsh, artificial look that does not suit a classic aircraft.
Sharpening is where long-lens warbird shots are won or lost. Apply output sharpening to taste, but resist the urge to crank it, because heavy sharpening on a slightly soft slow-shutter frame just makes the softness obvious. Noise reduction helps the frames you shot at higher ISO in the evening, and modern AI noise reduction is very effective on aviation files. Crop for the composition you wanted, leaving room ahead of the nose, and keep the horizon level if any land is in shot. A consistent, restrained edit across a set is what makes a body of warbird work look professional.
Turning a day’s shooting into a body of work
One good warbird frame is satisfying. A coherent archive of them is what turns a hobby into something more, whether that is a portfolio, prints, or stock that earns. The habit to build is to shoot the whole event, cull ruthlessly, edit consistently and caption accurately. Record the aircraft type, the registration or serial, the scheme and the event, because that information is what makes an image findable and licensable later. A sharp Spitfire is one of hundreds online, but a correctly identified, well-captioned image of a specific airframe at a specific event has lasting value.
If you want to see how a long-term aviation archive is presented and licensed, the Piemags aviation galleries show the breadth a consistent approach builds over time, and the licensing pages explain how that work is made available for use. Building your own archive with the same care, one show at a time, is how a folder of warbird frames becomes a genuine collection.
Frequently asked questions
- What shutter speed should I use for warbird photography?
- For a single radial or inline piston fighter such as a Spitfire or Mustang, start at 1/200 second and work down towards 1/125 and 1/100 for a fuller propeller arc. Multi-engine bombers turn slower, larger propellers and look right closer to 1/250 to 1/320. Going below 1/125 gives a fuller disc but a lower keeper rate, so set the speed to the effect you want rather than to a single rule for the day.
- Do I need a full propeller disc to get a good warbird shot?
- No. A clean arc of blur that shows the engine is running is enough to make an aircraft look alive. A full disc, where the blades merge into a complete circle, takes very slow shutter speeds and brings a high failure rate. Plenty of strong warbird images sit between the two, with roughly two thirds of an arc and a tack-sharp airframe. Decide the look you want and choose the shutter speed to suit.
- What lens is best for photographing warbirds?
- A telephoto zoom in the 100-400mm or 150-600mm range covers almost every warbird situation, from a topside pass to a distant tail chase. The zoom lets you reframe fast as the display line changes, which matters more than absolute reach. A short telephoto around 70-200mm is useful for formations, close taxi shots and aircraft on the ground.
- How do I stop warbirds coming out as dark silhouettes against the sky?
- The bright sky fools the meter into underexposing the aircraft. Add positive exposure compensation, often plus one to plus two stops against bright cloud, or switch to manual exposure set off the aircraft itself. Read the histogram rather than the bright screen, and accept a brighter sky to keep detail in the airframe. A blown patch of empty sky costs nothing, while a blocked-up dark aircraft is hard to recover.
- Should I use shutter priority or manual exposure?
- Shutter priority works when the background is an even sky, because you set the speed for the propeller and let the camera handle the rest. When the background swings between bright cloud, dark land and the crowd line, manual exposure gives more consistent results, because the aircraft is exposed the same way in every frame regardless of what is behind it. Many experienced warbird photographers shoot manual for exactly this reason.
- Where can I photograph warbirds in the UK?
- IWM Duxford is the heart of UK warbird flying, with the Duxford Summer Air Show on 4 and 5 July 2026 and the Battle of Britain Air Show on 12 and 13 September 2026. Old Warden, home of the Shuttleworth Collection, flies vintage types in intimate, close conditions, and the RAF Battle of Britain Memorial Flight brings Spitfires, Hurricanes and a Lancaster to events across the country through the summer.
- What is the best time of day to photograph warbirds?
- Early morning and the last few hours before sunset give the warmest, most flattering light and pick out the curves of a polished airframe. Midday sun is harsh and flat; if you are stuck with it, keep the sun behind you and watch for glare off bare metal.
- What shutter speed gives a full propeller disc on a warbird?
- Aim for roughly 1/125th to 1/250th of a second for a full or nearly full propeller blur on a piston warbird. Faster than about 1/500th freezes the blades and makes the aircraft look dead in the air, so it is worth slowing down and panning smoothly to keep the fuselage sharp.
- How do I photograph warbirds on the ground or during engine start-up?
- Start-ups are a gift: smoke, noise and turning propellers make dramatic images. Use a slightly slower shutter speed to catch the blades moving, watch for the puff of exhaust smoke as a Merlin or radial fires up, and get low to make the aircraft look powerful against the sky.
Where to go from here
Warbird photography rewards the photographer who understands what makes these aircraft different and is willing to accept a lower hit rate for a better picture. Commit to slow shutter speeds so the propeller lives, expose for the aircraft and not the sky, pan smoothly and follow through, and chase the low light at the ends of the day. Work the ground as hard as the air, build a properly captioned archive one show at a time, and the frames will add up into something worth keeping. The aircraft will not be flying forever, which is all the more reason to photograph them well while they are.
