Photographing aircraft in museums and hangars is mostly a low-light problem solved without a flash. Use a fast lens wide open, push the ISO to 3200 or beyond, brace the camera against something solid, and work the angles to hide the clutter and kill the reflections. Do that and a dim, crowded hall gives up clean, sharp images that look nothing like the muddy snaps most visitors go home with.
An aircraft museum is one of the most rewarding and most difficult places to photograph an aeroplane. The light is low and mixed, the aircraft are packed close together, half of them sit behind glass or barriers, and the biggest ones simply will not fit in the frame. There is no golden hour and no clean sky. What there is, though, is unlimited time, no crowd line to shoot over, and the chance to get close to airframes you would never otherwise see still. This guide sets out exactly how to make the most of it.
What this guide covers
- Why museums and hangars are different
- Gear for museum photography
- Camera settings that work indoors
- Handling low light without a flash
- Beating reflections on glass and perspex
- Isolating the subject from the clutter
- Details, nose art and engines
- Photographing suspended aircraft
- Museums worth visiting
- Hangars and working collections
- White balance and mixed light
- Etiquette, tripods and the rules
- Processing museum photos
- A museum photography checklist
- Frequently asked questions
Why museums and hangars are different
Everything you rely on outdoors is missing indoors. There is no daylight to set a fast shutter speed, no clean background to make the subject pop, and no distance to let a long lens compress the scene. Instead you get artificial light that is dim and often an ugly colour, aircraft crammed wingtip to wingtip, and hard barriers that dictate where you can stand. The skills that matter shift from tracking and panning to seeing light, controlling reflections and finding a clean angle in a cluttered space.

The single biggest change is that the aircraft are not moving and you are. Outdoors the aeroplane does the work and you react. Indoors you have all the time in the world, so the burden is on you to move, to try angles, to wait for a gap in the visitors, and to think about composition in a way an airshow rarely allows. That is a gift, not a hardship. A static airframe under museum light will still be there in five minutes, so there is no excuse for a lazy frame.
The second change is light level. A bright museum hall might sit around 50 to 200 lux, which is perhaps a thousand times dimmer than a sunny airfield. That forces the exposure triangle into its corners: apertures wide open, ISO high, and shutter speeds slow enough that a steady hand or a firm support becomes essential. Get comfortable with those numbers and the rest of the job is composition and patience.
Gear for museum photography
The kit that shines at an airshow is the wrong kit for a museum. Leave the big telephoto in the bag and think fast and wide instead. Low light rewards fast glass, and tight spaces reward short focal lengths, so a very different set of lenses earns its place indoors.
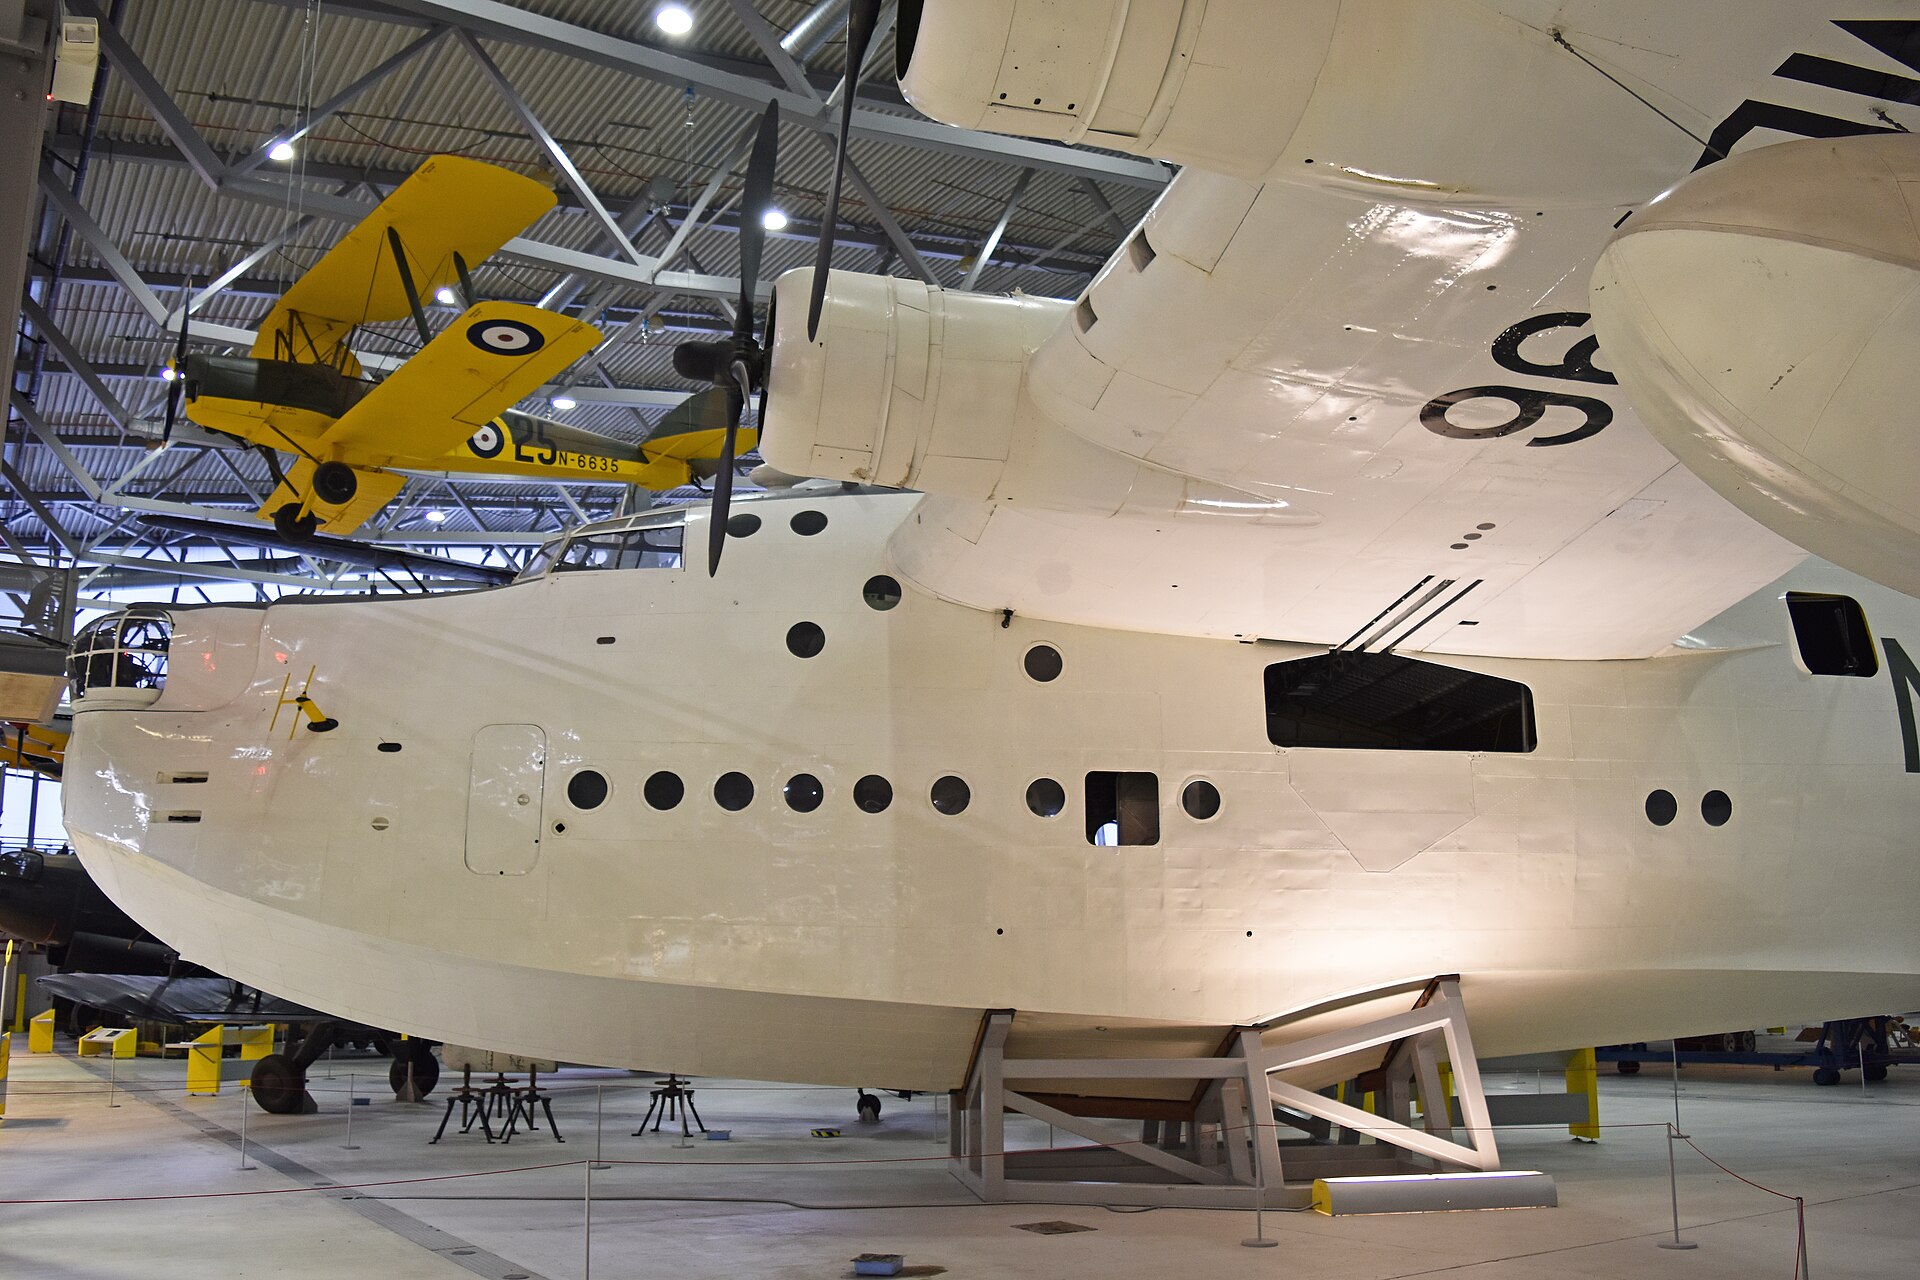
A fast standard or wide zoom is the workhorse. Something in the 16-35mm or 24-70mm range at f2.8, or a fast prime such as a 35mm or 50mm at f1.8, gathers far more light than a telephoto and lets you take in a whole airframe from close range. A wide lens is often the only way to fit a big aircraft into the frame at all, because you simply cannot back up far enough in a packed hall. Pair it with a body that holds up at high ISO, which today means almost any recent full-frame camera and most decent crop-sensor ones.
Image stabilisation is worth more here than anywhere else in aviation photography. In-body or in-lens stabilisation buys you three or four stops of shutter speed, which is the difference between a sharp handheld frame at a fifteenth of a second and a blurred one. A camera with good stabilisation and clean high ISO is a better museum tool than an exotic lens. Add a lens hood to cut flare from overhead lights, a polarising filter for the reflection work described below, and a soft cloth to wipe the front element, and you have everything you need.
What you often cannot bring is a tripod. Many museums ban them for safety and crowd-flow reasons, and even where they are allowed they are slow and awkward around other visitors. Plan to shoot handheld, and treat a monopod or a small beanbag as your support of choice. A monopod is usually tolerated where a tripod is not, and it steadies a slow shutter beautifully. Our guide to the best lenses for aviation photography covers the fast primes worth owning, most of which double as ideal museum lenses.
Camera settings that work indoors
Set the camera up for low light before you walk in, then fine-tune as you go. The starting point is aperture priority or manual, a wide aperture, auto ISO with a sensible ceiling, and a minimum shutter speed you trust yourself to hold. That combination lets the camera do the arithmetic while you concentrate on composition.
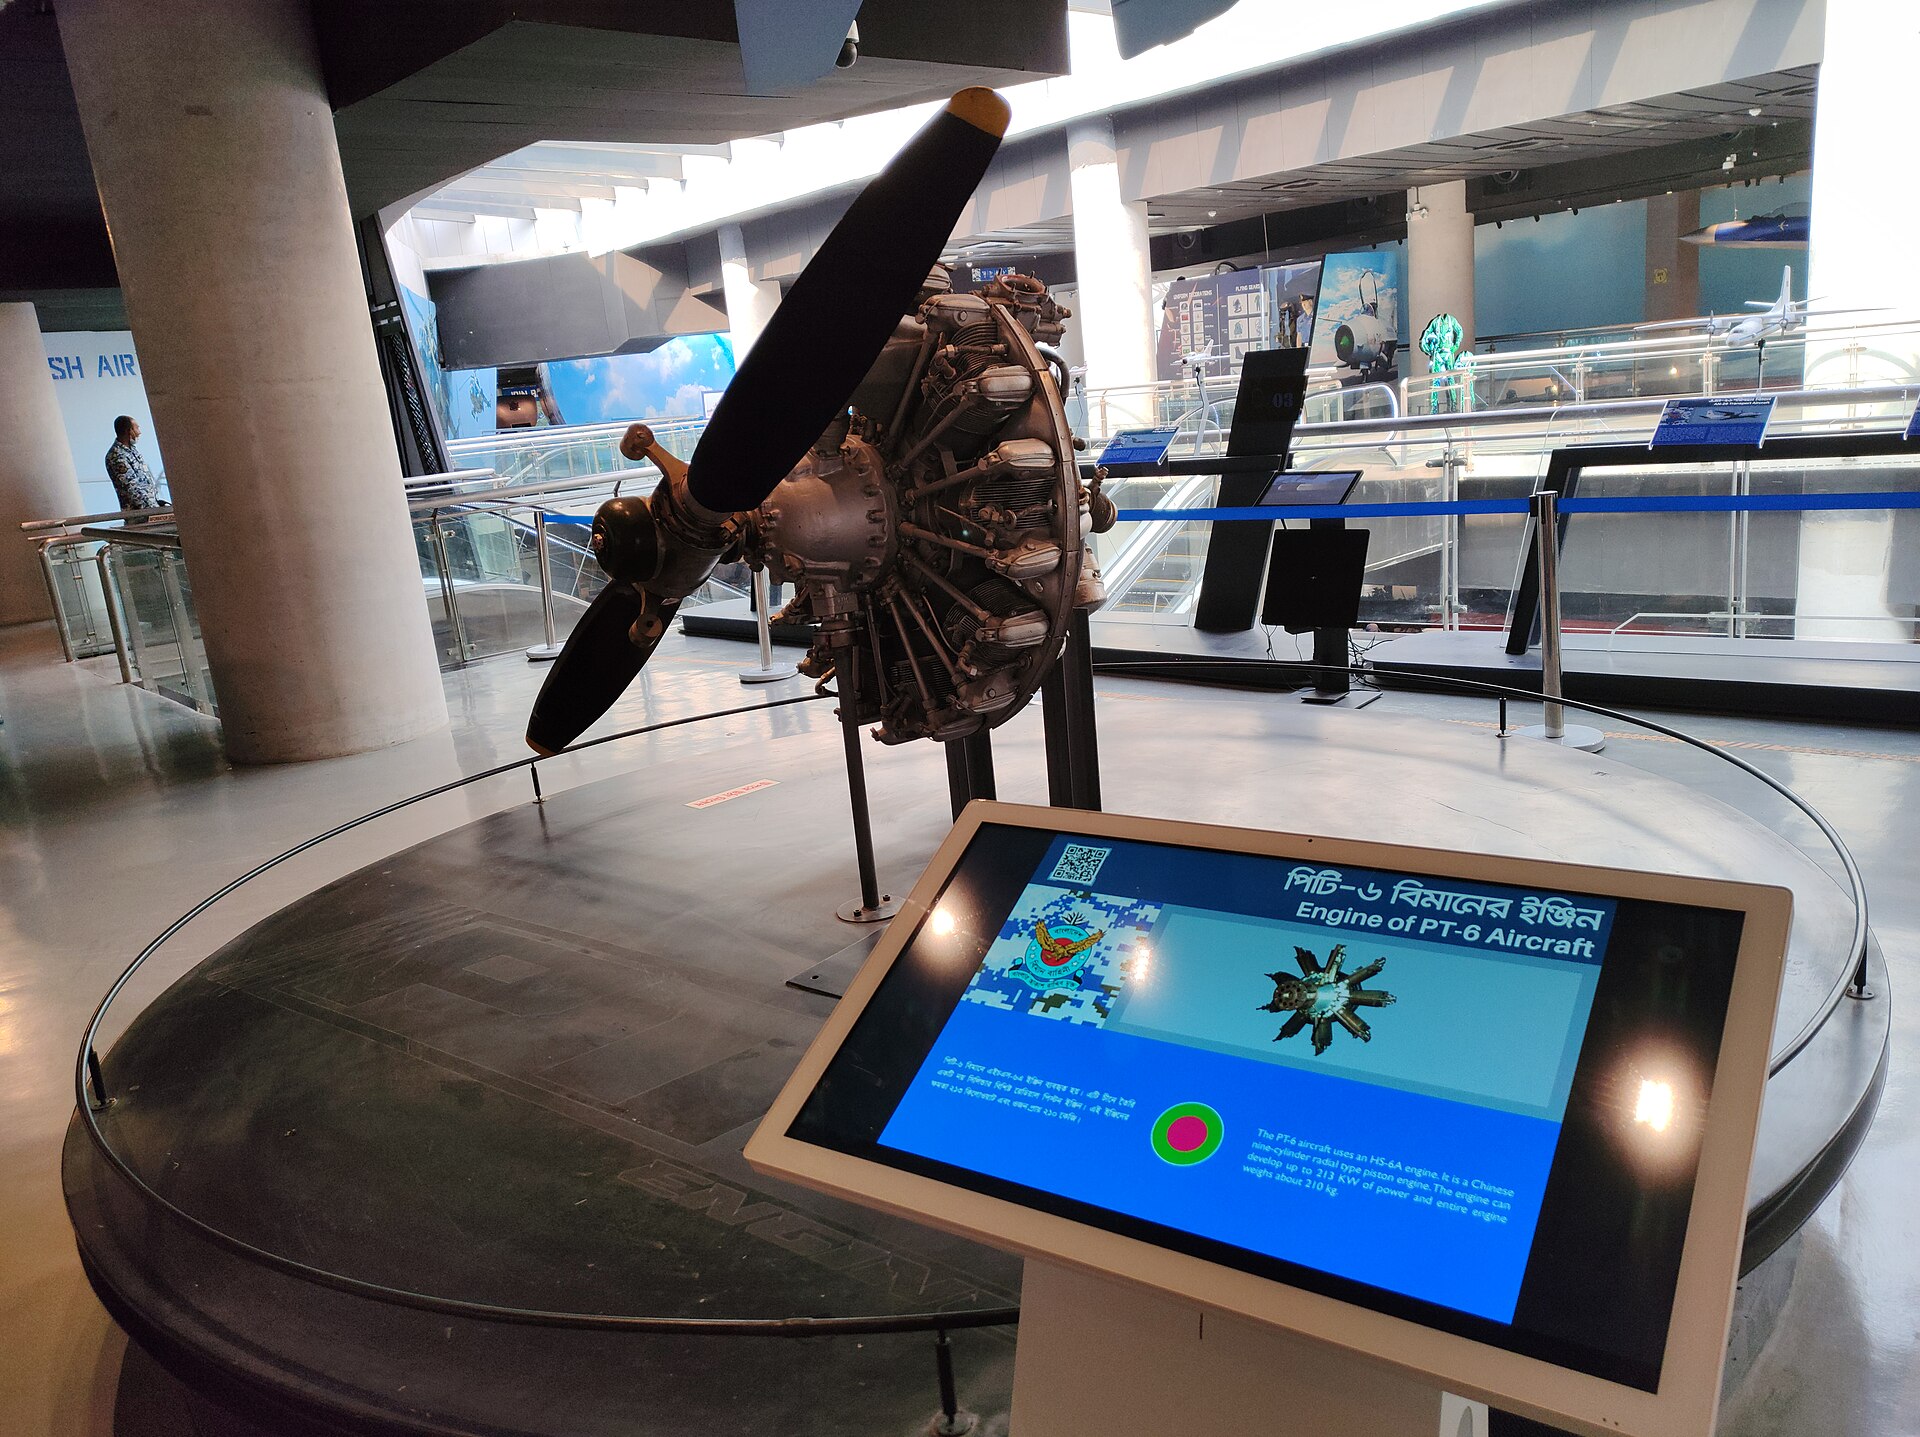
Open the aperture to around f2.8 to f4 for most whole-aircraft shots, which keeps the shutter speed usable and throws a distracting background gently out of focus. Stop down to f5.6 or f8 only when you need front-to-back sharpness, for example on an engine or a cutaway where the whole mechanism should be crisp. Remember that depth of field is shallow up close, so a wide aperture on a nearby detail can leave part of it soft. Judge each frame on its merits rather than locking one aperture for the day.
Set auto ISO with a ceiling you are comfortable with, commonly 6400 or 12800 on a modern body, and a minimum shutter speed of around one over the focal length, or slower if your stabilisation is good. A wide lens at 24mm can often be handheld at a fifteenth or a thirtieth of a second with care, which keeps the ISO down. Shoot raw, always, because raw gives you the latitude to lift shadows and fix the strange museum colours later without the image falling apart. Turn the flash off and leave it off.
Meter carefully, because museum scenes fool the camera. A dark hall with a bright spotlit aircraft will tempt the meter to overexpose, blowing the highlights on the fuselage, so a touch of negative exposure compensation often helps. Check the histogram rather than trusting the screen, which looks bright in a dark room, and expose to keep the highlights on the metalwork intact. Shadows lift cleanly from raw; blown highlights do not come back.
Handling low light without a flash
The instinct in a dark hall is to reach for the flash. Resist it. An on-camera flash flattens the aircraft, throws hard shadows onto the airframe behind, bounces straight back off any glass, and is banned in many museums anyway. Every good museum photograph is made with the light that is already there.
Start by getting stable. Brace your elbows against your body, or lean your shoulder or the camera against a pillar, a barrier rail or a wall. Breathe out and squeeze the shutter gently rather than stabbing it. A monopod, a beanbag on a rail, or even the camera pressed flat on a display case will hold a slow shutter far better than an unsupported hand. With good technique and stabilisation, sharp frames at a fifteenth of a second are routine, and that alone saves two or three stops of ISO.
Then let the ISO climb. Modern sensors are astonishing in low light, and a clean-looking ISO 6400 frame is easy on any recent camera, with 12800 and beyond perfectly usable once you have run it through noise reduction. High ISO with a little noise beats a blurred frame at low ISO every time, so do not be precious about the numbers. The noise you can fix in software; the motion blur you cannot.
Finally, use the light pools. Museum lighting is uneven, with bright spots and dark corners, so position yourself to catch an aircraft where a spotlight or a skylight falls on it. Move around a subject until the available light rakes across the fuselage and shows its shape, rather than hitting it flat from straight above. Working the light you have, rather than adding your own, is the whole game indoors.
Beating reflections on glass and perspex
Two kinds of glass get between you and the aircraft: the display cases and barriers in front of exhibits, and the canopies and cockpit glazing on the aircraft themselves. Both throw reflections that wreck a frame if you ignore them, and both are beaten with the same handful of tricks.
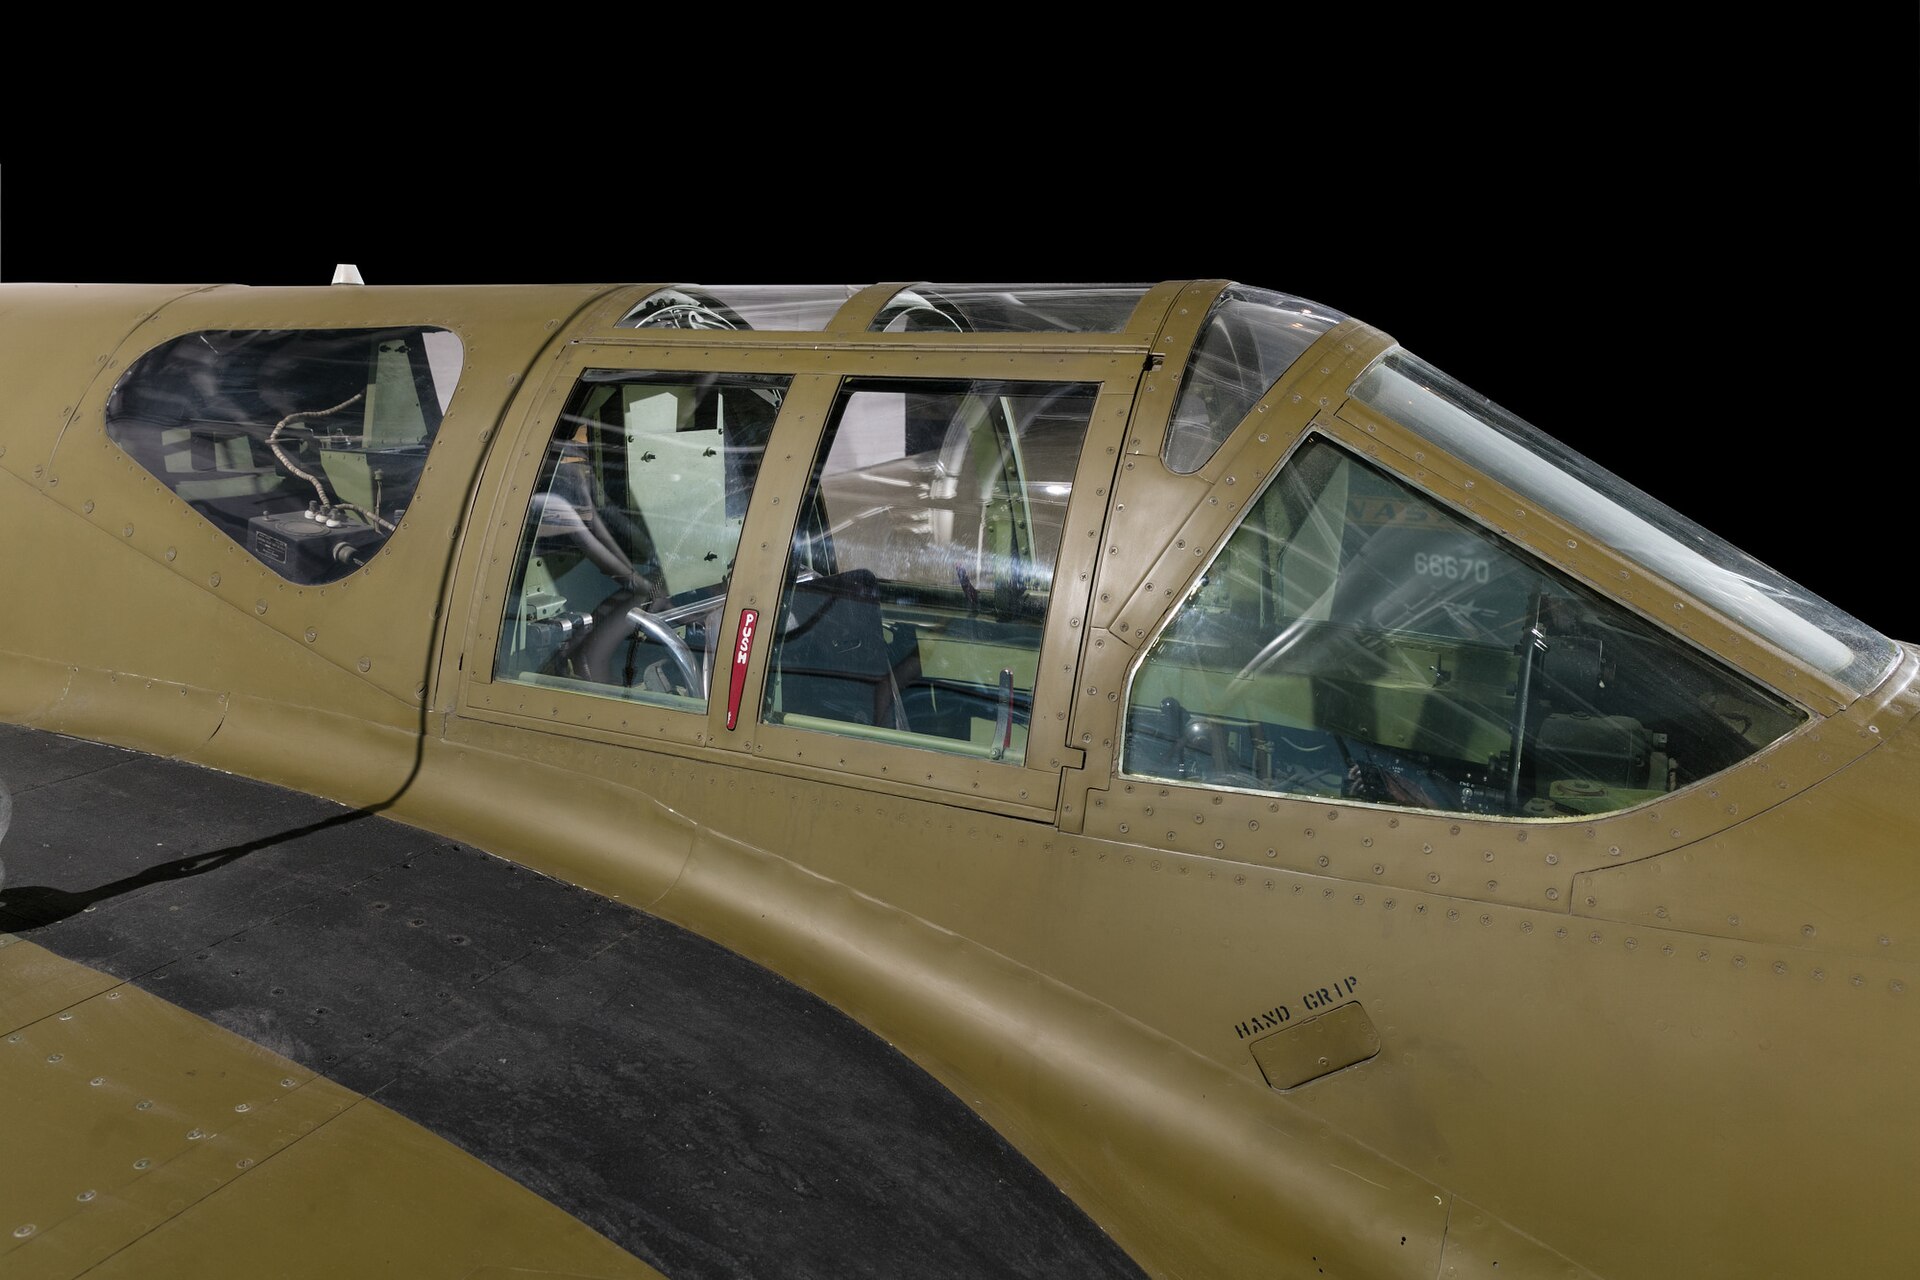
The most reliable fix is to put the lens right up against the glass. Press the lens hood gently onto the case or canopy and the reflections vanish, because there is no gap for stray light to bounce in. A rubber hood is kinder to the glass and seals better than a hard one. Where you cannot touch the glass, shade the gap with your free hand or your body to block the light source that is causing the reflection, and shift your angle so the bright overhead lamp no longer bounces towards the lens.
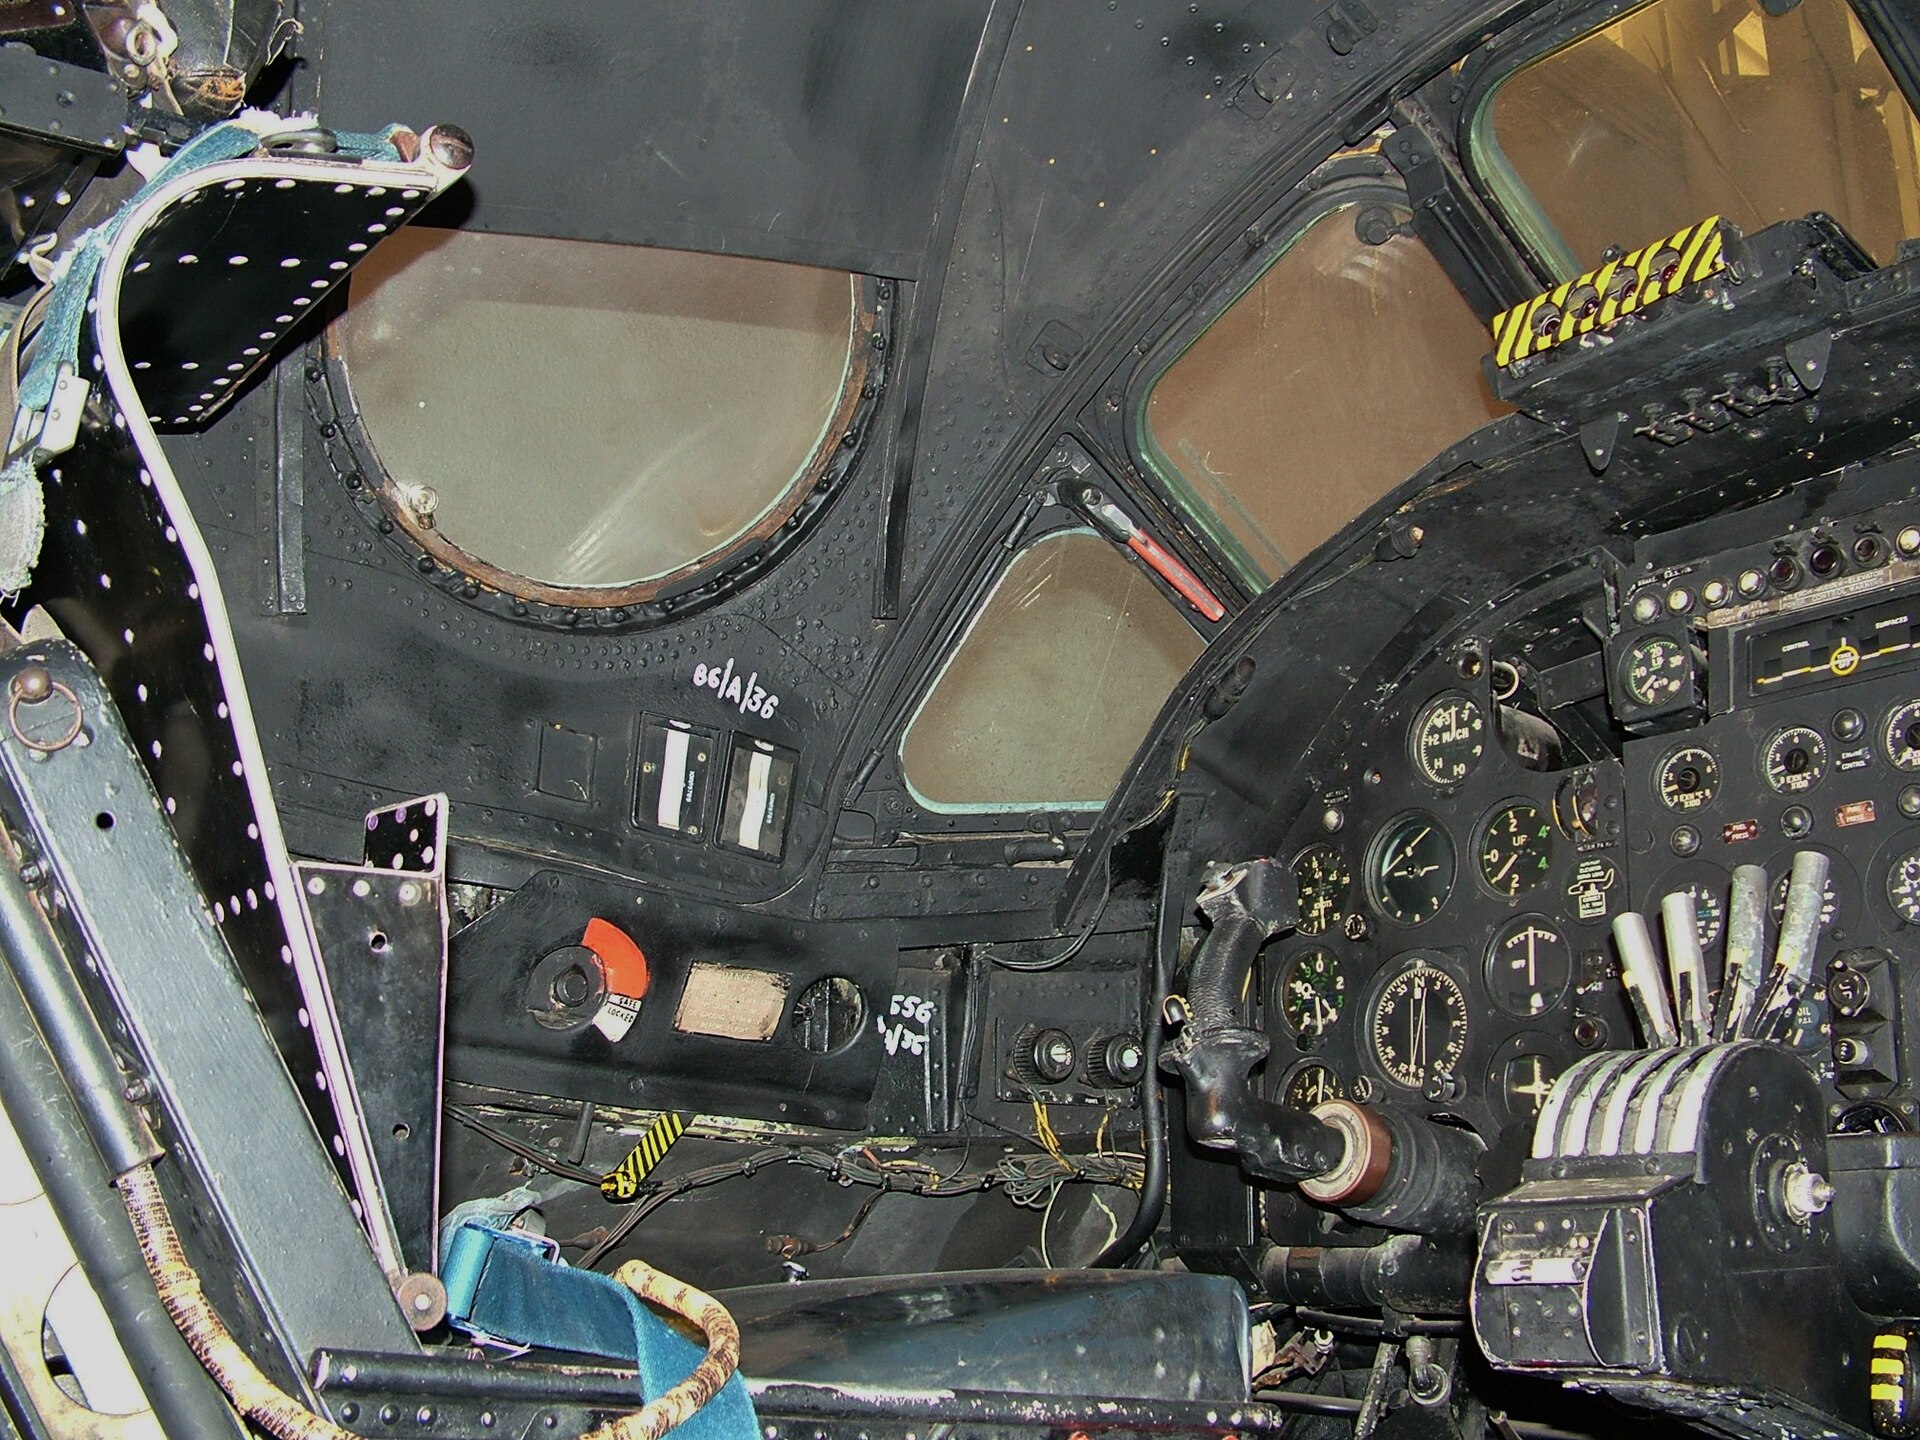
A circular polariser is the other weapon. Rotate it and watch the reflection on a canopy or a case fade, often almost completely, at the cost of a stop or two of light that you make up on the ISO. Polarisers work best at an angle to the glass rather than square on, so combine the filter with a change of position. For cockpit glazing specifically, get low and shoot slightly upward through the clearest panel, which usually shows the instrument panel with the least glare. Patience and small movements do most of the work here.
Sometimes the reflection is the picture. A clean reflection of a hall or another aircraft in a polished canopy or a mirror-finish fuselage can make a striking, deliberate image. The skill is choosing when to fight a reflection and when to use it, and that only comes from looking carefully at what the glass is actually doing before you press the shutter.
Isolating the subject from the clutter
The defining problem of an aircraft museum is that everything is jammed together. Wings overlap, signage sprouts everywhere, fire extinguishers and other visitors fill the gaps, and the aircraft you want shares its frame with three you do not. Making one airframe stand out from that chaos is the core compositional skill indoors.
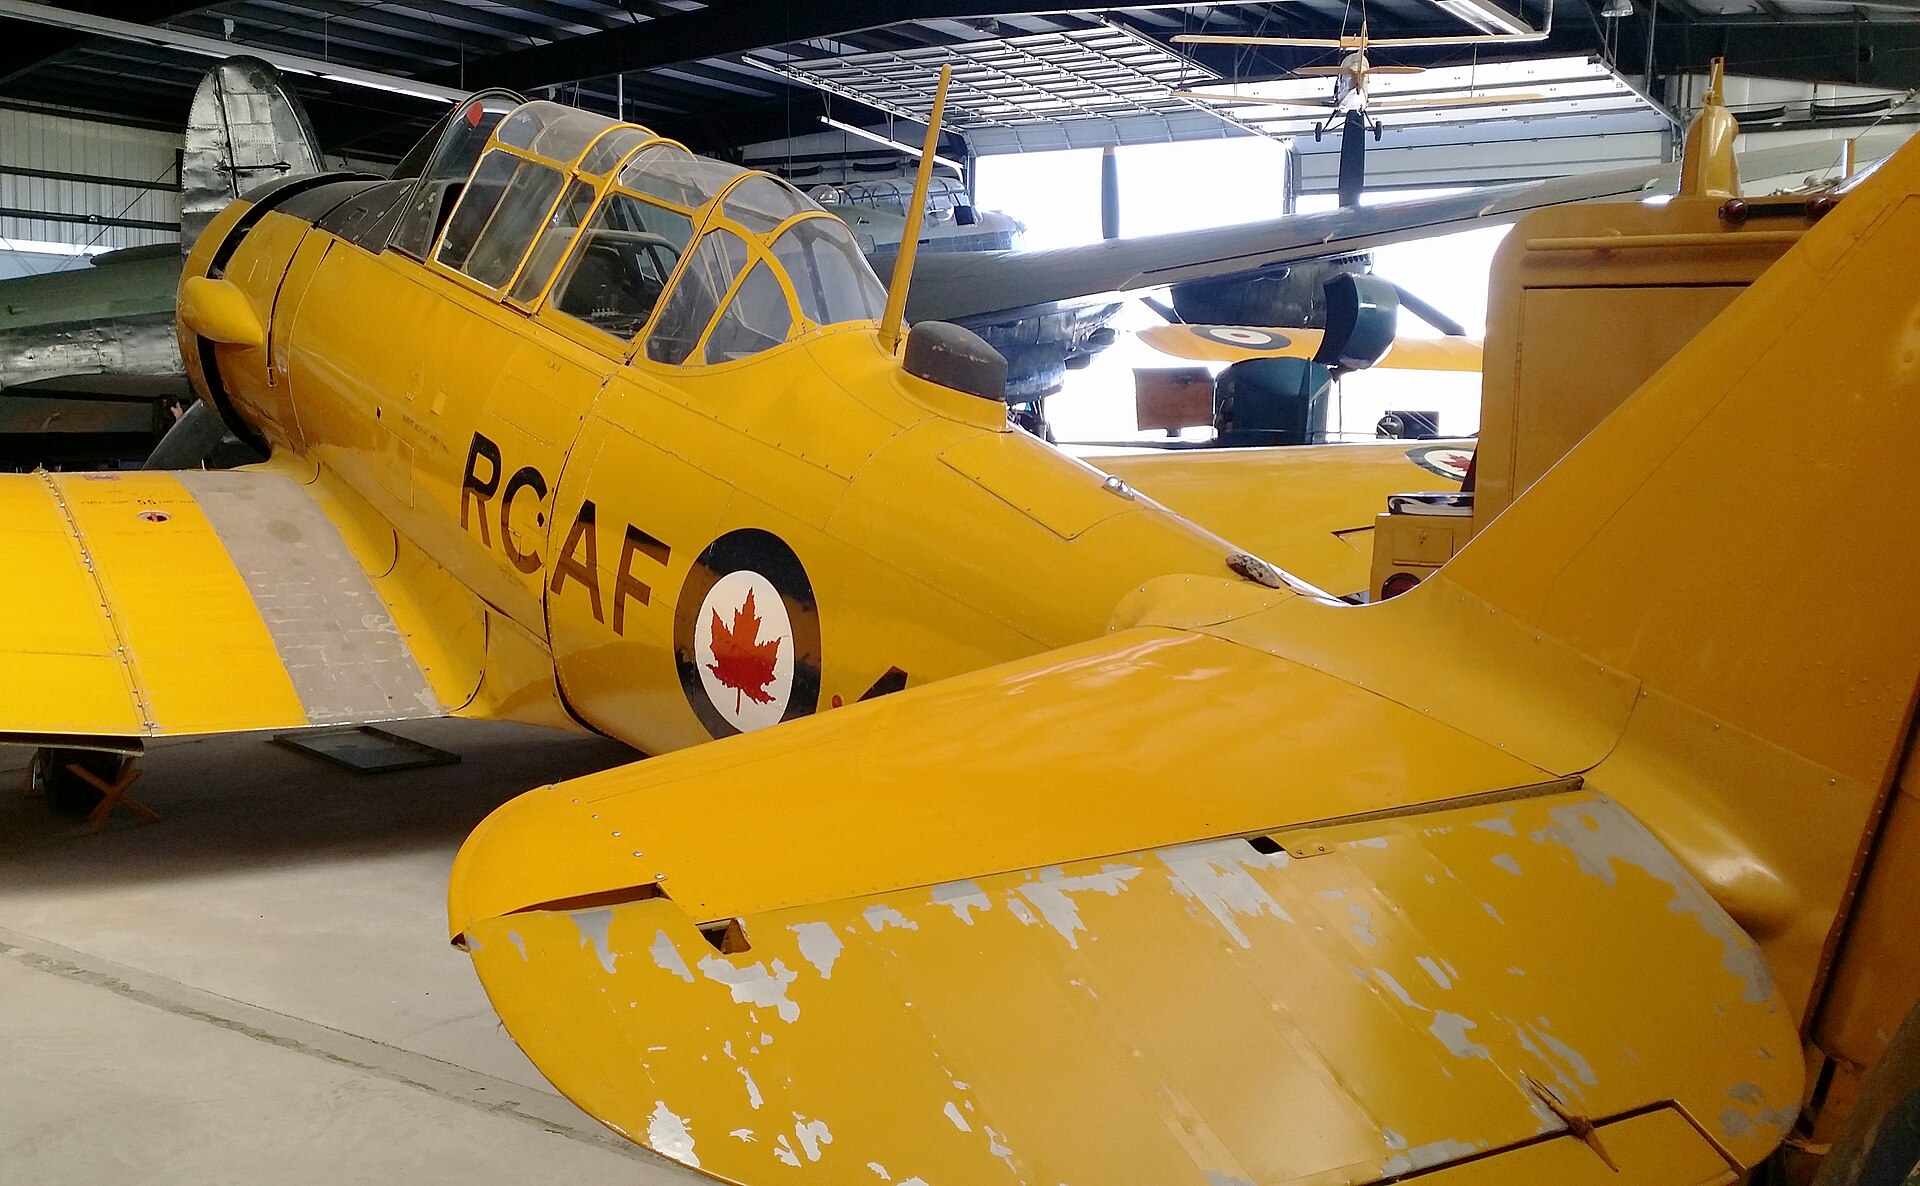
Shallow depth of field is your first tool. A wide aperture throws the background aircraft and the clutter behind into a soft wash that lets the subject breathe. Get low or high to put a plain part of the hall, a dark ceiling or a blank wall behind the aircraft rather than a jumble of other exhibits. A step to one side often swaps a messy background for a clean one, so move before you shoot and look at what is behind the subject, not just the subject itself.
Fill the frame with the part that matters. If the whole aircraft cannot be isolated, do not fight it. Move in and shoot a strong section instead: the nose and cockpit, the tail, an engine, the sweep of a wing. A tight, clean detail of a cluttered aircraft beats a wide shot that includes everything you were trying to avoid. Our guide to composition for aviation photography applies directly here, because the principles of filling the frame and controlling the background matter even more in a crowded hall than in open sky.
Use lines and light to lead the eye. Museum halls are full of strong lines, from girders and gantries to the aircraft themselves, and a low wide-angle viewpoint along a fuselage or a row of aircraft can turn clutter into a deliberate, layered composition. When the space is truly hopeless, wait: visitors move, and a patient photographer gets the clean gap that the impatient one never sees.
Details, nose art and engines
Some of the best museum photographs are not of whole aircraft at all. Details reward the close access a museum gives you, and they sidestep the clutter problem entirely because you are filling the frame with a single, controllable subject. Nose art, roundels, stencils, rivets, worn paint, engines and undercarriage all make strong, graphic images.
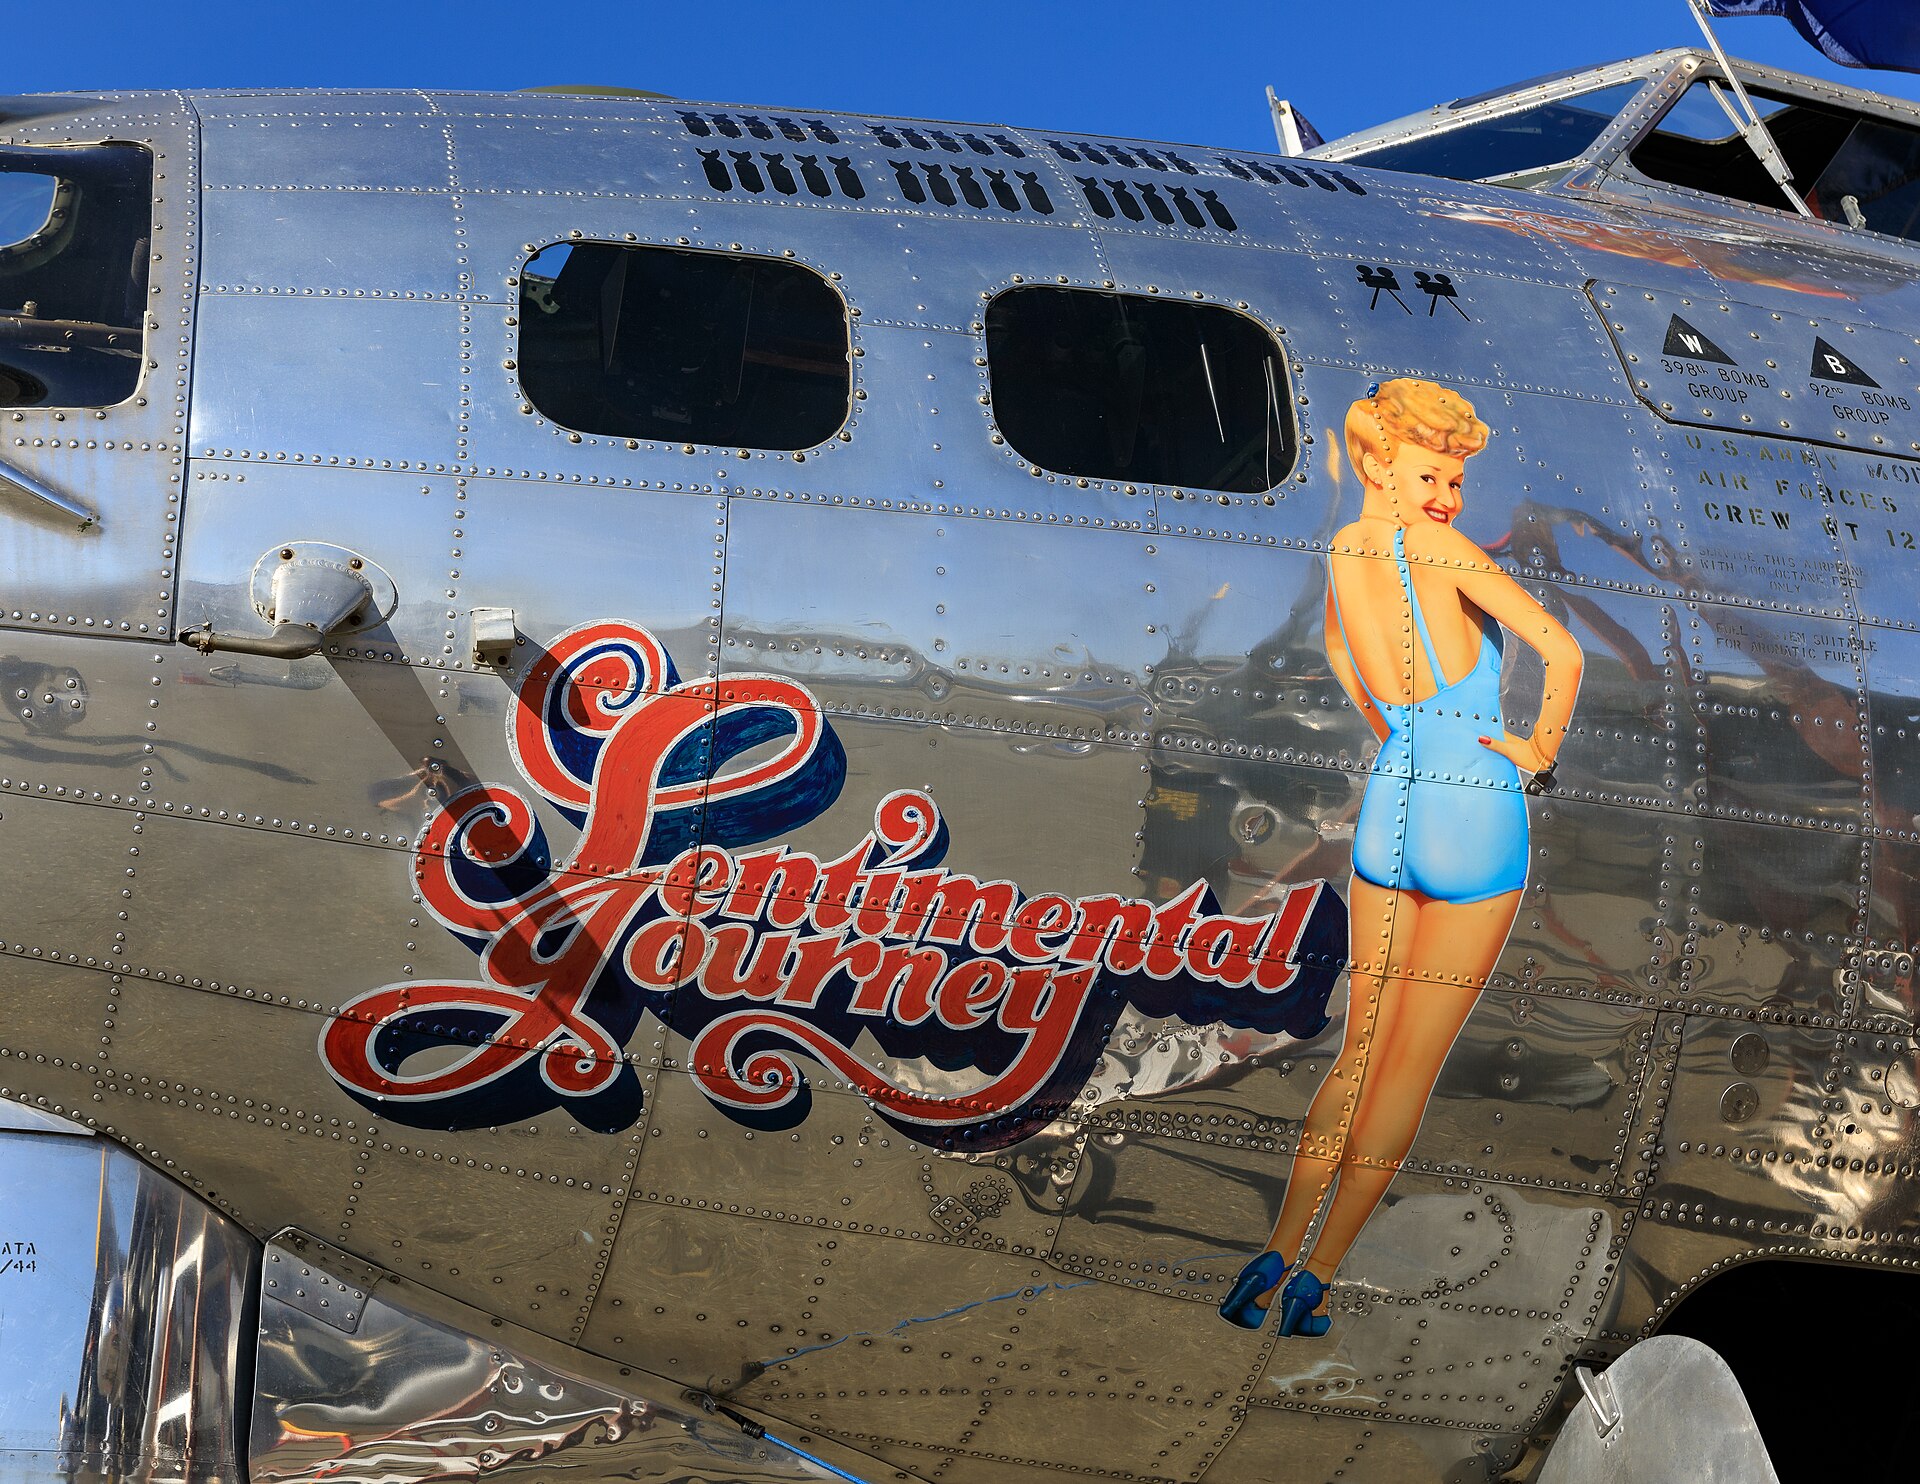
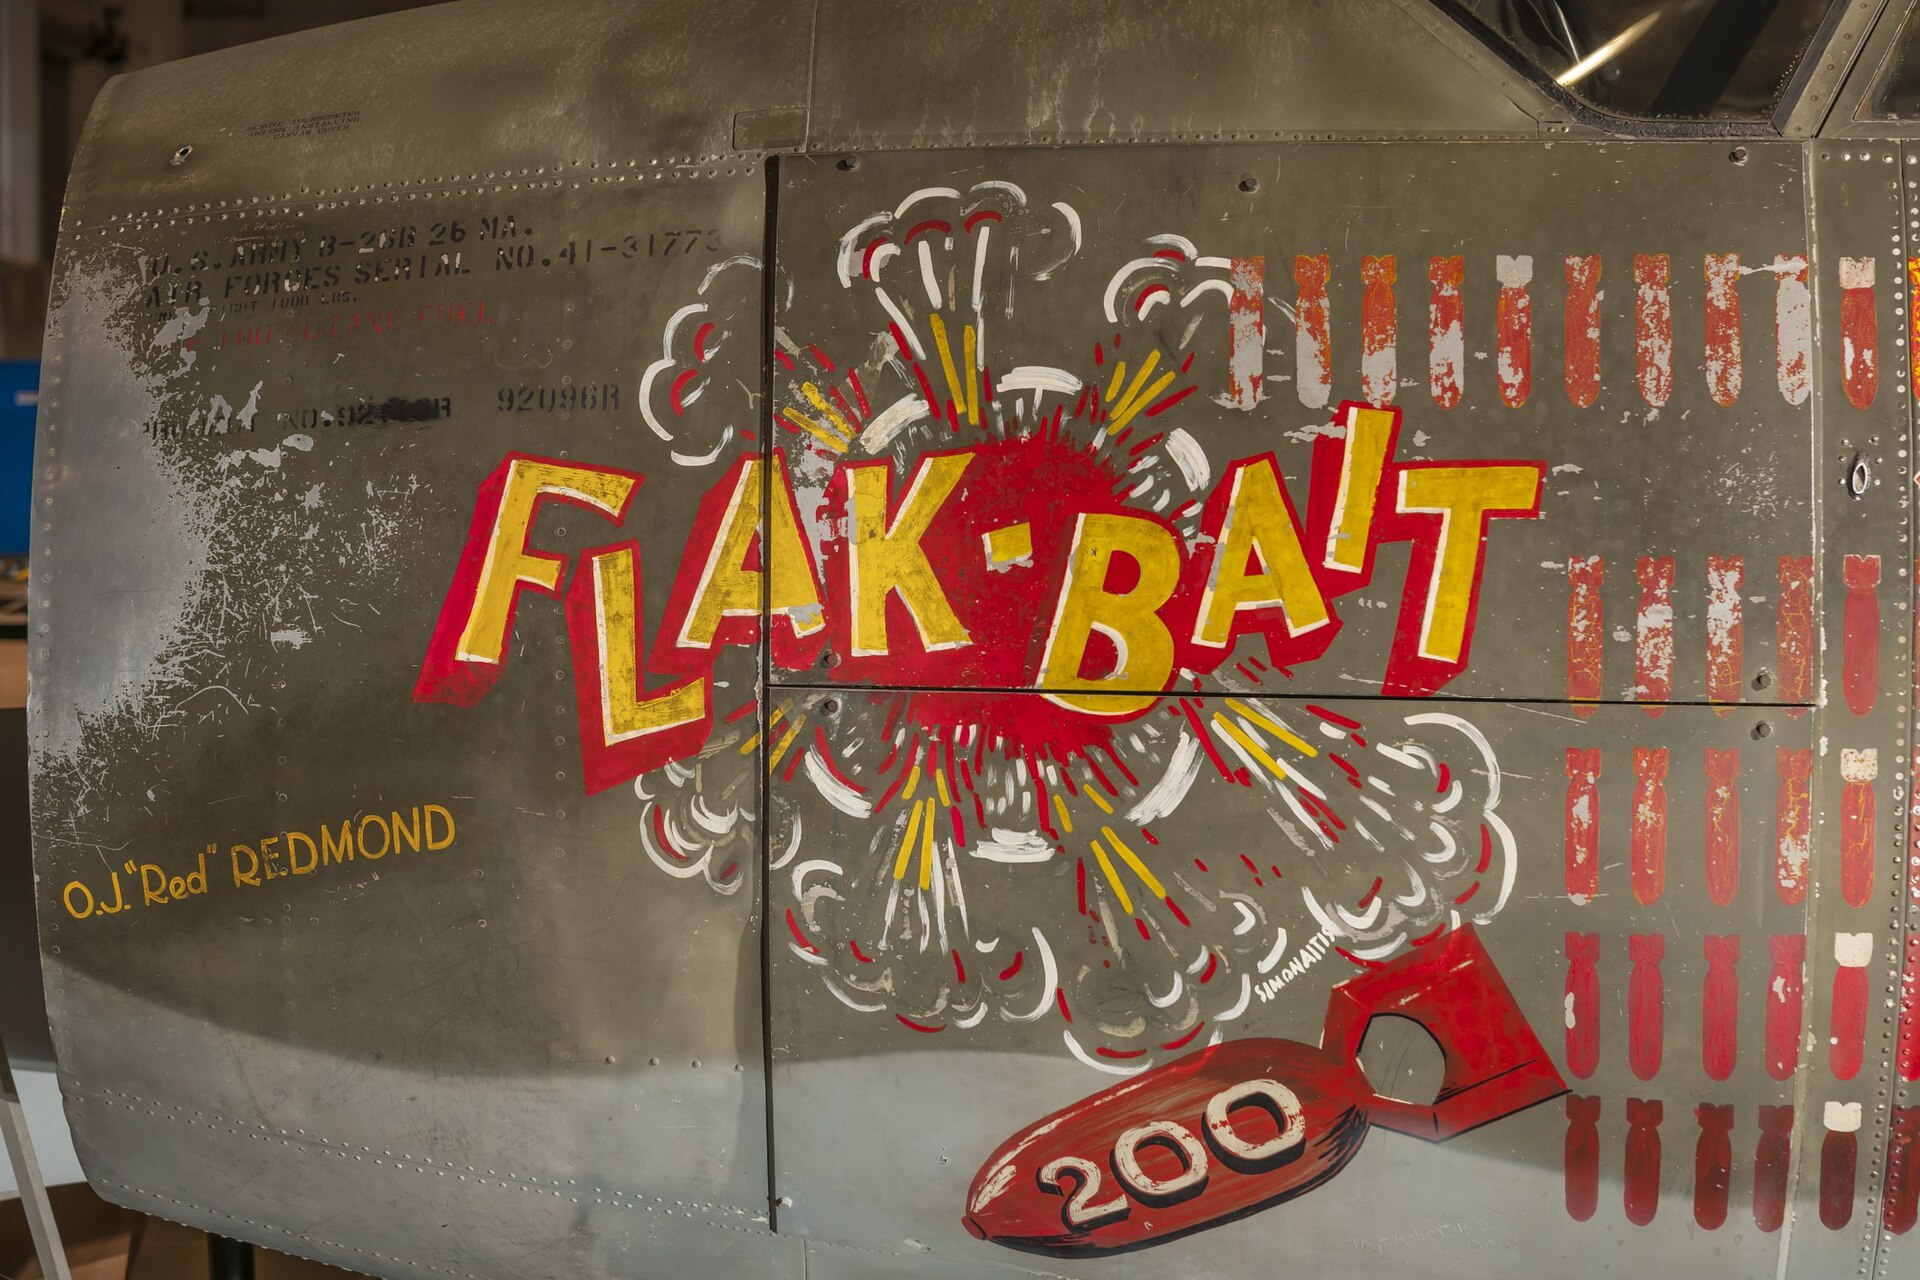
Nose art and markings want even light and careful exposure. Expose for the painted surface rather than the bright hall behind it, get square on to the artwork to keep it undistorted, and use a longer focal length if the aircraft is roped off. A short telephoto around 85mm to 135mm is ideal for lifting a detail out of a busy airframe without distortion. Watch for reflections on glossy paint and shift your angle until they clear.
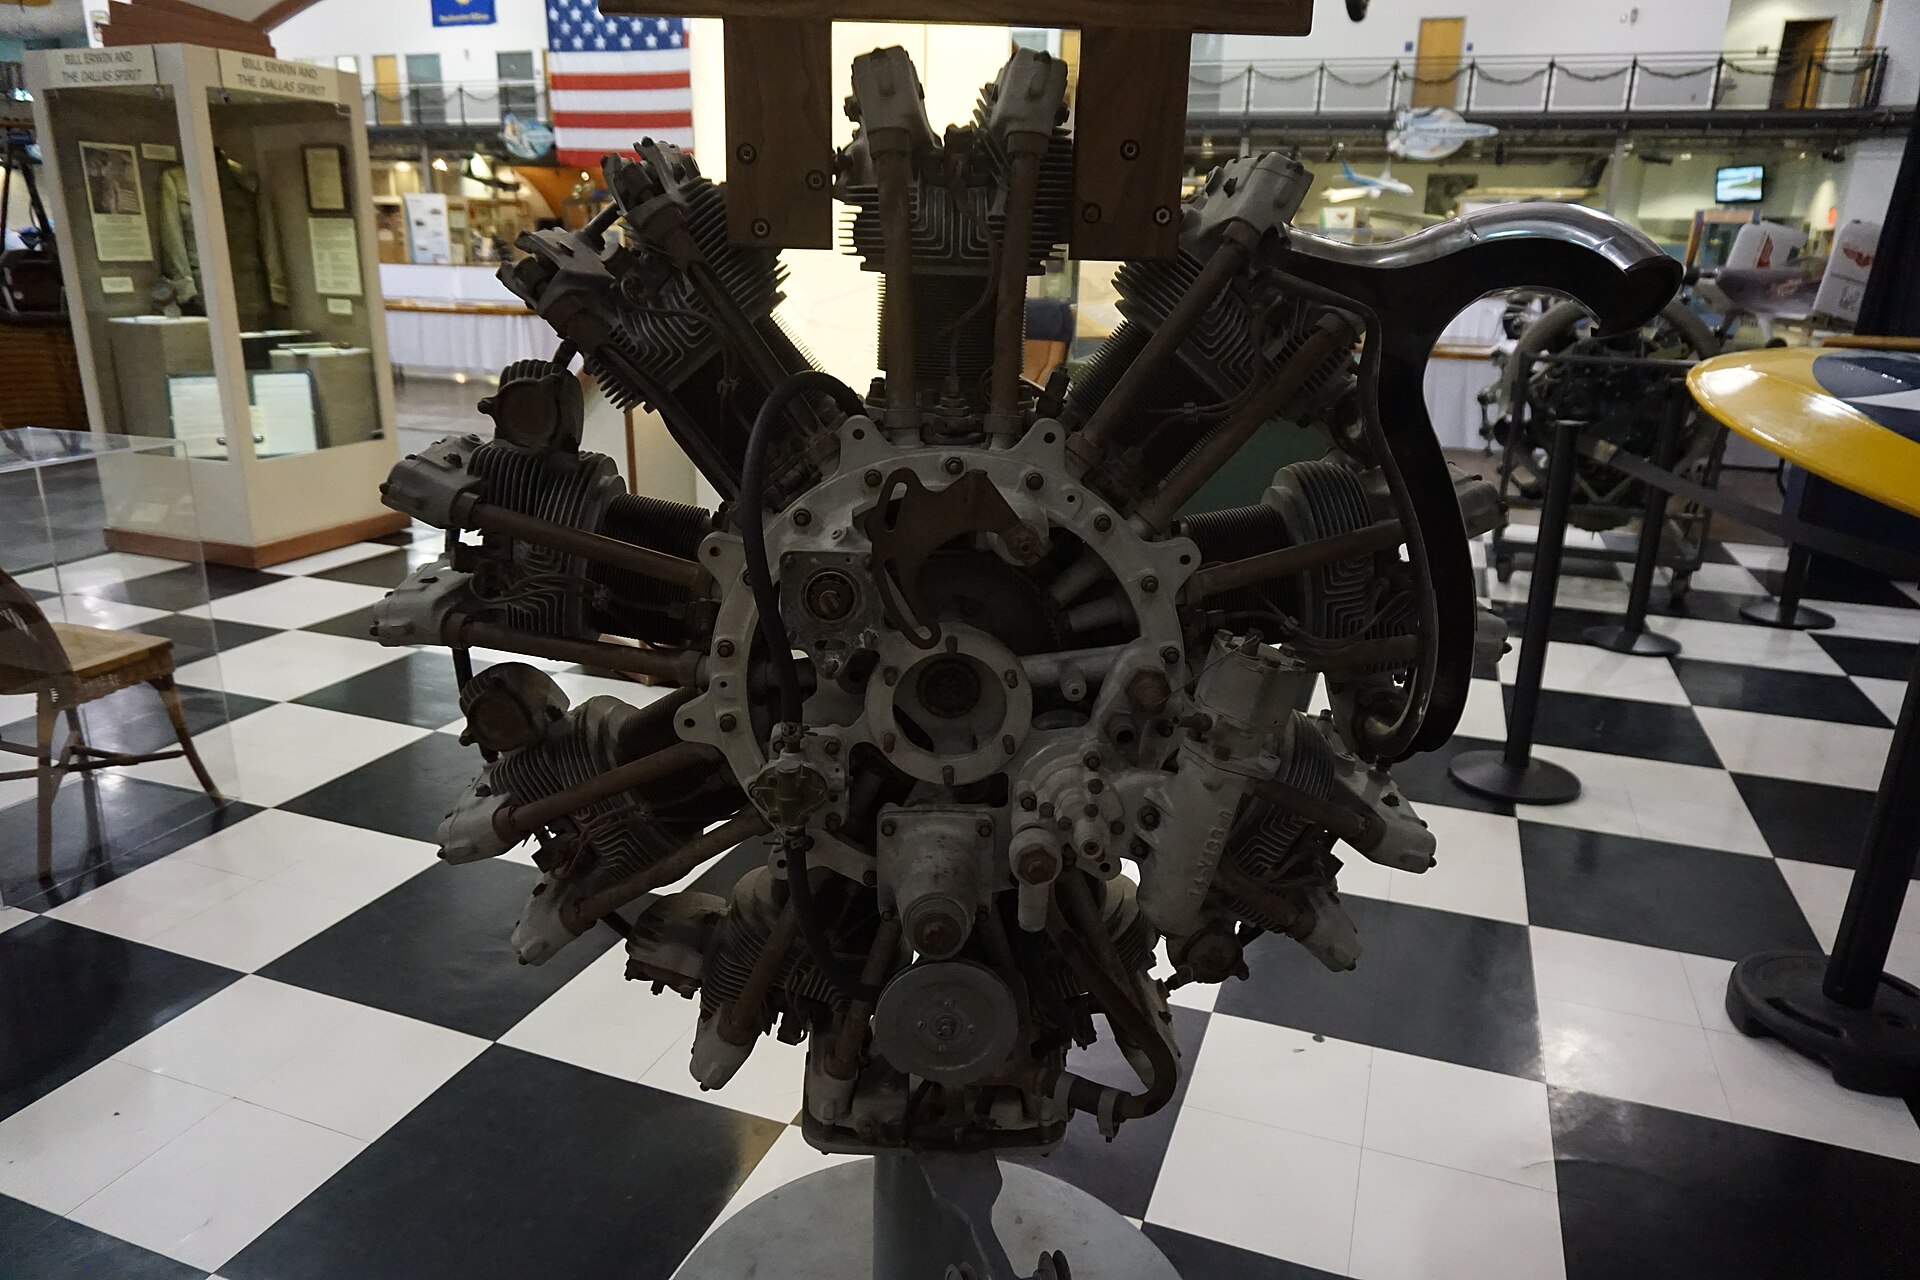
Engines and mechanical details are a genre in themselves, and this is where you stop the aperture down. A radial engine, a jet compressor face or a cutaway rewards front-to-back sharpness, so f8 or so keeps the whole mechanism crisp. Look for the repeating geometry of cylinders, blades and pipework, and light that rakes across the metal to show its form.
Undercarriage, control surfaces and the underside of an aircraft are all worth a look, especially on types displayed on stands or hung from the ceiling that let you see angles impossible on a flying example. Get underneath a suspended aircraft and shoot straight up, or crouch beside a main gear leg and shoot along it. The close, unhurried access of a museum is the whole point, so use it to make images you could never take at an airshow.
A few museums give you both halves of the hobby on one site. The Palm Springs Air Museum keeps a good part of its collection airworthy and flies it from the airport’s own runways, which our Palm Springs spotting and photography guide covers alongside the fence positions outside.
Photographing suspended and hanging aircraft
Many museums hang their lighter aircraft from the roof, from Great War biplanes to gliders and light jets, and these suspended machines offer angles you can get nowhere else. An aeroplane in flight never lets you stand beneath it and shoot straight up, but a museum does, and the underside of an aircraft is a shape most people never see.
Shoot from directly below with a wide lens and let the aircraft fill the frame against the roof structure, the skylights or a plain ceiling. The girders and gantries of a hall can frame a hanging aircraft nicely, or you can isolate it against a clean patch of ceiling with a wider aperture. Because the aircraft is lit from above by the hall lighting, the underside often falls into shadow, so expect to lift those shadows in processing and expose to keep detail in the darker surfaces.
Watch the geometry. A wide lens pointed steeply upward exaggerates perspective, so a hanging aircraft can look dramatically foreshortened, which is sometimes exactly what you want and sometimes not. Move around beneath it to find the angle where the planform reads clearly, and keep the camera square to the aircraft if you want a clean, undistorted record shot. Suspended aircraft are also a rare chance to photograph the top and bottom surfaces together as you walk a gallery that climbs past them, so use any raised walkway the museum provides.
Museums worth visiting for aircraft photography
Some collections are simply better for photography than others, whether because of the light, the space or the aircraft on show. In Britain, the Royal Air Force Museum at Hendon in London and its sister site at Cosford in Shropshire hold enormous collections across several halls, with everything from Great War fighters to V-bombers and a Vulcan. Admission to both RAF Museum sites is free, which makes repeat visits to chase the light easy.
Imperial War Museum Duxford in Cambridgeshire is the largest aviation museum in Britain and combines historic hangars with the vast AirSpace and American Air Museum buildings, plus aircraft that still fly from the airfield. The Fleet Air Arm Museum at Yeovilton in Somerset tells the naval aviation story and includes a walk-through carrier experience, while the National Museum of Flight at East Fortune near Edinburgh houses a Concorde in a former wartime hangar. Brooklands in Surrey pairs aviation with motoring history on the site of a famous racing circuit and aircraft factory.
Further afield, the Smithsonian National Air and Space Museum in Washington and its huge Steven F. Udvar-Hazy Center near Dulles Airport hold some of the most significant aircraft in the world, from a Concorde to the Space Shuttle Discovery, mostly under bright, even light that suits photography. Wherever you go, check opening times and any timed-entry or booking requirements before you travel, since popular sites increasingly ask visitors to reserve a slot, and arrive at opening for the quietest halls.
Hangars and working collections
A working hangar is a different animal from a polished museum hall, and some of the best aviation photographs are made in one. Restoration workshops, warbird operators and living museums such as Duxford let you see aircraft mid-rebuild, with panels off, engines exposed and the story of the airframe laid bare. The light is often better too, because hangar doors let in great slabs of soft daylight that a sealed museum never gets.
Use that door light. An aircraft parked in the mouth of a hangar, lit from the side by the open doors, gets a natural, directional light that models its shape beautifully, with the dark interior behind making a clean, moody backdrop. Position yourself so the daylight rakes across the fuselage and expose for the aircraft, letting the hangar behind fall dark. It is one of the most flattering light situations in all of aviation photography, and it costs nothing.
Working spaces demand extra care and courtesy. A hangar is a workplace with hazards, trip lines, moving equipment and people doing a job, so always ask permission, follow any safety brief, wear what you are told to, and never touch an aircraft or a tool. Stay out of the way of the engineers, and remember that access is a privilege that thoughtless behaviour quickly loses for everyone. Get it right and a hangar visit yields images with a depth and authenticity a roped-off exhibit can never match. Our guide to photographing warbirds covers the flying side of these same aircraft.
White balance and mixed light
Museum lighting is a mongrel. A single hall might mix warm tungsten spots, cold LED panels, greenish fluorescent tubes and a shaft of neutral daylight from a skylight, all falling on the same aircraft. Auto white balance does its best and usually lands somewhere unconvincing, which is the main reason museum snaps look muddy and off-colour.
The cure is to shoot raw and fix the white balance later, where you have full control and can neutralise a colour cast in seconds. If you prefer to get it close in camera, set a custom white balance from a grey card or a white part of the aircraft, or pick the preset that matches the dominant light, but do not agonise over it at the time. The raw file holds all the information you need to correct it at the desk.
Where light sources of different colours mix on one airframe, accept that no single white balance will make all of it neutral. Correct for the light on the most important part of the aircraft, usually the nose and cockpit, and let the rest fall where it may. Fighting for perfect colour across a mixed-light scene is a losing battle, so aim for a natural-looking subject rather than a technically neutral whole frame.
Etiquette, tripods and the rules
A museum is a shared space with rules, and respecting them keeps access open for everyone. Check the photography policy before you go or on arrival, because it varies widely. Most museums welcome personal photography, many ban flash and tripods, some restrict commercial shoots, and a few forbid photography of specific exhibits on loan. When in doubt, ask a member of staff rather than assume.
Flash is the most common ban, for good reasons: it disturbs other visitors, can harm sensitive artefacts and does nothing for your aircraft photographs anyway. Tripods are usually restricted because they block walkways and pose a trip hazard in a crowded hall. A monopod is often the accepted compromise, taking up little floor space while steadying a slow shutter, so pack one rather than a tripod. Never climb barriers, touch the aircraft or move stanchions to improve a shot.
Be considerate of other people. Museums are busy, and a photographer who plants themselves in front of an exhibit for twenty minutes is not making friends. Work quickly when others are waiting, step aside to let people see the aircraft, and come back for the clean shot when the crowd thins. Early opening on a weekday is the single best time for a serious shoot, with the halls at their quietest and the light unchanged. A polite word with staff can occasionally open doors, sometimes literally, to a better vantage point.
Processing museum photos
Museum files need a slightly different edit from airshow shots, because the challenges are noise, colour and perspective rather than sharpness and cropping. A calm, methodical pass in your raw editor turns a dim, off-colour capture into a clean image.
Start with white balance, neutralising the dominant colour cast until the aircraft looks natural. Lift the shadows to reveal detail in the dark corners of the airframe, pull the highlights down to hold the metalwork, and add a little contrast to counteract the flat museum light. Then tackle noise: modern raw converters and dedicated tools remove high-ISO noise beautifully while keeping detail, and our guide to noise reduction and sharpening covers the balance between clean and crunchy that matters most on high-ISO files.
Finally, fix the geometry. Wide lenses in tight halls produce converging verticals and bulging lines, so use the lens-correction and transform tools to straighten the aircraft and level the horizon of the floor. A small perspective correction makes a museum shot look deliberate rather than snatched. Do not overdo it, because a heavy transform crops away the corners and can leave the aircraft looking oddly stretched. You can see finished aviation images in the Professional Aviation Photography galleries, with the terms for using them set out on the licences page.
A museum photography checklist
The table below distils the guide into a quick reference to run through before and during a visit. None of it is complicated, but having it in mind stops the common mistakes that spoil indoor aircraft shots.
| Situation | What to do | Why |
|---|---|---|
| Dim hall | Fast lens wide open, ISO 3200 to 12800, brace the camera | Gets a sharp frame without a flash |
| Glass and canopies | Lens hood on the glass, or a polariser, shade the gap | Removes reflections |
| Cluttered background | Wide aperture, change angle, fill the frame with a detail | Isolates the subject |
| Big aircraft | Wide lens, step back, use the depth of the hall | Fits the whole airframe in |
| Engines and cutaways | Stop down to f8, rake the available light | Front-to-back sharpness |
| Mixed light | Shoot raw, correct white balance later | Neutral, natural colour |
| Busy halls | Arrive at opening on a weekday, be patient | Clean frames, fewer people |
Some of the aircraft in this guide are the last of their kind, and a few are the only ones. Our account of the aircraft of the Pearl Harbor attack ends on what is left of the three Japanese types, which is less than most people assume.
Museum light is the only light left for some aircraft. Exactly one aeroplane that fought at Midway still exists, a Douglas SBD-2 Dauntless at the National Naval Aviation Museum at Pensacola, and our account of the battle decided from the air explains why nothing else did.
Duxford is the largest test of everything on this page, with a modern shed you can photograph down into from a walkway, three original Belfast-truss hangars and a column-free concrete shell with a fully glazed wall facing the airfield. Our photographer’s guide to IWM Duxford works through each of them.
Frequently asked questions
What camera settings are best for photographing aircraft in a museum?
Start in aperture priority or manual with the lens wide open, around f2.8 to f4, auto ISO with a ceiling of 6400 or higher, and a minimum shutter speed of about one over the focal length. Shoot raw, turn the flash off, and use a little negative exposure compensation if a spotlit aircraft sits against a dark hall. Stop down to f8 only for engines and cutaways where you need front-to-back sharpness.
Do I need a tripod for museum aircraft photography?
Usually not, and many museums ban them because they block walkways and pose a trip hazard. Plan to shoot handheld with a fast lens, high ISO and good bracing technique, which is enough for sharp frames in most halls. A monopod is a better bet than a tripod, since it is often allowed where a tripod is not and still steadies a slow shutter.
How do I avoid reflections on aircraft canopies and display cases?
Put the lens hood right against the glass so no stray light can bounce in, or shade the gap with your hand or body. A circular polariser cuts reflections when rotated, working best at an angle to the glass rather than square on. For cockpit glazing, get low and shoot slightly upward through the clearest panel to see the instruments with the least glare.
What lens should I use for photographing aircraft indoors?
Fast and wide, not long. A 16-35mm or 24-70mm f2.8 zoom, or a fast prime such as a 35mm or 50mm f1.8, gathers plenty of light and lets you take in a whole airframe from close range in a tight hall. Add a short telephoto around 85mm to 135mm for pulling out details and nose art on roped-off aircraft.
Can I use flash in an aircraft museum?
Usually you should not, and many museums ban it outright. Flash flattens the aircraft, throws hard shadows onto the airframe behind, bounces straight back off any glass, and disturbs other visitors. Every good museum photograph is made with the available light, using a fast lens, high ISO and steady support instead of a flash.
How do I photograph a large aircraft that will not fit in the frame?
Use a wide lens and use the depth of the hall, stepping back as far as the space allows and shooting from a corner to gain distance. If the whole airframe still will not fit, do not force it: shoot a strong section such as the nose, the tail or an engine instead. A clean detail beats a cramped wide shot that clips the wingtips.
What ISO is acceptable for museum photography?
Whatever it takes to get a sharp frame. Modern cameras produce clean images at ISO 6400 and very usable ones at 12800 and beyond once run through noise reduction. A slightly noisy sharp frame is always better than a clean blurred one, so raise the ISO rather than let the shutter speed drop below what you can hold steady.
How do I deal with the strange colours of museum lighting?
Shoot raw and correct the white balance later, where you can neutralise a colour cast in seconds with full control. Museum halls mix warm, cold and greenish light on the same aircraft, so auto white balance rarely gets it right. Where light sources of different colours mix, correct for the light on the most important part of the aircraft and accept the rest.
Is photography allowed in aircraft museums?
Personal photography is welcome in most aircraft museums, though policies vary. Flash and tripods are commonly restricted, some places limit commercial shoots, and a few forbid photographing specific exhibits on loan. Check the policy before you go or on arrival, and ask a member of staff if you are unsure rather than assuming.
When is the best time to photograph in an aircraft museum?
Early opening on a weekday is ideal, with the halls at their quietest and the artificial light unchanged through the day. Fewer visitors means cleaner frames and no waiting for people to clear an exhibit. Because the light indoors does not change, there is no need to chase a particular hour as you would outdoors; chase the quiet instead.
How do I get sharp handheld shots in a dark hall?
Brace the camera against a pillar, rail or wall, tuck your elbows in, breathe out and squeeze the shutter gently. Rely on image stabilisation, which buys three or four stops, and a fast lens wide open. With good technique, sharp frames at a fifteenth of a second are routine, and a monopod or a beanbag on a barrier steadies even slower shutters.
What are the best subjects to photograph in an aircraft museum?
Whole aircraft are the obvious target, but details often make the strongest images because they sidestep the clutter. Nose art, roundels, stencils, worn paint, engines, cockpits and undercarriage all reward the close access a museum gives you. Suspended aircraft let you shoot angles impossible on a flying example, so look up as well as around.
