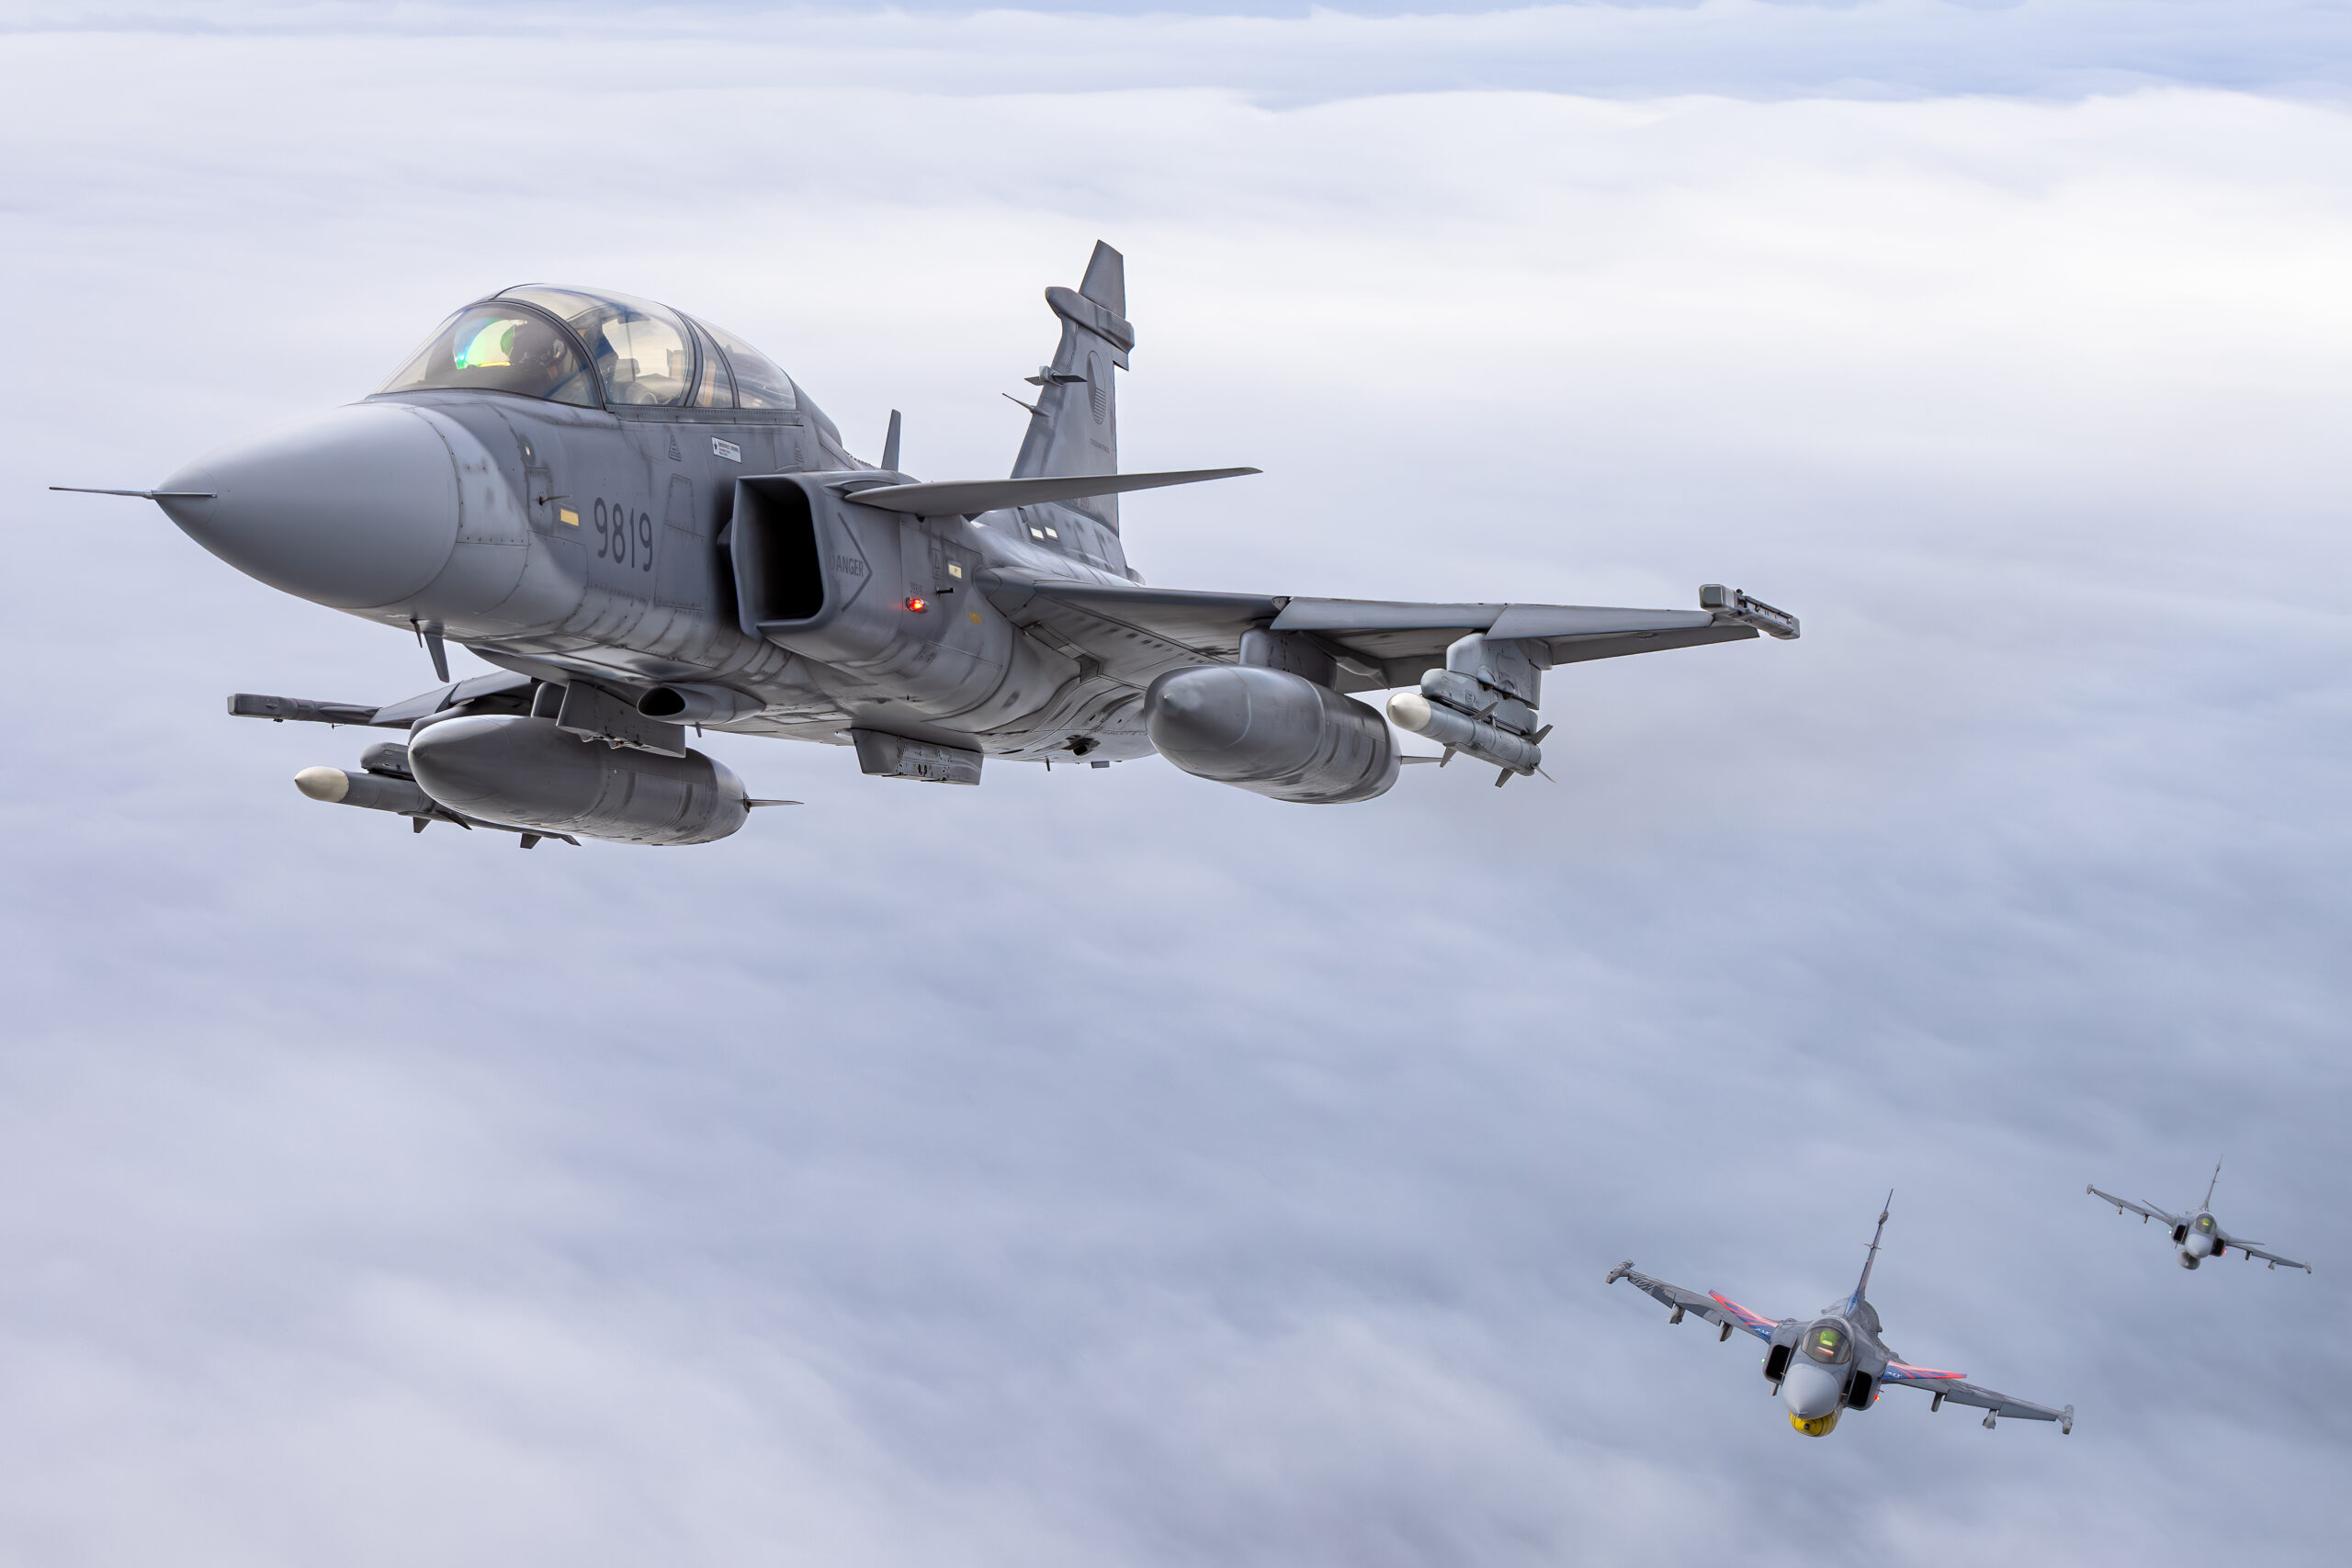
To photograph fast jets, freeze them at 1/1000 second or faster with continuous autofocus, or pan at 1/200 to 1/400 second for a motion-blurred background, and expose for the aircraft rather than the bright sky behind it. A fast jet is the hardest thing most of us ever point a long lens at. It can cross the display line in a couple of seconds, change direction without warning, and go from a distant dot to a wall of metal and noise before you have settled the focus. Get it right and you have an image with real power. Get it wrong and you have a soft, badly framed grey shape against a grey sky. This guide is about getting it right, on purpose and repeatably.
What follows is everything we wish someone had told us before our first fast jet display: how to choose between freezing and panning, what shutter speed actually works for each, how to set autofocus so the jet stays sharp through a turn, how to meter against a bright sky, where the jet will actually fly relative to the crowd, and how to recover when a pass goes wrong. There are settings recipes you can copy, reference tables you can screenshot, and a long section on the mistakes that quietly ruin most people’s first attempts. If you want the broader picture first, our airshow photography tips guide sets the scene, and our deep dive on airshow camera settings and autofocus goes further on focus modes than we can here.
What this guide covers
- Why fast jets are the hardest subject on the flight line
- Where the jet will be: display lines and CAP 403
- Freeze or pan: the two ways to shoot a jet
- Shutter speed for fast jets, with a reference table
- Panning technique: tracking a jet across the sky
- Autofocus and tracking that keeps up
- Exposure, ISO and metering against the sky
- Lenses, focal length and where to stand
- Reading the conditions: vapour, afterburner and heat haze
- Full settings recipes for every kind of pass
- Scenario by scenario: the passes you will actually get
- Fast jets on the UK display circuit in 2026
- Common mistakes and how to fix them
- How to practise before the show
- A quick word on processing jet images
- Frequently asked questions
Why fast jets are the hardest subject on the flight line
Most aviation subjects give you time. A static aircraft sits still. An airliner on approach is large, slow and predictable. Even a propeller display aircraft tends to fly graceful, repeatable shapes. A fast jet does none of that. A modern fighter on a fast pass can be doing 400 knots or more, which is just over 200 metres every second, and UK display rules only stop it at an absolute ceiling of Mach 0.90 or 600 knots true airspeed in level flight. At those speeds it covers the width of your viewfinder almost faster than you can react. The display pilot is also flying for the audience, not for you, so the aircraft will pitch up, roll, pull hard into a turn and disappear behind the trees while you are still composing.
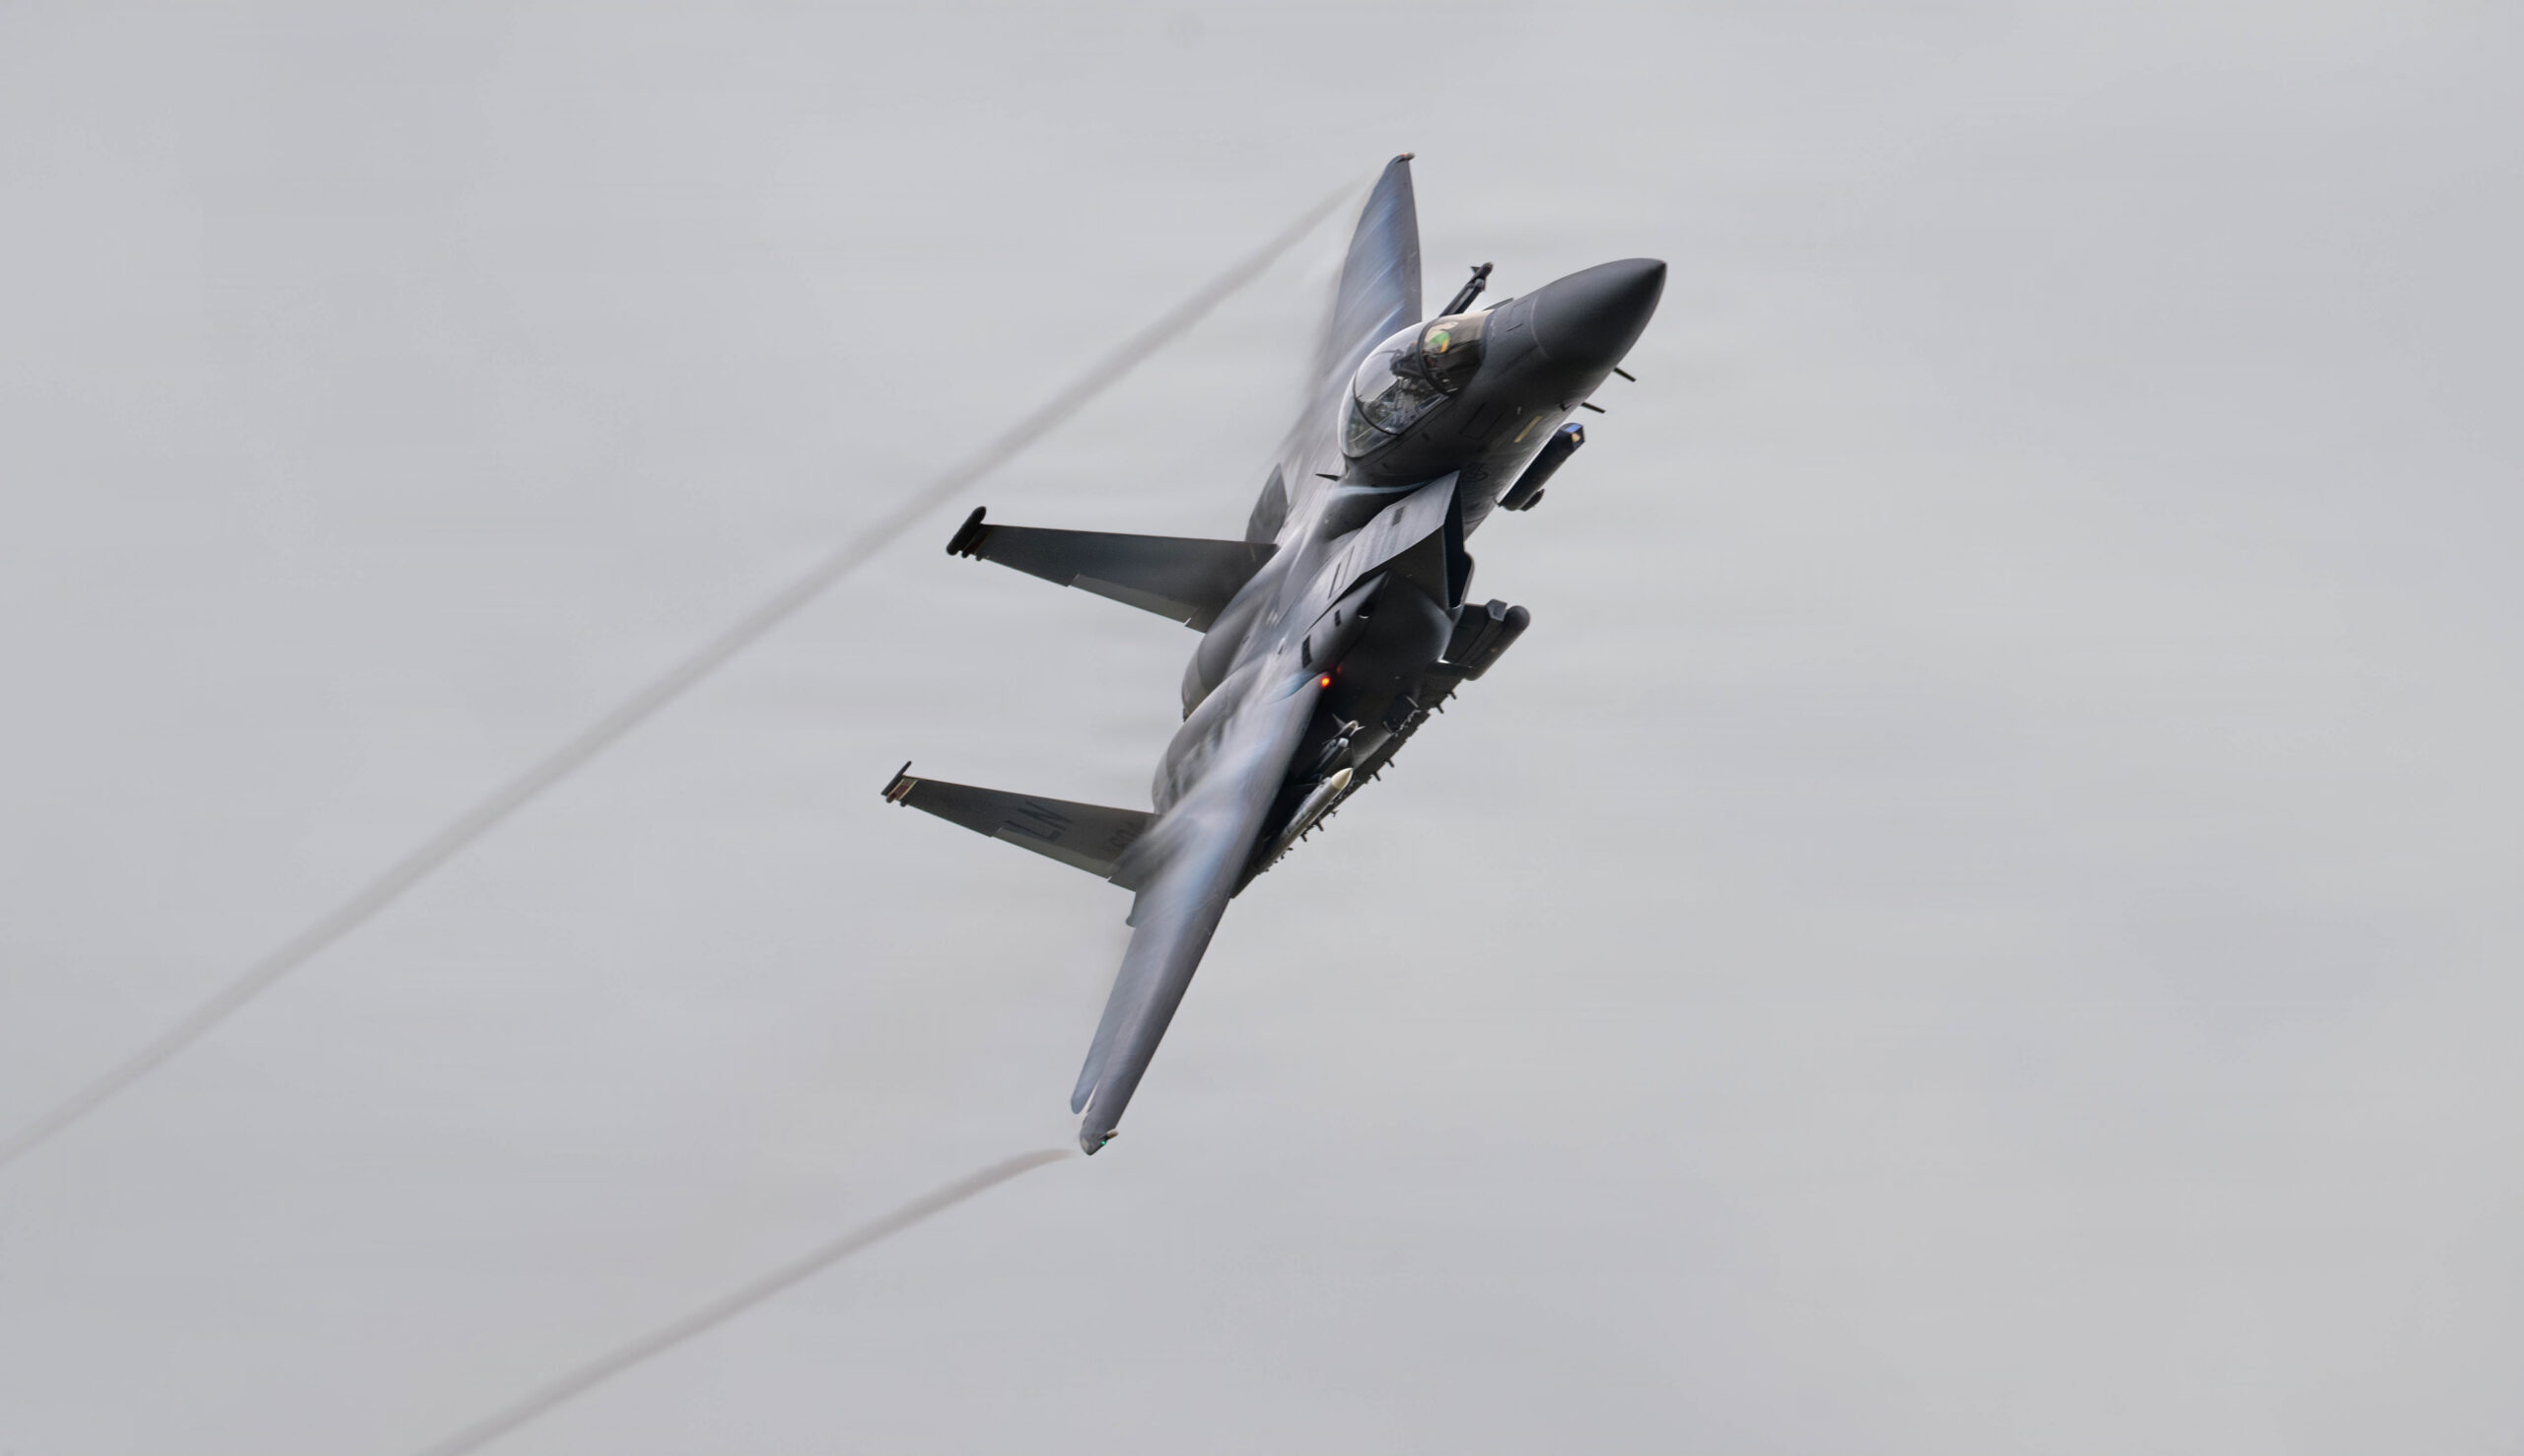
Three things make jets difficult, and it helps to name them. The first is angular speed. A jet a long way out moves slowly across your frame even though its airspeed is high. The same jet close in and passing left to right moves through your frame extremely quickly, which is why a pan that felt easy on the distant run becomes a scramble on the crowd-front pass. The numbers are sobering: a jet at 400 knots on a display line 230 metres out sweeps past a fixed camera at roughly 50 degrees per second, and a 400mm lens on full frame sees only about five degrees of sky, so the aircraft would cross a stationary frame in around a tenth of a second. The second problem is unpredictability. Unlike a landing airliner, you do not know exactly where the jet will be in two seconds, so you cannot pre-focus and wait. The third is contrast. A grey jet against a bright overcast sky gives your autofocus and your meter very little to work with, and a dark jet against cloud is worse.
None of this is a reason to be intimidated. It is a reason to set the camera up properly before the display starts, so that when the jet appears you are reacting with your hands and your eye rather than fumbling through menus. Almost every fast jet image that fails, fails because of a decision the photographer made, or failed to make, before the aircraft was even airborne. Get the preparation right and the keeper rate climbs dramatically.
Where the jet will be: display lines and CAP 403
Knowing where a fast jet is allowed to fly is one of the most underrated advantages a photographer can have, and in the UK it is written down. Civil flying displays are governed by the CAA’s CAP 403, which requires every display to be flown relative to a clearly marked display line, usually parallel to the runway or, at seafront shows, parallel to the shore. The rules then set hard minimum distances between displaying aircraft and any area occupied by spectators, and those distances are what decide how big the jet will ever be in your viewfinder.
The distances that matter
Under CAP 403, fixed-wing display aircraft must stay at least 230 metres from the crowd line, and any aircraft travelling faster than 300 knots indicated with its velocity vector pointed towards the crowd must stay at least 450 metres away. Only light aircraft under 1,200 kg flying below 150 knots are allowed in to 150 metres. For formations, the distance is measured to whichever aircraft is nearest the crowd. On top of the geometry, CAP 403 sets that absolute speed ceiling of Mach 0.90 or 600 knots, whichever comes first, specifically so that nobody inadvertently puts a sonic boom across the showground.
| Aircraft and manoeuvre | Minimum distance from crowd line |
|---|---|
| All fixed-wing aircraft, and rotary-wing aerobatics | 230 metres |
| Any aircraft above 300 knots indicated with velocity vector towards the crowd | 450 metres |
| Light aircraft under 1,200 kg maximum take-off mass, below 150 knots | 150 metres |
| VSTOL aircraft in vertical or low-speed non-wing-borne flight | 150 metres |
What this means for your photography
The practical consequences are worth thinking through. First, a fast jet will usually feel further away than the warbirds and trainers that displayed before it, because much of its routine, and anything pointed at the crowd at speed, happens out on the 450 metre line while a 200 knot piston fighter can work the 230 metre line all day. That is not the organiser being mean; it is the law, and it is why reach matters more for jets than for anything else on the programme. Second, because the closest approach is fixed, pushing to the barrier gains you nothing except a worse background and less room to swing. Third, the display is flown about a line and a central datum, so once you have watched one pass you know the axis every subsequent pass will follow, and you can pre-plan your pans along it. The gate position at either end of the crowd line often gives you a more three-quarter view of topside passes as the jet rolls in towards the display line, which is why experienced shooters frequently drift towards the ends rather than the centre.
The angular arithmetic changes with the line too. That 50 degrees per second figure from the previous section applies to a 400 knot jet on the 230 metre line; out at 450 metres the same jet tracks at roughly half that rate, which is precisely why the fastest passes are flown further out and why they feel strangely manageable through the lens. The pass that catches people out is the slower, closer one, where the angular rate can be just as high and the framing much tighter.
Freeze or pan: the two ways to shoot a jet
Every fast jet image is one of two things. Either you have frozen the aircraft with a high shutter speed so that every rivet is sharp and the background is sharp too, or you have panned with a slower shutter speed so the aircraft is sharp but the background is streaked into motion. These are not just different settings. They are different intentions, and choosing between them is the first creative decision you make on the flight line.
Freezing: sharp, clean and detailed
Freezing is the safe default and the one to learn first. You set a fast shutter speed, you track the jet, and you shoot. The aircraft comes out crisp, the canopy reflections are clean, the squadron markings are readable. Topside passes, where the jet banks towards you and shows you its upper surfaces, almost always want to be frozen, because the appeal is the detail and the shape. Vapour pulling off the wings in a hard turn wants to be frozen so you can see its structure. Anything where the aircraft is clean and you want a technical, documentary look should be frozen.
The cost of freezing is that a frozen jet can look static, as if it were hanging in the air rather than tearing across the sky. With a pure jet that has no propeller, you lose the one easy cue that says movement. That is fine for many images, but it is the reason panning exists.
Panning: speed, motion and atmosphere
Panning means using a slower shutter speed and swinging the camera to follow the aircraft, so the jet stays sharp while the background blurs into horizontal streaks. A well panned jet looks fast even in a still frame. The technique shines on takeoff and landing runs, on lower passes with ground or trees behind, and any time you want a more dramatic, less clinical feel. It is harder, your hit rate is lower, and you will throw away more frames, but the keepers have an energy that a frozen shot cannot match.
The practical answer for most people is to freeze by default and pan deliberately. Spend the first pass freezing to bank a safe set of sharp images, then, once you know the display routine and where the jet will be, switch to panning for the runs where it will pay off. We will cover the exact shutter speeds for both in the next two sections.
Shutter speed for fast jets, with a reference table
Shutter speed is the setting that decides whether you freeze or pan, and it is the number most people get wrong at first. There is a temptation to set the fastest speed the camera offers and leave it there. That freezes everything, but it also throws away light and pushes your ISO higher than it needs to be, and it makes panning impossible. The better approach is to match the shutter speed to the shot you want.
To freeze a jet
For a clean freeze of a fast jet, 1/1000 second is the sensible starting point. That is fast enough to stop the airframe of a jet doing a few hundred knots and to keep wingtips and tail sharp. When the jet is very fast and very close, or crossing your frame quickly, push to 1/1600 or 1/2000. There is rarely a reason to go beyond 1/2500 for a pure jet, because at that point you are freezing motion that was already frozen and simply costing yourself light. Remember a jet has no propeller to worry about, so you do not need the careful balancing act that propeller aircraft demand. With a prop you have to keep the shutter slow enough to blur the disc, which is a separate problem covered in our prop blur and shutter speed guide. With a jet you are free to go as fast as the light allows.
It is worth understanding why 1/1000 works at all, because the physics is not what most people assume. A jet at 400 knots covers about 20 centimetres of sky during a 1/1000 second exposure, and at display distance through a 400mm lens that would smear the aircraft across a very visible band of pixels if the camera were fixed. The reason your frames come out sharp is that you are tracking the jet, so most of that motion is cancelled by your pan and the shutter only has to freeze your tracking errors. That is why smooth tracking matters even when you are shooting fast, and why a jerky follow produces soft frames at shutter speeds that should be more than enough.
To pan a jet
Panning shutter speeds are much slower and depend on how the jet is moving relative to you. For a level pass where the jet crosses left to right at a steady height, 1/200 to 1/400 second gives you blurred background streaks while leaving room to keep the aircraft sharp. For a slow, low takeoff or landing run, where the jet is moving more slowly across your frame, you can drop to around 1/125 or even 1/100 once your panning is reliable. The slower you go, the more dramatic the blur and the lower your hit rate, so build up gradually rather than starting at the extreme.
A reference table
| Shot | Shutter speed | What you get |
|---|---|---|
| Fast topside pass, frozen | 1/1000 to 1/1600 | Crisp airframe, sharp background, full detail |
| Very fast, very close pass | 1/1600 to 1/2000 | Stops rapid frame-crossing motion |
| High-G turn with vapour | 1/1000 to 1/1250 | Sharp vapour structure on the wings |
| Level pass, panned | 1/200 to 1/400 | Sharp jet, streaked background, sense of speed |
| Takeoff or landing run, panned | 1/100 to 1/160 | Strong motion blur, dramatic but harder |
| Reheat or afterburner at dusk | 1/800 to 1/1000 | Sharp jet, glowing flame, dark backdrop |
Panning technique: tracking a jet across the sky
Panning is a physical skill more than a camera setting. The settings get you in the right range, but the sharp frames come from your body, your stance and your timing. We break the whole skill down, with drills, in our dedicated panning technique guide; here is how to build a pan that works on a jet.
Stance and grip
Plant your feet shoulder width apart and turn your hips and shoulders to face the point where you expect to release the shutter, not the point where the jet appears. The idea is that you wind yourself up towards the start of the pass and unwind towards the end, so that your smoothest, most controlled movement happens at the moment you are actually shooting. Tuck your elbows in, support the lens with your left hand well forward, and bring the camera firmly to your eye. The whole upper body should rotate as one unit from the waist, driven by your core and legs rather than your arms.
Pick the jet up early
Start tracking the aircraft well before you intend to shoot. Get it in the frame, settle the autofocus, and match its speed with your rotation so the jet sits still in your viewfinder while everything behind it slides past. Only once you are locked on and moving smoothly do you begin to press the shutter. If you wait until the jet is in front of you to start moving, you will always be chasing it and your pan will be jerky.
Follow through
Keep swinging after the shutter fires. A pan that stops at the moment of exposure tends to be soft, because you decelerate into the shot. Treat it like a golf swing or a cricket shot: the follow through matters as much as the contact. Shoot in short bursts as you swing, and you will find that the frames in the middle of the burst, when your movement is smoothest, are the sharp ones.
Use continuous shooting and accept the throwaways
Panning is a numbers game. Even professionals throw away most of their panning frames. Set the camera to its continuous high drive mode, take a burst through each pass, and judge yourself on the best frame, not the hit rate. As your technique improves the proportion of keepers rises, but it never reaches the level of a frozen shot, and that is normal. The reward is that one panned frame with the background dissolved into speed lines is worth a dozen safe, static freezes.
Image stabilisation and panning
If your lens or body has a panning-aware stabilisation mode, often called Mode 2, use it. It stabilises vertical shake while letting you swing horizontally, which is exactly what a level pan needs; Canon’s own guidance for its IS lenses says the same, correct the vertical, leave the horizontal alone. If you only have standard stabilisation, it still helps, though some photographers prefer to turn it off for fast horizontal pans to avoid the system fighting the movement. Test both with your own gear before the show rather than guessing on the day.
Autofocus and tracking that keeps up
A perfectly exposed, perfectly timed frame is worthless if the focus missed. Autofocus is where fast jet photography is most often won or lost, so it deserves real attention. The good news is that modern cameras are extraordinarily capable at this if you set them up correctly. We cover focus in much more depth in our airshow camera settings and autofocus guide, but here are the essentials for jets.
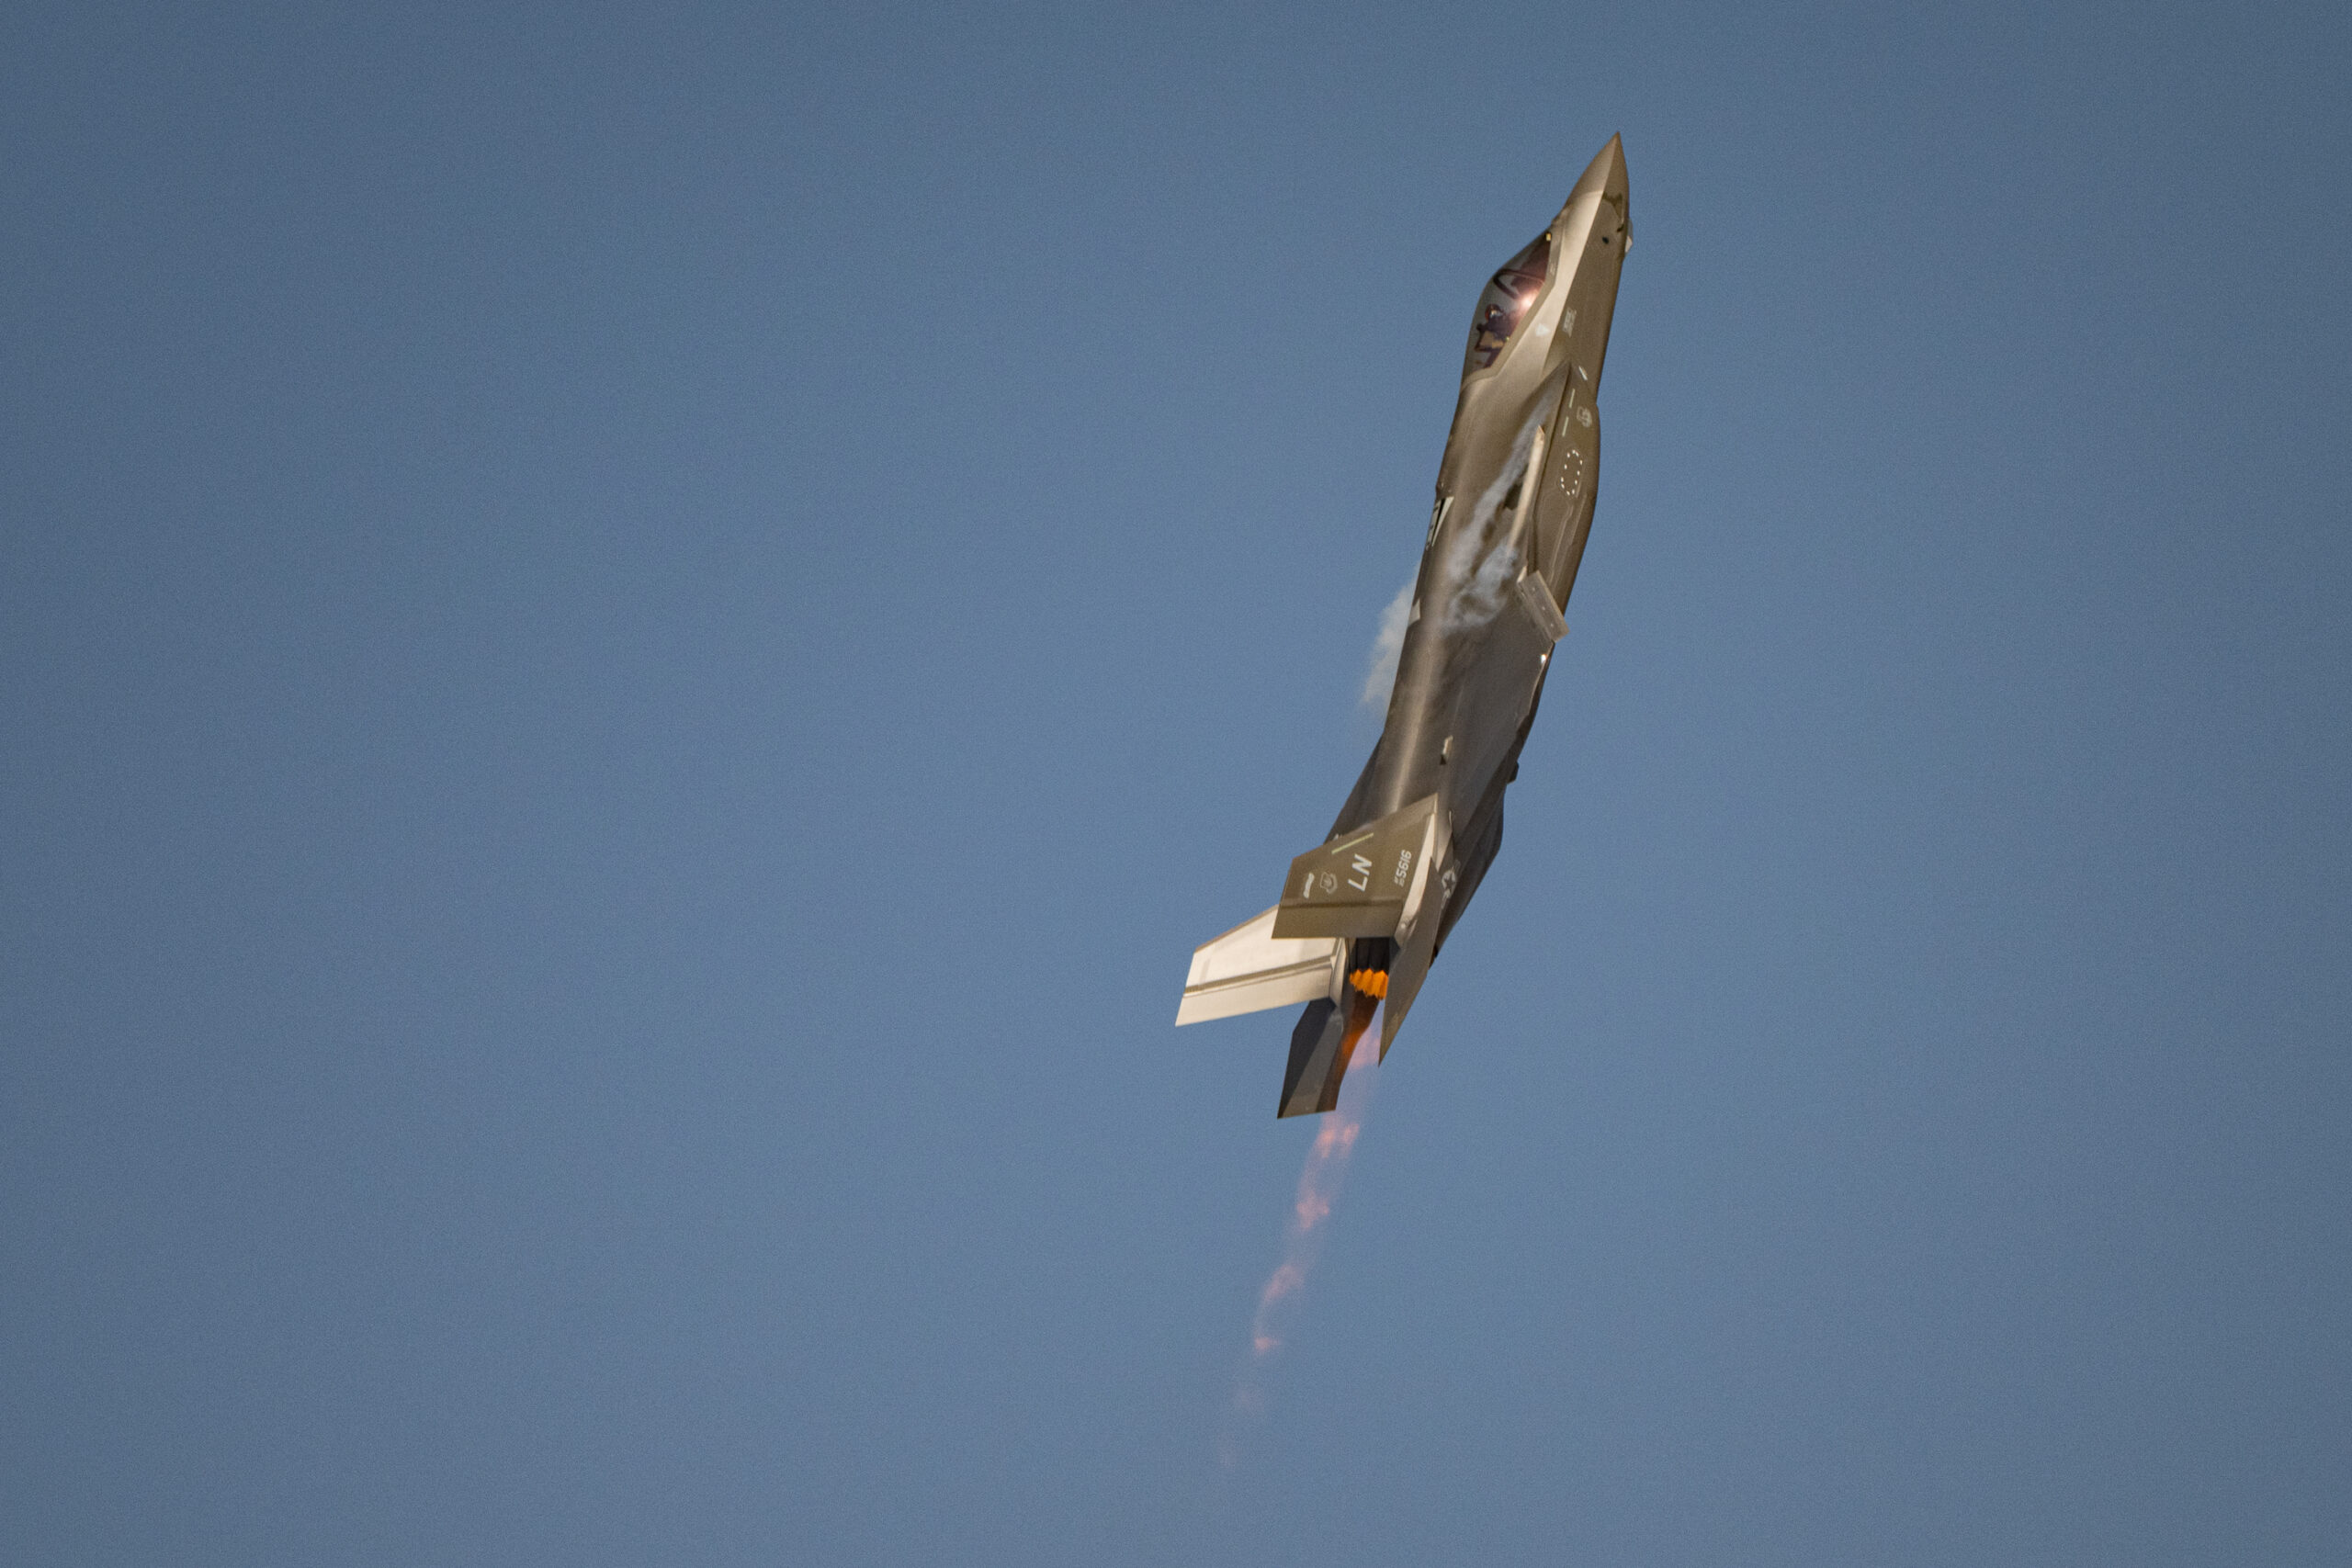
Always use continuous autofocus
Single autofocus locks once and stops, which is useless for a moving jet. You need continuous autofocus, which keeps adjusting as the subject moves. It is called AF-C on Sony, Nikon and Fujifilm, and Servo AF (AI Servo on DSLRs) on Canon. Set it and leave it there for everything that flies. This single change fixes more soft jet images than any other.
Choose the right focus area
Against a clean sky, a small zone, group or expanded point works well. It gives the camera enough area to grab the jet without being so wide that it locks onto a distant cloud edge. Against a cluttered background, such as trees on a low pass, switch to a single point and put it deliberately on the aircraft, because a wide area will happily focus on the busy background instead. Many photographers set up two custom buttons or modes, one for sky and one for clutter, so they can switch instantly.
Aircraft subject detection
If your camera offers aircraft or plane subject detection, turn it on. Recent bodies from Sony, Nikon and Canon can recognise an aircraft and hold focus on it as it moves through the frame, which takes a lot of the pressure off your point placement. It is not infallible. It can lose a jet that is small in the frame or briefly confused against cloud, so keep your area mode sensible as a fallback rather than relying on detection alone. When it works, and it usually does, it is a real advantage for fast, erratic subjects.
Back button focus
Separating focus from the shutter button, so that a button on the back of the camera drives autofocus while the shutter only takes the picture, transforms tracking. You hold the back button to keep the lens focusing continuously, and you fire the shutter independently. It means a half press never accidentally locks focus at the wrong moment, and you can stop and start focusing at will. It feels strange for a day and then becomes second nature. If you photograph jets regularly, set it up; our full back button focus guide walks through the setup on each major camera system.
Tracking sensitivity
Most cameras let you tune how stubbornly the autofocus stays on its current subject when something crosses in front. For fast jets against open sky, a slightly more responsive setting helps the camera grab the aircraft quickly. When you are tracking through a busy background, a less sensitive, stickier setting stops the focus jumping to a passing tree line. The defaults are a reasonable starting point, so do not lose sleep over this, but it is worth knowing the menu exists.
Exposure, ISO and metering against the sky
A bright sky is a trap for your camera’s meter. The meter wants to turn everything towards a middle grey, so when it sees a frame dominated by bright cloud it pulls the exposure down, and your jet comes out as a dark, underexposed silhouette. Understanding this is the difference between consistently good exposures and a folder of murky aircraft.
The two reliable approaches
The first approach is aperture priority with exposure compensation. You choose the aperture, the camera sets the shutter, and you dial in positive exposure compensation, often plus one to plus two stops, to counter the meter’s tendency to underexpose against bright sky. The risk is that the shutter speed the camera chooses may drop too low for a clean freeze, so you have to watch it.
The second approach, and the one many jet photographers prefer, is manual exposure with auto ISO. You set the shutter speed you want, say 1/1250 to freeze, you set the aperture, and you let ISO float to balance the exposure. You still apply exposure compensation to lift the aircraft against the sky on cameras that allow it in this mode. This gives you direct control of the two settings that decide sharpness and depth, while the camera handles the variable that matters least for image quality on a modern sensor. It is our default for fast jets.
Do not fear ISO
New photographers often keep ISO pinned low and end up with shutter speeds too slow to freeze a jet. This is the wrong trade. A sharp image at ISO 1600 beats a soft one at ISO 200 every time, and modern sensors handle moderate ISO cleanly, with noise reduction in editing mopping up the rest. Let ISO rise to whatever keeps your shutter speed where it needs to be. On a bright day it will stay low anyway; on a dull, overcast day you may be at ISO 1600 or higher, and that is fine.
Aperture choice
Wide open gives you the most light and the fastest shutter speed, which is tempting, but many telephoto lenses are slightly soft at their maximum aperture and sharpen up a stop down. A jet against the sky has effectively infinite depth of field at these distances, so you are not stopping down for depth, only for sharpness. On a typical telephoto zoom, f/8 to f/9 is a good compromise that gets you into the lens’s sweet spot while still leaving plenty of light. If the day is dull and you need the speed, open up and accept a touch of softness rather than missing the shot.
Watch the highlights
A jet’s upper surfaces and any bright markings can clip to pure white in strong sun, and clipped highlights cannot be recovered. Keep an eye on your highlight warning or histogram and pull exposure back a little if the brightest parts are blinking. It is easier to lift shadow detail in editing than to invent highlight detail that the sensor never recorded.
Lenses, focal length and where to stand
You do not need exotic glass to photograph fast jets, but you do need enough reach and an autofocus motor that can keep up. Our full guide to the best lenses for aviation photography goes into specific models; here is how to think about it for jets in particular.
How much reach
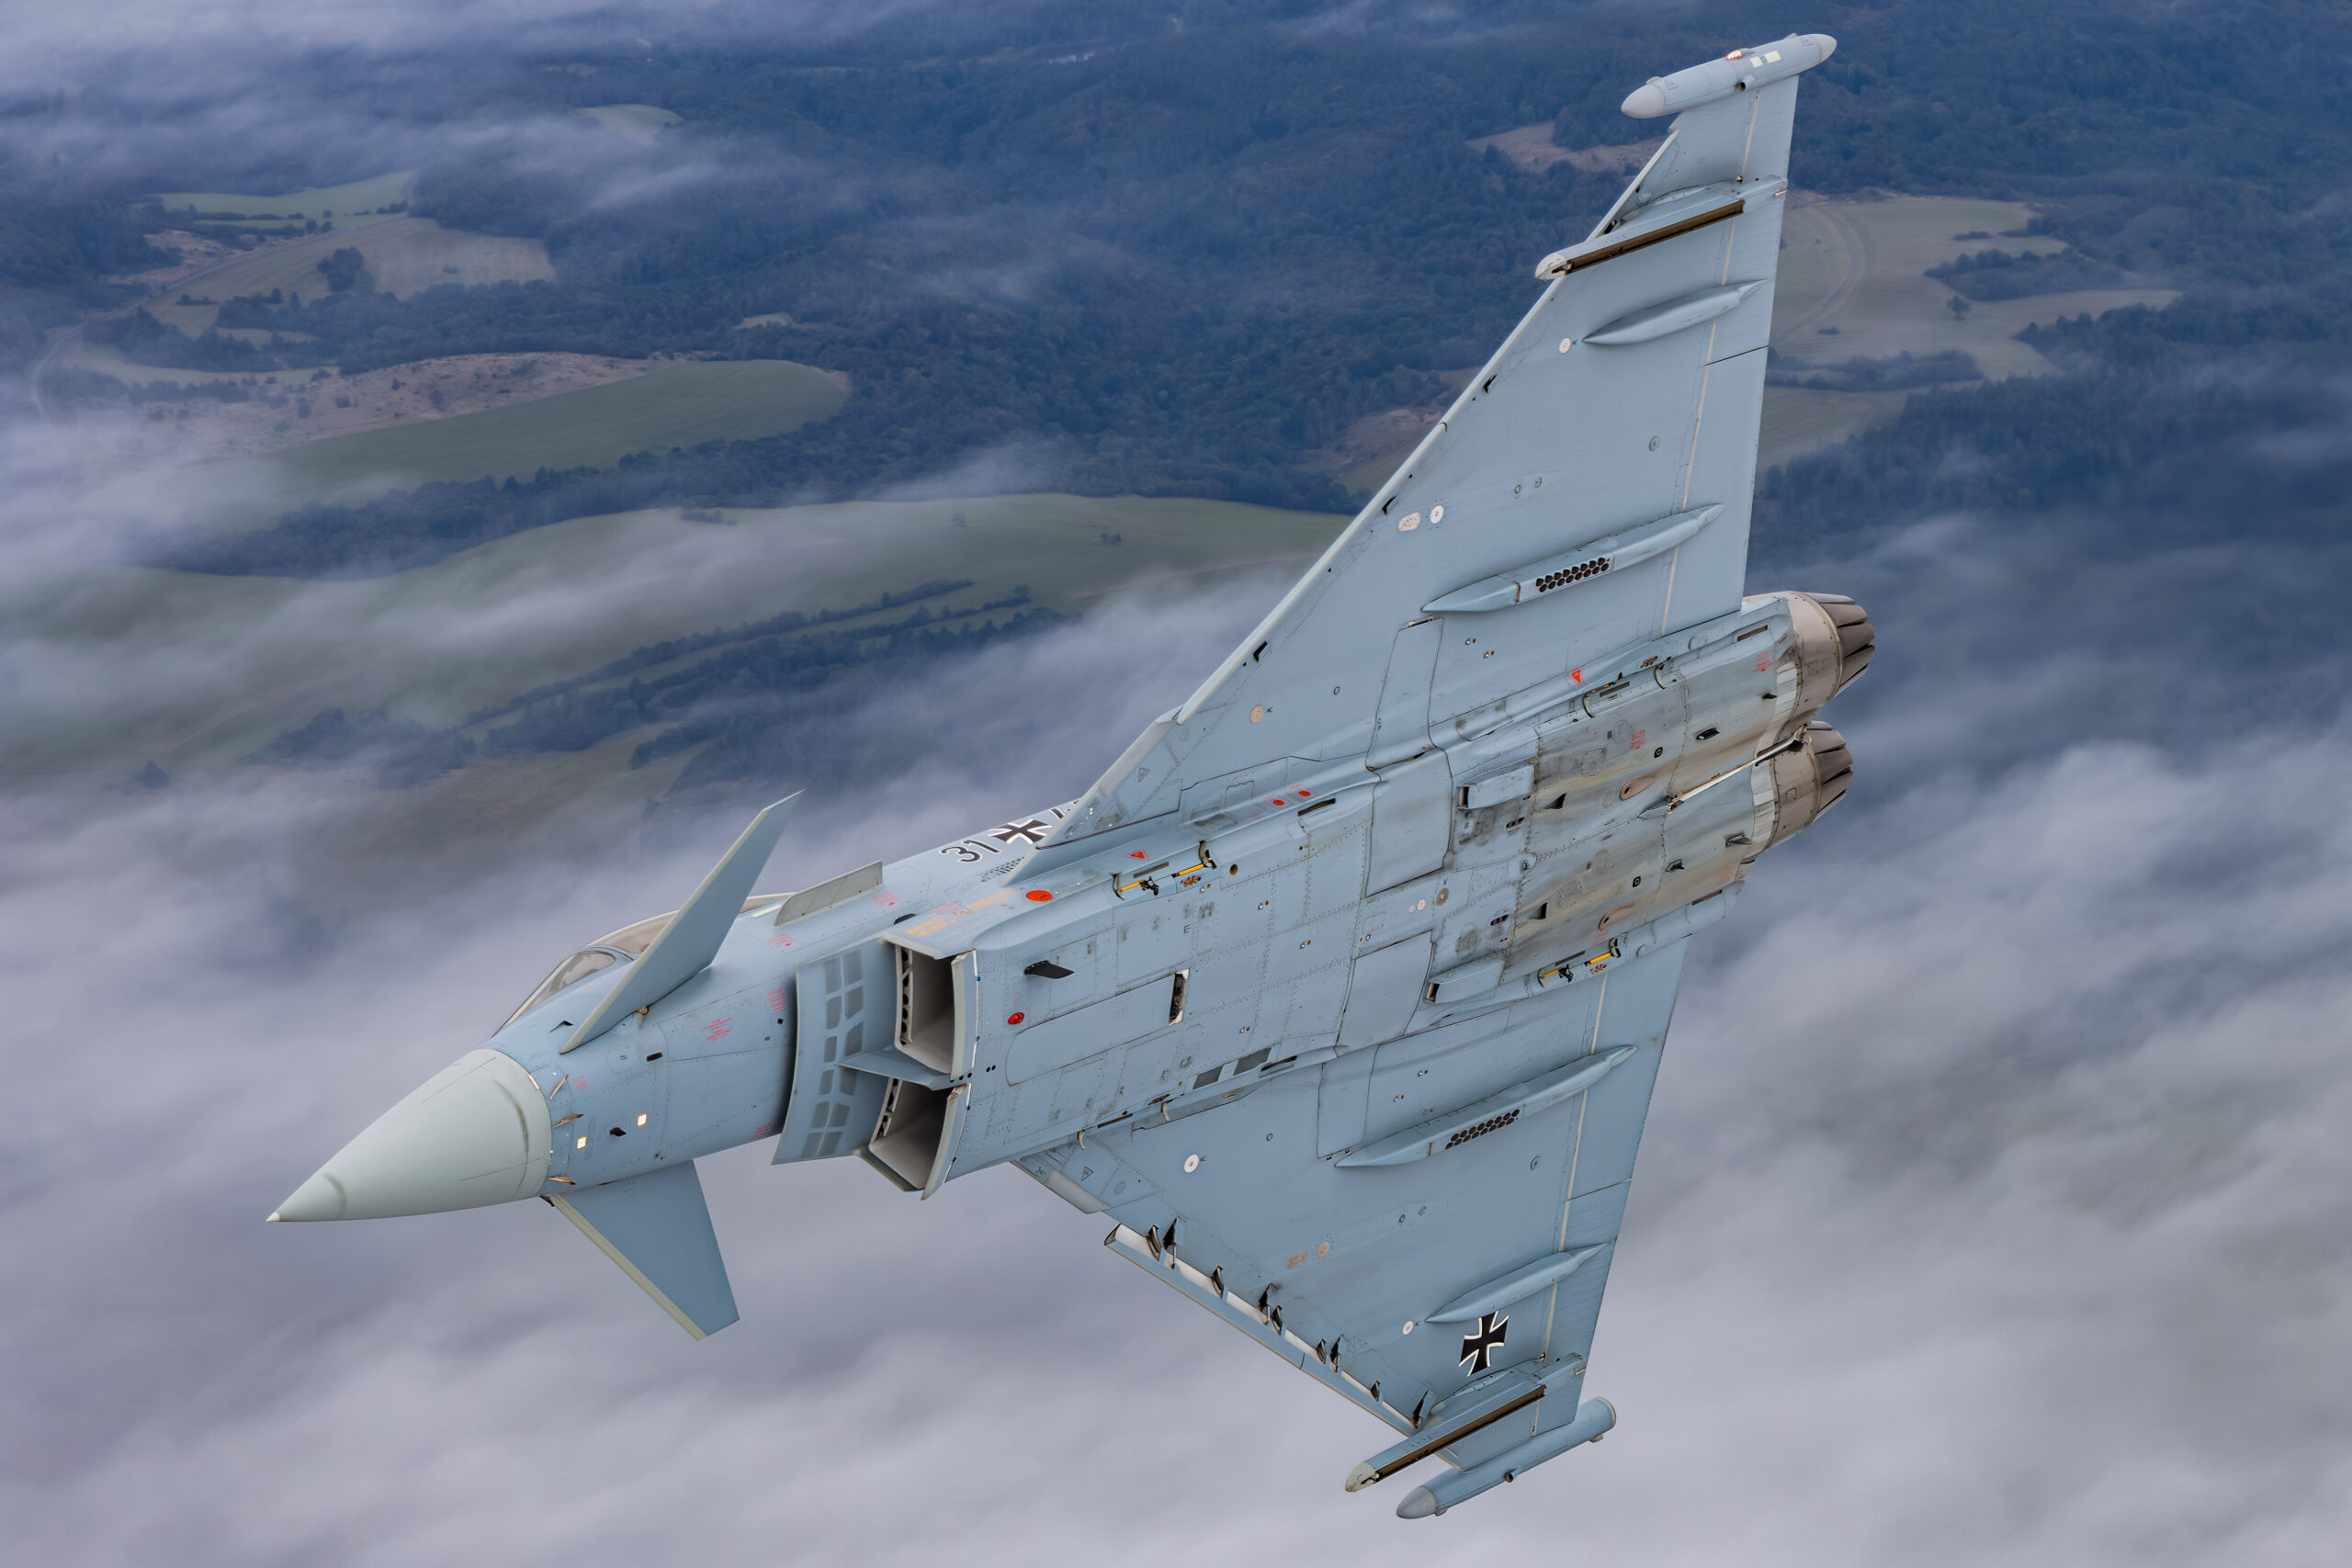
On a full frame camera, a lens reaching 400mm covers most display flying comfortably. The popular choices are 100-400mm zooms, which are light enough to swing all day, and 150-600mm zooms, which give you more reach for distant topside work at the cost of size and weight. On a crop sensor body the field of view is tighter, so a 100-400mm behaves like roughly 600mm, which is why many jet photographers happily shoot crop bodies for the extra reach. A zoom is far more useful than a prime here, because the jet’s distance changes constantly and you need to reframe in an instant. Remember from the display line section that a fast jet’s aerobatics happen at least 450 metres out under CAP 403, so the long end earns its keep more often with jets than with anything else on the programme.
Why a zoom beats a prime for jets
A jet display takes the aircraft from a distant speck to a close crowd-front pass and back again, sometimes within a single routine. A fixed focal length forces you to either crop heavily on the distant shots or clip the wings on the close ones. A zoom lets you frame the aircraft properly throughout, leaving a little room around it so a sudden pull-up does not amputate a wingtip. Frame slightly loose and crop later rather than filling the frame so tightly that you lose the aircraft when it manoeuvres.
Where to stand
Position matters as much as gear. The light is the first consideration: you want the sun behind you or over your shoulder so it falls on the aircraft, not behind the jet where it throws the underside into shadow and flares your lens. At a typical airshow this means thinking about which end of the crowd line gives you the sun at your back for the main axis of the display. Arrive early to claim a spot with a clean background and an open view of the display line, away from clutter like marquees, flagpoles and the heads of the crowd in front of you.
Mind the display line and the crowd
Displays are flown along a set line a fixed, regulated distance from the crowd, so the closest the jet comes is decided by CAP 403, not by how hard you press against the barrier. Standing further back from the fence does not change how close the jet gets, but it can give you a cleaner foreground and more room to swing your lens without elbowing your neighbours. A monopod takes the weight of a long lens during the long waits between passes and steadies vertical movement during a pan, while still letting you swing freely. Many jet photographers use one for exactly this reason.
Reading the conditions: vapour, afterburner and heat haze
Two jets can fly the same routine on different days and give you completely different photographs, because the air itself is part of the picture. The three conditions that matter most to a jet photographer are vapour, burner visibility and heat haze, and all three can be read before the display even starts if you know what drives them.
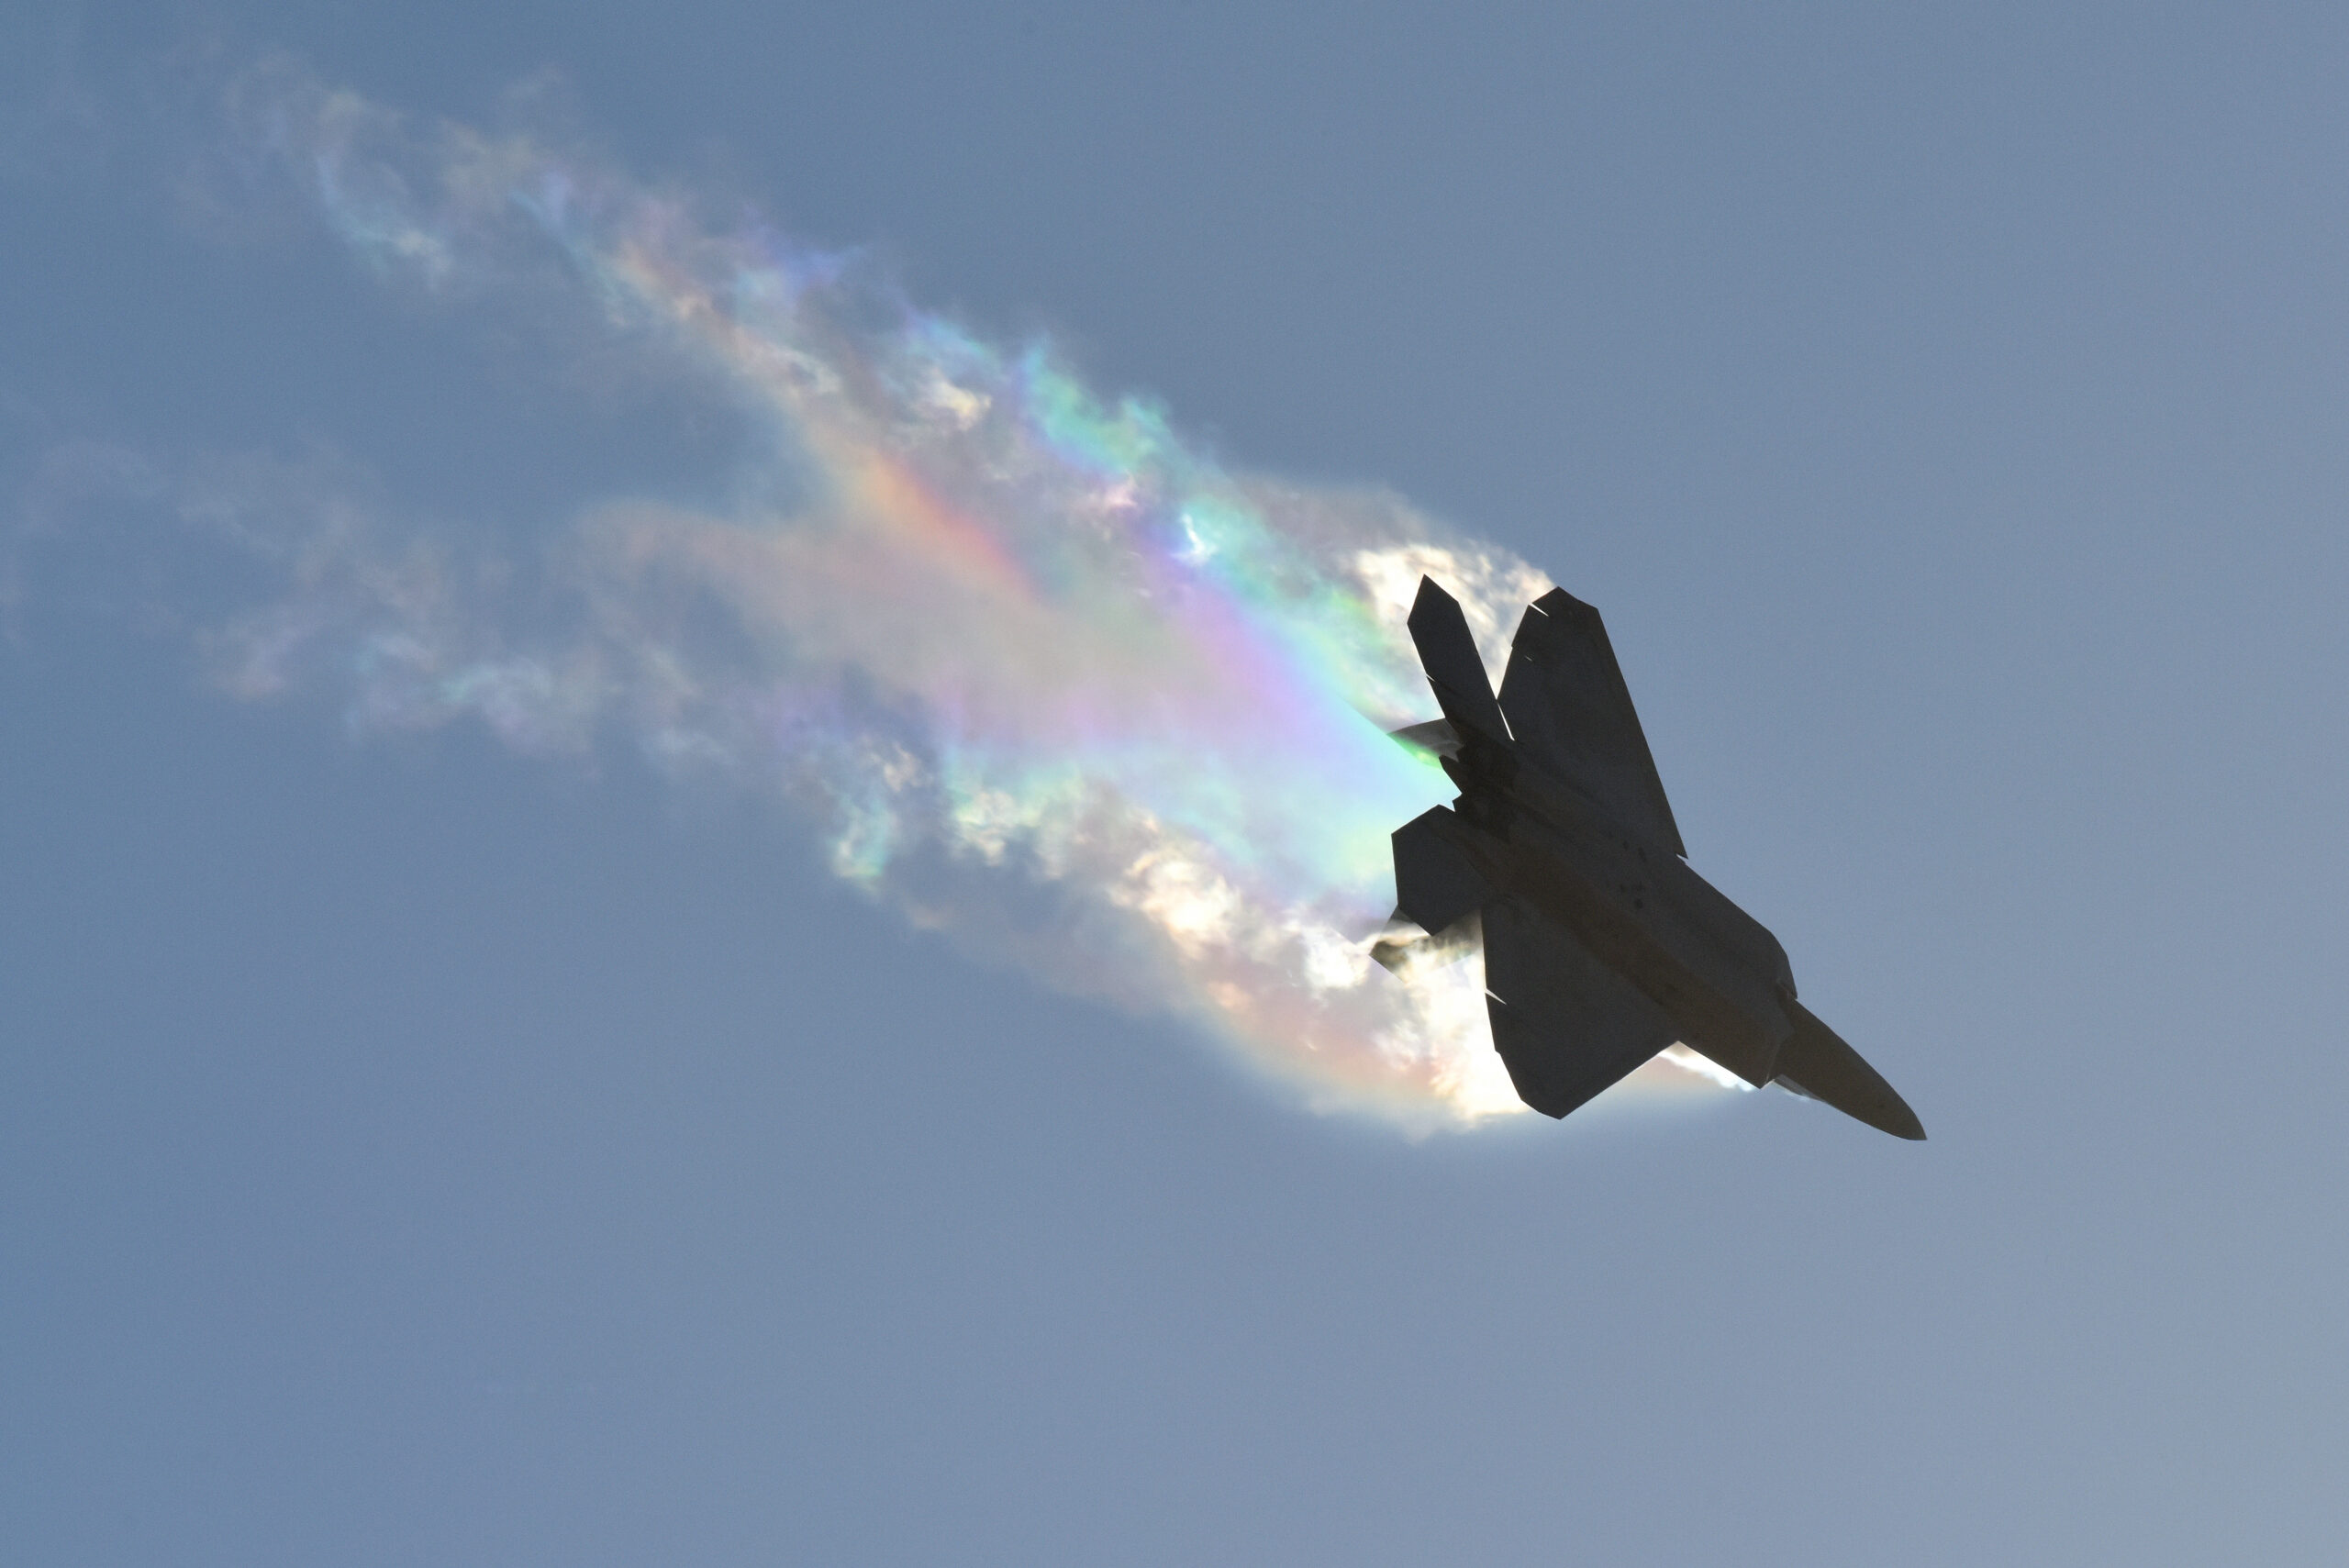
Why vapour happens, and when to expect it
The white cloud that streams off a jet’s wings in a hard turn is condensation, and the physics is simple enough to use as a forecast. A wing generates lift by creating low pressure above and behind it, and in a high-G turn that pressure drop becomes severe. Air expanding into a low pressure region cools, and if it cools below its dew point, the temperature at which the moisture it carries must condense, the water vapour in it turns to visible droplets. The moment the aircraft unloads, the pressure recovers, the air warms and the cloud vanishes, which is why vapour builds and dies within a second or two of the pull.
The practical forecast rule is the gap between air temperature and dew point. When that spread is small, which is another way of saying relative humidity is high, only a little cooling is needed and the jet will drag vapour through every hard turn. When the spread is wide on a dry day, no amount of G will produce it. This is why humid maritime air at UK seaside shows and coastal venues produces such reliable vapour, why a muggy, thundery afternoon can wrap a fighter in a full cone of cloud, and why crisp dry days give you beautifully clean light but almost nothing off the wings. Check the dew point alongside the forecast temperature the night before a show and you will know which kind of day you are walking into.
Afterburner and when you will actually see it
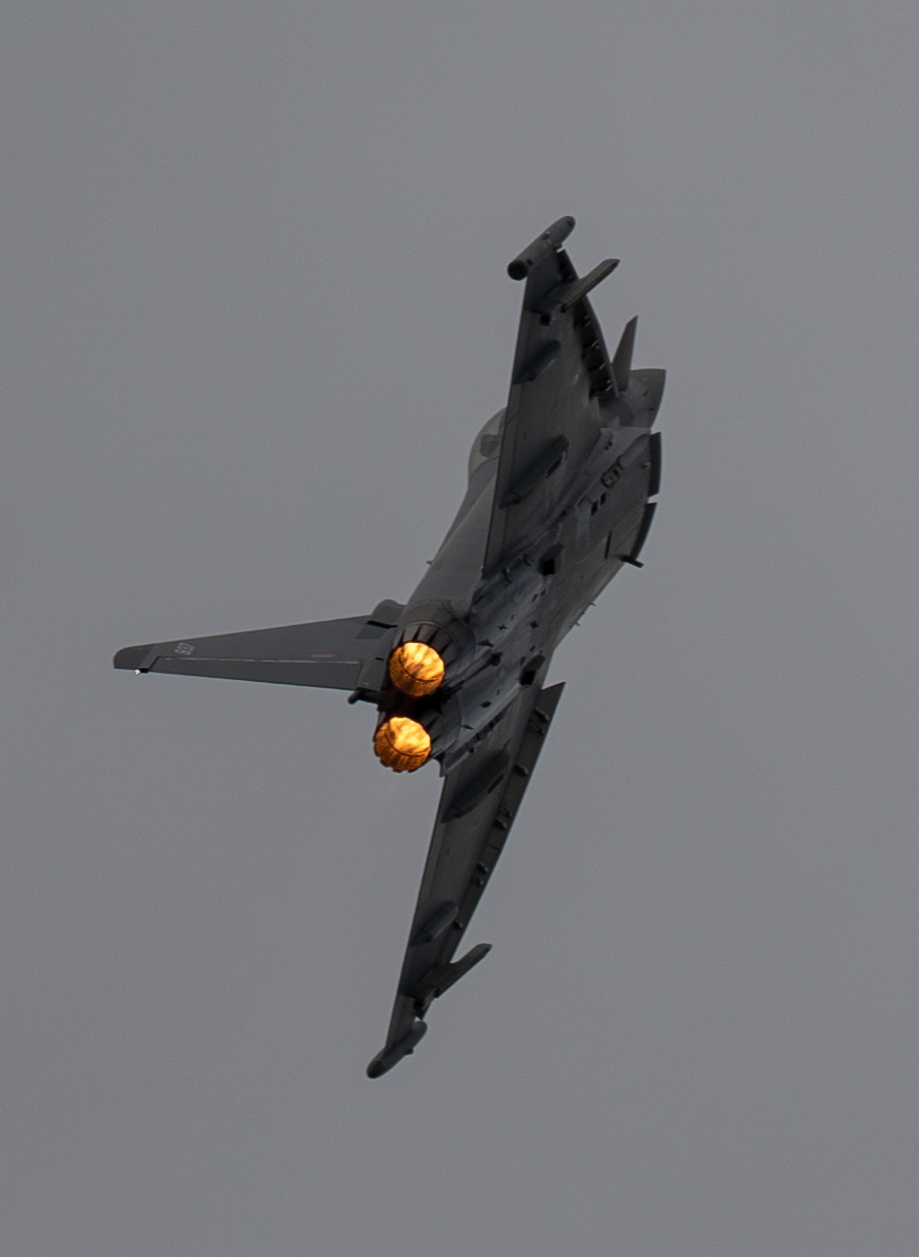
Reheat works by spraying fuel into the hot exhaust behind the turbine and igniting it, and the flame it produces is bright but not as bright as daylight. In full sun a burner plume is often barely visible in photographs, a faint orange shimmer at the nozzles, which disappoints people who heard the noise and expected the picture to match. The flame comes into its own against a dark backdrop: dusk slots, heavy grey cloud, or a jet climbing against dark terrain. In those conditions you will also often resolve the ladder of bright discs inside the plume, called shock diamonds, which form where the exhaust repeatedly compresses and expands as its pressure equalises with the surrounding air. If a show offers a twilight or sunset slot for a jet, that is the slot to plan your evening around.
Heat haze, the invisible image killer
Heat haze is the shimmer you see over hot tarmac, and it is the reason distant shots on a scorching day are never quite sharp. Ground heated by the sun warms the air immediately above it unevenly, and the resulting turbulent mix of warmer and cooler air has a constantly shifting refractive index. Light from the aircraft bends slightly differently through every parcel it crosses, so fine detail arrives at your sensor smeared, and no autofocus system or sharpening slider can undo it. The longer the path through the boiling air and the longer your focal length, the worse it looks. Your defences are all about geometry: shoot the jet higher in the sky where the light path avoids the ground layer, favour passes that bring the aircraft closer, shoot early in the day before the runway has cooked, and accept that head-on shots down a shimmering runway are lost causes after noon in summer. Haze is also at its worst directly behind another jet’s exhaust, which is why the second aircraft in a formation sometimes renders soft even on a cool day.
Full settings recipes for every kind of pass
Here are complete starting points you can dial in before the display. Treat them as a baseline, then adjust exposure compensation and ISO for the light on the day. All assume continuous autofocus, continuous high drive, and a telephoto zoom on a modern body. The aim is that when the jet appears you are already close to the right settings and only fine tuning.
| Scenario | Mode | Shutter | Aperture | ISO | Focus area |
|---|---|---|---|---|---|
| Standard topside pass, frozen | Manual + auto ISO | 1/1250 | f/8 | Auto | Small zone or group |
| Fast, close crossing pass | Manual + auto ISO | 1/2000 | f/8 | Auto | Small zone or group |
| High-G turn with vapour | Manual + auto ISO | 1/1250 | f/8 | Auto | Aircraft detect or zone |
| Level pass, panned for speed | Shutter priority | 1/250 | Auto | 100-400 | Single point or small zone |
| Takeoff or landing run, panned | Shutter priority | 1/125 | Auto | 100-400 | Single point |
| Reheat pass at dusk | Manual + auto ISO | 1/1000 | f/6.3 | Auto, capped high | Single point on aircraft |
| Low pass against trees | Manual + auto ISO | 1/1250 | f/8 | Auto | Single point |
How to use these
Set the camera to the standard topside pass recipe before the show starts, because that is the most common pass you will get and the safest. Programme a custom mode or memorise the changes for the panning recipes so you can switch in a couple of seconds when you decide to go for a motion shot. The reheat recipe is for the rare dusk or twilight slot when a jet lights the afterburner against a dark sky; cap your auto ISO ceiling so the camera does not push the sensitivity into ugly noise to chase a bright flame.
Scenario by scenario: the passes you will actually get
A display routine is made up of recognisable moves, and each one rewards a slightly different approach. Once you can read the routine, you can anticipate the good shots instead of reacting to them. Here are the passes you will see most often and how to handle each.
The topside pass
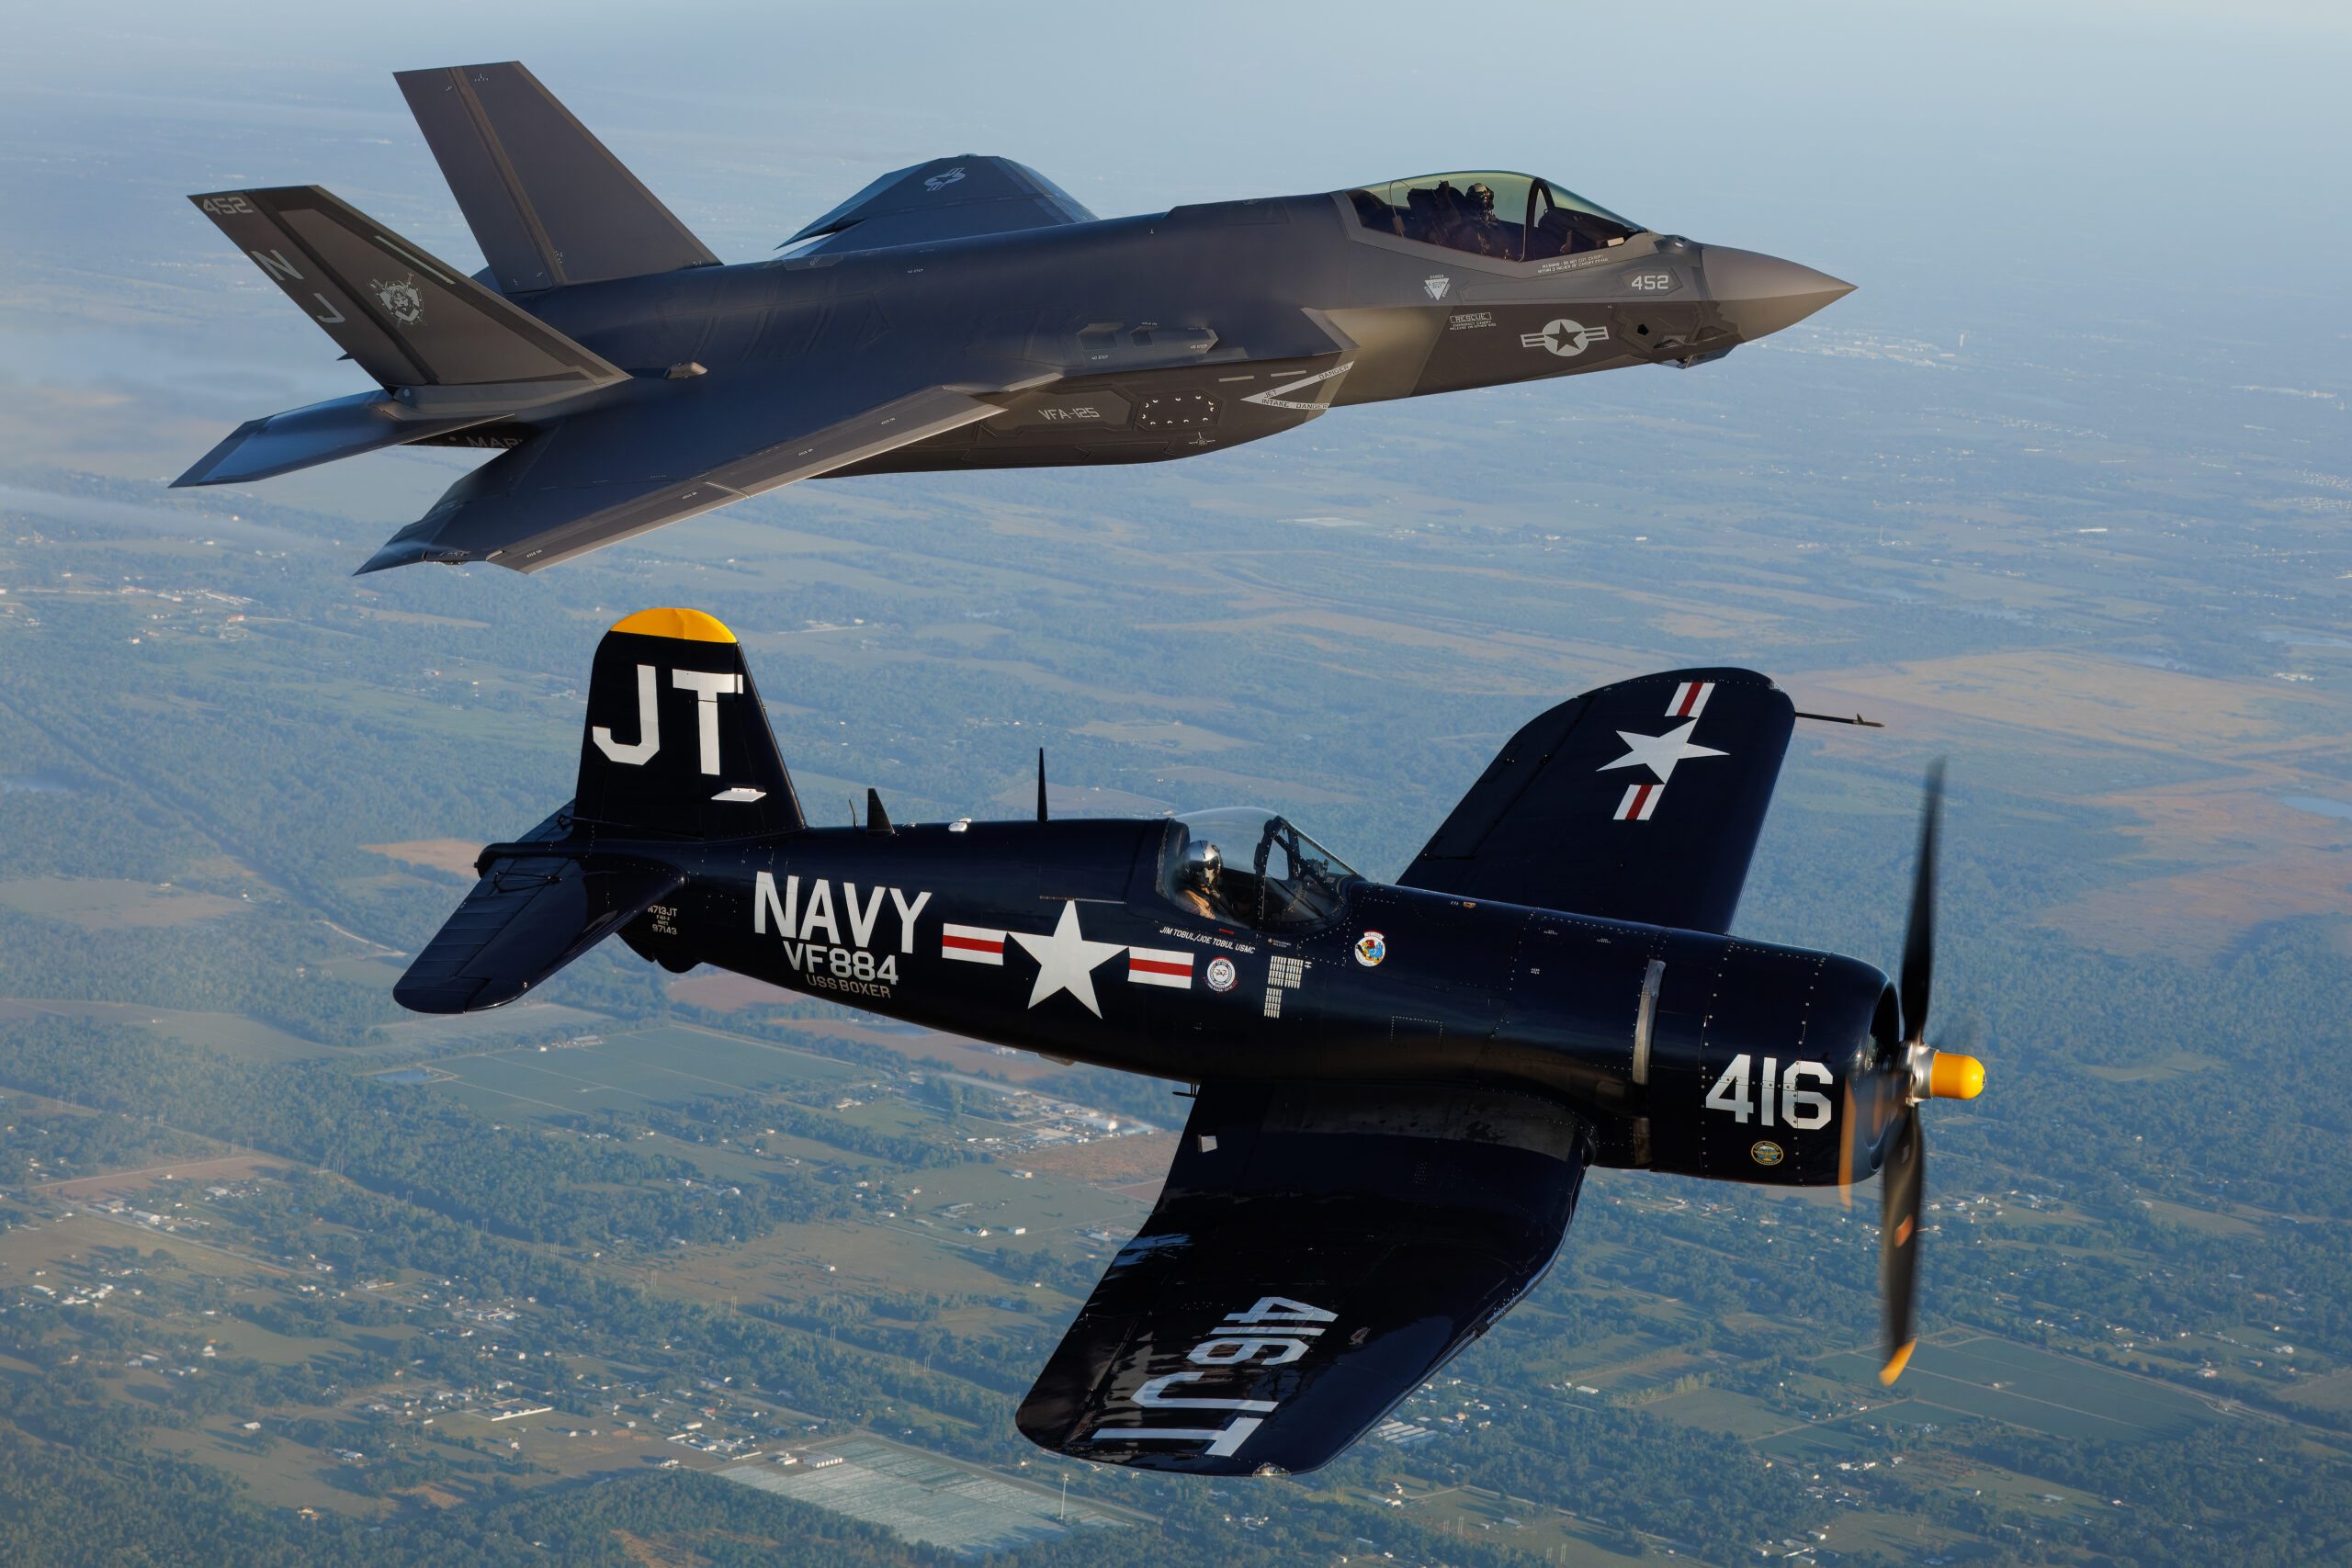
The jet banks towards the crowd and shows you its upper surfaces, markings and shape. This is the bread and butter shot and the one most people want. Freeze it at 1/1000 to 1/1600, keep the focus on the cockpit area, and try to catch the moment the bank angle is steepest, because that is when you see the most of the aircraft. Frame with a little air around the jet so the wingtips are not clipped if the pilot rolls further than you expect.
The head-on pass
A jet coming straight at you is dramatic but technically awkward, because the closing speed makes autofocus work hard and the aircraft barely seems to move until it is suddenly huge. Remember that CAP 403 pushes anything pointing at the crowd above 300 knots out to the 450 metre line, so a true head-on aspect is usually flown further away than it feels. Pick it up as early as you can, hold the focus, and shoot a burst as it approaches. Aircraft subject detection earns its keep here. The keeper is often the frame just before the jet reaches you, with the nose filling the frame and the intakes clearly visible.
The high-G turn and vapour
On a humid day a hard turn pulls visible vapour off the wings and the fuselage, sometimes wrapping the whole aircraft in a cone of cloud. This is one of the most spectacular things a jet does. Freeze it at 1/1000 to 1/1250 so the vapour keeps its structure rather than smearing, expose for the aircraft, and shoot a burst through the turn because the vapour builds and fades within a second or two. The best frame usually has the most vapour and the steepest bank together.
The reheat or afterburner pass
Selecting reheat dumps fuel into the exhaust and produces a long, bright flame, most visible at dusk or against a dark backdrop. Keep the shutter fast enough to freeze the airframe, around 1/1000, but be careful with exposure because the flame is far brighter than the jet. Expose for the aircraft and let the flame burn slightly, pulling exposure compensation down a little if the jet is small in a dark frame. Shoot bursts, because the brightest, longest flame lasts only a moment.
Takeoff and landing
The takeoff and landing runs are slower and lower, which makes them perfect for panning. As the jet accelerates down the runway or rolls out after touchdown, drop to 1/125 to 1/200, pan smoothly with it, and you will get streaked tarmac and a sharp aircraft that screams speed. Landing also gives you gear, flaps and sometimes a brake parachute, all of which add interest a clean pass lacks.
Formation and the run in
When jets fly in formation, focus on the lead aircraft and frame to hold the whole shape, leaving room so a tight formation does not lose an outer aircraft at the edge. The run in, where the jet approaches the display line before pulling up into its first move, is a good moment to pick up focus and settle your tracking before the action starts. We cover multi-aircraft work more fully in our airshow guides, but the principle for jets is simple: focus on the leader and keep the formation intact in the frame.
Fast jets on the UK display circuit in 2026
Knowing what is actually flying in a given season helps you plan which shows are worth the ticket, and the UK fast jet picture changes every year with squadron commitments and world events. The reliable constant is the RAF’s own solo display: the Typhoon Display Team, drawn from 29 Squadron at RAF Coningsby, which works up a new routine each winter and tours the circuit from late spring. It remains the loudest, fastest and most photogenic regular act on the UK calendar, and everything in this guide applies to it directly.
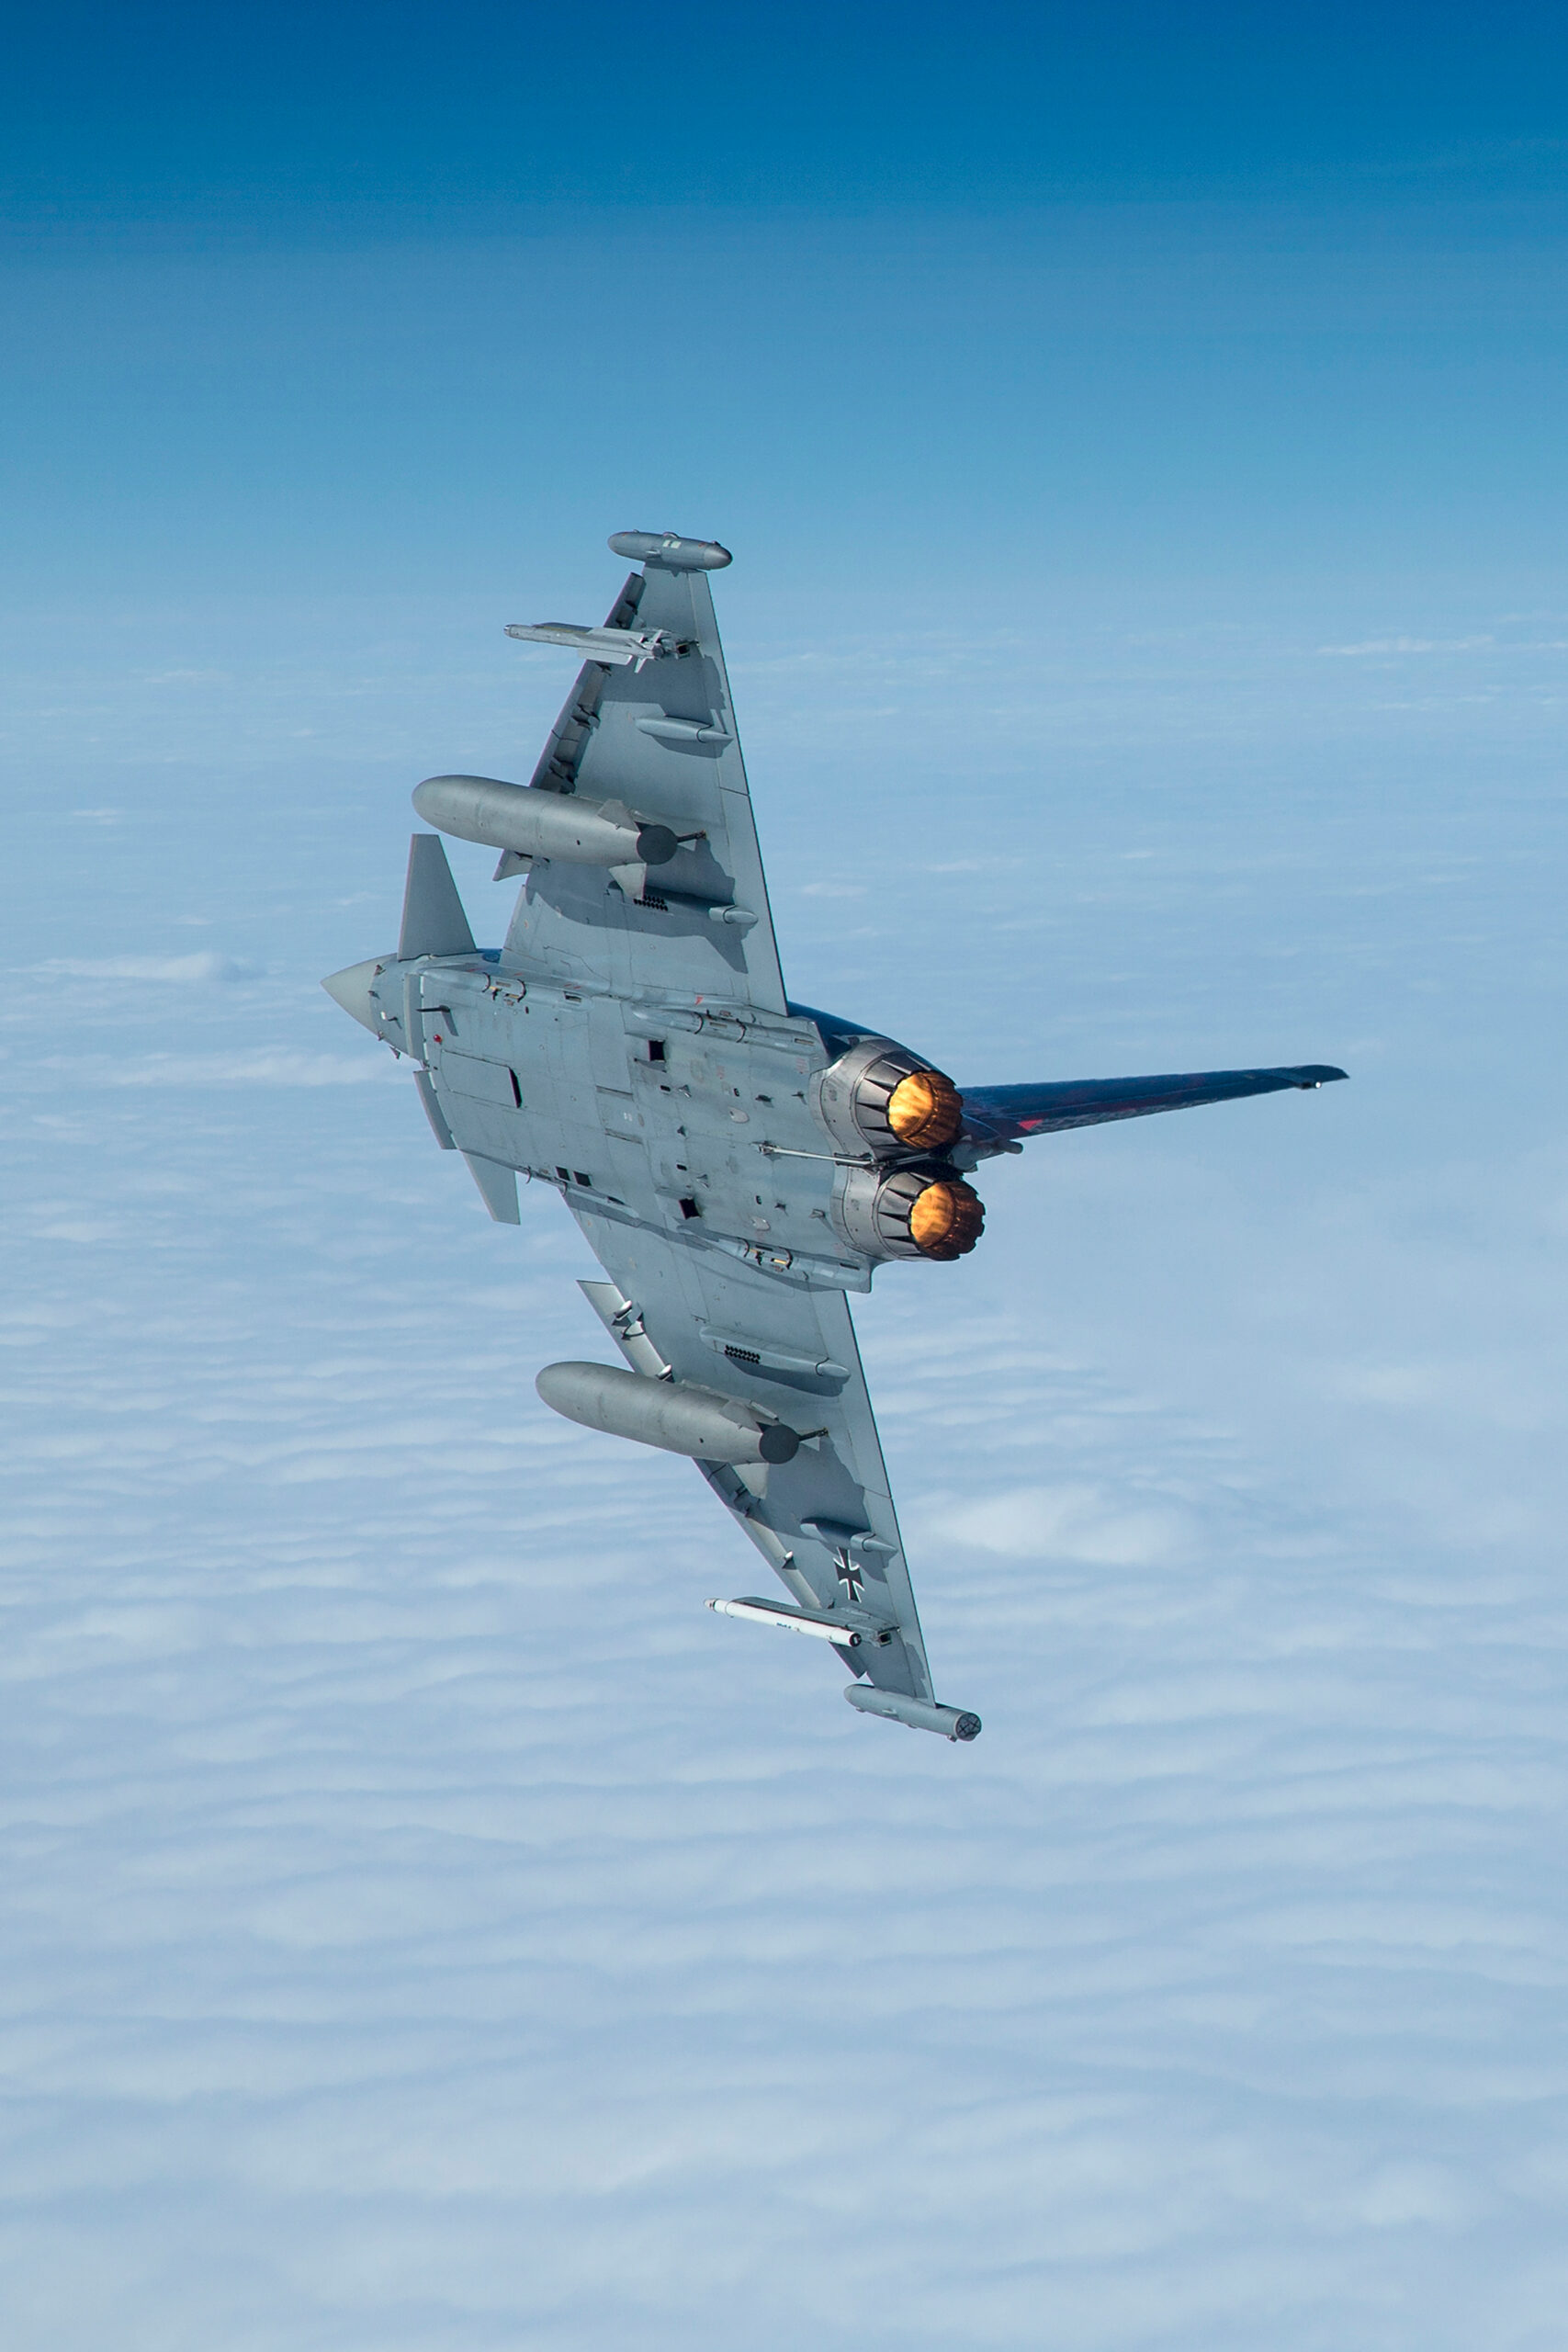
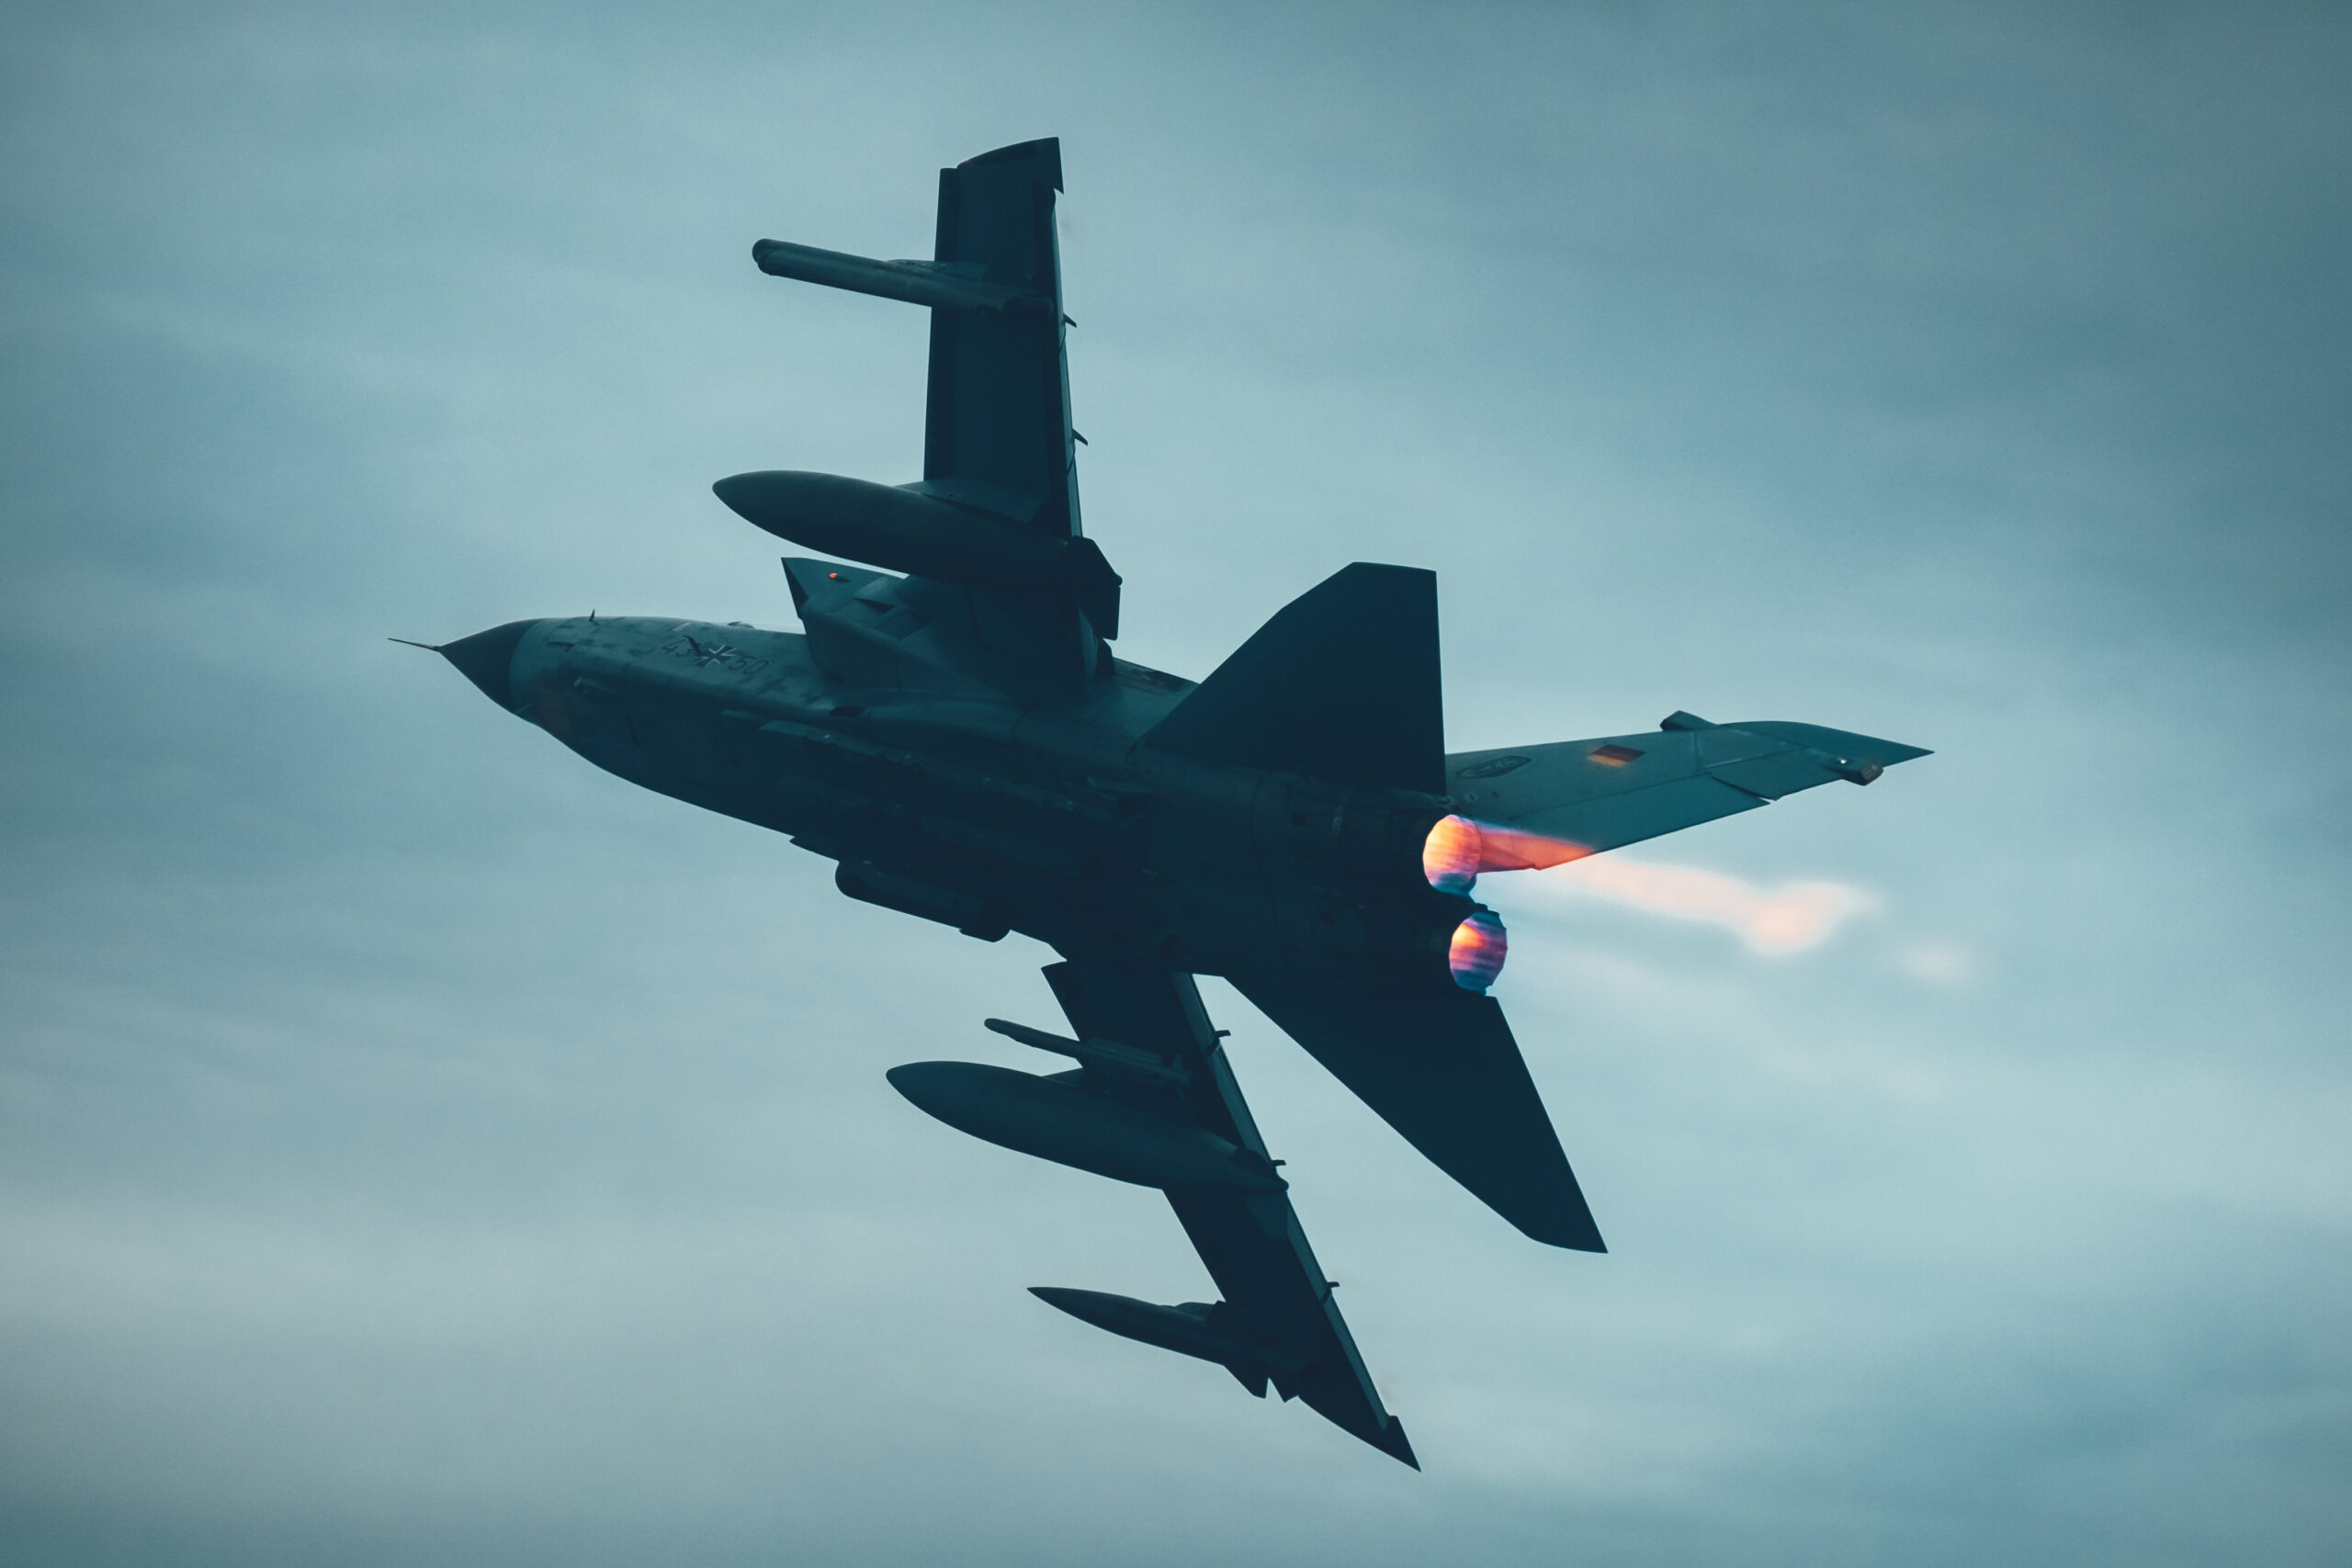
Updated July 2026: the 2026 UK season has been an unusual one. The Royal International Air Tattoo at RAF Fairford was cancelled this year, with organisers citing uncertainty over access to the base, given the ongoing situation in the Middle East, and offering ticket holders a rollover to RIAT 2027. Before the cancellation, RIAT’s Fighter Meet theme had confirmed flying displays including a Finnish Air Force F/A-18C Hornet, a German Air Force Panavia Tornado from TLG 51, a German Eurofighter from TLG 31, Saab’s Gripen E and the Turkish Stars, alongside a Royal Netherlands Air Force F-35A pair and an RAF F-35B from Marham on static display, which gives you a fair picture of the fast jet acts circulating in Europe this season. The RAF Typhoon Display Team is flying on regardless: Flight Lieutenant Tom Nation of 29 Squadron is the 2026 display pilot, showing the Typhoon FGR4 from RAF Coningsby at venues around the UK and Europe through the summer. Check each show’s official participation list close to the date, because military line-ups shift at short notice.
For photographers, the practical lesson of a season like this is to spread your bets. Seaside shows give you humid air and vapour, display axes over water and the chance of golden evening light; airfield shows give you takeoff and landing runs to pan and cleaner topside angles. If a European trip is an option, the big continental shows regularly field fast jet displays that rarely cross the Channel, and the techniques in this guide travel with you unchanged.
Common mistakes and how to fix them
Most fast jet images fail for a handful of predictable reasons. If your hit rate is low, you are almost certainly making one of these, and the fixes are simple once you know what to look for.
Shutter speed too slow when freezing
If your frozen jets are slightly soft all over, the shutter was probably too slow to stop the motion. People often set 1/500 because it sounds fast, but for a close, fast jet it is not enough. Push to 1/1000 or beyond and let ISO rise to pay for it. The fix is almost always faster shutter, not better technique.
Missed focus rather than motion blur
If the shutter was fast but the image is still soft, the problem is focus, not movement. The usual culprits are being in single autofocus instead of continuous, picking the jet up too late so the lens never caught it, or a focus point sitting on the sky behind the aircraft rather than on the aircraft itself. Switch to continuous AF, pick the jet up early, and watch where your point actually lands.
Underexposed jets against bright sky
A dark, murky aircraft against a bright sky means the meter underexposed, as it always wants to. Add positive exposure compensation, plus one to plus two stops, or shoot manual and expose for the aircraft. This single fix lifts a whole day’s worth of grey, lifeless jets into properly exposed images.
Clipping the wings or losing the jet in the frame
Framing too tightly is a classic error. The jet manoeuvres, you lose it out of the edge of the frame, or you clip a wingtip just as the pilot rolls. Zoom out a touch, leave breathing room, and crop in editing. A slightly smaller, complete aircraft beats a frame-filling one with a wing cut off.
Stopping the pan too early
Soft panned shots usually come from decelerating into the exposure. The cure is to follow through, keep swinging after the shutter fires, and shoot a burst so the smoothest part of your swing is captured. Treat the pan as a continuous movement that the shutter happens to interrupt, not a movement that ends when you press the button.
Fighting heat haze
On a hot day, the air shimmering over tarmac and distant ground softens anything seen through it, and no amount of focus skill will fix it. Heat haze is worst when shooting across a long stretch of hot runway at a distant subject. Shoot the jet higher in the sky where there is less haze between you and it, get closer to your subject where you can, and accept that the very distant shots on a scorching day will never be tack sharp. The conditions section above explains why it happens and how to plan around it.
How to practise before the show
The flight line is a bad place to learn the basics, because the action is fast and you only get each pass once. The good news is that you can build almost every skill you need somewhere far calmer and cheaper.
Practise panning on cars
A road with passing traffic is the ideal panning gym. Stand at a safe distance, set shutter priority at 1/125, and pan with cars as they go by. They move at a predictable speed and you get a new subject every few seconds, so you can refine your stance and follow through quickly. When you can reliably get sharp cars with streaked backgrounds, a panned jet on a landing run will feel familiar. Drop the shutter speed gradually as you improve.
Practise tracking on birds and airliners
Birds in flight and airliners on approach are excellent autofocus practice. They teach you to pick a subject up early, hold the focus point on it, and follow it smoothly. A local airport with an approach path, or even gulls over a car park, will sharpen your continuous autofocus skills without the pressure of a once-only display pass. The muscle memory transfers directly to jets.
Learn your menus at home
Set up continuous autofocus, your focus area modes, back button focus, auto ISO ceilings and any custom modes at the kitchen table, not on the flight line. Know which button switches focus area and which custom mode holds your panning settings, so that on the day your hands move without you thinking. Five minutes of menu practice at home saves a missed pass at the show.
Study the routine
If you can, watch the first display of the day purely to learn the routine, then shoot it on a later slot when you know where the jet will go. Many displays repeat a recognisable sequence, and knowing that a topside pass is followed by a turn and a reheat run lets you anticipate rather than react. If you have seen footage of the display online beforehand, you will already know the shape of it.
A quick word on processing jet images
Good processing finishes a jet image, but it cannot rescue a soft or badly exposed one, which is why everything above matters first. With a sharp, well exposed raw file, a light touch goes a long way.
Start with the basics: set the white balance, lift the shadows on the underside of the aircraft, and rein in any bright highlights on the upper surfaces. A clean sky often benefits from a small boost in clarity or texture on the aircraft alone, using a brush or mask, so the jet pops without making the sky look harsh. Avoid global clarity sliders that crunch the whole frame.
Sharpening and noise reduction matter more for jets than for many subjects, because you are often working at a long focal length and a moderate ISO, and you may have cropped in. Apply output sharpening sensibly and use modern noise reduction to clean up the higher ISO frames from dull days. The aim is a crisp aircraft against a clean sky, not an over sharpened halo. If you intend to sell or license your images, keywording and a consistent edit help, and you can see how finished aviation work looks in the Piemags Aviation galleries, or read about licensing options if you want to use images commercially.
Finally, be honest about which frames are keepers. Fast jet photography produces a lot of near misses, and the discipline of culling hard, keeping only the sharp, well composed frames, is what builds a portfolio that stands up. One outstanding panned reheat shot is worth more than fifty average topside passes.
Fast jets reward preparation more than any other aviation subject. Set the camera up before the display, decide whether each pass wants freezing or panning, expose for the aircraft against the sky, and track smoothly with the focus picked up early. Do that and your keeper rate will climb every time you go out. For the wider picture, read our airshow photography tips and the in-depth camera settings and autofocus guide, and when you are ready to see where this leads, browse the Piemags Aviation galleries.
Fast-jet work is where technique and commercial value overlap most directly, and our guide to licensing F-4 Phantom photographs shows what that looks like from the buyer’s side. Our guide to building an aviation photography portfolio covers which frames actually earn their place.
If you want to apply this to a specific airfield, our guide to RAF Lakenheath and RAF Mildenhall gives the runway bearings, the sun angles by date and the focal lengths the distances demand.
If you are after pictures of a fast jet rather than the means of making your own, our guide to licensing F-104 Starfighter photographs covers a type only seven of which still fly.
Frequently asked questions
What shutter speed should I use for fast jets?
To freeze a fast jet, start at 1/1000 second and go faster, to 1/1600 or 1/2000, when the jet is fast and close. These speeds keep the airframe pin sharp and stop wingtip and control surface movement. For a panned shot that shows speed with a blurred background, drop to between 1/200 and 1/400 second for a level pass, and lower still, around 1/125, for a slow takeoff or landing run once your technique is reliable.
How do I keep a fast jet in focus?
Use continuous autofocus, called AF-C on Sony, Nikon and Fujifilm and Servo AF (AI Servo on DSLRs) on Canon, with a small zone or group of points against clean sky and a single point against cluttered backgrounds. Turn on aircraft subject detection if your camera has it, set back button focus so focus and shutter are separated, and pick the jet up early so the lens is already tracking before you start shooting.
What lens do I need to photograph fast jets?
A telephoto zoom reaching 400mm covers most flying displays on a full frame body, and 100-400mm or 150-600mm zooms are the popular choice because they let you frame both distant topside passes and closer crowd-front runs. On a crop sensor body you get extra reach, so a 100-400mm behaves more like 600mm. Reach matters less than a fast, reliable autofocus motor and the discipline to track smoothly, and our guide to the best lenses for aviation photography covers specific models.
Should I freeze or pan a fast jet?
Freeze when the jet is clean and fast and you want a crisp, detailed frame, especially for topside passes, vapour and high-G turns. Pan when you want to show speed and motion, particularly on takeoff, landing and lower level runs, where a blurred background conveys movement. Most photographers freeze by default and pan deliberately when the moment suits it.
Why are my jet photos blurry even at a fast shutter speed?
If the shutter speed is high and the image is still soft, the usual cause is missed focus rather than motion blur. Check that you are in continuous autofocus, that you picked the jet up early, that your focus point or zone was actually on the aircraft and not the sky behind it, and that heat haze on a hot day is not softening distant subjects. Stopping the lens down a little from wide open and shooting in bursts to catch the sharpest frame both help.
What settings work best for an afterburner or reheat pass?
A reheat pass is often photographed at dusk or against a dark backdrop so the flame stands out. Keep the shutter fast enough to freeze the airframe, around 1/1000, but watch your exposure: the bright flame can fool the meter, so expose for the aircraft and let the flame burn slightly. Underexpose by a third to two thirds of a stop if the jet is small in a dark frame, and shoot in bursts because the brightest part of the flame lasts only a moment.
How do I photograph a fast jet coming straight towards me?
A head-on pass is dramatic but awkward, because the closing speed makes the autofocus work hard and the jet barely seems to move until it is suddenly huge. Pick it up as early as you can, hold focus with continuous autofocus, and fire a burst as it approaches, letting aircraft subject detection do the heavy lifting if your camera has it. The keeper is often the frame just before the jet reaches you, with the nose filling the frame and the intakes clearly visible.
How do I keep a fast jet sharp when it passes against a background of trees?
A wide focus area will happily lock onto the busy background instead of the aircraft, so switch to a single point and place it deliberately on the jet as it crosses the clutter. This is a good reason to set up two focus configurations, one wide zone for clean sky and one single point for cluttered passes, so you can switch in an instant. Pick the jet up early and keep the point on the cockpit or intake through the pass.
What focal length do I need for fast jets on a crop sensor camera?
A crop body crops into the image and gives you an effective reach boost of roughly 1.5x, or 1.6x on Canon, so a 100-400mm zoom behaves like around 600mm in full-frame terms. That extra reach is useful for distant topside passes, which is why many jet photographers happily shoot crop bodies. A 100-400mm class zoom is plenty to start with, and reach matters less than fast, reliable autofocus and smooth tracking.
How close do fast jets fly to the crowd at UK airshows?
UK display rules in the CAA’s CAP 403 keep fixed-wing display aircraft at least 230 metres from the crowd line, and any aircraft flying faster than 300 knots indicated with its velocity vector towards the crowd must stay at least 450 metres away. In practice a fast jet’s high-speed manoeuvres happen on the further line, with slower flypasts sometimes closer. Standing against the barrier does not change how close the jet gets, so pick your spot for light and background instead.
What weather gives the best vapour on a fast jet?
Warm, humid days with a small gap between the air temperature and the dew point produce the most vapour. The pressure drop above the wing in a hard turn cools the air, and if it cools below its dew point the moisture in it condenses into visible cloud that vanishes the moment the pilot unloads the G. Humid maritime air, common at UK seaside shows, is ideal, while dry days rarely produce much regardless of how hard the jet turns.
Which fast jet displays can I photograph in the UK in 2026?
The RAF Typhoon Display Team, flown in 2026 by Flight Lieutenant Tom Nation of 29 Squadron from RAF Coningsby, is the headline UK fast jet act, appearing at venues around the country through the season. The Royal International Air Tattoo was cancelled in 2026 over uncertainty about access to RAF Fairford, so seaside and airfield shows carry the season instead. Check each show’s official participation list close to the date, because military line-ups change at short notice.
When a hard-pulling jet condenses vapour off its wings, that is physics you can photograph: our guide to aircraft vapour photography explains how vapour, contrails and vapour cones form and how to capture them.
