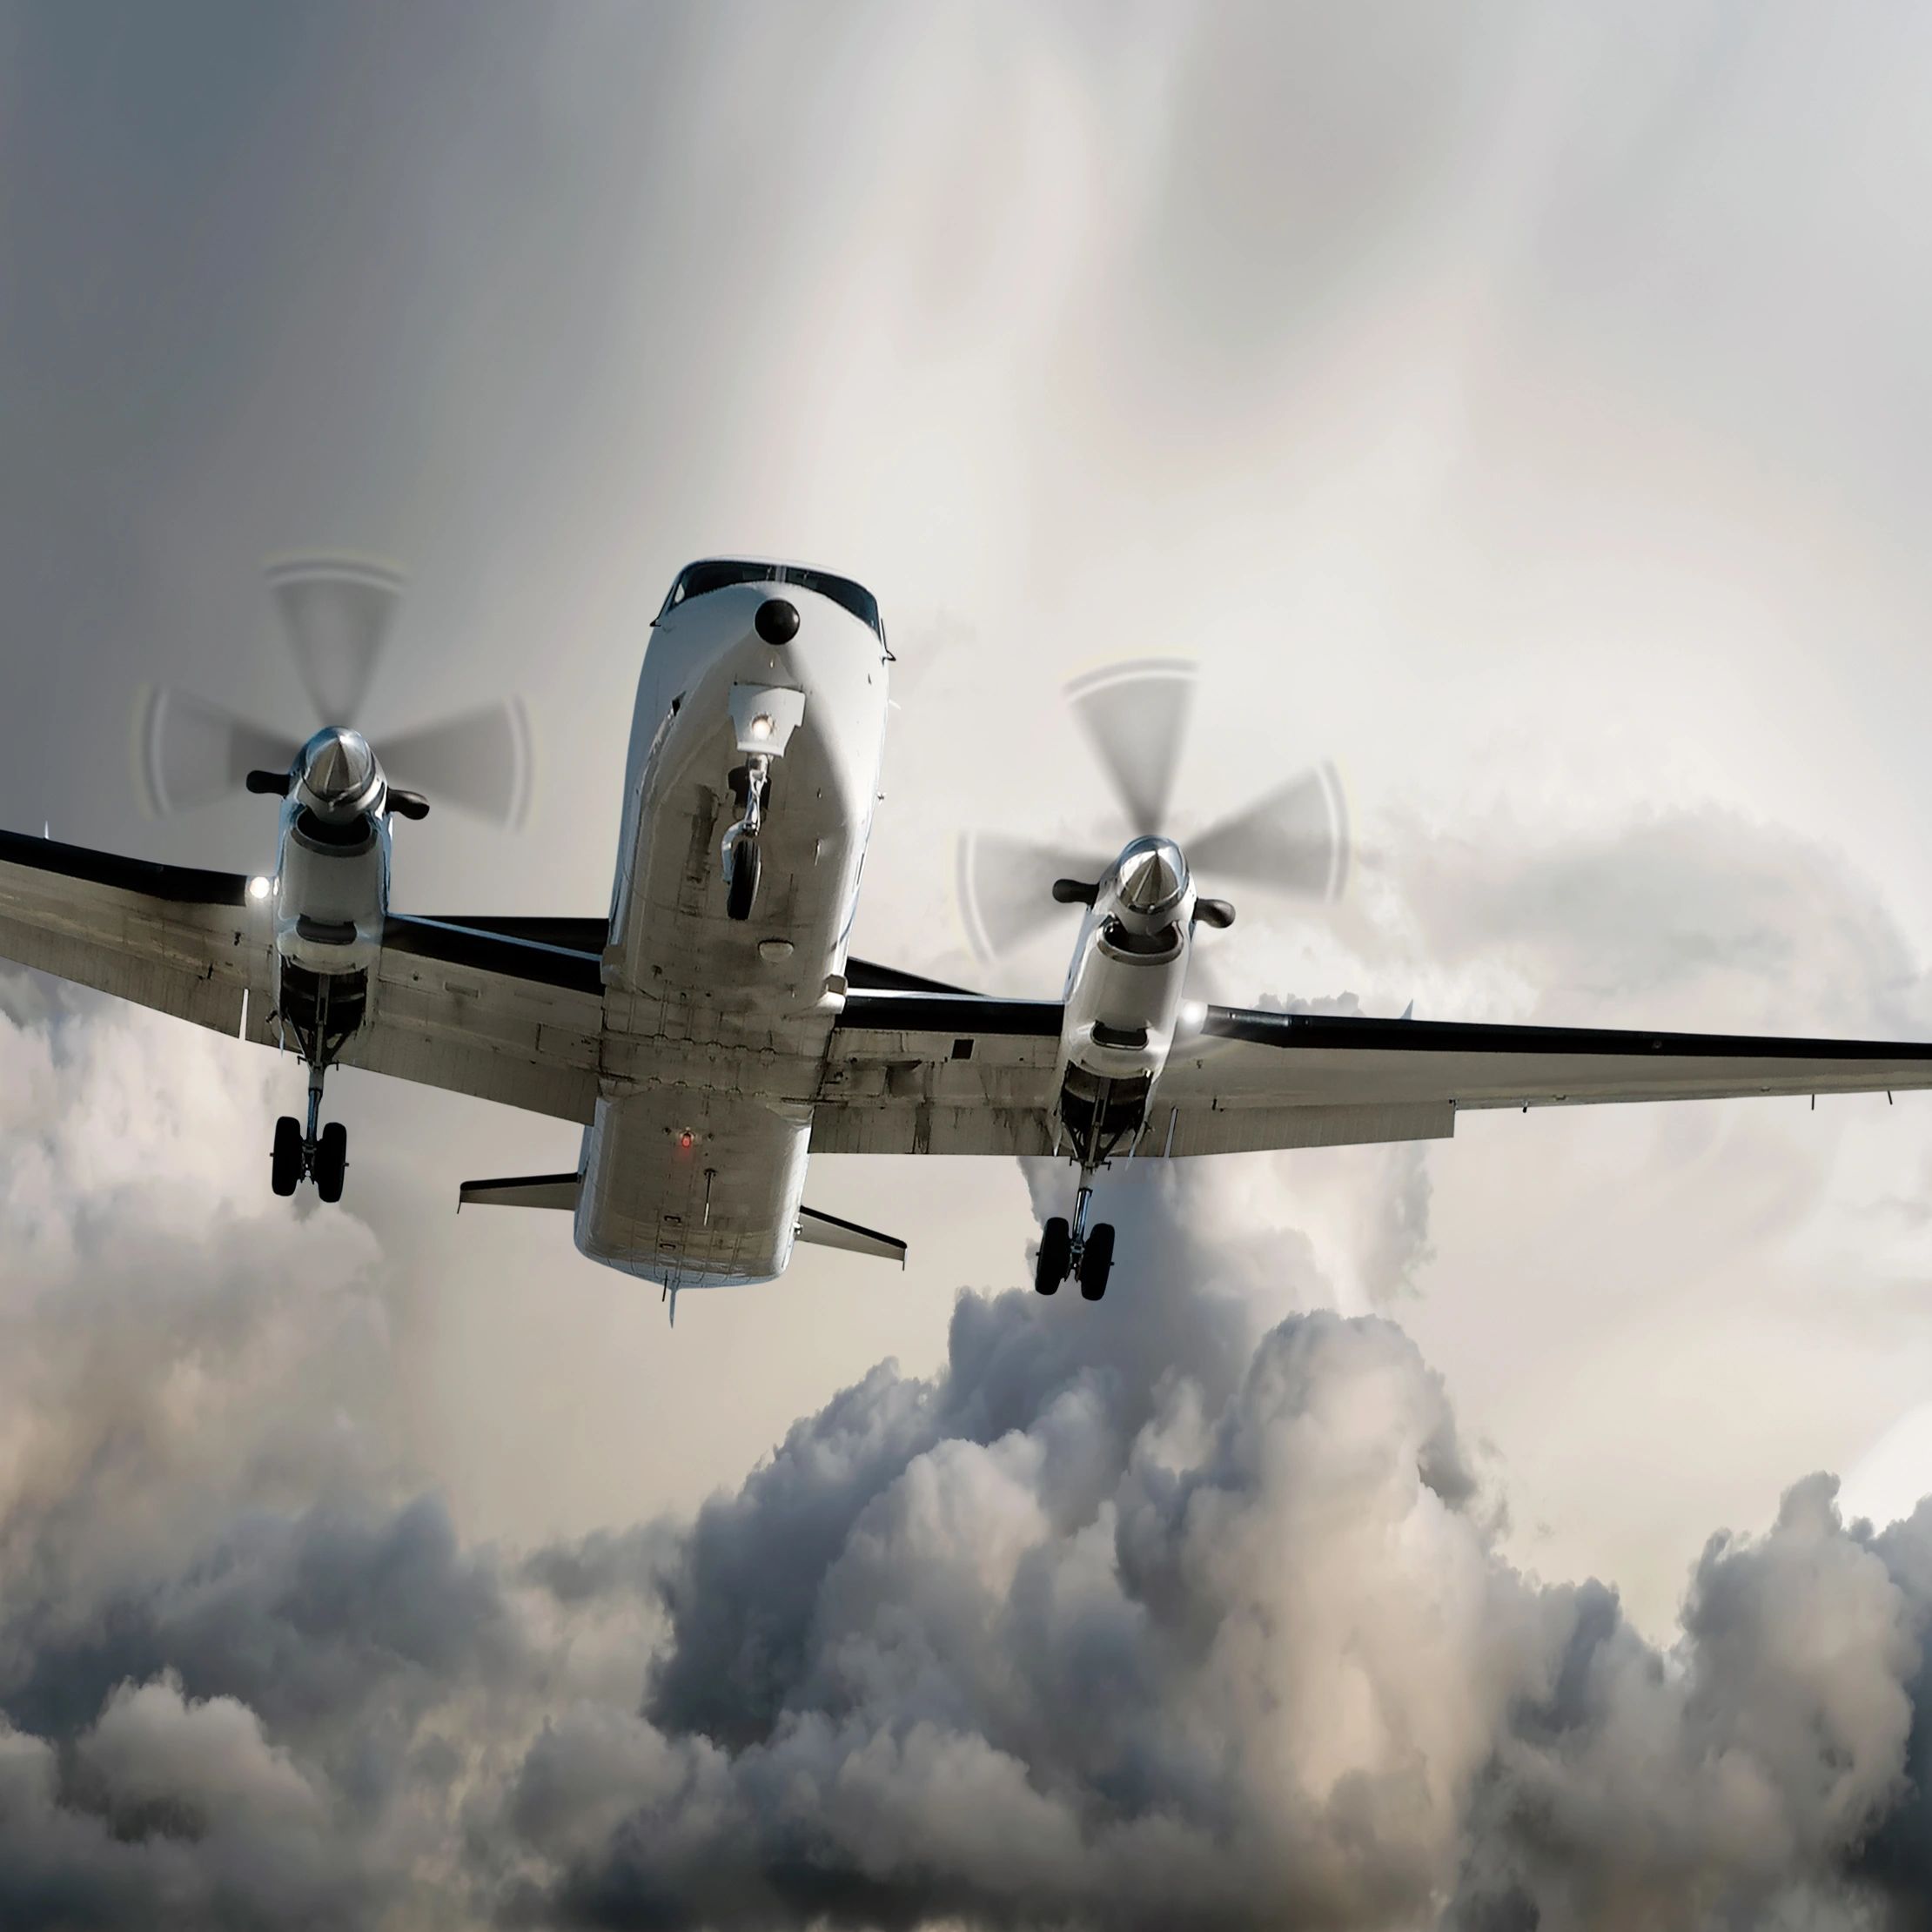
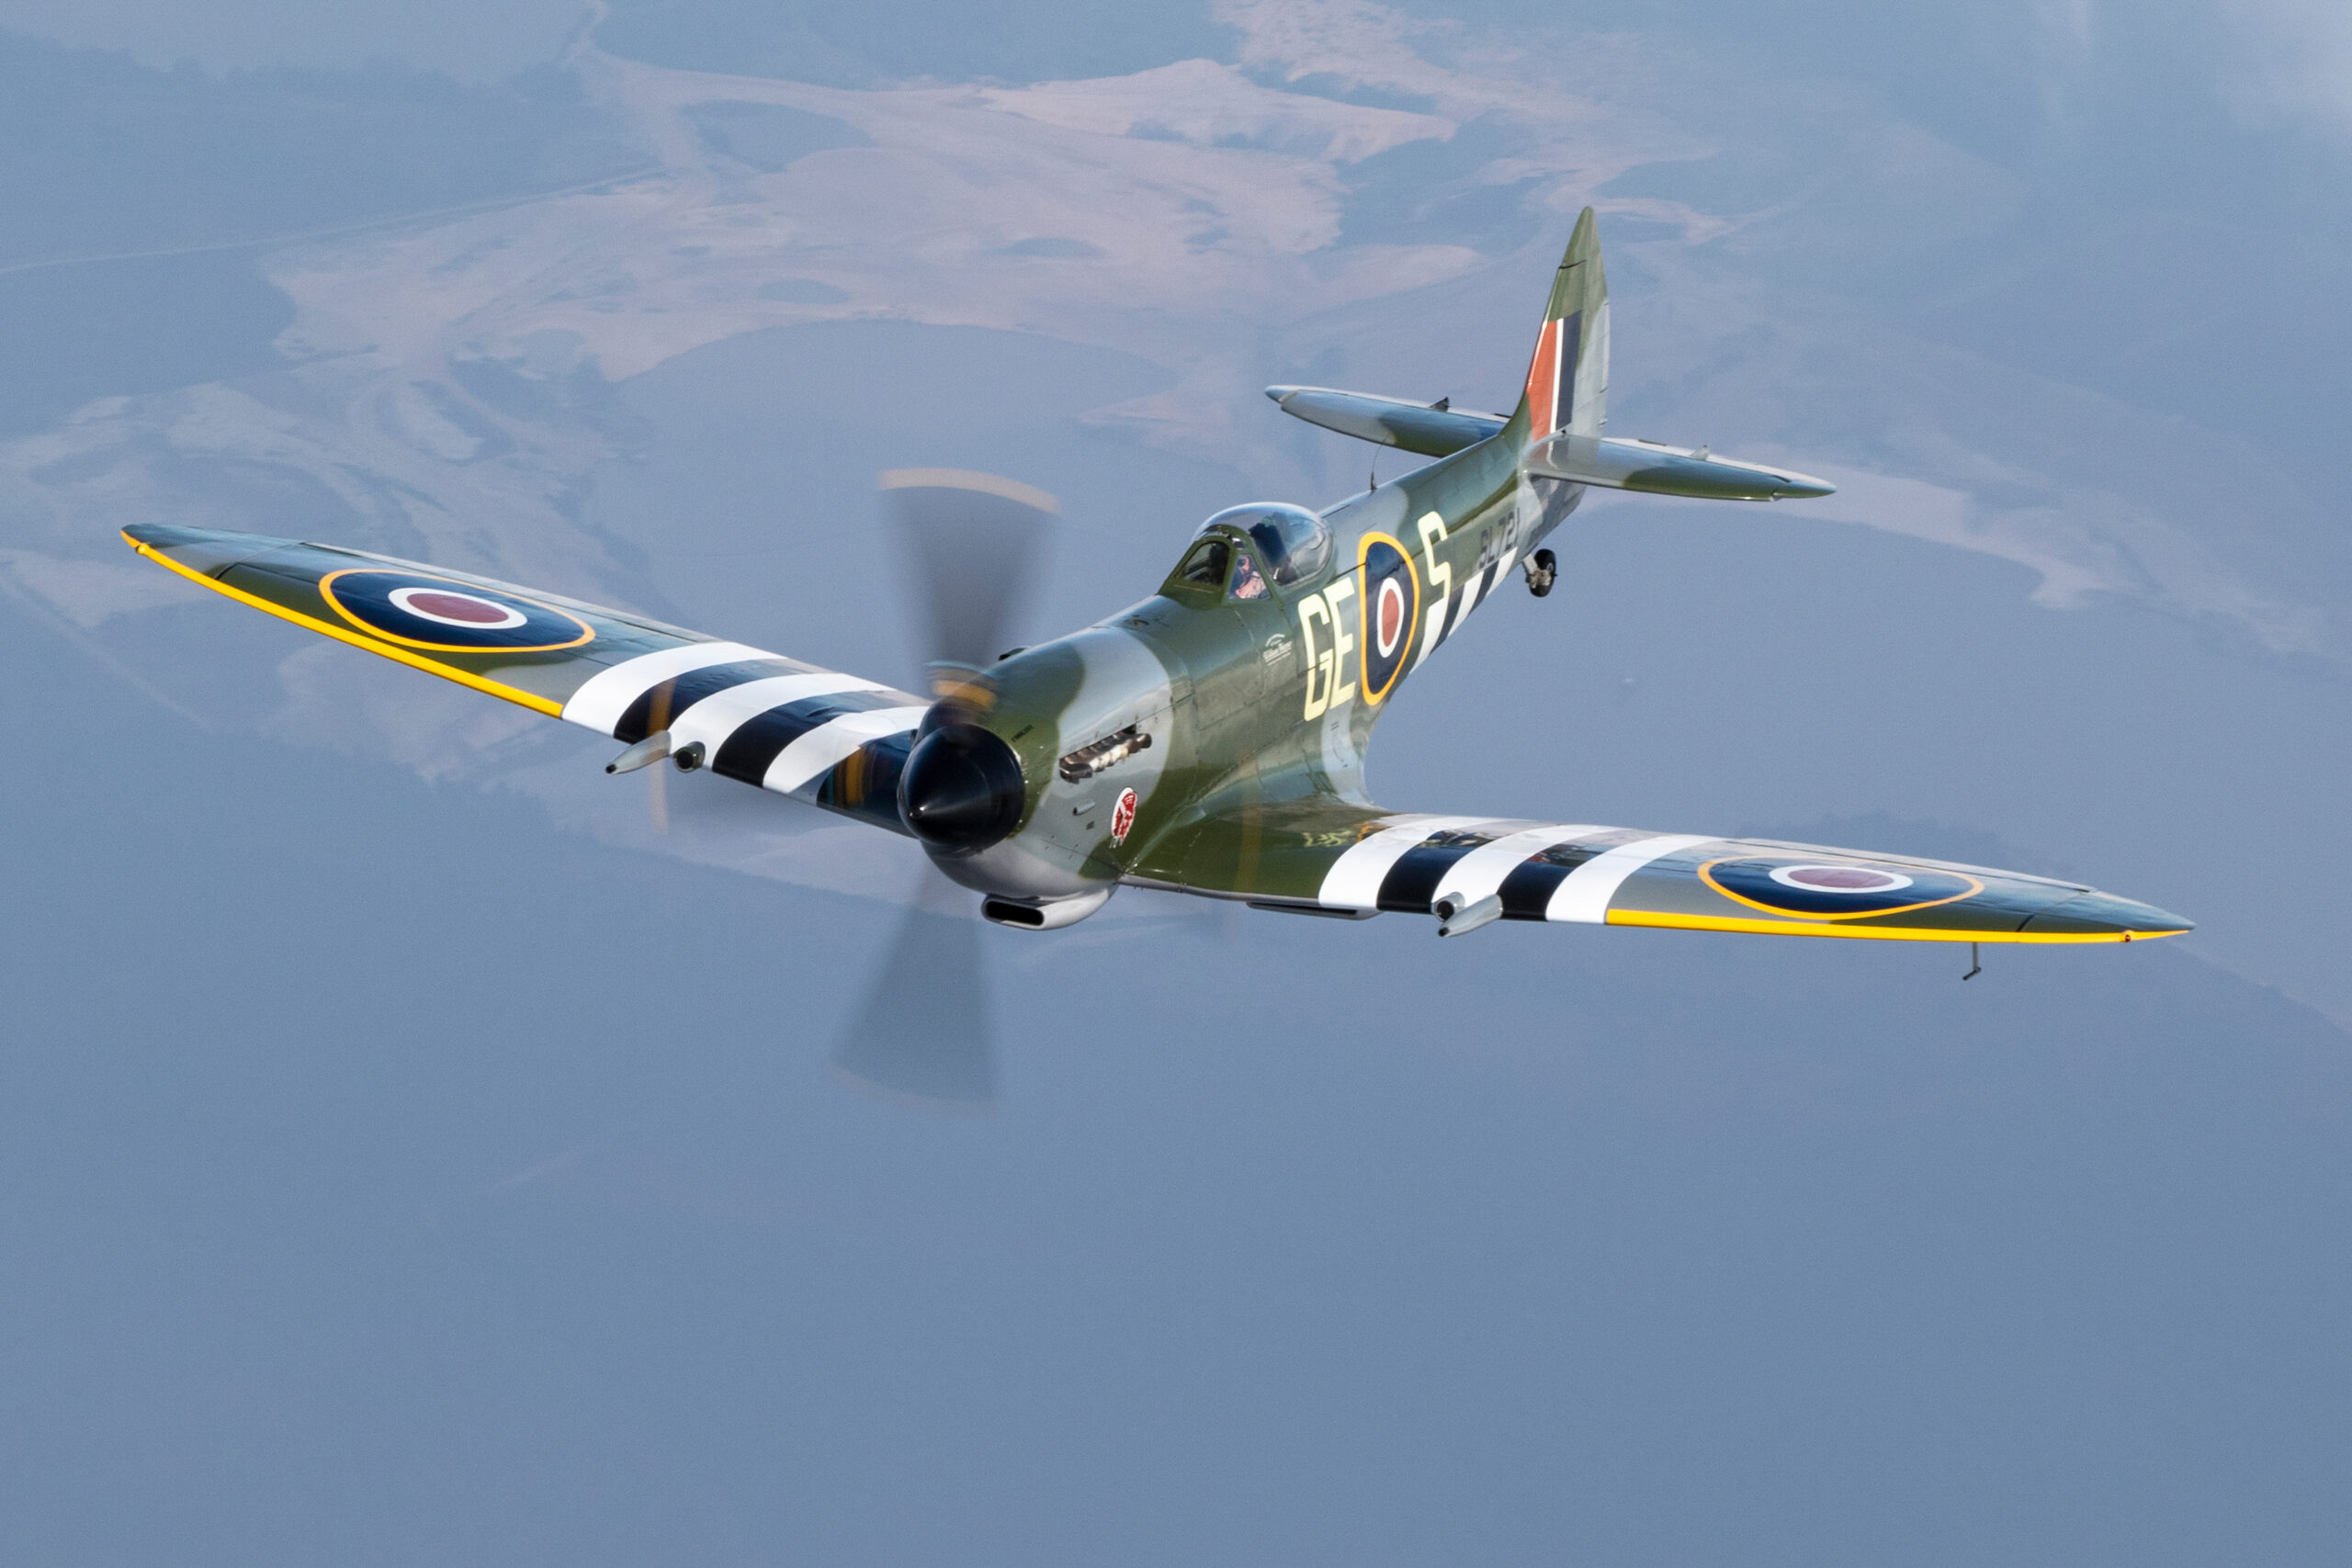
There is one mistake that marks out a beginner’s aircraft photo more than any other, and it has nothing to do with focus or framing. It is the dead propeller. A Spitfire hanging in a clear sky, every rivet sharp, and a propeller frozen solid as though the engine had quit and the pilot was gliding home in silence. The aircraft looks wrong because it is wrong. A piston warbird in the air has a propeller turning well over a thousand times a minute, and our job as photographers is to put that life back into the picture.
Getting prop blur is not difficult once you understand what is happening, but it does ask you to work against your instincts. Everything else in aviation photography pushes you toward fast shutter speeds. Sharp jets, frozen detail, no camera shake on a long lens. Prop blur asks you to slow down, sometimes dramatically, and that brings its own problems with exposure, panning and keeper rate. This guide covers all of it: how much blur to aim for, the exact shutter speeds for different aircraft, how to keep the exposure under control in bright light, and how to pan smoothly enough that the body stays sharp while the blades melt into an arc. There are reference tables you can screenshot and settings recipes you can copy at the flight line.
What this guide covers
- Why prop blur matters and what the dead prop tells the viewer
- What the camera actually sees: rpm, blades and exposure time
- How much blur do you want, from a hint to a full disc
- Propeller blur shutter speed, with a reference table
- Matching shutter speed to the aircraft type
- The exposure problem: shooting slow in bright light
- Panning while keeping the prop blurred
- Autofocus and continuous shooting for prop shots
- Image stabilisation and how to set it
- Full settings recipes for every kind of pass
- Scenario by scenario: the shots you will actually get
- Common mistakes and how to fix them
- How to practise and build a hit rate
- Frequently asked questions
Why prop blur matters and what the dead prop tells the viewer
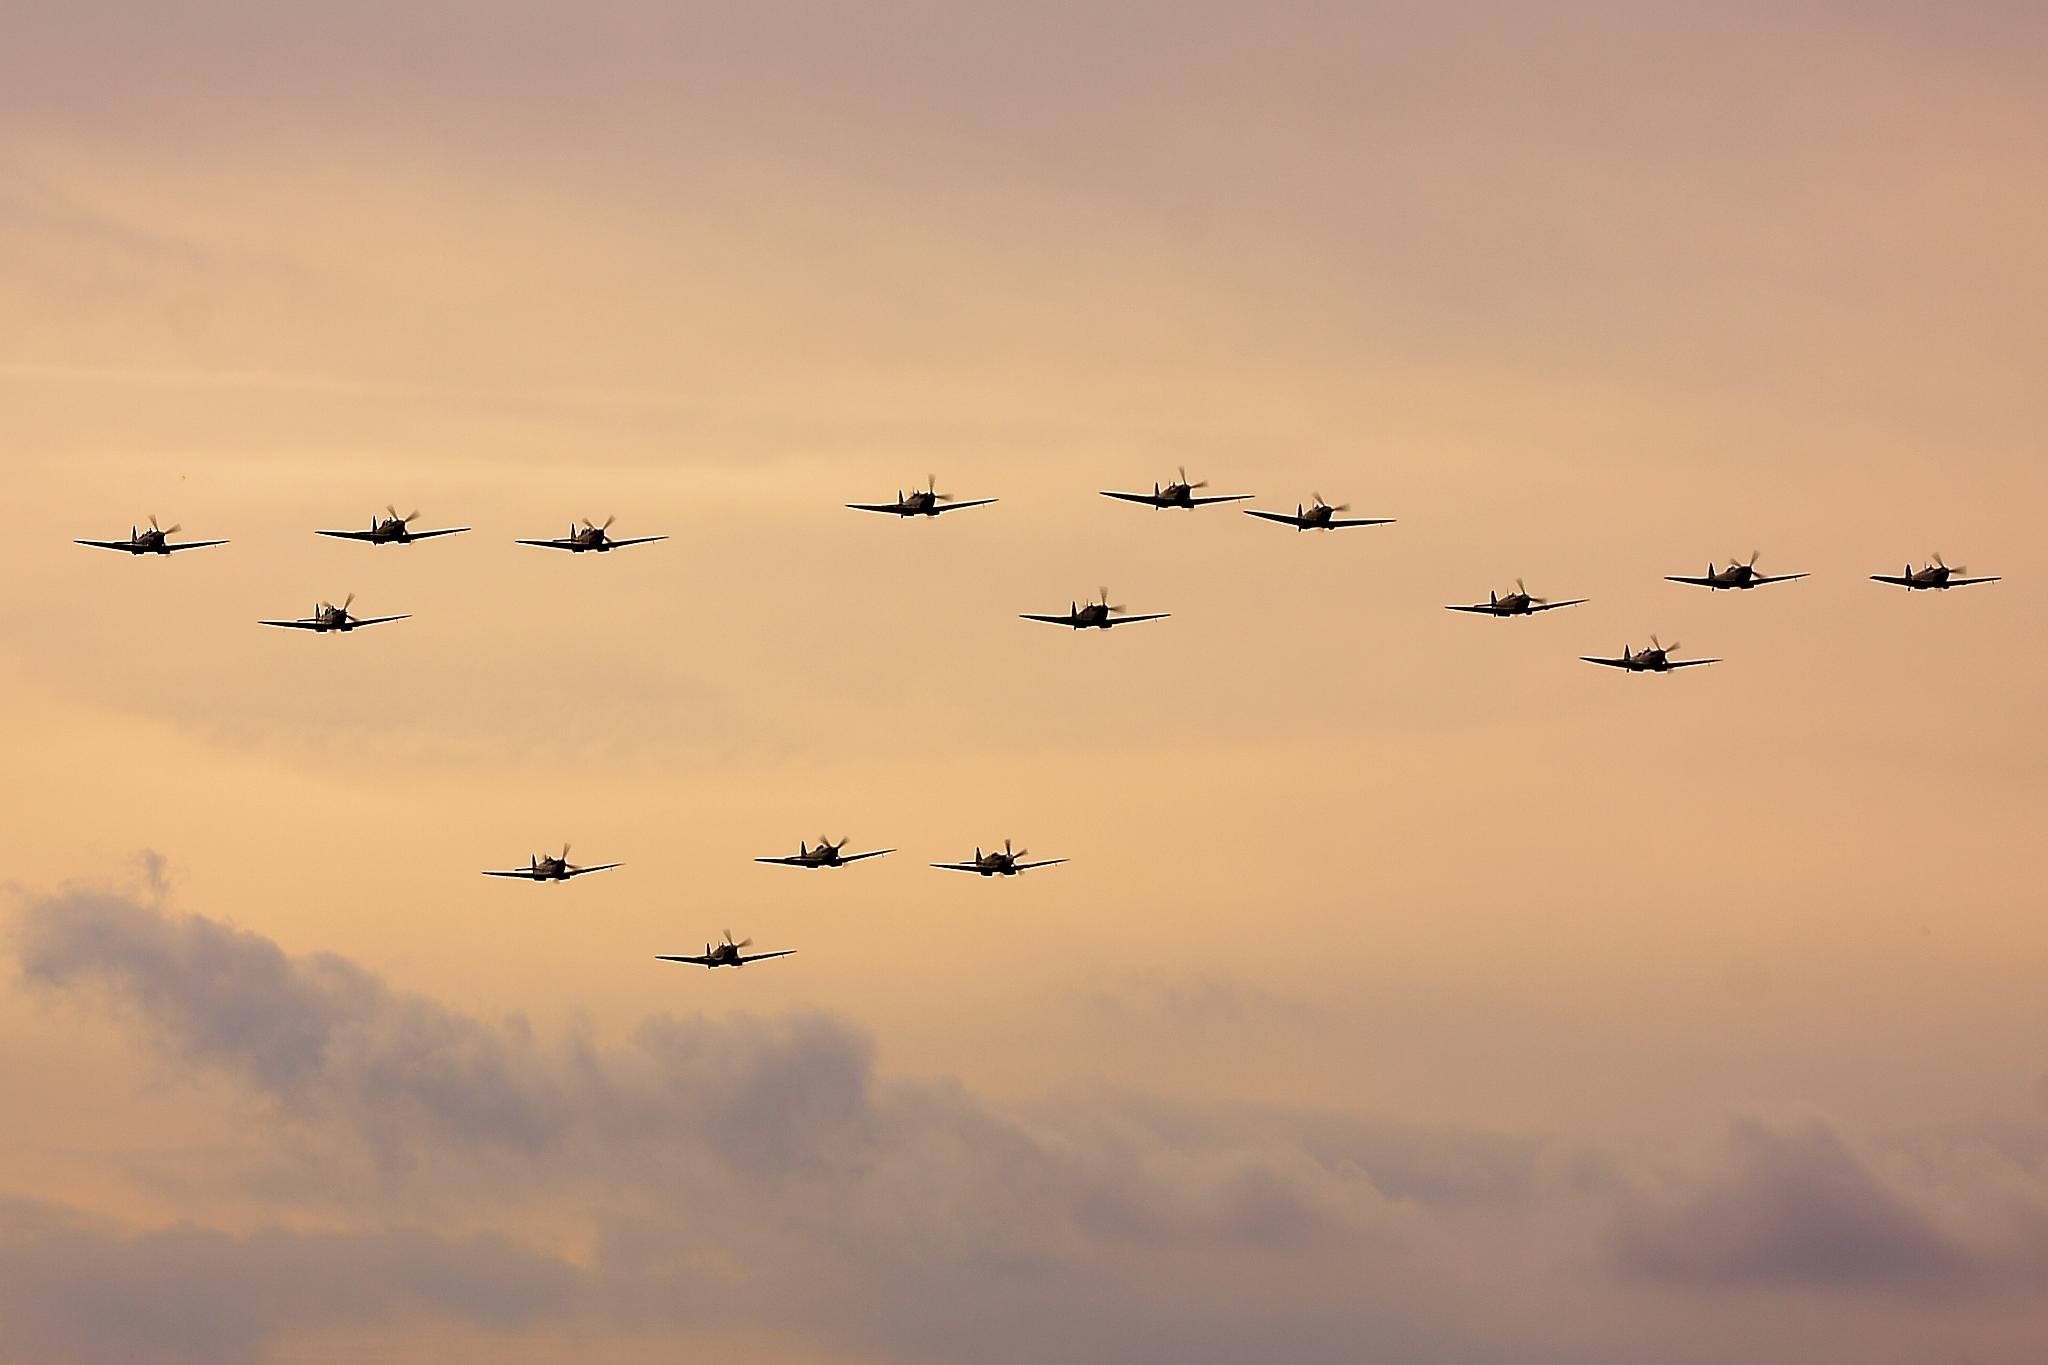
A photograph is a frozen moment, and the viewer reads everything in it as a statement of fact. When the propeller is a sharp, static cross or four-bladed star, the eye and brain conclude the only thing they can: the propeller was not moving. For an aircraft sitting on the ground with the engine off, that is correct and fine. For an aircraft in flight, it is a visual contradiction. The aircraft is clearly airborne, banking, fast, and yet the one part that should be a blur of motion is rendered as still as a parked car. The image feels lifeless, and most people cannot say why.
Prop blur fixes this by restoring the sense of motion. A propeller caught as an arc or a full translucent disc tells the viewer the engine is running, the aircraft is working, and the moment is alive. It is the difference between a model on a stand and a flying machine. Editors and picture buyers know this instinctively, which is why a frozen prop is one of the quickest ways to have an otherwise technically clean image rejected for stock or editorial use.
There is a craft argument too. Prop blur is really harder to achieve than a frozen frame, because it forces you to control exposure and panning at slow shutter speeds. A folder full of pin-sharp prop discs is a clear sign of a photographer who has put in the practice. It is one of the skills that separates a snapshot from a portfolio piece, and it is worth getting right.
What the camera actually sees: rpm, blades and exposure time
To control prop blur you need a rough mental model of what is happening during the exposure. A propeller is turning at a certain rotational speed, your shutter is open for a certain length of time, and the amount of blur is simply how far the blade tips travel while the shutter is open. Faster rotation, slower shutter, or both, gives more blur. That is the whole principle.
Rotational speeds are slower than people think
Engine rpm and propeller rpm are not the same thing on most aircraft, and this trips people up. A piston warbird like a Spitfire runs its Rolls-Royce Merlin up to around 3,000 rpm at full power, but the propeller does not turn that fast. The engine drives the propeller through a reduction gearbox, and on Spitfire and Hurricane Merlins that reduction was commonly around 0.477, meaning the propeller spins at roughly 47.7 percent of engine speed. So a Merlin at 2,750 rpm for takeoff is turning its propeller at around 1,300 rpm, not 2,750. At a display cruise it is often lower still.
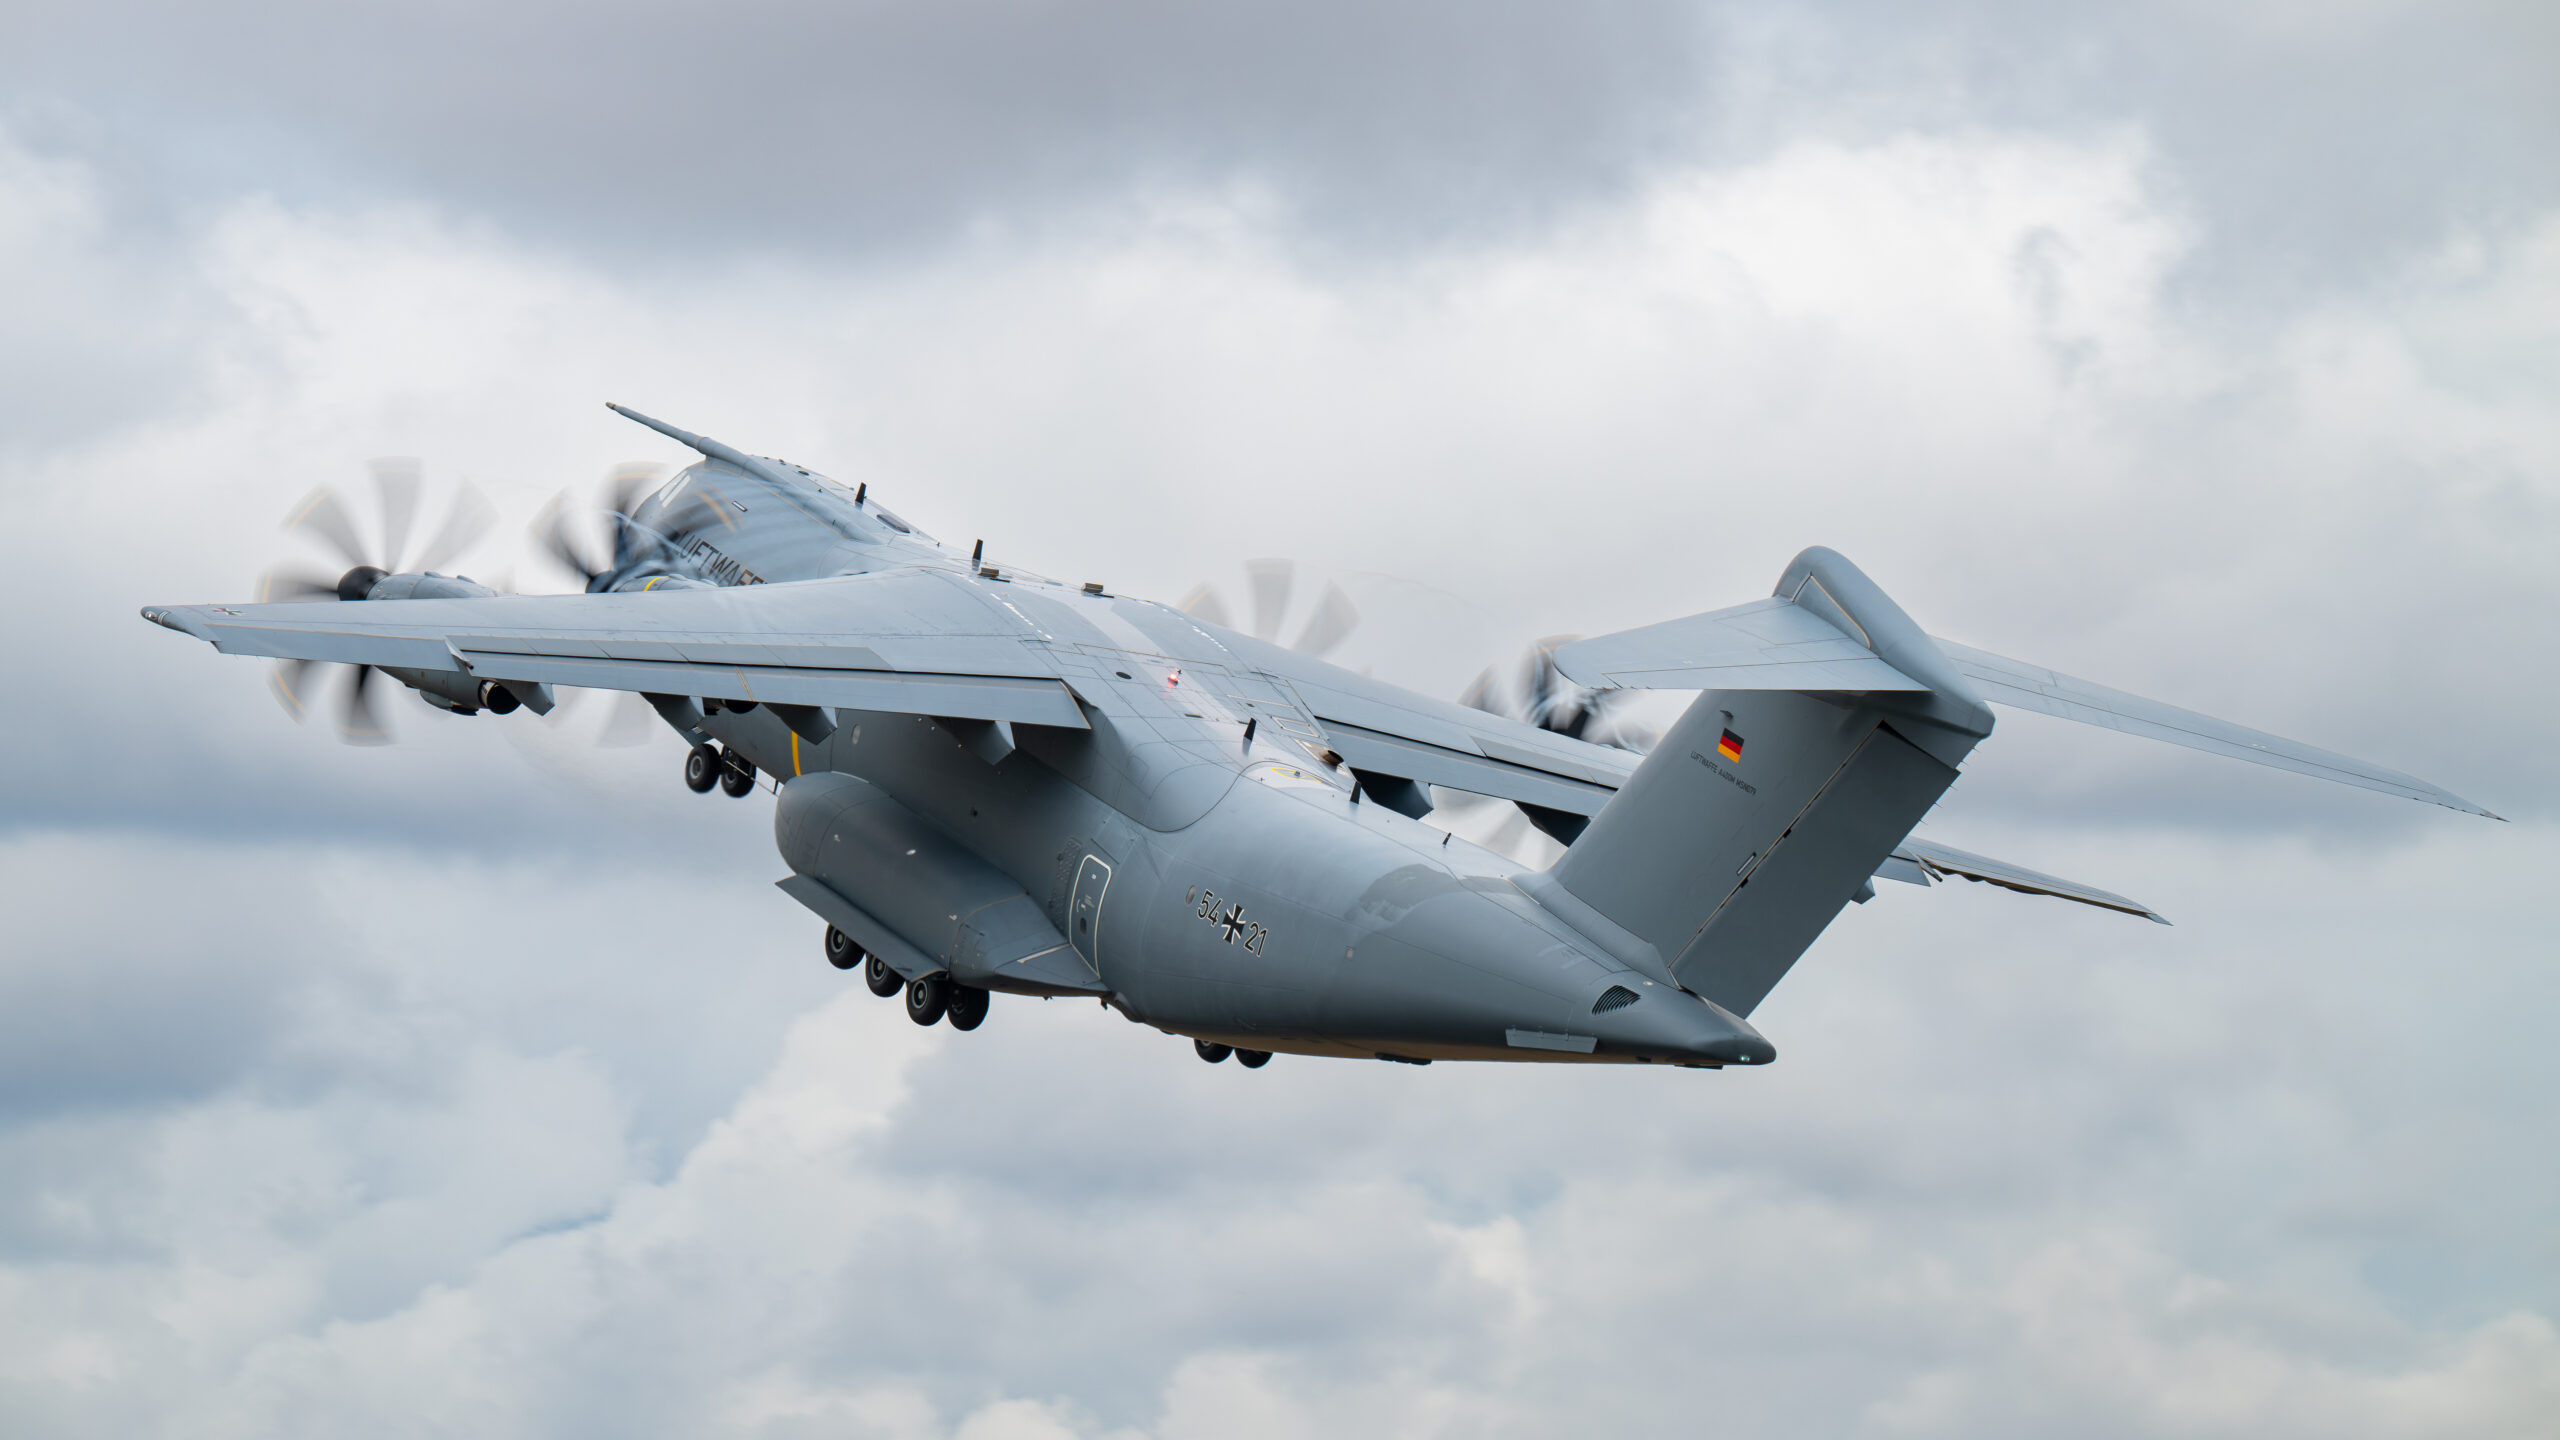
Turboprops are slower again. The Lockheed C-130 Hercules runs its propellers at a constant 1,020 rpm regardless of how hard the engines are working, because the gas generator spins at nearly 14,000 rpm and the gearbox holds the propeller at that fixed figure, with power changed by altering blade pitch rather than speed. Many airliner and military turboprops behave the same way, holding a constant and fairly low propeller speed in flight. The hard part in practice is an airport that sends you both kinds one after another: our guide to photographing at Scottsdale covers a field where a King Air at 1/200 follows a Citation at 1/2000, and you will miss one of them. Light general aviation aircraft with fixed pitch propellers typically turn somewhere between about 2,000 and 2,700 engine rpm, and on a direct drive engine that is also the propeller speed.
The practical lesson is that a slower turning propeller needs a slower shutter speed to show the same amount of blur. A C-130 at 1,020 rpm photographed at 1/250 will show far less movement than a light aircraft propeller at 2,500 rpm shot at the same speed. This is why one single shutter speed never works for every propeller aircraft.
Blade count changes the look, not the rule
A two-bladed propeller, a three-bladed propeller and a five-bladed propeller will all blur, but they look different as they do it. More blades fill the disc more quickly and reach a smooth, even full disc at a slightly higher shutter speed than a two-blade propeller, which tends to show a thinner, more obviously bladed arc. Contra-rotating propellers, such as those on a Shackleton or a Gannet, produce a dense, busy disc that looks superb when fully blurred and very strange when frozen. The underlying rule does not change: slower shutter, more blur. Blade count just affects how the partly-blurred stage looks on the way there.
How much blur do you want, from a hint to a full disc
Prop blur is not a single target. There is a spectrum, and different points on it suit different aircraft and different intentions. Deciding what you want before you raise the camera saves a lot of guesswork.
A hint of movement
At the cautious end, you keep a fairly high shutter speed and accept only a slight softening of the blade tips. The propeller is still clearly bladed, but the very ends are smeared into short curves. This is the safe option when the light is poor for slow shutter work, when the aircraft is moving fast and erratically, or when you simply need a high keeper rate. It is far better than a dead prop and it is forgiving of imperfect panning. Many photographers live here for fast, distant passes.
A clear arc
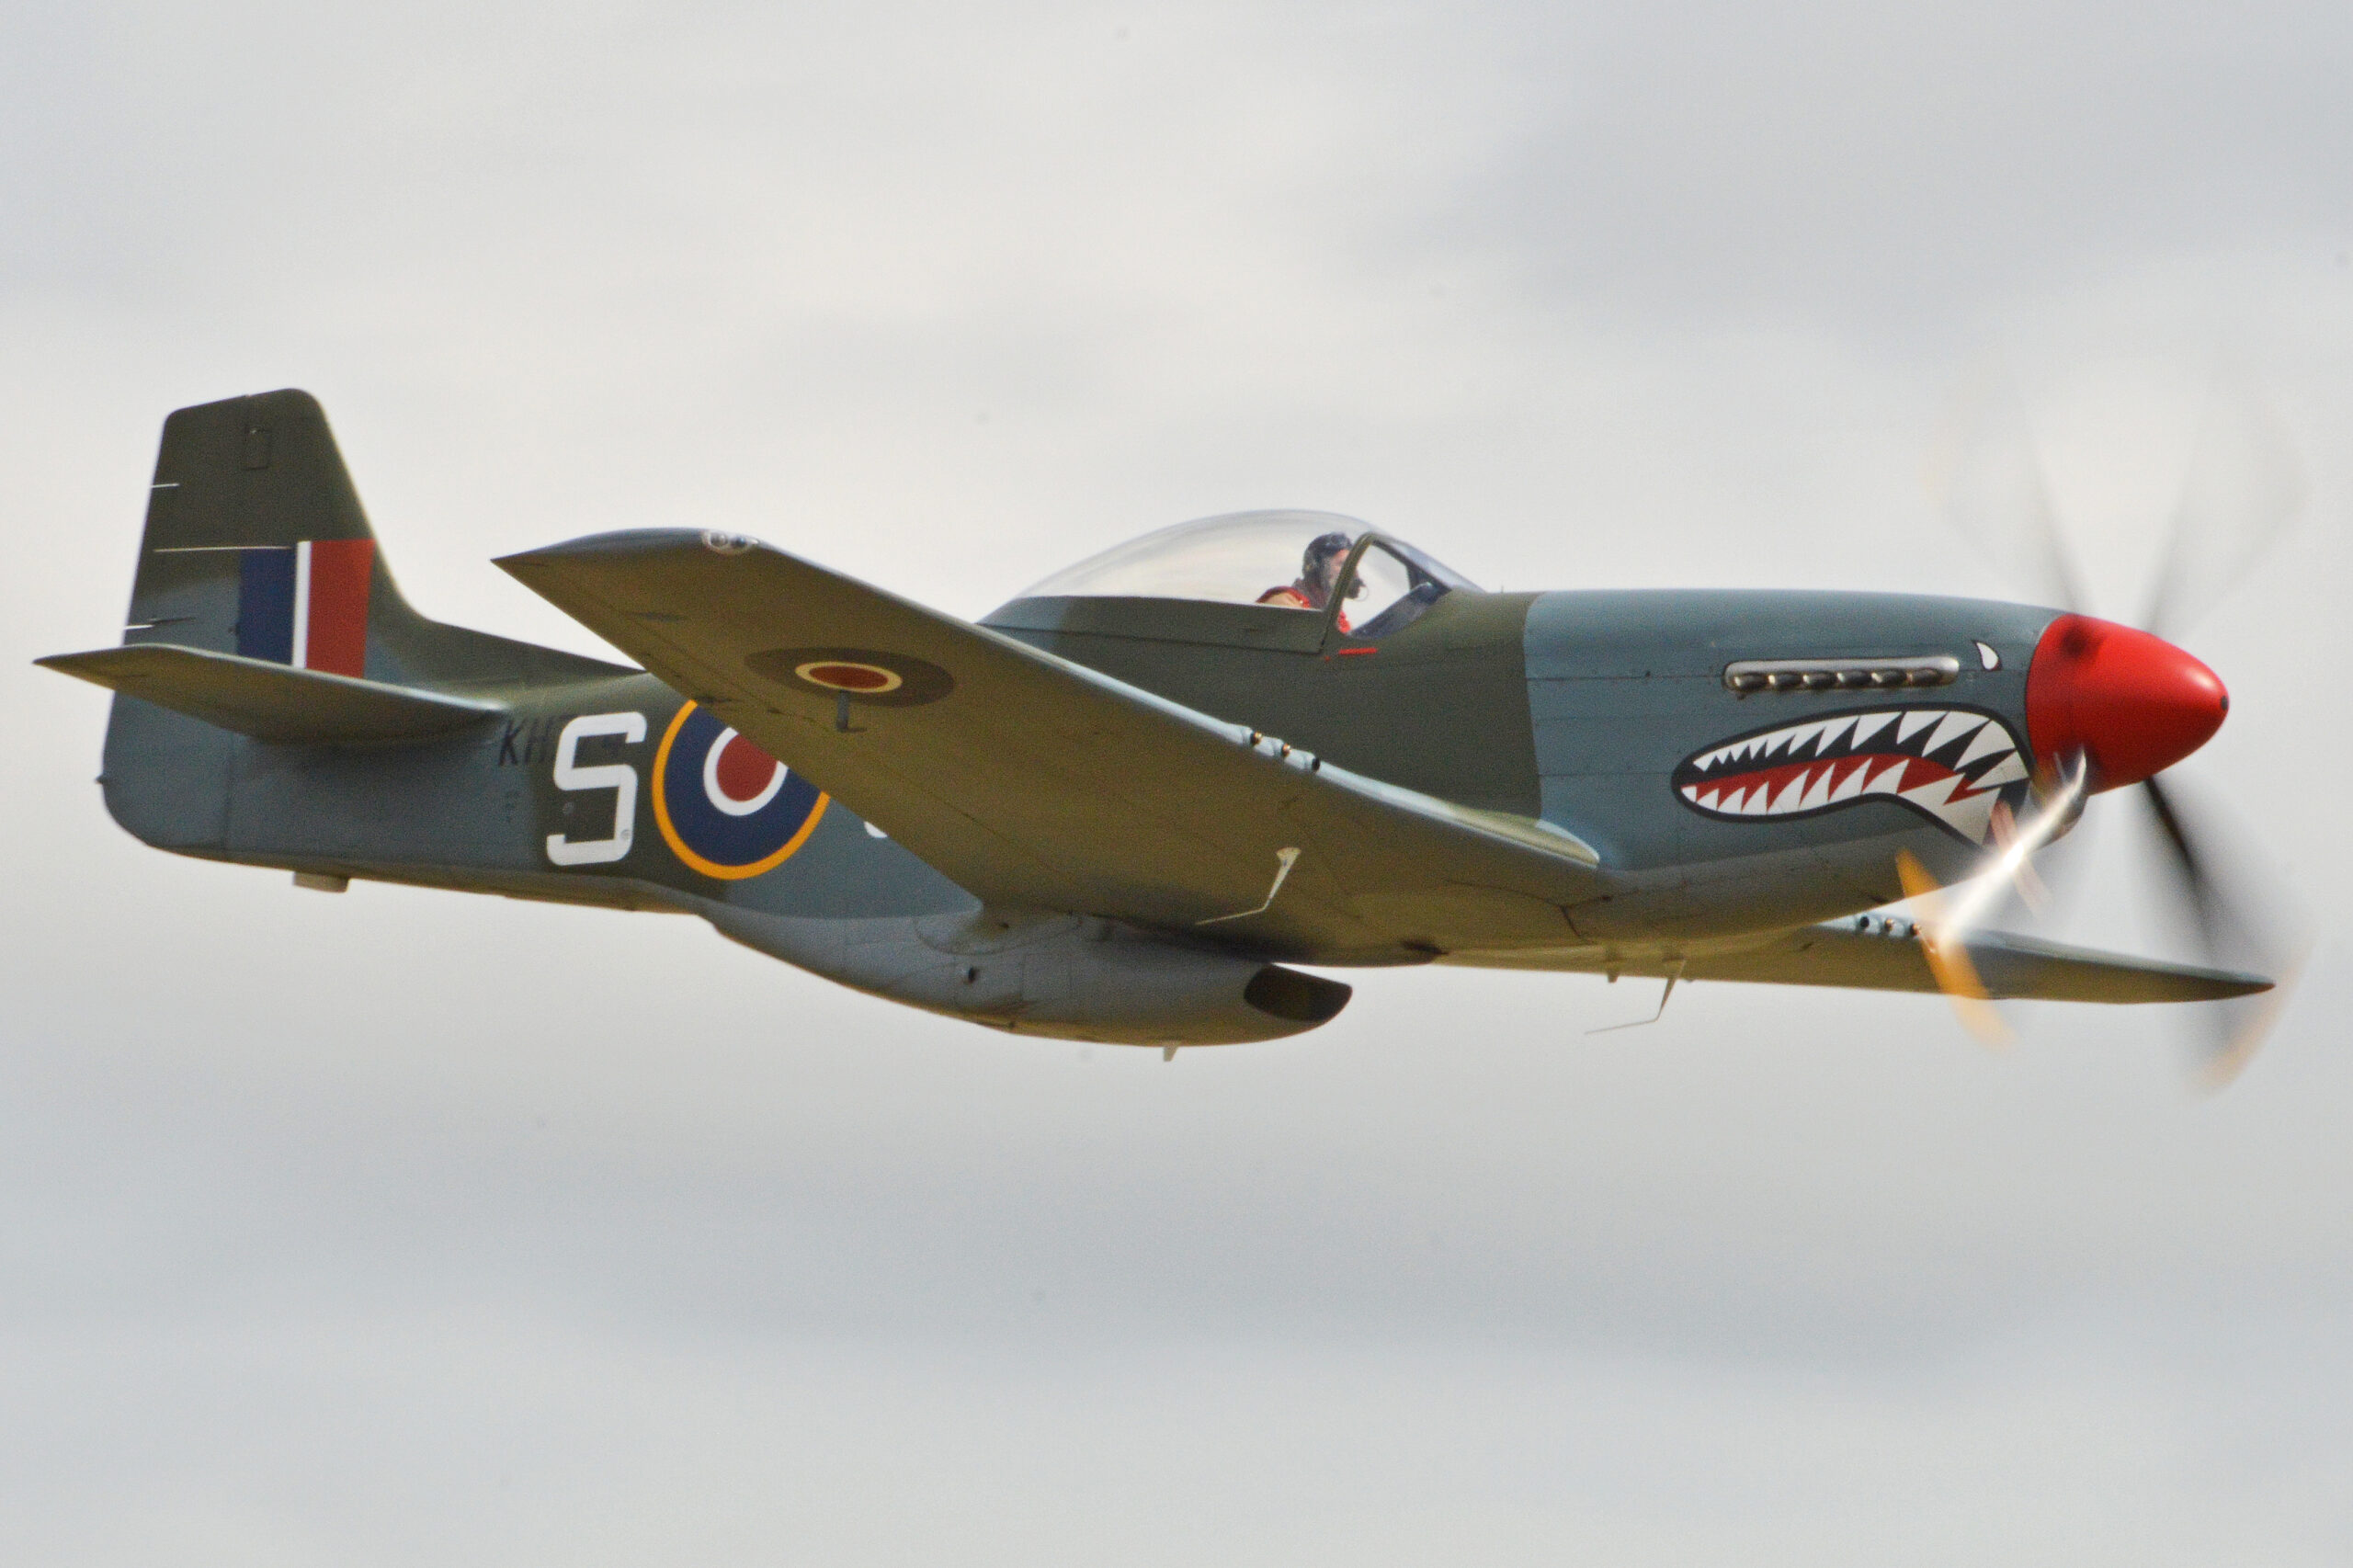
The middle of the range gives a clean, obvious arc. The individual blades are smeared into broad sweeping shapes, you can still see there is a propeller, but it now reads unmistakably as turning. This is the everyday sweet spot for piston warbirds and light aircraft. It looks natural, it survives moderate panning errors, and most viewers find it the most pleasing balance of detail and motion.
A full disc
At the demanding end is the full disc, where the blades merge completely into a single translucent circle, like a faint grey coin laid over the engine. This is the trophy shot for many aviation photographers and it is really striking when the aircraft body is also pin sharp. It requires the slowest shutter speeds, the steadiest panning and the most patience, and your keeper rate will fall. The reward is an image with real impact and a clear sign of technical control.
Propeller blur shutter speed, with a reference table
This is the heart of the guide. The figures below are practical starting points, not laws. Light, aircraft type, distance and your own steadiness all shift them. The right way to use this table is to set the suggested speed, take a few frames, zoom in on the back of the camera to check the blur and the body sharpness, then adjust. If the prop is too frozen, go slower. If the body is soft, go faster or pan more smoothly.
| Effect you want | Shutter speed range | Best for | Difficulty |
|---|---|---|---|
| Hint of tip blur | 1/400 to 1/640 | Fast or distant passes, poor light, high keeper rate needed | Easy |
| Light arc | 1/320 | Light aircraft, fast piston passes, learners building confidence | Easy |
| Clear, natural arc | 1/160 to 1/250 | Piston warbirds, the everyday all-round choice | Moderate |
| Strong arc, near disc | 1/100 to 1/125 | Warbird topside and banking passes, confident panning | Harder |
| Full disc | 1/80 to 1/100 | The trophy shot, slower passes, steady technique | Very hard |
| Turboprop movement | 1/80 to 1/160 | C-130, Dash 8, ATR and similar slow turning props | Harder |
| Helicopter rotor disc | 1/60 to 1/100 | Rotor blur on hovering or slow helicopters | Hardest |
A few notes on reading this. The piston warbird range of 1/160 to 1/250 is where you should start if you are unsure, because it works across the widest set of aircraft and is achievable with reasonable panning. The turboprop range looks slower than you might expect relative to the blur achieved, and that is the constant low propeller speed at work: a C-130 at 1,020 rpm simply needs more time to show the same movement. The helicopter figures are there because people often ask in the same breath, and the principle is identical, just pushed further because rotor speed is lower again.
Shutter priority mode, marked S or Tv depending on your camera, is the natural home for this work. You dial the shutter speed, the camera handles aperture, and you adjust exposure compensation as needed. Many experienced shooters use manual with auto ISO instead, setting shutter and aperture and letting ISO float, which gives more control over depth of field. Either works. What matters is that you own the shutter speed and it does not drift upward in bright light.
Matching shutter speed to the aircraft type
Because propeller speed varies so much, it pays to think in categories rather than chasing a single number.
Piston warbirds
Spitfires, Mustangs, Hurricanes, Corsairs and the like sit in the comfortable middle. Their propellers turn fast enough that a clear arc appears at 1/200 to 1/250 without too much difficulty, and a full disc is realistic at 1/80 to 1/125 on a steady pass. These are the aircraft most people learn prop blur on, partly because they are common at UK shows and partly because the rotation speed is forgiving. Start at 1/200 and push slower as your panning improves. If you want to read more about handling the warbird category specifically, our history of the Supermarine Spitfire gives useful context on the aircraft you are most likely to be tracking.
Light aircraft and trainers
Cessnas, Pipers, Tiger Moths, Chipmunks and similar often have smaller two-bladed propellers turning quickly. They blur readily, so you can sometimes stay a touch faster, around 1/250 to 1/320, and still get a respectable arc. The two-blade look means the partly-blurred stage can appear thin, so if you want a fuller disc you will need to commit to 1/100 or slower.
Turboprops
This is where people come unstuck. The C-130 Hercules, the Dash 8, the ATR series, the A400M and military trainers like the Tucano and Texan all hold their propellers at a constant governed speed however hard the engines are working. The big transports turn slowly, while trainer propellers spin rather faster, but none of them speeds up on a fast pass the way you might expect. Photograph the big types at 1/500 and the blades look almost stopped. You need to drop to 1/100 to 1/160 to show convincing movement, and slower for a full disc. The upside is that turboprops are often big and stately, flying steady passes, which makes slow shutter panning more achievable than it is on a twitchy fighter.
Multi-engine and bombers
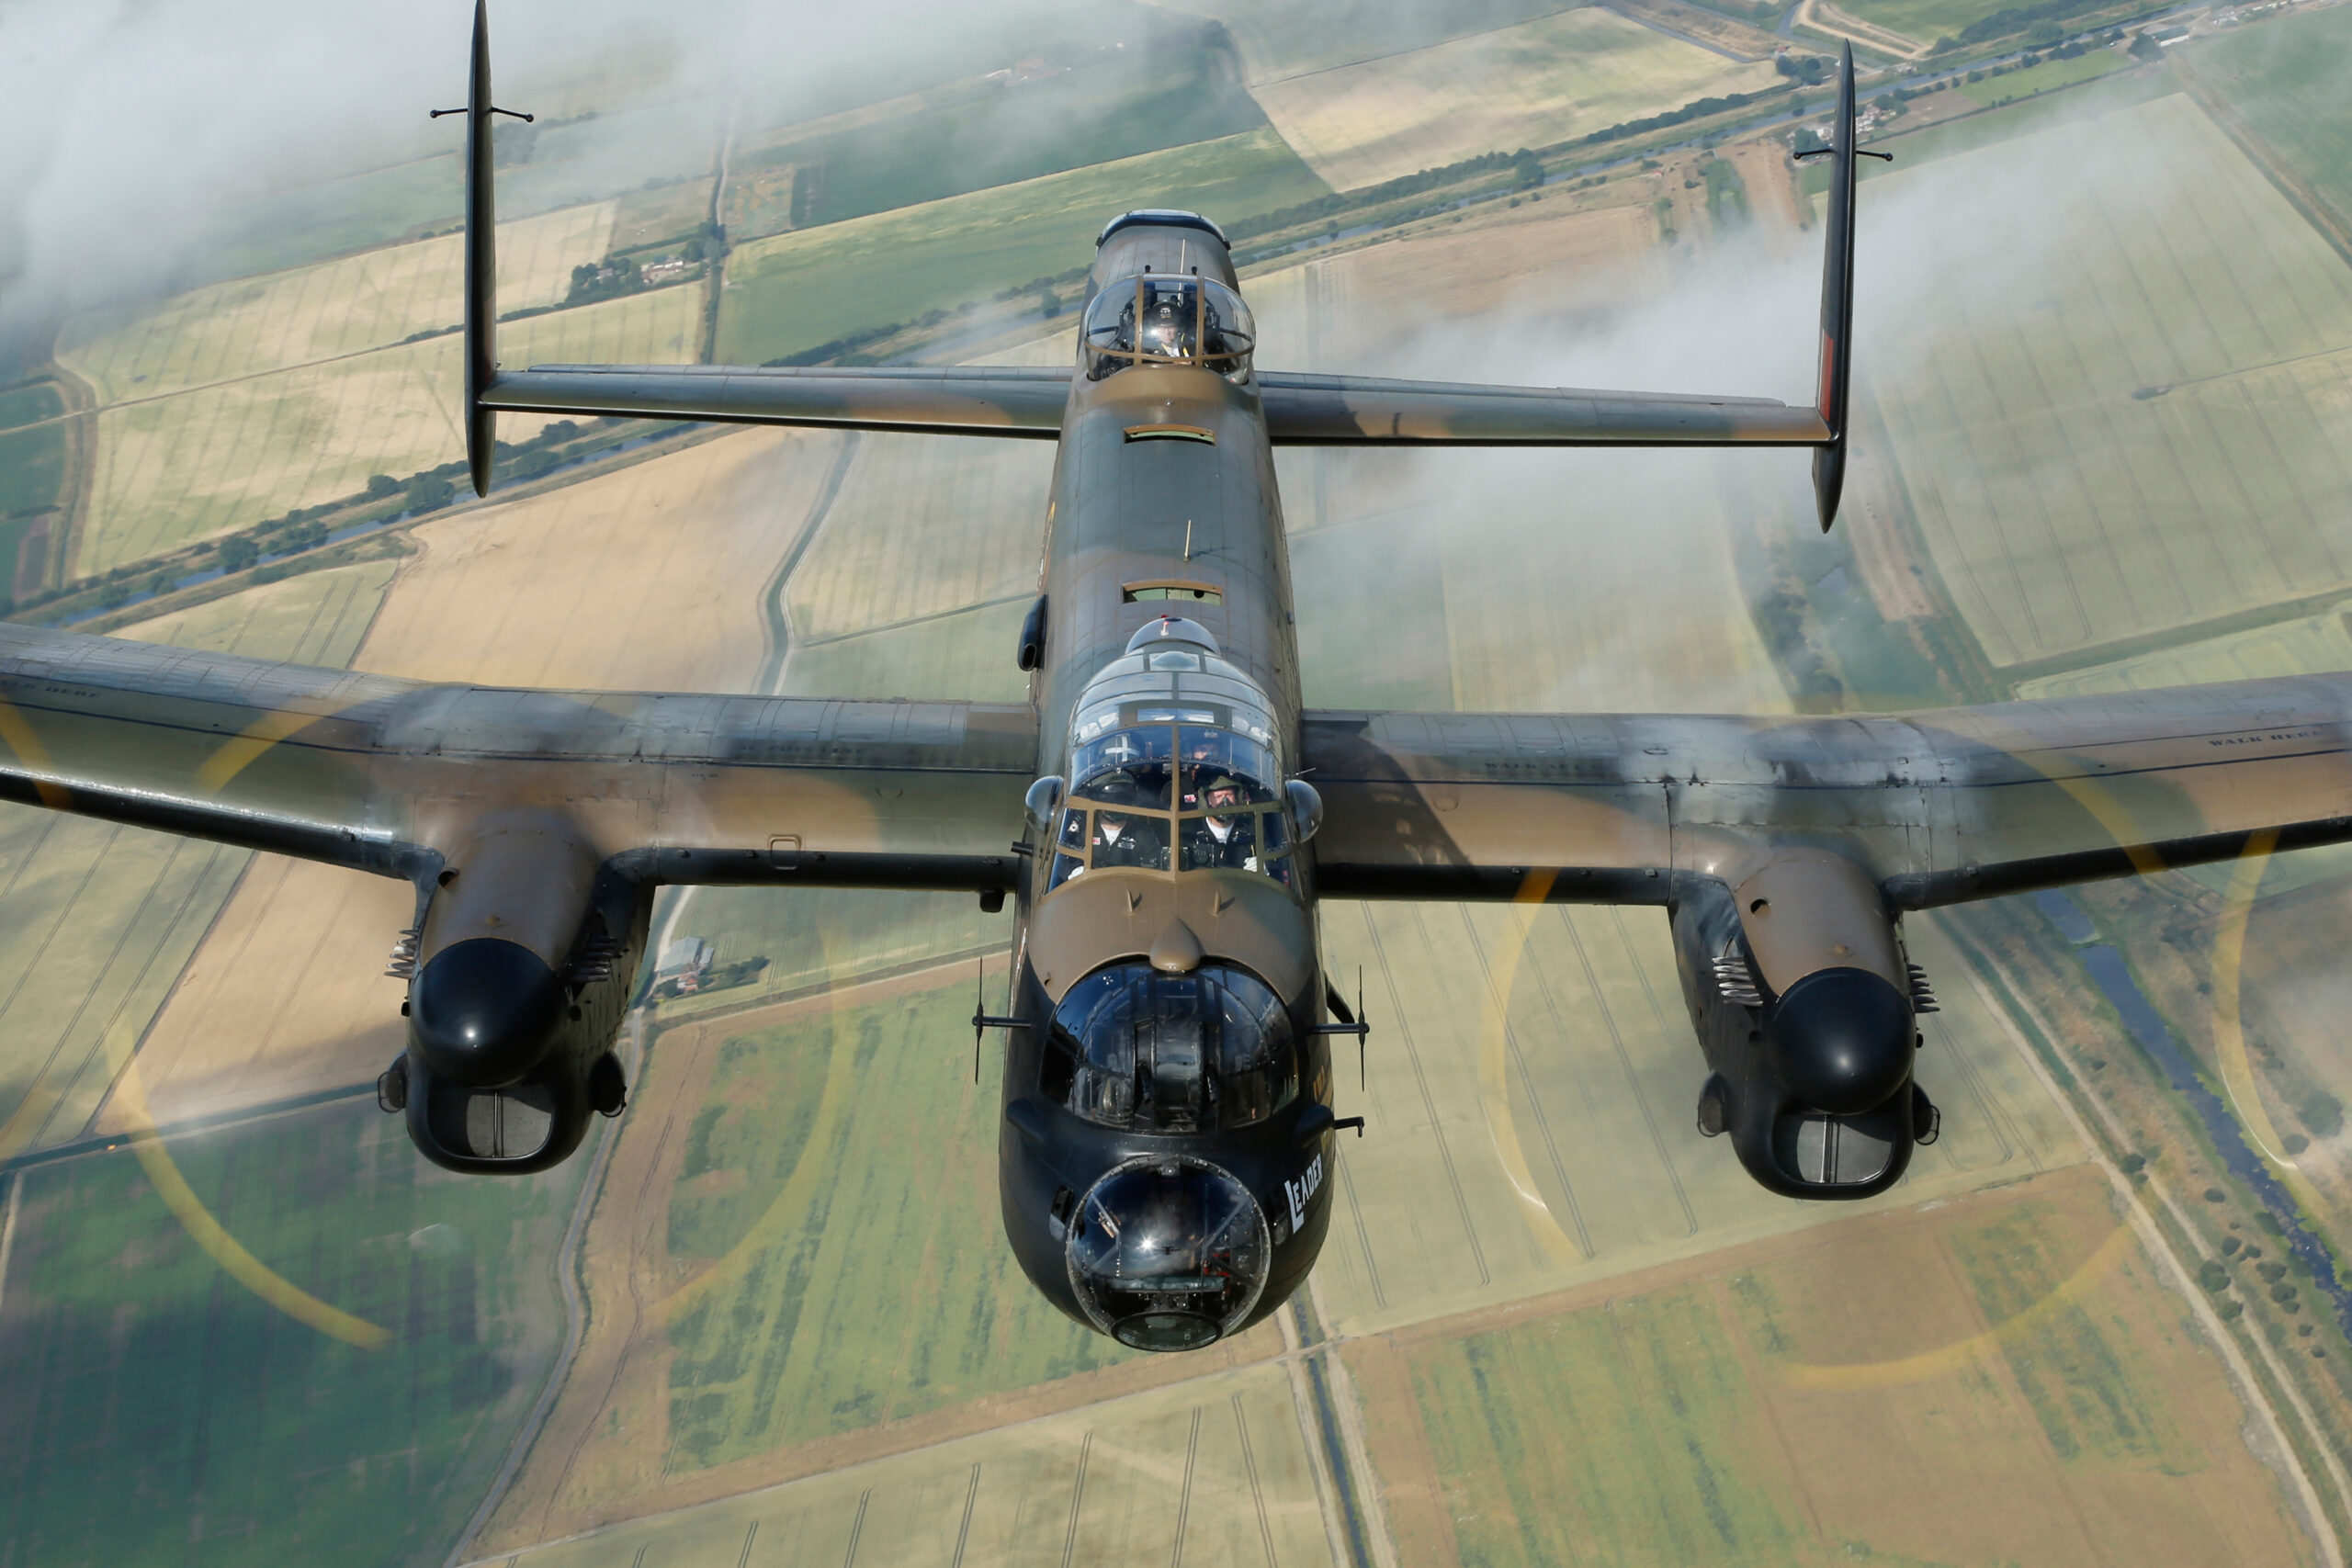
A Lancaster, a B-17 or a Dakota gives you several propellers to keep alive at once, and they must all blur consistently or the eye is drawn to the odd one out. There is no special trick beyond choosing a shutter speed that blurs the slowest-turning of them and keeping your pan dead level so all the discs sit cleanly. Around 1/125 to 1/200 is a sensible starting point for multi-engine piston aircraft.
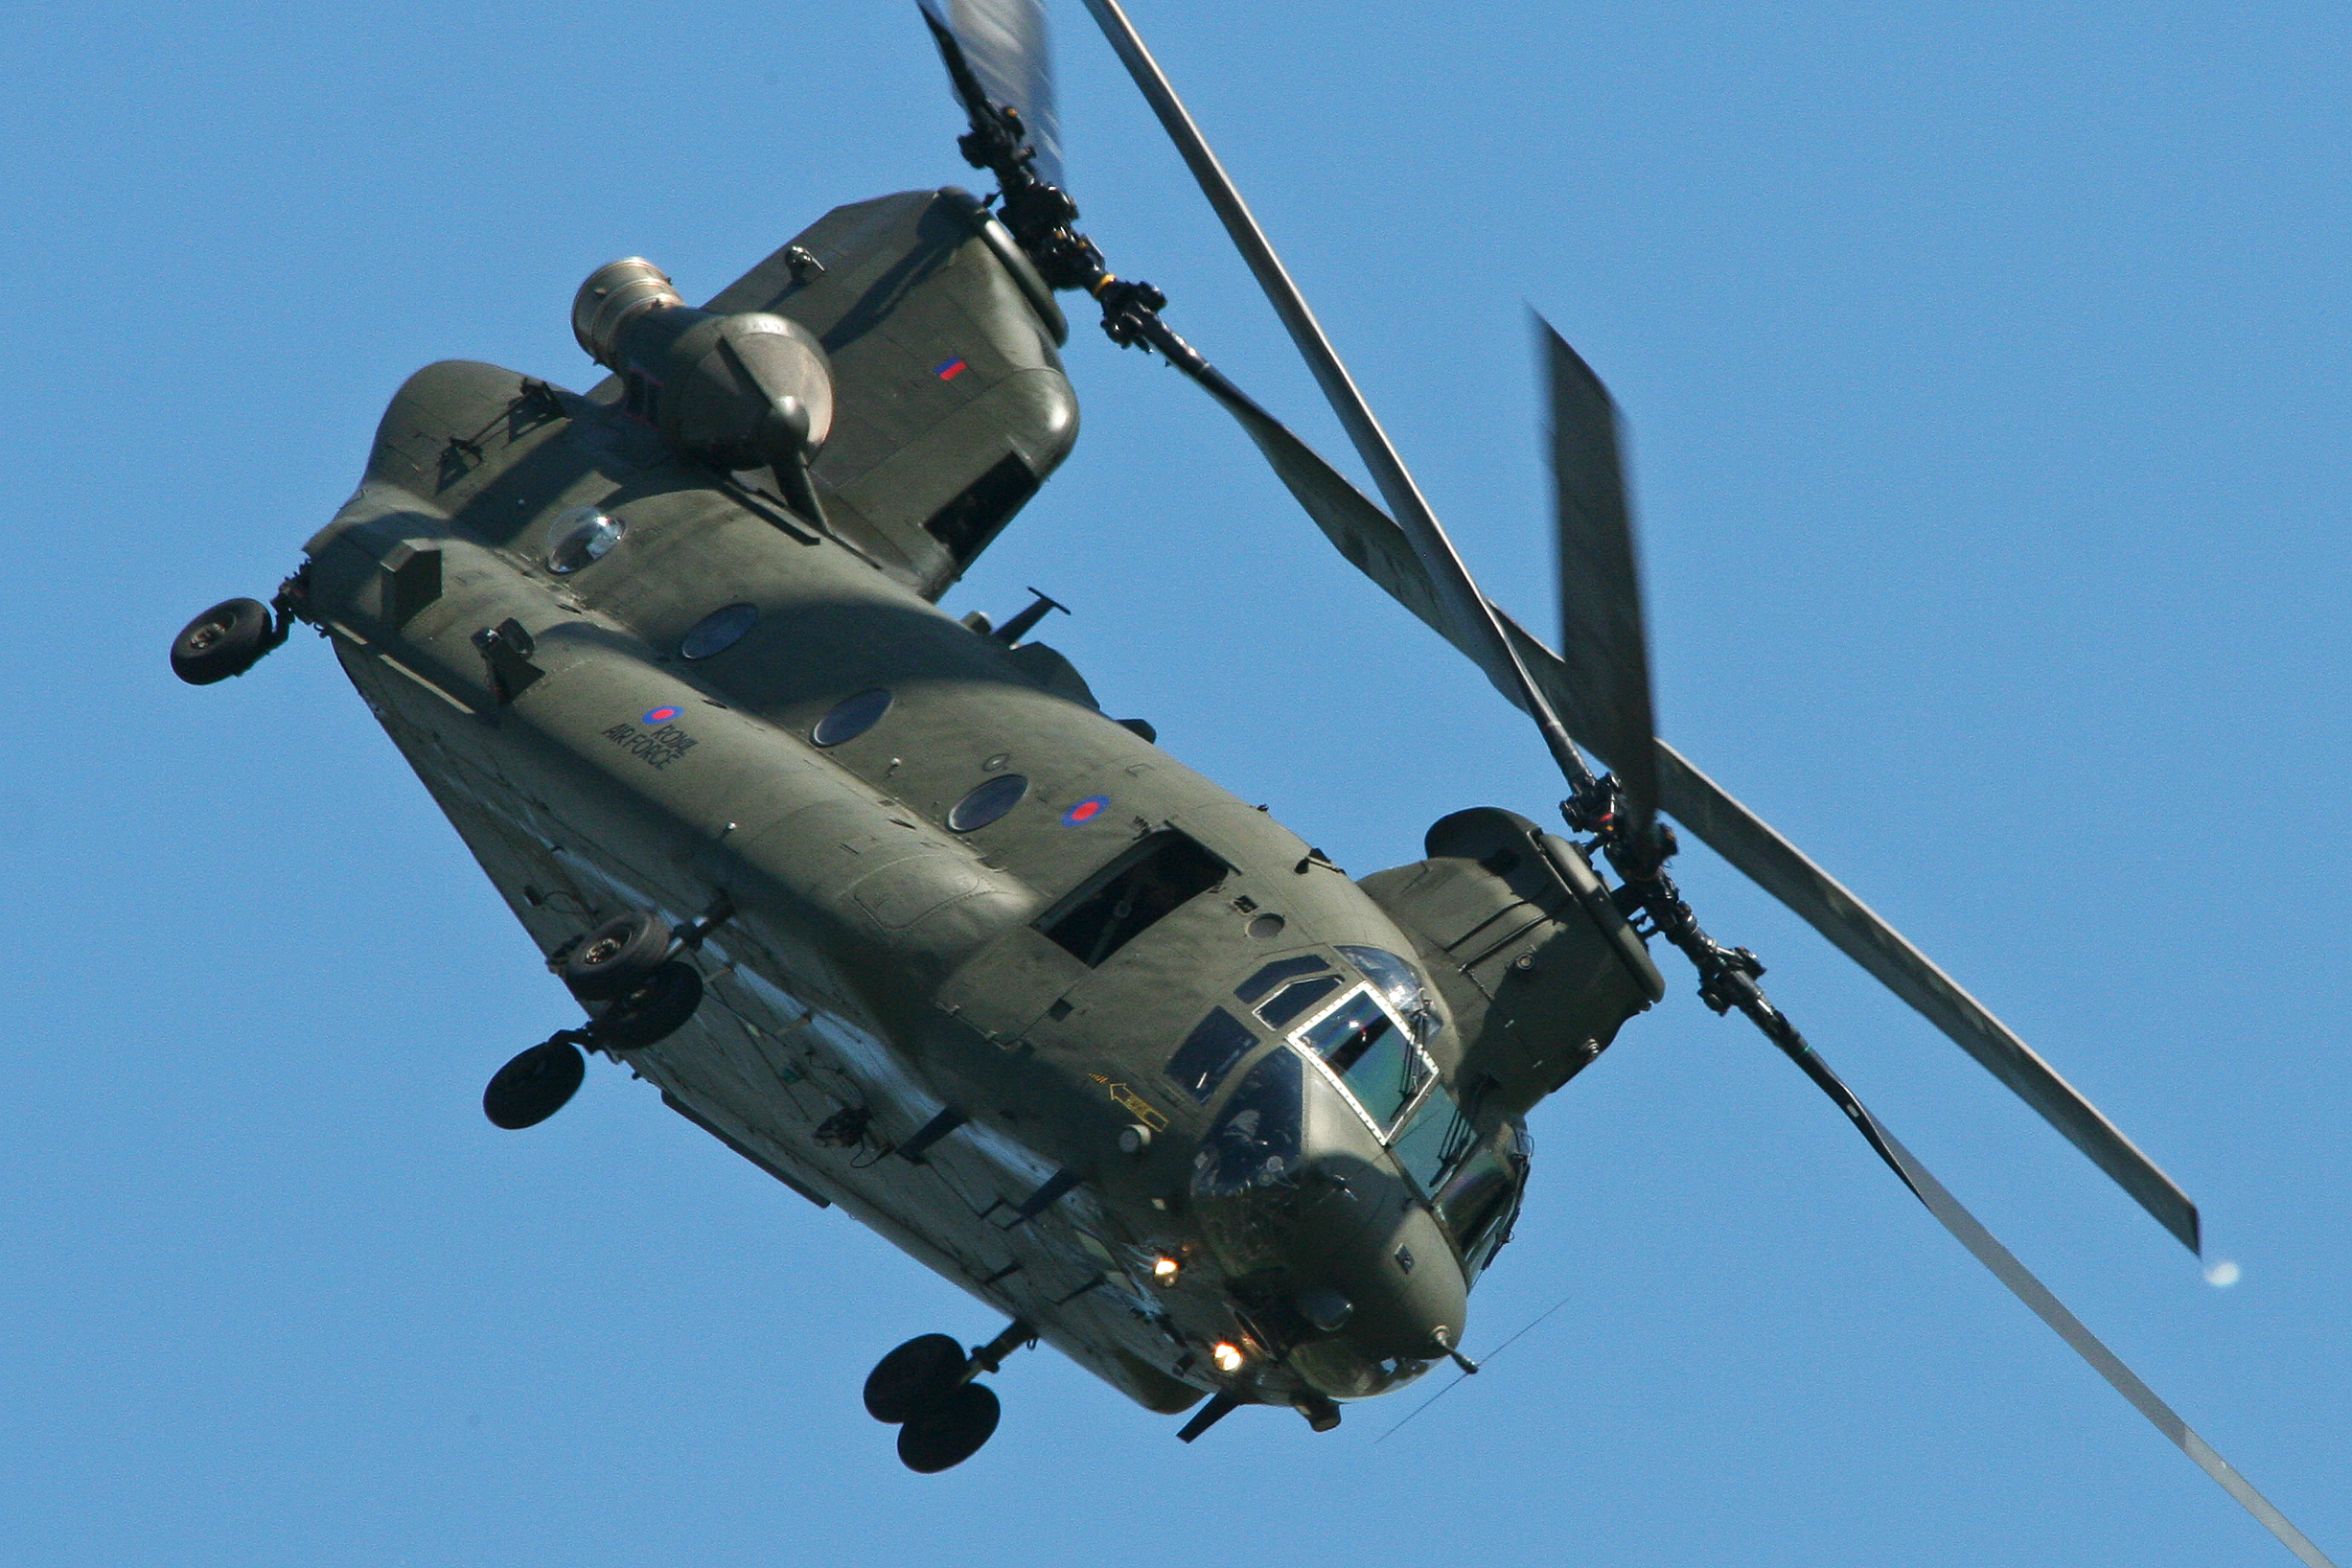
Helicopters
Not propellers, but they come up constantly. The main rotor turns far slower than any propeller, so you need 1/125 for clear movement and 1/100 down to 1/60 for a full rotor disc. The tail rotor is faster and will blur at a higher speed. These are among the hardest shots in the genre because the shutter speed is so low, and they reward a monopod or very disciplined handholding. There is more detail on tracking rotor craft in our guide to airshow camera settings and autofocus.
The exposure problem: shooting slow in bright light
Here is the catch nobody warns beginners about. A sunny airshow day is bright, and a slow shutter speed lets in a lot of light. Set 1/125 at midday in June and a normal lens, even at a small aperture and base ISO, can run out of room and overexpose. This is the single biggest practical barrier to prop blur, and it has clean solutions.
Start with ISO and aperture
Drop to your camera’s lowest native ISO, usually 100 or sometimes 64. Do not use extended low settings like ISO 50 if your camera offers them, because they often clip highlights and reduce dynamic range. Then close the aperture. Moving from f/5.6 to f/8 or f/11 buys you one to two stops and also deepens depth of field, which helps keep the whole aircraft sharp. Be wary of going beyond f/11 to f/16 on most lenses, because diffraction begins to soften the image and you lose the very sharpness you are working to protect.
Reach for filters when you run out of room
When base ISO and a small aperture still leave you overexposed, a filter is the answer. A neutral density filter reduces the light reaching the sensor without changing colour, letting you keep a slow shutter speed in bright sun. A three-stop ND is a useful all-rounder for prop work, and a four to six-stop ND covers the brightest days. Variable ND filters are convenient because you can dial the strength to suit, though the cheapest ones can produce uneven darkening, so buy carefully.
A circular polariser is the prop photographer’s secret weapon. It cuts roughly one and a half to two stops of light, which is often exactly the amount you need, and at the same time it deepens blue skies, lifts the contrast of clouds and cuts glare off canopies and polished metal. On a sunny day with the sun to one side, a polariser can transform both your exposure and your sky in one move. The trade-off is that it darkens unevenly across a very wide angle and reduces light, so it is less suited to dull days.
Expose for the highlights and check the histogram
Slow shutter work in bright light lives close to overexposure, so protect your highlights. Use the histogram rather than judging brightness on the rear screen, which lies in sunshine. If the right edge is clipping, the brightest parts of the aircraft and the prop arc are losing detail you cannot recover. Pull in a third to two thirds of a stop of negative exposure compensation if you are shooting a light or polished aircraft against a bright sky. Highlight alerts, the blinking warning on the playback image, are your friend here.
Panning while keeping the prop blurred
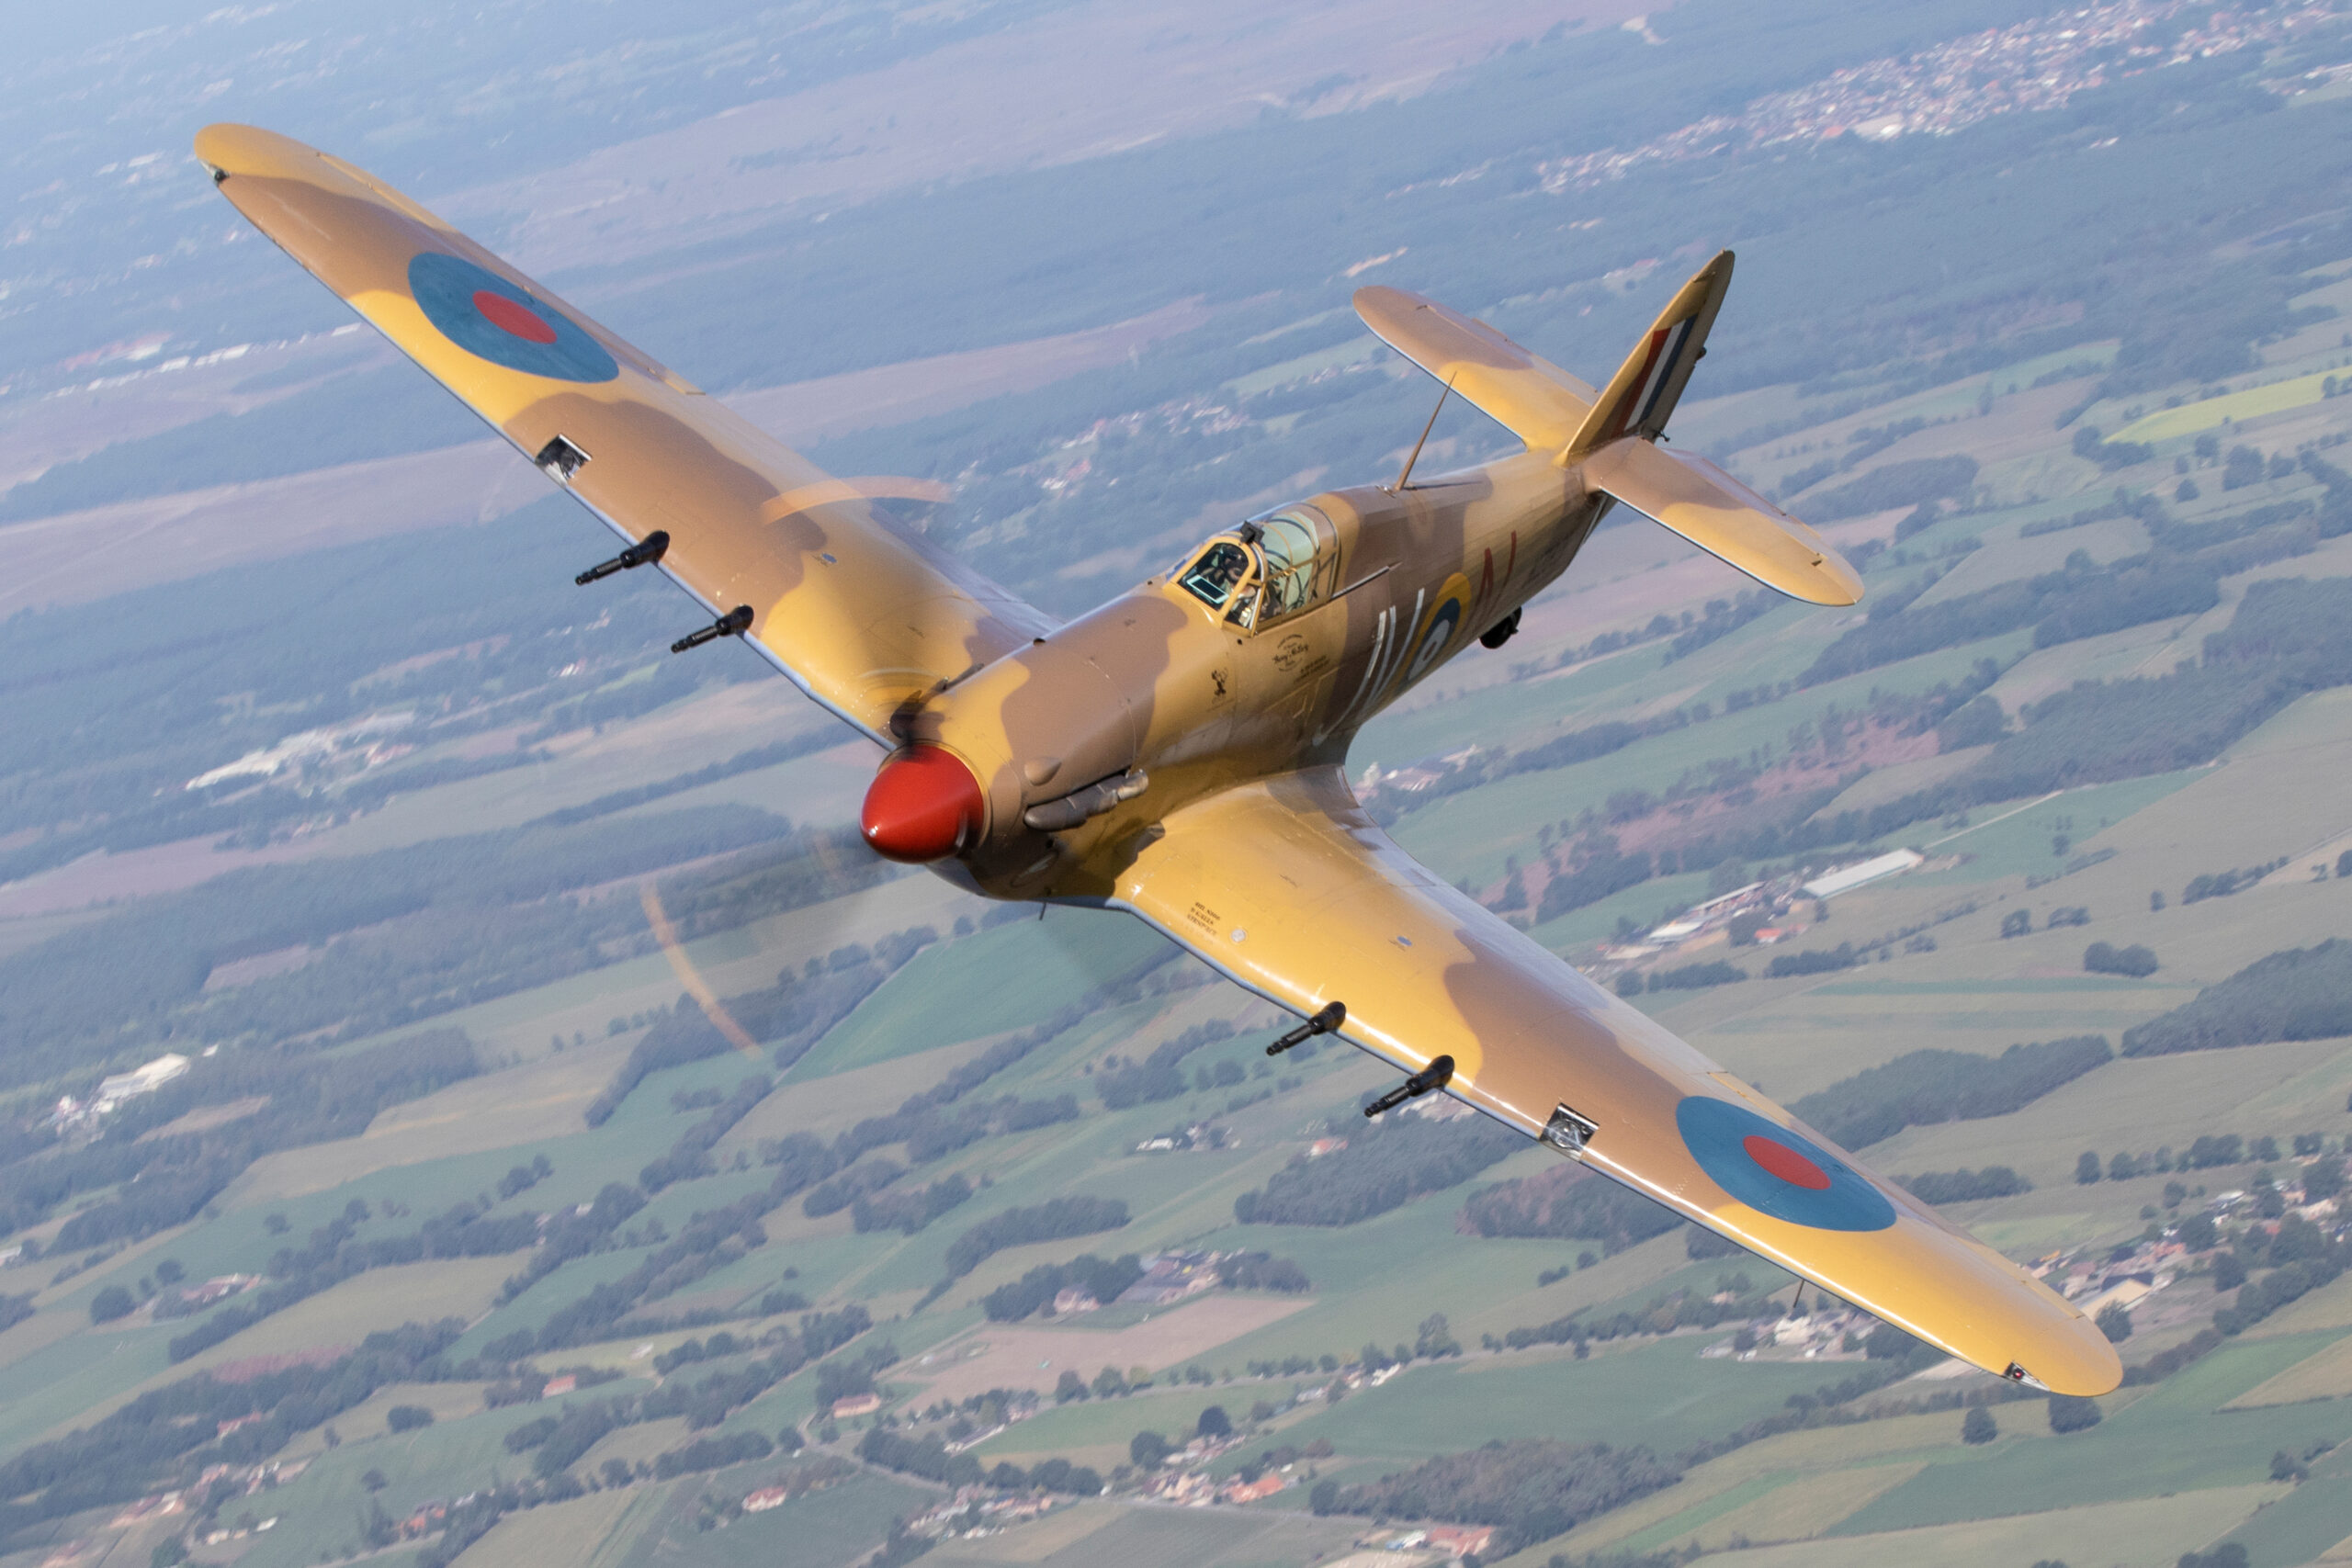
This is the part that separates people who understand the theory from people who can actually do it. At 1/125 or slower, any movement of the camera relative to the aircraft body shows up as blur on the body, not just the propeller. The whole technique is about moving the camera so smoothly that the body stays sharp while the propeller, which is moving relative to the body, blurs on its own.
Stance and grip
Plant your feet shoulder width apart and turn from the hips, not the arms. Think of yourself as a tripod head: the legs are fixed, the upper body rotates. Tuck your elbows in against your ribs to brace the camera, support the lens from underneath with your left hand, and keep the camera firmly to your eye. A loose, arms-out stance is the enemy of slow shutter sharpness.
Pick the aircraft up early and follow through
Acquire the aircraft well before the point you want to shoot, and start tracking it smoothly while it is still approaching. Match your rotation speed to its apparent movement so it sits still in the viewfinder. Squeeze the shutter without stabbing at it, which jerks the camera, and crucially keep panning after the shutter fires. Following through, exactly like a golf swing, keeps the motion smooth across the frames and stops the deceleration that softens the body on the last shot of a burst.
The two effects work together
The pleasing thing about prop work is that panning and prop blur reinforce each other. A panned shot at 1/200 blurs the background to convey speed, and the same slow shutter speed produces the propeller arc at no extra cost. You are getting two motion effects from one setting. The aircraft body stays sharp because you are tracking it, the background streaks because you are not, and the propeller blurs because it is turning relative to the body. When it all comes together, a panned prop shot is one of the most satisfying images in the genre. For the broader mechanics of tracking aircraft across the sky, our fast jet panning guide covers the movement in more depth, and most of it transfers directly to propeller aircraft.
Autofocus and continuous shooting for prop shots
Slow shutter speeds do not change the autofocus logic much, but a few choices make a clear difference to your hit rate.
Use continuous autofocus and a burst
Set continuous autofocus, called AF-C on Nikon and Sony or Servo AF (AI Servo on DSLRs) on Canon, so the camera keeps refocusing as the aircraft moves toward or away from you. Shoot in bursts rather than single frames. At slow shutter speeds your keeper rate falls, because any given frame might catch a small panning wobble, so a burst of six or eight gives you several chances to land one where the body is sharp and the prop arc is clean. Do not spray endlessly, but do accept that prop blur is a numbers game and a burst is how you win it.
Focus area and subject detection
A small or medium dynamic-area or zone focus point works well for propeller aircraft, large enough to stay on the moving subject but not so large that it grabs the background. Modern cameras with aircraft subject detection are a real help, locking onto the airframe and often the cockpit, which frees you to concentrate entirely on smooth panning. If your camera has it, turn it on for propeller work. If it hunts on a busy background, fall back to a manually placed zone on the nose or cockpit.
Back button focus
Separating focus from the shutter, by assigning autofocus to a rear button, helps on prop passes because you can lock focus and concentrate on the timing and smoothness of the pan without the camera refocusing at the moment of release. It is not essential, but many aviation photographers find it steadies their slow shutter work. If you have never tried it, practise at home before a show rather than learning it on the flight line.
Image stabilisation and how to set it
At the slow shutter speeds prop blur needs, camera shake on the aircraft body becomes a real risk, so stabilisation earns its keep. Leave it switched on for handheld prop work. The question is which mode.
Many long lenses offer a panning-specific stabilisation mode, often labelled Mode 2, which only corrects vertical movement and ignores the horizontal motion of your pan. This is exactly what you want, because a normal stabilisation mode can fight your deliberate horizontal sweep and produce an odd stutter. If your lens or camera has a panning mode, use it for prop blur. In-body stabilisation on mirrorless cameras usually detects panning automatically, but it is worth checking your menus for a dedicated setting.
One caution: stabilisation corrects camera shake, not subject movement, and it cannot rescue a jerky pan. It buys you perhaps two or three stops of steadiness on the body, which is valuable at 1/100, but smooth technique still does the heavy lifting. Treat stabilisation as insurance on top of good panning, not a replacement for it.
Updated July 2026: stabilisation modes on current cameras
Updated July 2026. The advice above maps onto current gear as follows. Canon’s stabilised telephotos carry three switch positions: Mode 1 corrects everything and suits static subjects, Mode 2 detects the direction of your pan automatically and corrects only the perpendicular axis, and Mode 3 applies correction during the exposure alone, which suits erratic subjects because the finder image is left untouched while you track. Nikon’s Z bodies offer Normal and Sport vibration reduction, and Nikon’s own documentation recommends Sport for panning; in both modes the system corrects only motion that is not part of the pan. OM System’s S-IS Auto goes a step further and watches for a pan, suspending correction on that axis without being told. Coordinated in-body and lens stabilisation on current mirrorless systems is quoted at seven or eight stops, but those figures describe static handholding. On a pan, smooth technique still does the work, and stabilisation remains insurance on the vertical axis.
Full settings recipes for every kind of pass
These are complete starting points you can dial in and adjust. They assume a bright but not harsh day. In flatter light, open the aperture or raise ISO a little. Always confirm the result on the back of the camera and tune from there.
Recipe 1: Safe piston warbird arc
Shutter priority, 1/250 second. ISO 100. Let the camera pick the aperture, which will usually land around f/8 to f/11 in bright sun. Continuous autofocus, medium zone, aircraft detection on. Continuous burst. This is your bank-the-keepers setting for Spitfires, Mustangs and the like. The arc is clear, the body is easy to keep sharp, and you will come home with usable frames.
Recipe 2: Strong warbird arc, pushing for the disc
Manual with auto ISO, 1/125 second, f/9. ISO floats but will sit at base in bright light. Polariser fitted to control exposure and deepen the sky. Panning stabilisation mode. Burst of six to eight per pass. Expect to throw away more frames, but the propeller is now close to a full disc and the look is far stronger.
Recipe 3: Turboprop, real movement
Shutter priority, 1/125 second. ISO 100, three-stop ND filter if the exposure runs out of room. Continuous autofocus. A C-130, Dakota or Dash 8 flies steady passes, so commit to the slow speed and pan smoothly. At 1/125 a 1,020 rpm propeller shows convincing arc rather than a frozen blade.
Recipe 4: Full disc trophy shot
Manual with auto ISO, 1/80 second, f/11. Polariser or ND as needed. Panning mode on. This is the demanding one. Take it on a steady, predictable pass rather than a fast topside, brace hard, follow through, and shoot generous bursts. One sharp frame from a pass is a success at this speed.
Recipe 5: Helicopter rotor disc
Shutter priority, 1/80 second. ISO 100, ND filter likely needed. Panning stabilisation. This pushes everything to the limit, so a monopod helps enormously. Aim for a hovering or slow-moving helicopter where the body movement is predictable, and accept a low keeper rate for a striking result.
| Recipe | Mode | Shutter | Aperture | ISO | Filter |
|---|---|---|---|---|---|
| Safe warbird arc | Shutter priority | 1/250 | Auto (f/8 to f/11) | 100 | None or polariser |
| Strong arc | Manual + auto ISO | 1/125 | f/9 | Floating | Polariser |
| Turboprop | Shutter priority | 1/125 | Auto | 100 | 3-stop ND |
| Full disc | Manual + auto ISO | 1/80 | f/11 | Floating | Polariser or ND |
| Helicopter | Shutter priority | 1/80 | Auto | 100 | ND |
Scenario by scenario: the shots you will actually get
An airshow or spotting day throws up the same handful of situations. Here is how to handle each for the best prop blur.
Taxiing and engine start
An aircraft taxiing with the engine running is a gift, because it is moving slowly and predictably and you can use very slow shutter speeds. This is the easiest place to get a full disc. Drop to 1/60 or even 1/40, pan gently with the aircraft, and the propeller will render as a beautiful translucent circle while the moving aircraft stays sharp. Engine start and run-up on static aircraft is similar, though a stationary aircraft means no panning, so brace hard and shoot at 1/60 to 1/80.
Takeoff and climb out
On takeoff the aircraft accelerates and the angles change quickly, but it is still relatively close and not yet at display speed. A clear arc at 1/200 is achievable, and you can push to 1/125 once it settles into the climb. Watch the background, because a cluttered airfield behind a climbing aircraft can pull your focus point off the subject.
Level flypass
The classic side-on pass is the bread and butter of prop photography. The aircraft tracks a predictable line, your pan is a smooth horizontal sweep, and 1/200 to 1/250 gives a reliable arc. This is where you build your keeper count before attempting anything slower. Keep the pan level so the prop disc sits cleanly and the horizon does not tilt.
Topside and banking passes
When a warbird banks toward you to show its upper surfaces, the prop disc faces you more directly and looks superb fully blurred. The movement is more complex because the aircraft is turning as well as travelling, so your pan must follow a curve. This is harder to keep sharp, so a slightly faster 1/160 to 1/200 hedges your bets while still giving a strong arc.
Head-on and topside crossing
A head-on approach foreshortens the aircraft and presents the propeller disc almost face on, which can look dramatic. The closing speed is high and focus is challenging, so this is one place to accept a faster shutter, around 1/320, and a lighter arc in exchange for a sharp frame. A frozen-looking prop is more forgivable head-on than side-on, but aim for at least some movement.
Formation and multi-ship
Display teams of propeller aircraft, or a bomber with its fighter escort, ask you to keep several propellers alive at once and the whole formation sharp. Choose a shutter speed that blurs the slowest propeller in the group, keep your pan dead level, and frame for the formation as a unit. For the wider craft of photographing aircraft flying together, our airshow photography tips cover composition and timing that apply directly here.
Common mistakes and how to fix them
The shutter speed crept up in auto mode
This is the classic. You left the camera in an automatic or program mode, the bright sky pushed the shutter to 1/2000, and every propeller is frozen. The fix is to take control: use shutter priority or manual and set the speed yourself so it cannot drift. If you must use an auto mode, set a shutter speed limit if your camera allows it.
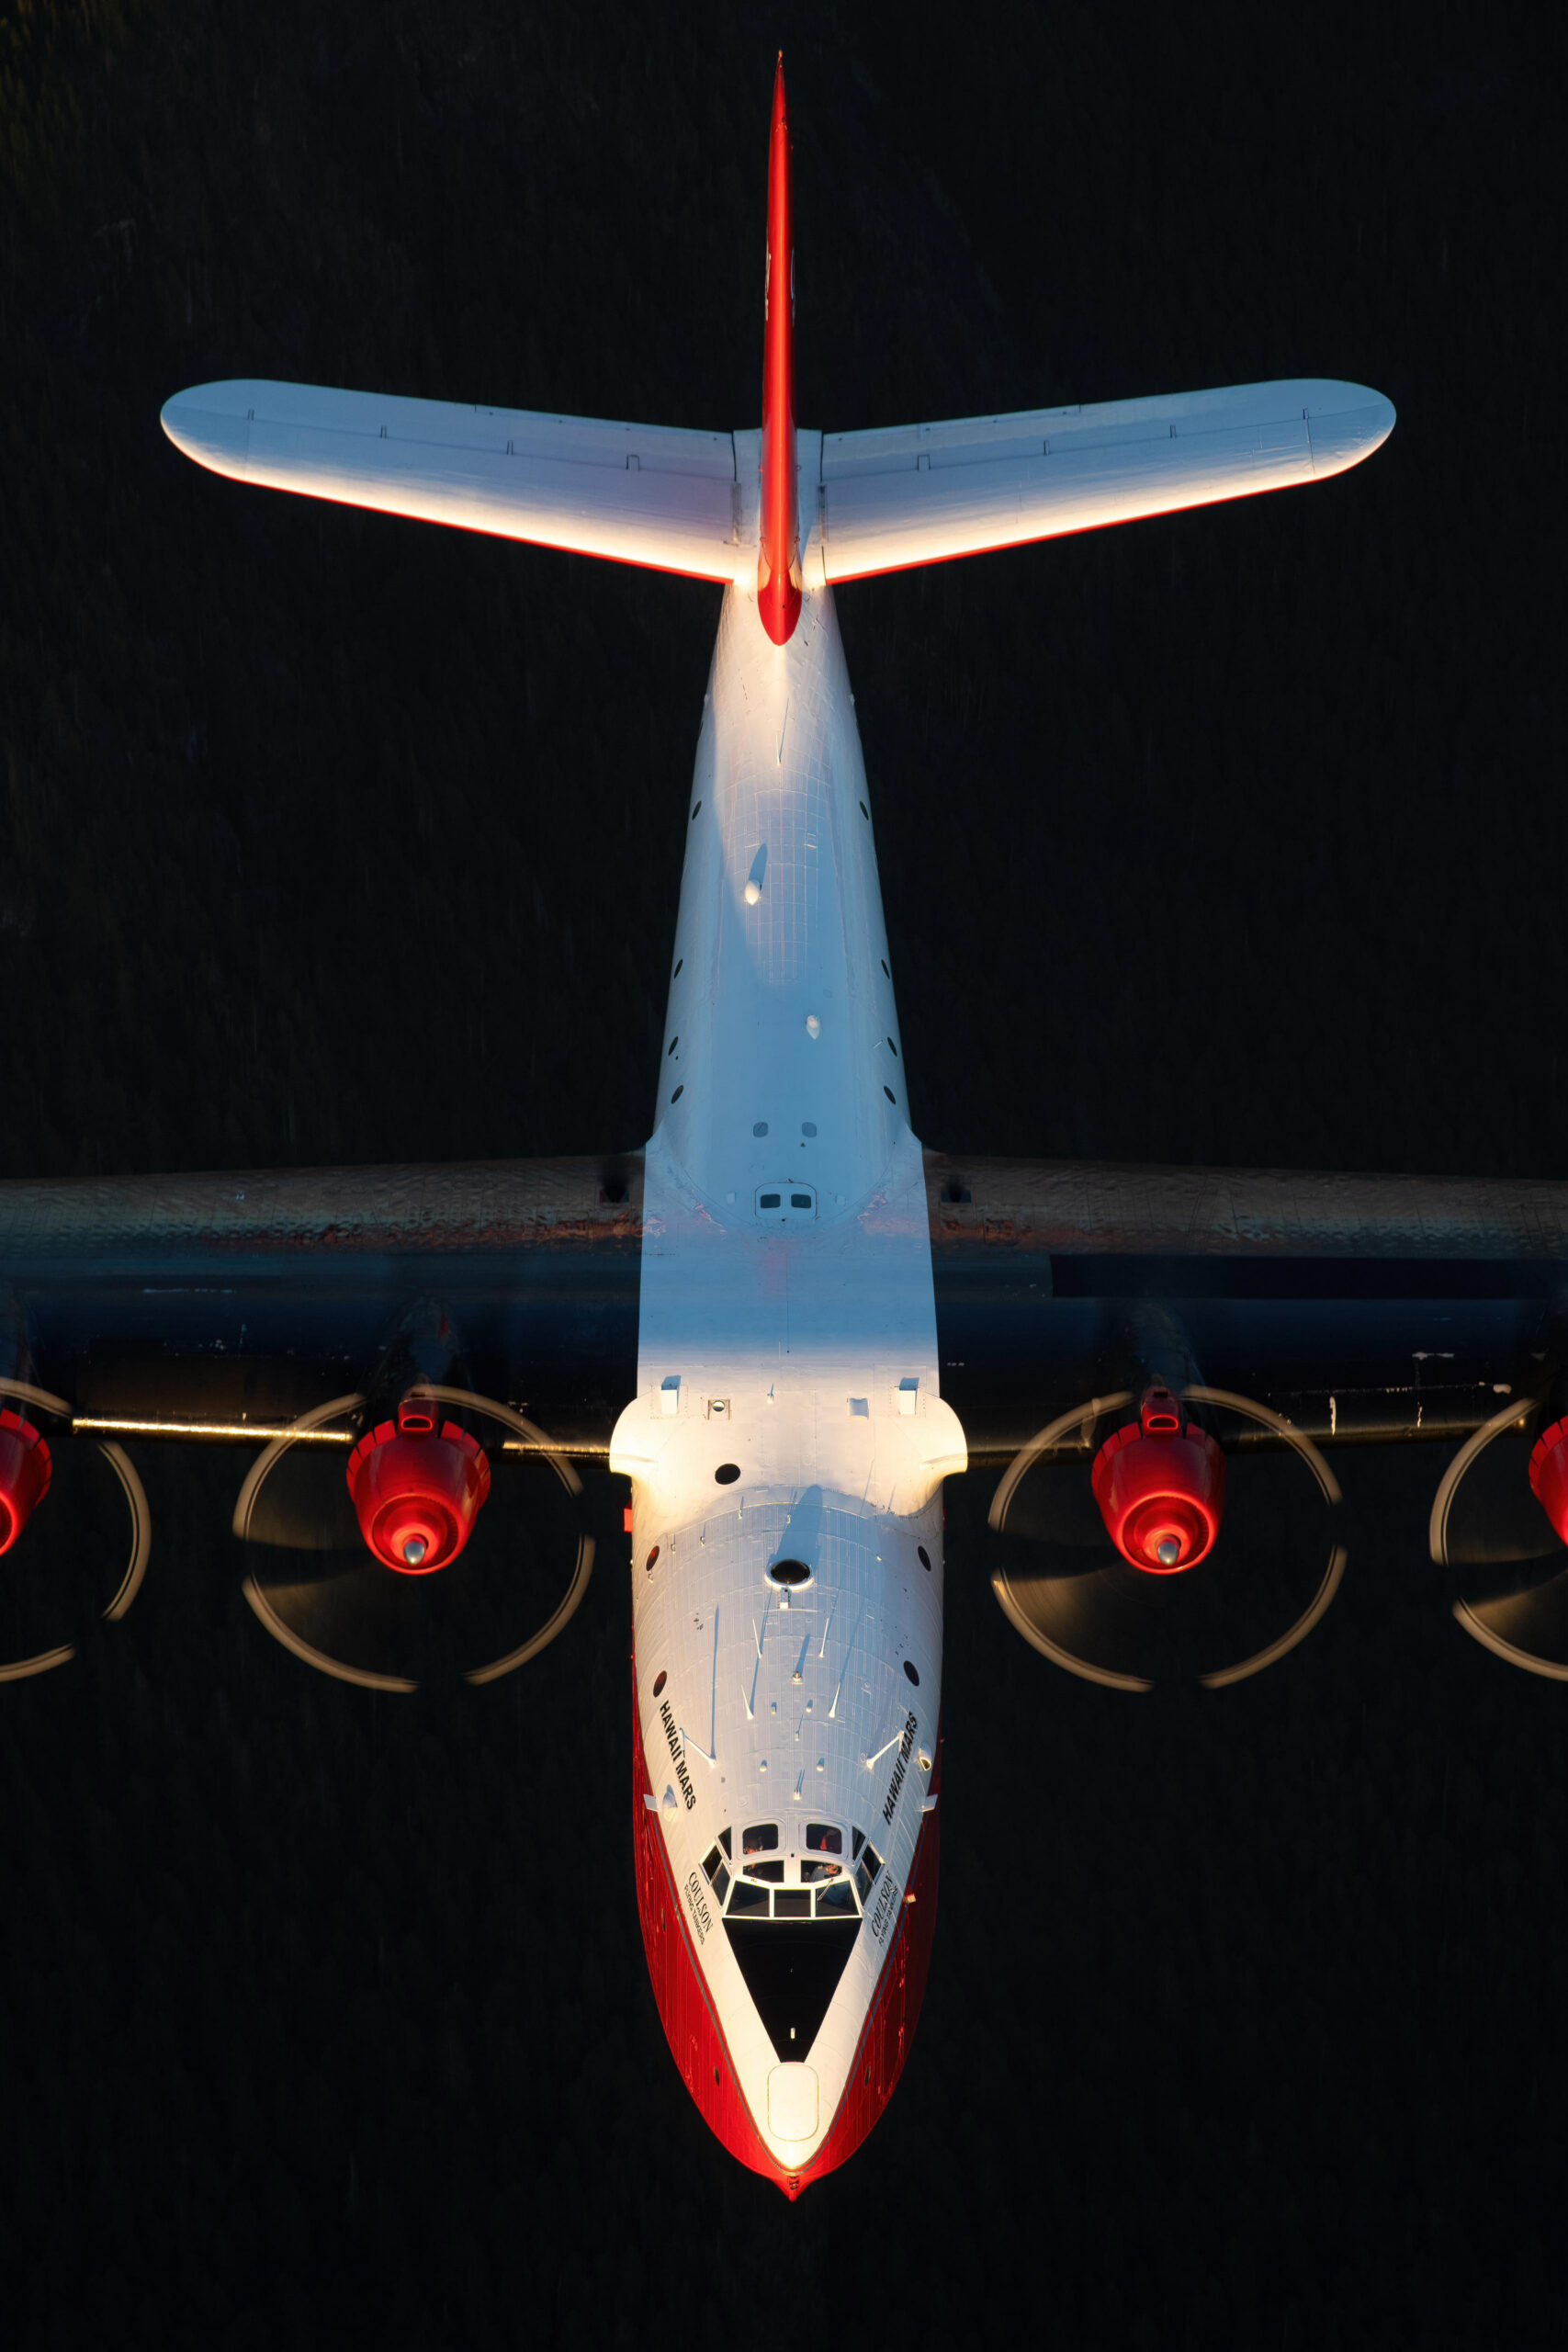
The body is soft, not just the prop
If the whole aircraft is blurred, your panning was not smooth or you stabbed the shutter. Slow down your sweep, brace your elbows, follow through, and shoot bursts so you catch the smooth frames. If it persists, back off the shutter speed a notch until your technique catches up, then push slower again.
Overexposed, washed-out frames
Slow shutter in bright light has blown the highlights. Drop to base ISO, close the aperture, and fit a polariser or ND. Check the histogram and dial in negative exposure compensation. Never trust the rear screen brightness in sunshine.
Only the tips are blurred, you wanted a disc
You are not slow enough. Each step down, from 1/250 to 1/200 to 1/160 to 1/125, adds visible blur. Keep dropping until the blades merge, accepting that the body gets harder to keep sharp. A full disc and 1/250 do not coexist.
One propeller is sharp on a multi-engine aircraft
Different propellers can be at slightly different rpm, or your pan tilted so one disc smeared and another did not. Choose a speed that blurs the slowest, keep the pan perfectly level, and shoot enough frames to catch one where all the discs are even.
Rolling shutter has bent the blades
If a propeller looks like a strange curved scythe, your electronic shutter is reading the sensor too slowly for the fast blade movement. Switch to the mechanical shutter for prop work in daylight, which avoids the distortion.
How to practise and build a hit rate
Prop blur is a physical skill, and like any physical skill it improves with reps. You do not need an airshow to practise. Stand by a road and pan passing cars at 1/125, tracking smoothly and checking how many frames come out sharp. Cars are a near-perfect rehearsal for the panning motion, they are predictable, frequent and free, and the feedback is immediate. If you can keep a car sharp at 1/100 while the background streaks, you can keep a warbird sharp.
At a flying club or a local airfield, light aircraft taxiing and taking off give endless slow-moving propeller subjects to work on, usually with quiet backgrounds. Spend a session doing nothing but propeller arcs and you will arrive at your next airshow with the technique already in your hands rather than learning it under pressure.
Review your results properly. Zoom in on the body to judge sharpness and on the propeller to judge the arc, and keep a mental note of which shutter speed produced your best balance for each type of aircraft. Over a few outings you will build an instinct for the right starting speed, and that instinct is worth more than any table once it is yours.
When you have a folder of strong prop shots, they become some of the most marketable images in aviation photography, precisely because so many people get them wrong. If you want to see the standard that licensing buyers expect, browse the Piemags aviation galleries, and if you are thinking about selling your own work, the licensing information explains how aviation images are licensed for editorial and commercial use.
Clean prop blur is one of the things picture editors look for, and it is often what separates a usable frame from a rejected one. Our guide to building an aviation photography portfolio covers what buyers actually select for.
Frequently asked questions
What shutter speed gives prop blur on propeller aircraft?
For a natural, pleasing arc, start at 1/200 second and work down. Around 1/160 to 1/250 gives a clear arc on most piston aircraft while staying easy to keep sharp. For a full disc, where the blades merge into a single circle, drop to 1/100, 1/80 or even 1/60 second. Slower turning turboprops such as the C-130, whose propeller runs at a constant 1,020 rpm, need 1/100 or slower to show real movement.
Why do my propeller photos look like the engine is switched off?
A frozen, stationary propeller almost always means the shutter speed was too high, often 1/1000 second or faster, which the camera tends to choose in bright light or an automatic mode. The blade moves so little during such a short exposure that it appears stopped. Switch to shutter priority, drop to 1/250 or slower, and the blade will start to streak into an arc.
How do I get prop blur in bright sunshine without overexposing?
Use the lowest native ISO, close the aperture toward f/8 to f/11, and if the exposure still blows out, fit a neutral density filter of three to six stops or a polariser, which also cuts about one and a half to two stops and deepens the sky. Check the histogram rather than the rear screen brightness, and use negative exposure compensation for bright or polished aircraft.
Can I pan a propeller aircraft and keep the prop blurred at the same time?
Yes, and it is the ideal approach. A panned shot at 1/125 to 1/250 second blurs the background to show speed and produces a healthy propeller arc at the same time, because one slow shutter speed serves both effects. The aircraft body stays sharp as long as your panning tracks it smoothly and you follow through after the shutter fires.
What shutter speed should I use for helicopters?
Helicopter rotors turn far slower than a propeller, so go slower still. Aim for 1/125 second as a starting point and 1/100 down to 1/60 for a full rotor disc on a hovering or slow-moving helicopter. These speeds demand careful panning and a steady stance, so a monopod helps and you should expect a lower keeper rate.
Does image stabilisation help or hurt prop blur shots?
It helps. The slow shutter speeds used for prop blur make camera shake visible on the aircraft body, so leave stabilisation switched on. On lenses with a dedicated panning mode, often called Mode 2, use it so the system corrects only vertical movement and does not fight your horizontal pan.
What shutter speed gives prop blur on a static aircraft with its engine running?
A running aircraft on the ground or taxiing is the easiest place of all to get a full disc, because it is moving slowly and predictably. Drop to 1/60 or even 1/40 and pan gently with a taxiing aircraft, and the propeller will render as a beautiful translucent circle while the airframe stays sharp. For a stationary aircraft at engine run-up there is no panning to worry about, so brace hard and shoot at 1/60 to 1/80.
Why does one propeller look sharp on a multi-engine aircraft when the others are blurred?
Either the engines are turning at slightly different rpm, or your pan tilted so one disc smeared while another did not. Choose a shutter speed that blurs the slowest turning propeller in the group, keep your pan dead level so all the discs sit evenly, and shoot generous bursts. Out of a burst you will usually find one frame where every propeller reads as a clean disc.
Should I use a neutral density filter or a polariser for prop blur in bright sun?
A polariser is the more useful all-rounder because it cuts roughly one and a half to two stops, which is often exactly what you need, and at the same time it deepens the sky and cuts glare off canopies and metal. Reach for a neutral density filter when base ISO, a small aperture and a polariser still leave you overexposed, with a three-stop for general use and a four to six-stop for the brightest days. Avoid the cheapest variable ND filters, which can darken unevenly across the frame.
Do I need a tripod or monopod for propeller blur shots?
For most fixed-wing work you are better off handholding, because a tripod restricts the smooth horizontal sweep that panning depends on. A monopod earns its keep at the slowest speeds, especially helicopter rotor discs at 1/80 and below, and with heavy telephoto lenses late in a long display day. If you use one, leave the head free to swivel and still turn from the hips.
Can I shoot prop blur at sunset or against the light?
Yes, and low light is actually a gift for this technique, because the bright-day exposure problem disappears: at sunset you can hold 1/80 or 1/60 at base ISO with no filters at all. A propeller disc catching rim light against a coloured evening sky is one of the most striking images in the genre. We cover exposing for shape and colour when the light is behind the aircraft in our guide to backlit aviation photography and silhouettes.
Can I add prop blur in Photoshop instead of getting it in camera?
Software radial blur rarely stands up to close inspection, because a real prop arc interacts with light, exhaust haze and the background in ways a filter does not mimic. Just as importantly, images sold for editorial use must not be materially altered, so a faked disc can make an otherwise saleable photograph unusable. Treat prop blur as a camera-craft skill: it is entirely learnable, and the results are honest.
Prop blur rewards the photographer who slows down and takes control. Decide how much blur you want, set the shutter speed for the aircraft in front of you, control the exposure, and pan as smoothly as you can. Bank the safe arcs first, then push slower for the disc when the pass allows. Do that consistently and the dead propeller, the one mistake that quietly spoils so many aircraft photos, will be a thing of your past.
Slow shutter speeds only work if the pan is smooth, and that comes from practice: see our panning drills that actually improve your keeper rate.
One of the most rewarding propeller subjects is the Dakota. Read the full story of the Douglas DC-3 and C-47 Dakota, the aeroplane that never retired.
