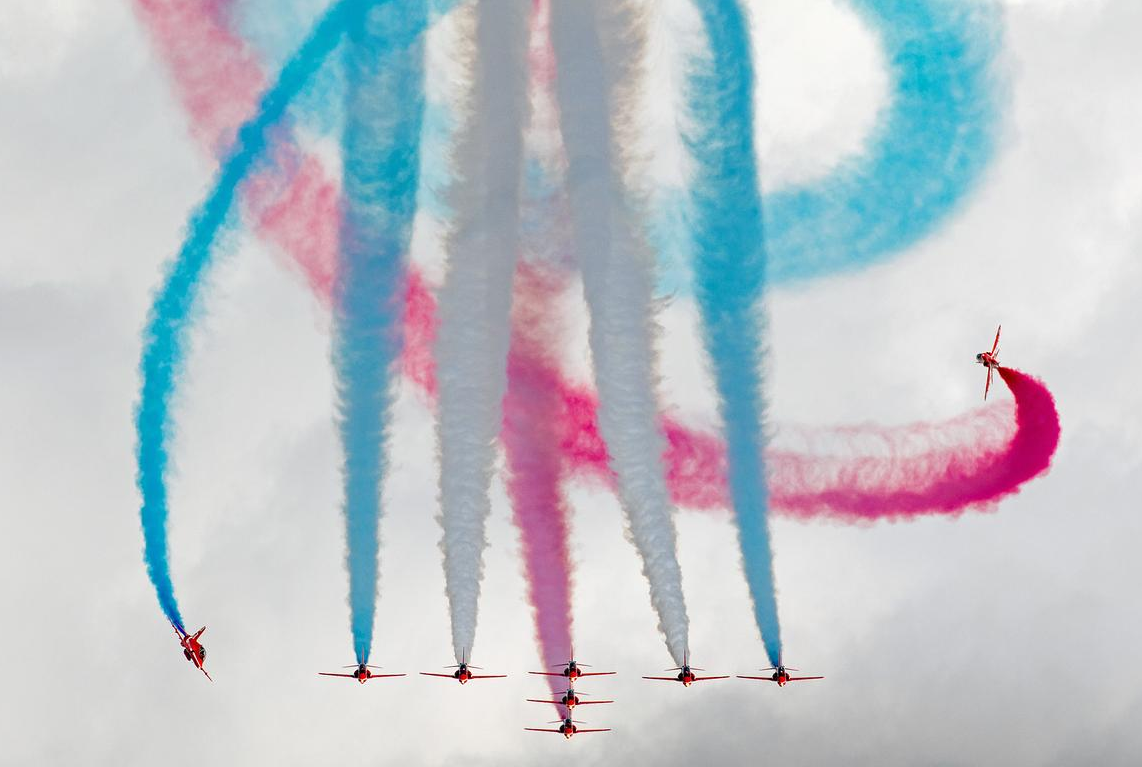
The Red Arrows are the most photographed display team in Britain, and also one of the hardest to shoot well. A tight block of red Hawks moving as one, smoke streaming behind them, the whole thing finished in under half an hour. This guide covers the settings, the position and the timing that turn a folder of blurry red dots into pictures you would be proud to print.
Most people come away from a Red Arrows display with a memory card full of near misses. The aircraft are sharp but the formation is cut in half by the frame edge. The shape is perfect but everything is soft. The smoke looks great but the jets are tiny specks. None of this is bad luck. The Red Arrows fly a tightly scripted sequence, and once you understand what is coming and where to be, you can plan your shots instead of reacting to them. That is the whole idea behind this article.
We will work through how the display is built, where to stand relative to the sun and the crowd line, the gear that actually copes with the speed, the camera settings that give you keepers, and the specific set pieces worth waiting for. There is a settings table you can screenshot, a scenario guide for tricky moments, and a FAQ at the end. UK readers will recognise most of the venues mentioned, but the technique travels anywhere the team performs.
What this guide covers
- Understanding the display before you shoot it
- What changed for 2026: the seven jet display
- Where to stand: sun, crowd line and angles
- Gear that copes with the Red Arrows
- Camera settings, with a reference table
- Autofocus and tracking technique
- Shooting the first half: formation passes
- Shooting the second half: Synchro and opposition
- Capturing the smoke
- Timing the set pieces
- Flypasts versus full displays
- Weather, light and haze
- Common mistakes and how to fix them
- A quick post-processing pass
- Scenario by scenario settings
- Frequently asked questions
Updated July 2026: For the 2026 display season the Red Arrows are flying most aerobatic displays with seven jets (Reds 1 to 7) rather than the traditional nine, with the full nine-ship reserved for selected flypasts and state occasions while the RAF manages the ageing BAe Hawk T1 fleet. The team received its Public Display Authority on 22 May 2026, its 62nd season, and continues to operate from RAF Waddington in Lincolnshire. The Royal International Air Tattoo at RAF Fairford was cancelled for 2026, with the next RIAT scheduled for 16 to 18 July 2027, so this year plan your Red Arrows viewing around the seafront and regional shows.
Understanding the display before you shoot it
You cannot photograph what you do not anticipate, and the Red Arrows move too fast to chase. The single biggest improvement most photographers can make is to learn the shape of a display before they ever raise the camera. The team flies a routine that has a clear structure, and the structure tells you when to be ready and where to look.
The Royal Air Force Aerobatic Team, to give the Red Arrows their proper name, flies the BAE Systems Hawk T1. It is a jet trainer, not a fast jet in the fighter sense, but in formation it is quick, agile and unforgiving of a slow shutter. The team has flown a version of the Hawk since 1979 and the famous Diamond Nine shape dates back to 1968. That diamond is the picture most people want, so it is worth knowing exactly when it appears.
The two halves of a display
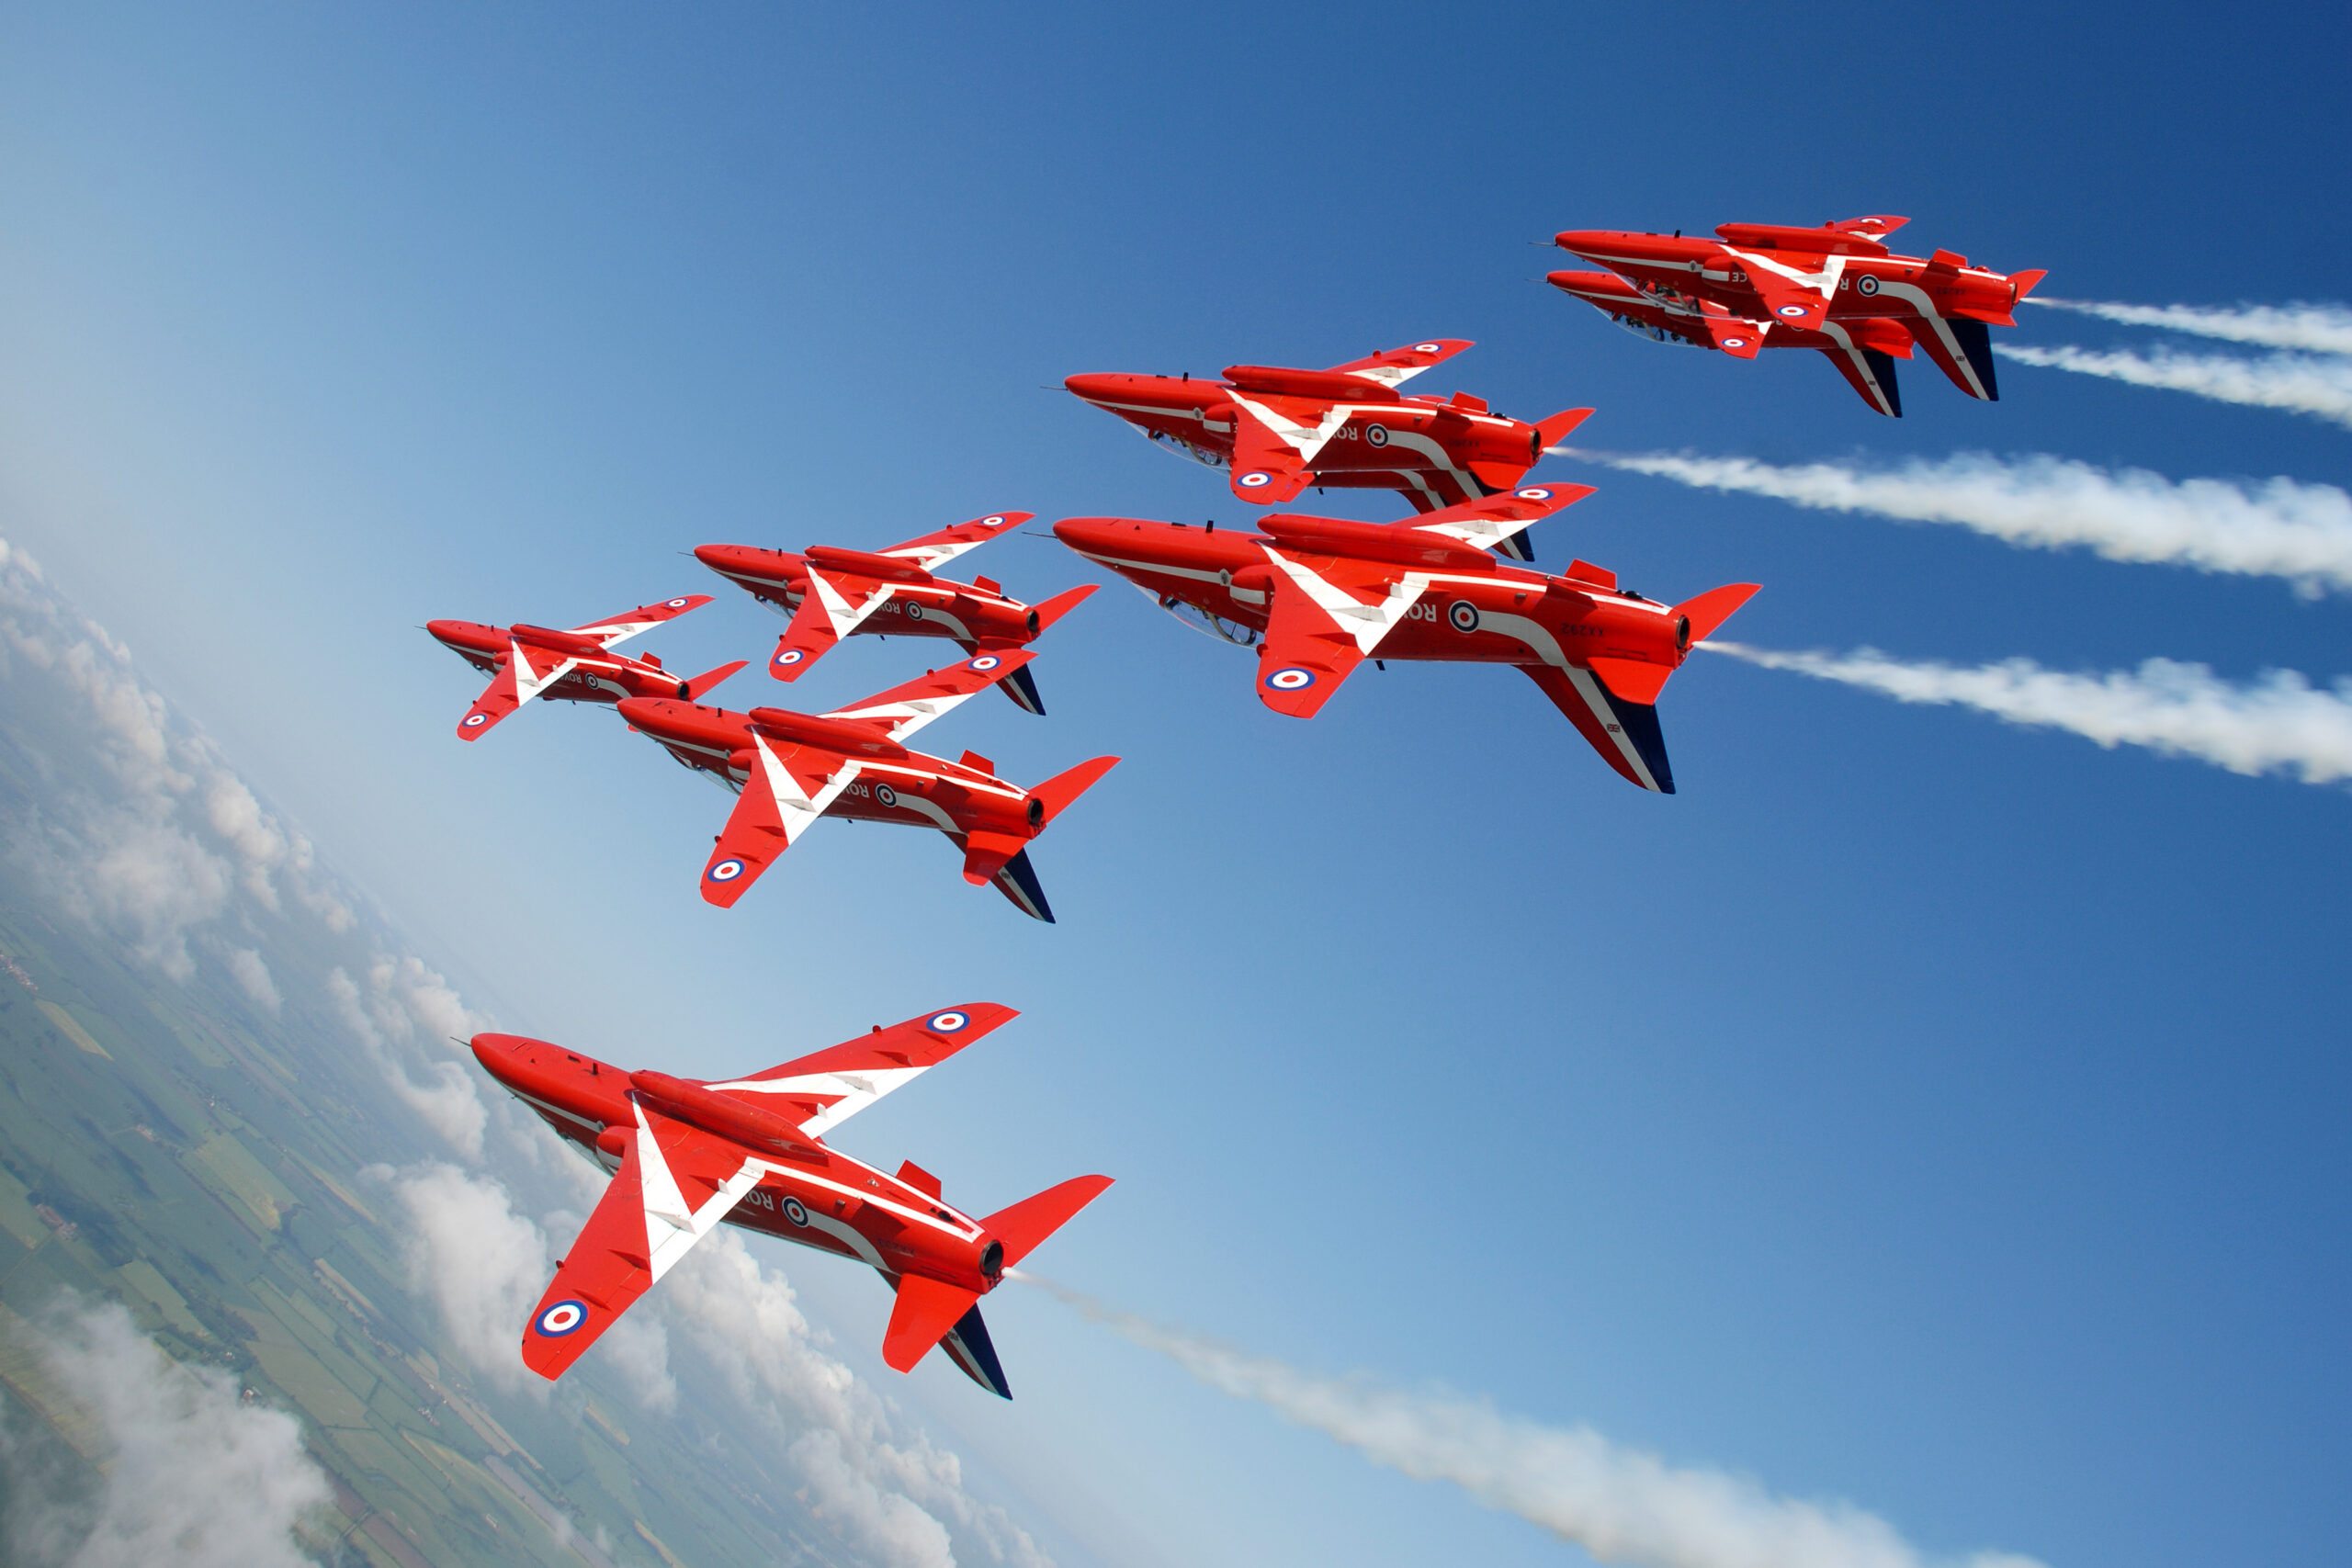
A full Red Arrows display splits cleanly into two parts, and they call for different shooting styles. The first half is formation aerobatics. All the aircraft fly together in changing shapes, looping and rolling as one block, trailing smoke. This is your chance for the classic team shots: the diamond, the big arrow shapes, the tightly stacked passes. The aircraft are predictable here because they hold formation, so you can frame for the whole group.
The second half is more dynamic and the team divides into two sections. Reds 1 to 5 form a section nicknamed Enid, after the author Enid Blyton, and Reds 6 to 9 form a section called Hanna, named after Squadron Leader Ray Hanna, one of the team’s founding pilots and an early leader. The two sections cross, chase and rejoin. Within the second half sits the part that catches photographers out completely: the Synchro Pair.
The Synchro Pair
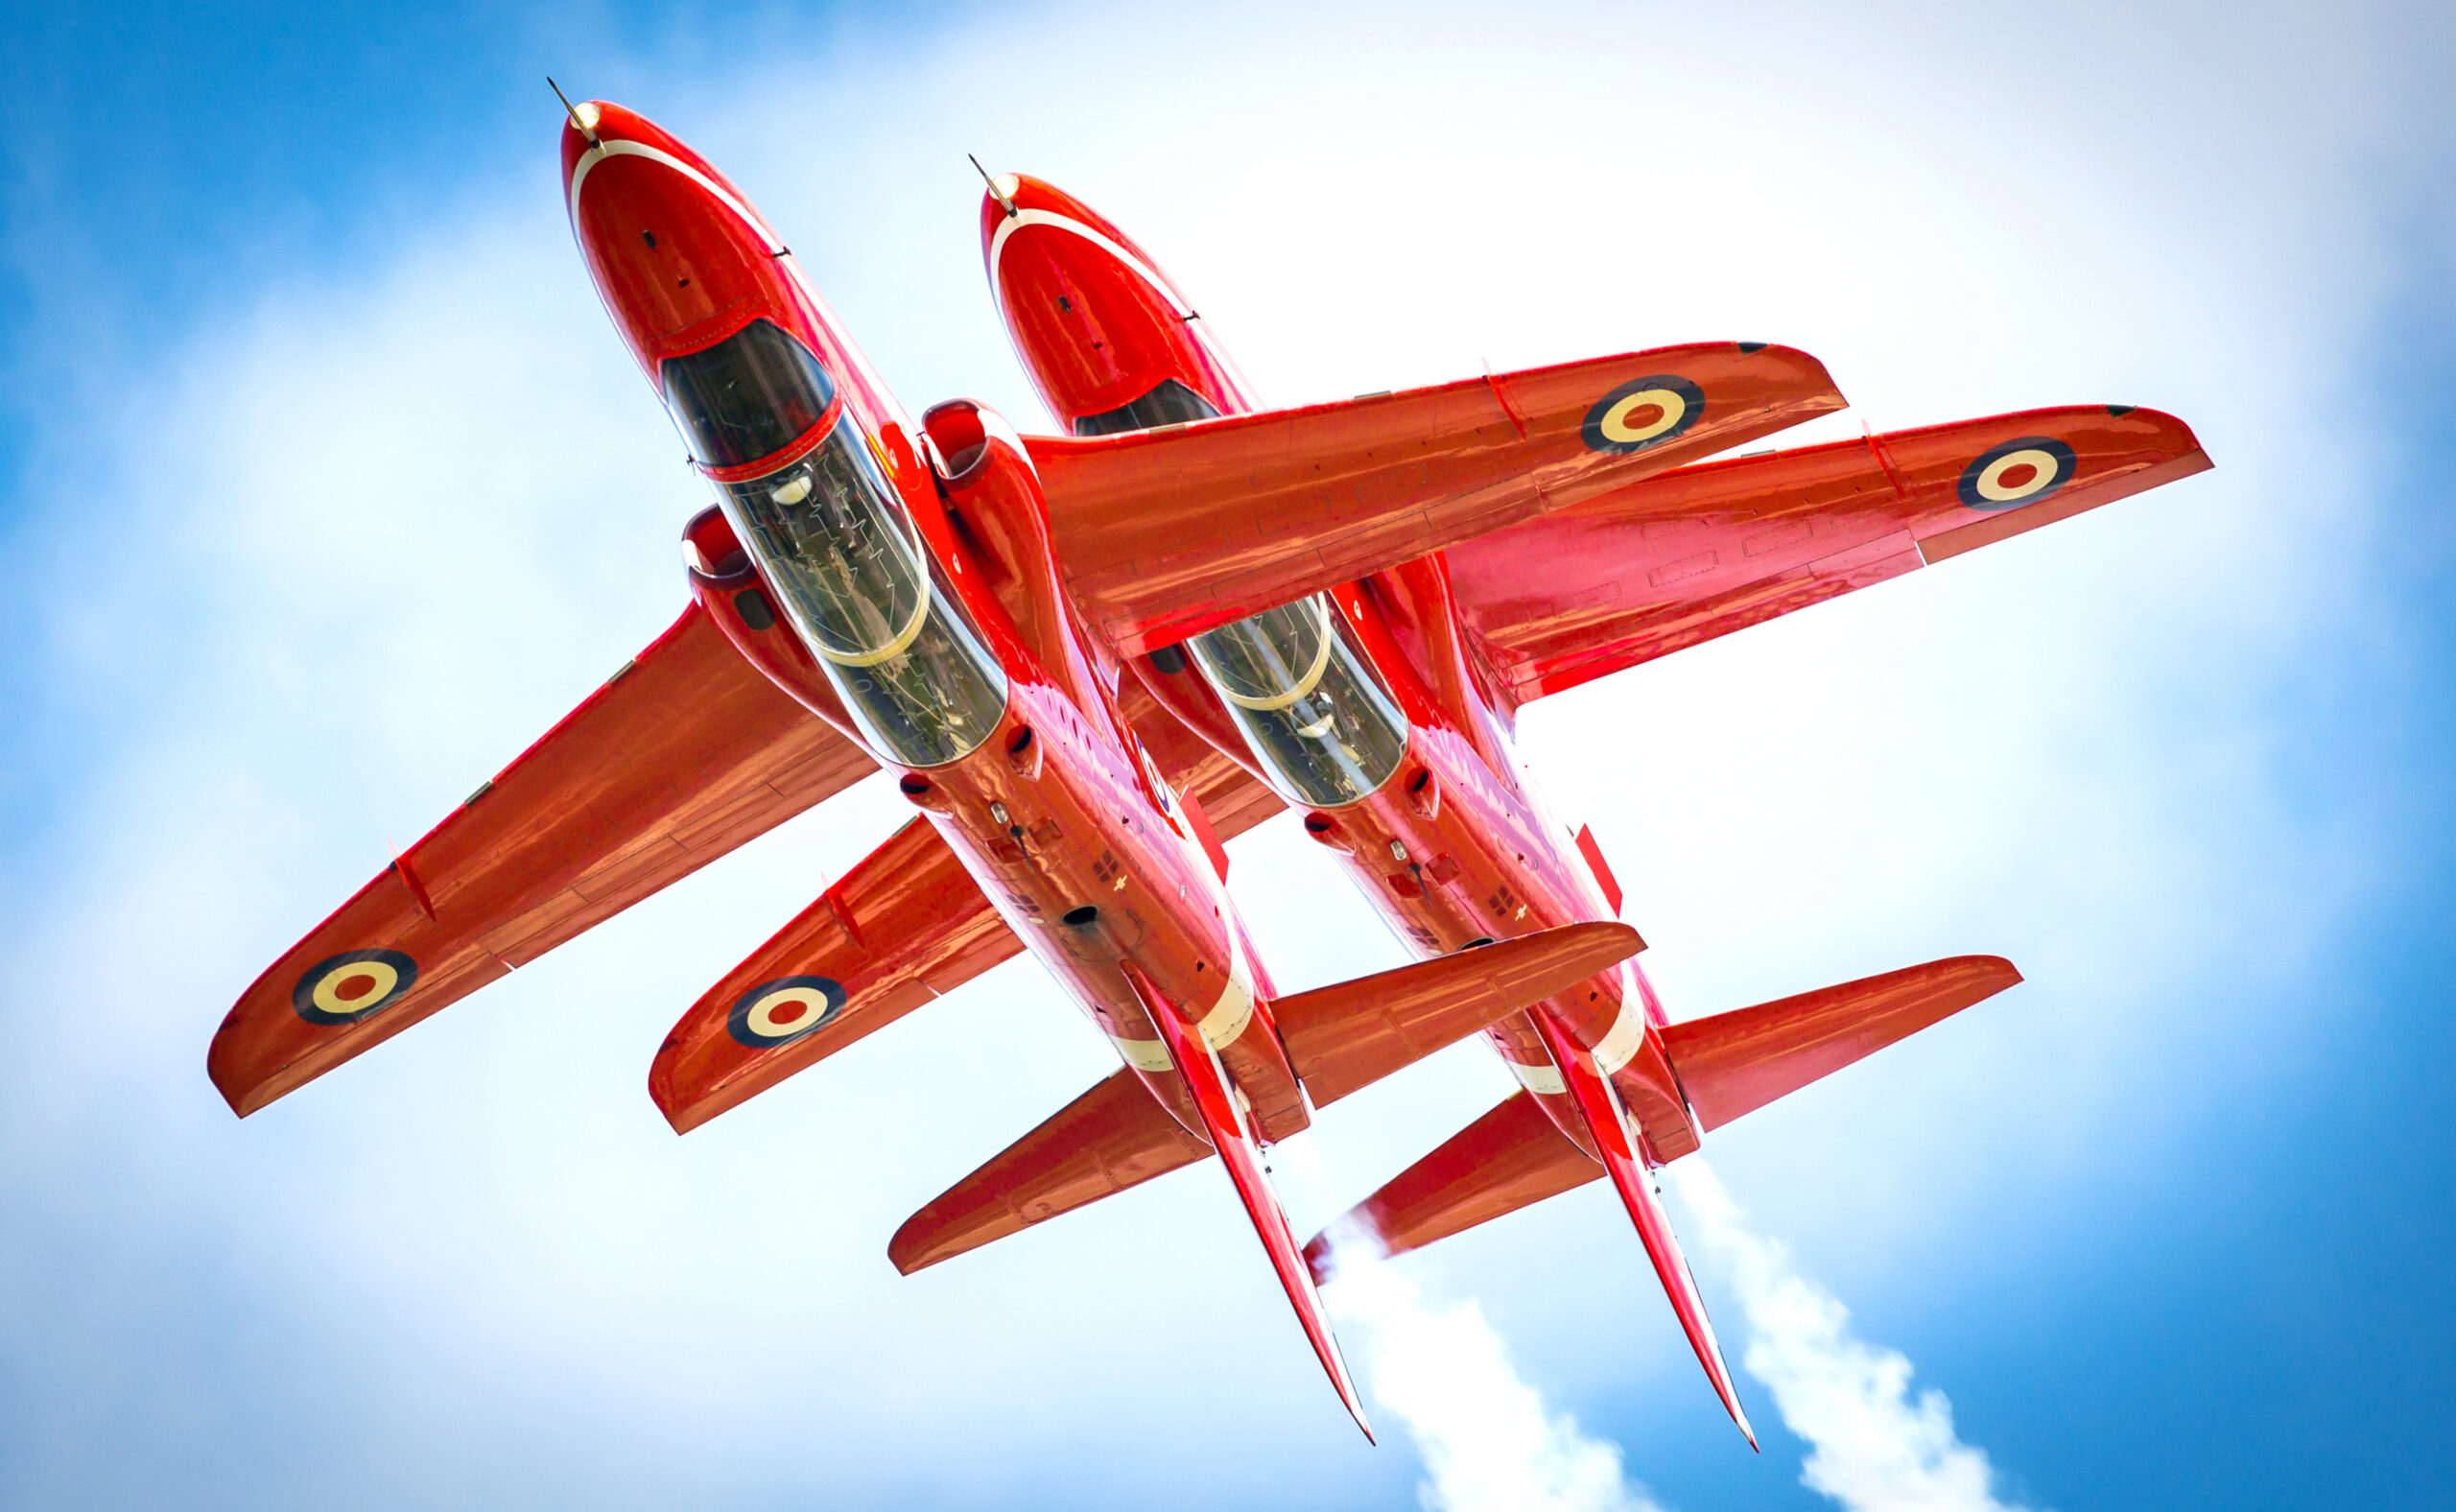
Red 6, the Synchro Leader, and Red 7, Synchro 2, peel away to fly opposition passes. They run at each other from opposite ends of the display line and cross close together at high speed, often low and right in front of the crowd. These passes produce some of the most dramatic images of the whole show, two aircraft apparently about to collide with smoke pouring behind them, but they happen in a heartbeat and from a direction you may not expect. Knowing the Synchro section is coming, and roughly where the crossing point sits, is half the battle.
What changed for 2026: the seven jet display
If you photographed the team a few seasons ago and you are returning in 2026, you need to know about an important change. The Red Arrows are flying most 2026 displays with seven aircraft rather than the traditional nine. Reds 1 to 7 perform the aerobatic displays, while Reds 8 and 9 join only for selected flypasts.
The reason is the age of the Hawk T1 fleet. The aircraft are due to retire in March 2030, spare parts are harder to source, and the team is conserving airframe hours and components by flying fewer jets through the season. The plan is expected to hold until at least 2030. The full nine ship formation is scheduled to appear on only two occasions in 2026: the King’s Birthday Flypast in June and the United States 250th anniversary of independence celebrations in July.
For a photographer this matters in practical terms. The signature Diamond Nine will not appear at a typical 2026 airshow, so do not plan your day around it. The seven jet shapes are still tight, symmetrical and photogenic, and the Synchro work is unchanged, but your framing needs to suit a slightly smaller block of aircraft. If your goal is specifically the nine ship diamond, you need to target one of the rare nine aircraft flypasts rather than a standard display.
Where to stand: sun, crowd line and angles
Position decides more about your pictures than any setting on the camera. The Red Arrows fly their display centred on a fixed point, usually the middle of the crowd line, and they orient the show so the best passes happen in front of that centre. Get yourself near display centre and put the sun behind you, and most of your problems disappear.
Keep the sun over your shoulder
Red aircraft against a blue sky look superb when the light is falling on them, and dreadful when they are between you and the sun. Front lighting brings out the gloss red, the roundels and the smoke. Back lighting turns the jets into dark shapes and makes the smoke look grey. Before the display, work out where the sun will be for the next twenty five minutes and choose a spot that keeps it behind you or over your shoulder. At a long afternoon show the sun moves enough to matter, so think about where it will be when the team flies, not where it is when you arrive.
There is one deliberate exception. Smoke shot slightly towards the light can glow, and a low sun behind a looping formation can rim the smoke beautifully. That is an advanced choice, not a default. Master front lit shots first, then experiment.
Find display centre
The crowd line at a UK airshow is marked, and display centre is normally opposite the commentary position or the main enclosures. The team aims its frontal passes and the Synchro crossing at this point. If you stand far out towards the ends of the crowd line you will see more passes side on and at a distance, and the Synchro crossing will happen away from you. Near centre, the action comes towards you and across your front, which is exactly what you want for head on formation shots and the opposition passes.
Mind the background and the crowd line
Sky is the cleanest background, but the most interesting Red Arrows pictures often include something below the aircraft: a hangar, a treeline, the airfield, even other spectators looking up. Low passes against a ground background can be stronger than yet another jet on plain blue, so do not always crop tight to sky. At the same time, watch the foreground. Heads, flags and tent poles creep into the bottom of the frame at a packed show. Arriving early to claim a clear spot at the rope pays off all day.
Gear that copes with the Red Arrows
You do not need the most expensive kit to photograph the Red Arrows, but you do need enough reach, fast and reliable autofocus, and the discipline to hold it steady. Here is what actually matters.
Lenses and reach
A telephoto zoom in the 100 to 400mm class is the single most useful lens for this team. The zoom range is the point. In the first half you will want to pull back to fit the whole formation in the frame, and in the second half you will want to push in on fast singles and the Synchro pair. A fixed 400mm prime is wonderful for the singles and useless when nine, or seven, aircraft fill the sky in front of you. If you only own a prime, a 300mm is a sensible compromise for formation work, while 400 to 500mm suits distant passes.
On a crop sensor body the effective reach increases, which helps with distant aircraft but makes it even more important to be able to zoom wide for the close formation passes. Many aviation photographers settle on a 100 to 400mm or 150 to 600mm zoom precisely because the team’s display swings between tight group shapes and lone fast passes within seconds. For a fuller treatment of glass, see our guide to the best lenses for aviation photography.
Camera body
Autofocus tracking and frame rate matter more than megapixels here. A body that locks onto a moving subject and holds it through a pan will get you far more keepers than a high resolution camera with sluggish focus. Modern mirrorless bodies with subject detection are excellent for this, but a competent DSLR with a good continuous autofocus mode is more than capable. The Red Arrows have been photographed superbly on equipment that is now a decade old.
Support: monopod or handheld
For panning a long lens, a monopod takes the weight and steadies the vertical axis while letting you swing freely to follow the aircraft. Many aviation photographers use one all day at airshows. If your lens is light, or you prefer total freedom of movement for the fast overhead passes, handholding with good technique works well too. Tuck your elbows in, support the lens from underneath, and pan from the hips rather than the arms.
Cards, batteries and a spare
You will shoot in bursts, so a fast memory card with room to spare prevents the buffer from stalling at the worst moment. Bring a charged spare battery, a lens cloth for the inevitable smudge, and if rain threatens, a simple cover. The display will not wait while you fix a flat battery.
Camera settings, with a reference table
The Red Arrows are jets, so the rules for fast jets apply. Unlike propeller aircraft, there is no rotating disc to blur, which frees you to use a high shutter speed and freeze everything cleanly. Smoke trails read well at any shutter speed, so you can prioritise sharpness. The settings below are a starting point you can adjust to the light.
Shutter speed
For sharp, frozen jets, start at 1/1000 second and treat that as your floor for formation work. For the fast singles and the Synchro crossing, 1/1250 to 1/2000 buys you insurance against motion blur, especially as the aircraft cross your front at speed. Because the Hawks have no propeller, you are not forced into slow shutter speeds the way you are with a Spitfire or a Lancaster. If you want a sense of motion, you can pan a single aircraft at 1/500 and let the background streak, but keep this for deliberate creative shots rather than the whole display.
Aperture
Aperture around f/5.6 to f/8 gives a good balance of sharpness and depth. At f/8 a whole formation sits comfortably within the depth of field even when the aircraft are stacked at slightly different distances. Wide open at f/5.6 or f/4 you gain shutter speed and lower ISO, but the nearest and furthest jets in a formation can fall soft. For group shapes lean towards f/8. For a lone aircraft against sky, f/5.6 is fine.
ISO
Use auto ISO with a sensible ceiling so the camera maintains your chosen shutter and aperture as the light changes behind cloud. On a bright day you will sit at base ISO. Under heavy overcast you may climb to 800 or higher, which is a fair trade for a sharp frame. Modern sensors handle moderate ISO well, and a slightly noisy sharp image always beats a clean blurry one.
Drive mode and metering
Set continuous high speed drive and shoot short bursts at the key moments rather than holding the button down for the whole pass. Bursts of three to five frames let you pick the moment when the formation is squarest to you or the Synchro pair is closest. For metering, evaluative or matrix works for front lit aircraft on blue. Against a bright sky the meter wants to underexpose and silhouette the jets, so dial in positive exposure compensation of around plus one third to plus one stop, or use manual exposure once you have a reading you trust. Our piece on exposure and metering for bright skies goes deeper on this.
| Situation | Shutter | Aperture | ISO | AF mode | Notes |
|---|---|---|---|---|---|
| Formation, blue sky | 1/1000 | f/8 | Auto, base to 400 | Continuous, wide or zone | Frame for the whole shape, leave smoke room |
| Formation, overcast | 1/1000 | f/5.6 to f/8 | Auto, up to 800+ | Continuous, zone | Add +1/3 to +2/3 EV to keep jets bright |
| Fast single pass | 1/1250 to 1/1600 | f/5.6 to f/8 | Auto | Continuous, single point or small zone | Pan smoothly, keep focus point on cockpit |
| Synchro crossing | 1/1600 to 1/2000 | f/5.6 to f/8 | Auto | Continuous, zone | Pre-focus on crossing point, fire a burst |
| Creative motion pan | 1/400 to 1/500 | f/8 to f/11 | Low | Continuous, single point | One aircraft only, smooth follow through |
| Smoke loop / heart | 1/1000 | f/8 | Auto | Continuous, zone | Zoom wide, include the full smoke shape |
Autofocus and tracking technique
Sharp aviation images come from good autofocus settings combined with a smooth pan. Get both right and your hit rate climbs sharply.
Continuous autofocus is essential
Switch to continuous autofocus, called AF-C on most cameras and AI Servo on Canon DSLRs. This keeps the lens refocusing as the aircraft moves towards or away from you. Single shot focus will lock once and then let the subject drift soft, which is fatal for anything moving. This is the most important single setting for the whole day.
Choosing focus points
For formation work, a zone or group of points helps the camera hold the block of aircraft rather than hunting between them. For a lone fast jet, a single point or a small cluster placed on the cockpit gives the cleanest result, because you are telling the camera exactly what to keep sharp. If your camera has aircraft or subject detection, it can be a real help, but be ready to switch it off if it jumps between aircraft in a tight formation. Our airshow autofocus guide covers how to set this up across the main camera brands.
The pan
Pick the aircraft up early, well out to the side, and begin tracking before you press the shutter. Move your whole upper body, not just your arms, and keep the lens moving smoothly through the shot and after it. The follow through is what keeps the subject sharp during the burst. Plant your feet shoulder width apart, swing from the hips, and breathe out as you fire. For overhead passes, lean back rather than lifting the lens with your arms, which tires you and introduces wobble.
Back button focus
Many aviation photographers separate focus from the shutter button, assigning autofocus to a rear button. This lets you start tracking with your thumb and fire with your finger independently, which is handy when the team flies a sequence of passes and you want to hold focus going into a turn. It takes a little practice but pays off for fast, repetitive action like a display.
Shooting the first half: formation passes
The first half of the display is where you get the team pictures. The aircraft hold tight shapes, loop and roll together, and trail smoke that draws the eye. Your job is to frame the formation as a deliberate composition rather than grabbing whatever fills the viewfinder.
Frame for the shape, not just the aircraft
A formation is a shape, and the shape needs room. Leave space around the aircraft, particularly in the direction the smoke is trailing, so the eye can read the pattern. A diamond or arrow cropped hard against the frame edge looks cramped and accidental. Zoom out a touch more than feels necessary, because you can always crop later, and a clipped wingtip cannot be recovered. When the team rolls or loops as a block, the smoke describes the manoeuvre, so include enough of it to tell the story.
Anticipate the squaring moment
A formation looks its best when it is square to you, presenting its full plan shape rather than an edge. As the team turns in towards the crowd there is a moment when the shape opens up flat to your position. Fire your burst through that moment. Watch the run in, predict the geometry, and be on the shutter as it lines up rather than reacting after it has passed.
Vary your focal length
Within the first half the team flies tight stacks and wider shapes. A single focal length will not suit both. Keep your thumb on the zoom and pull back for the big shapes, push in when a smaller element comes towards you. The flexibility of a zoom is exactly why it is the recommended lens for this team. For more on tracking and panning jets in general, our fast jets guide covers the core technique in detail.
Shooting the second half: Synchro and opposition
The second half is faster, looser and more dramatic, and it rewards photographers who know what is coming. With the team split into its two sections, the action arrives from more than one direction, so you cannot simply lock onto a single block of aircraft and follow it.
Reset your expectations
Where the first half was about the whole group, the second half is about individual aircraft and pairs. Loosen your framing plans, raise your shutter speed a little, and keep your head up so you can see passes developing from the sides. The commentary at most UK shows will call the manoeuvres, which is a useful cue, but the aircraft move faster than the words, so use the commentary as a heads up rather than a trigger.
The opposition passes
The Synchro Pair, Reds 6 and 7, run at each other and cross close together in front of display centre. This is the money shot of the second half: two jets, smoke streaming, apparently on a collision course. The crossing happens fast and at a fixed point, so the technique is to pre-focus roughly on that point, frame for the gap where they will meet, and fire a burst as they converge. If you try to track one aircraft all the way in you will usually miss the cross. Watch one or two passes first to learn the crossing height and position, then commit to the next one.
Singles and rolls
The second half also features fast single passes, rolls and tight turns from individual aircraft. These are panning shots: pick the jet up early, track it smoothly across your front, and fire as it reaches the cleanest part of the sky or passes a useful background feature. A single aircraft trailing smoke against a clean sky, sharp from nose to tail, is a deceptively hard shot to nail and very satisfying when you do.
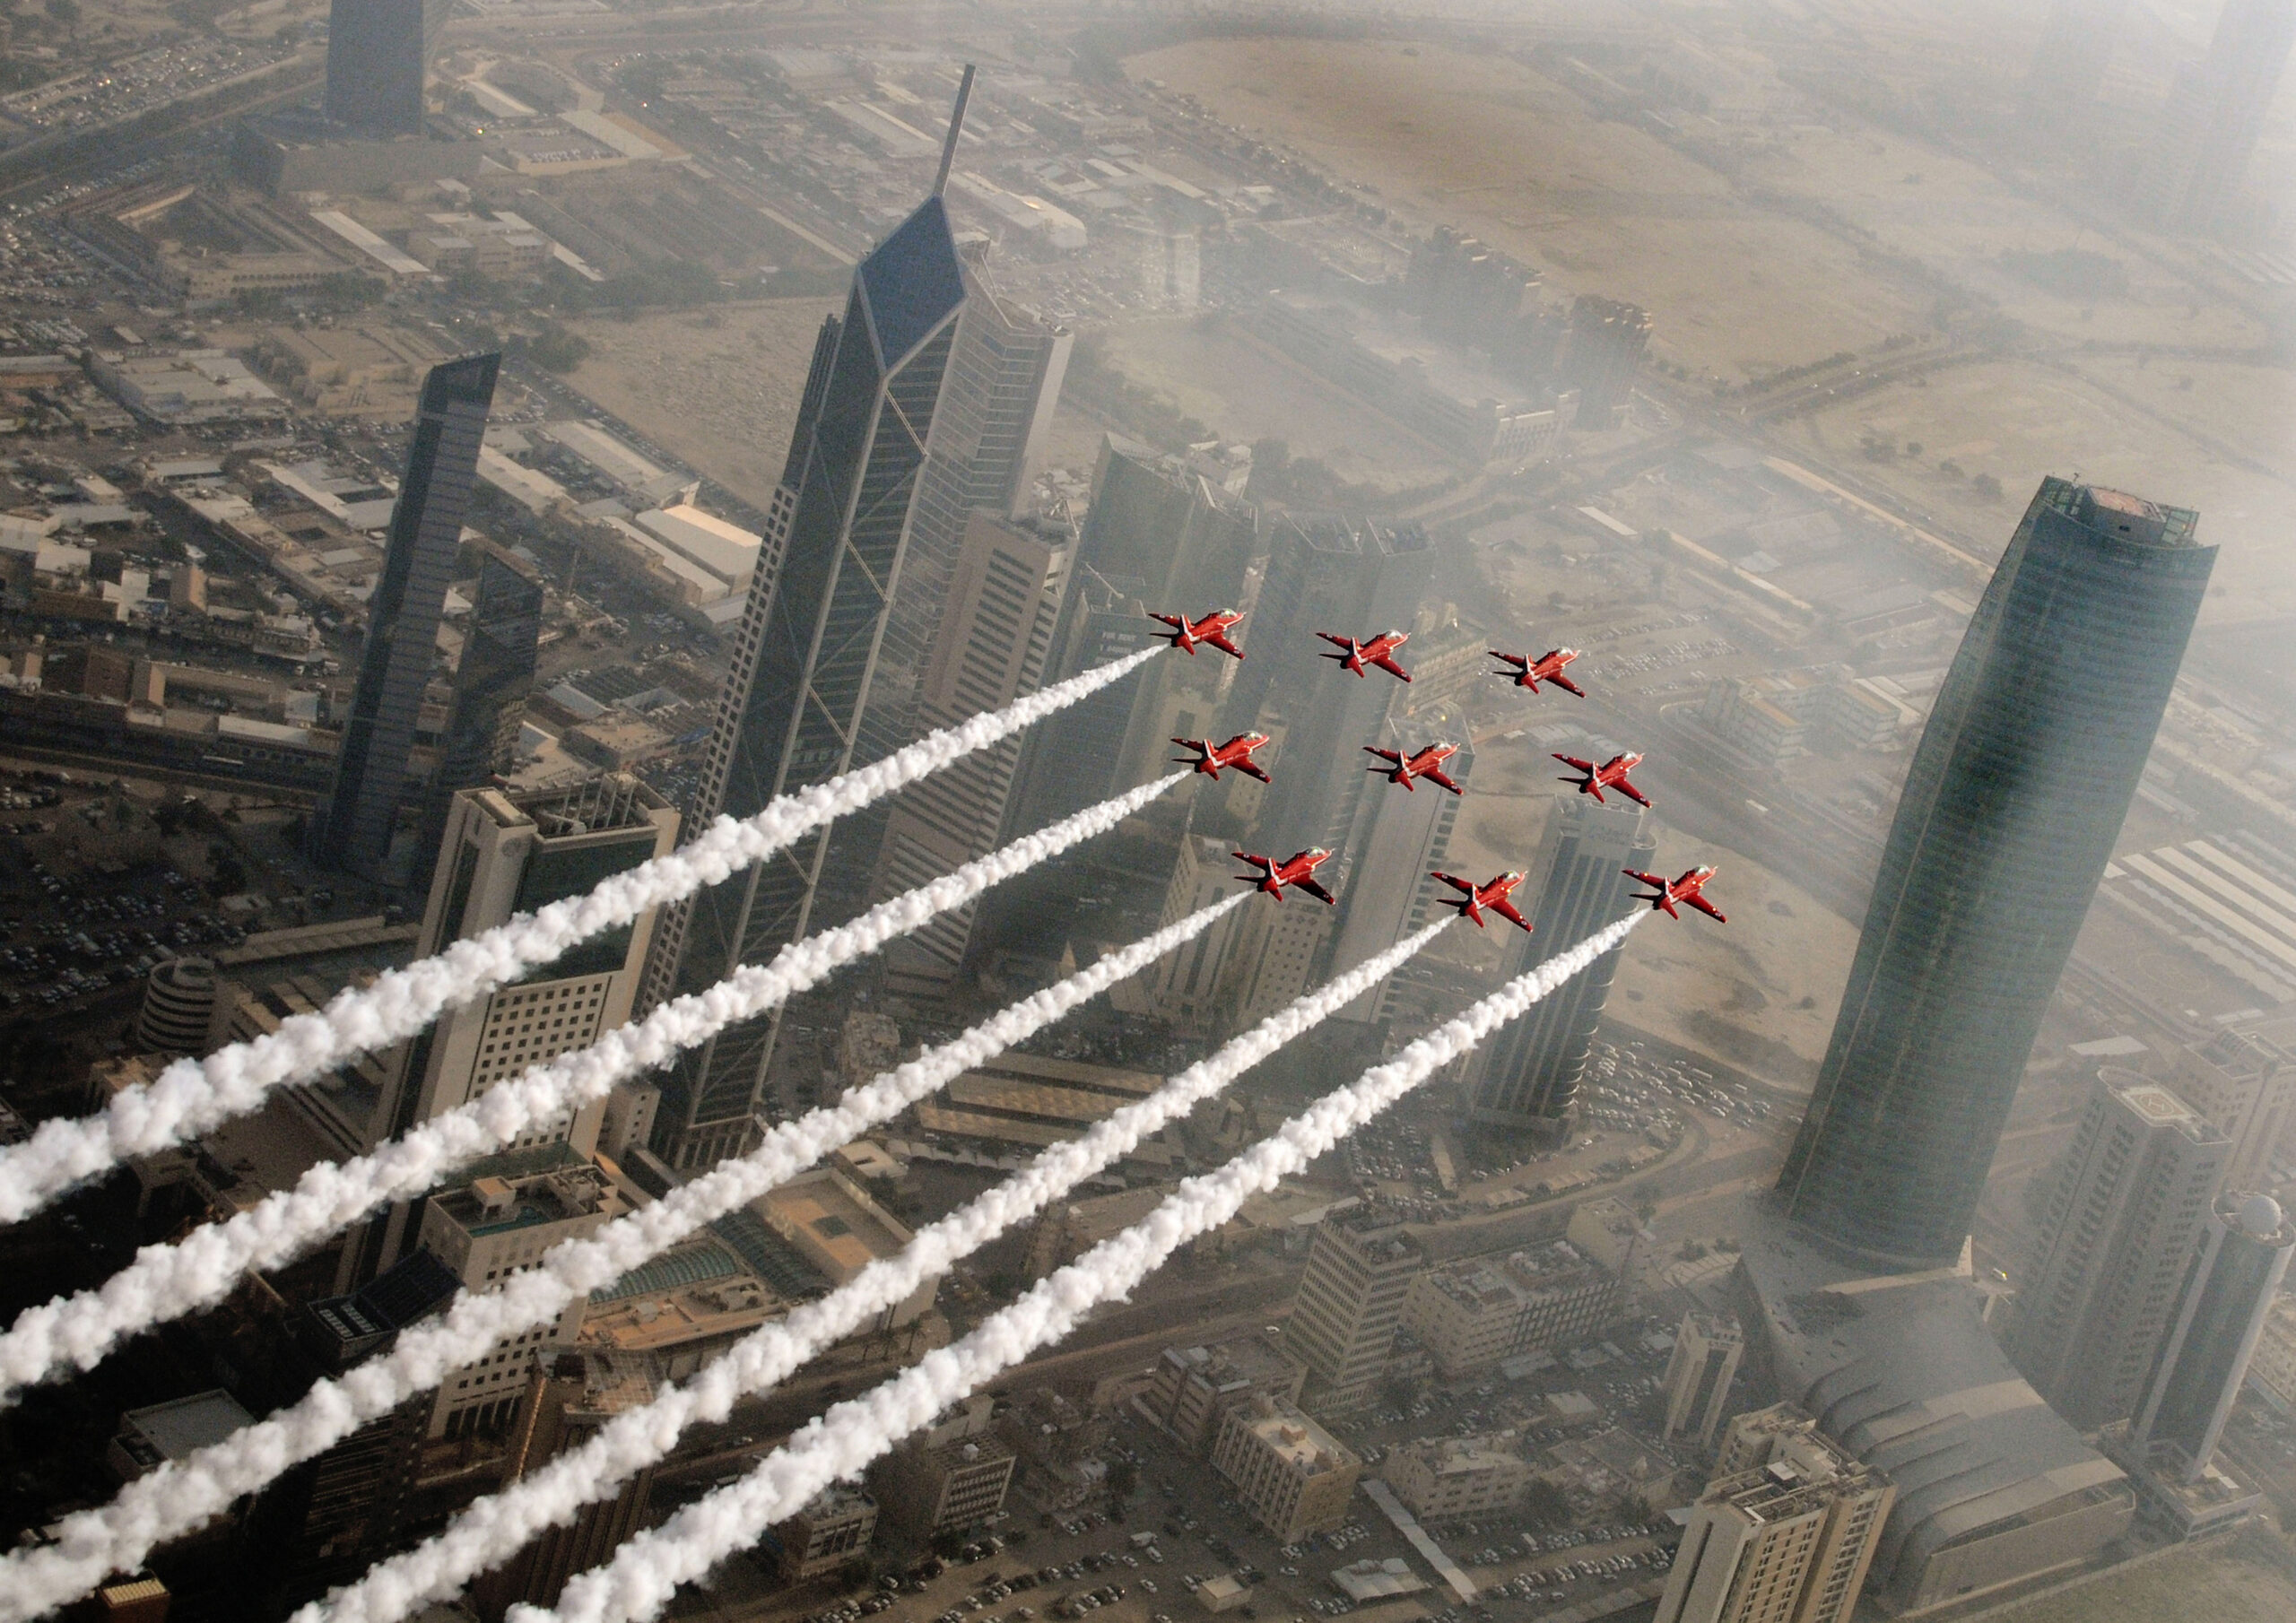
Capturing the smoke
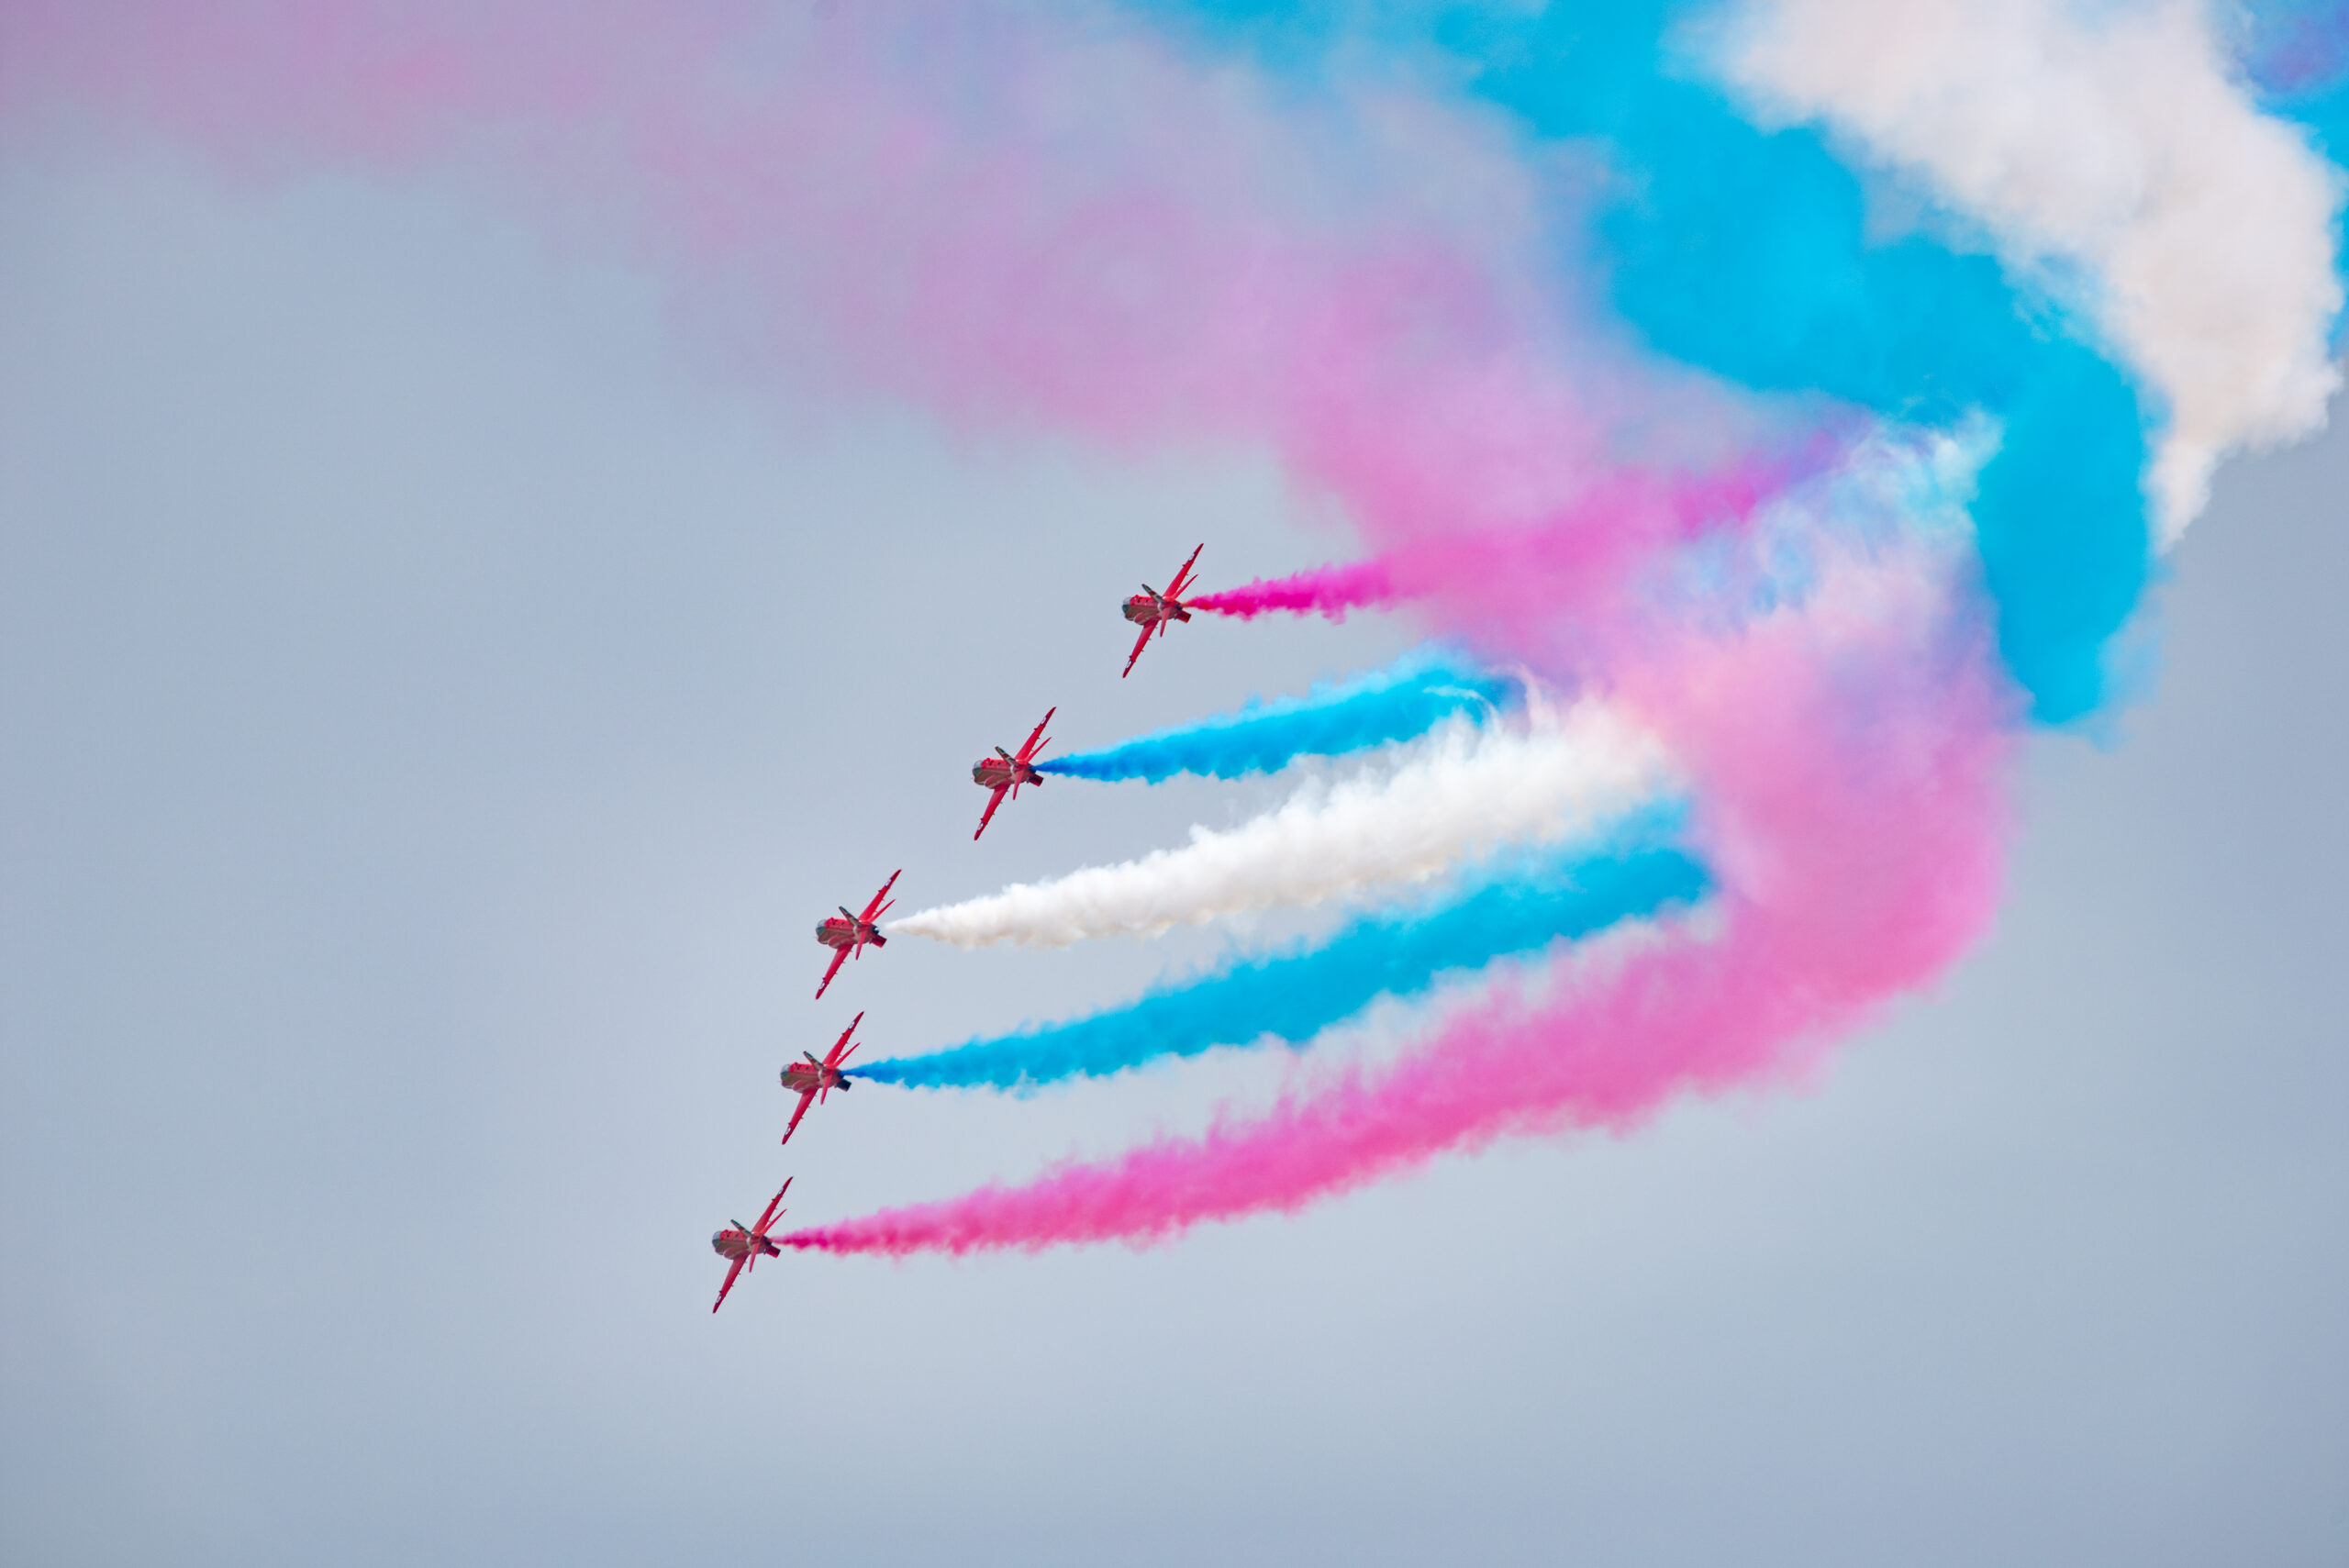
The smoke is what makes a Red Arrows picture instantly recognisable, so it is worth understanding how it works and how to photograph it well. The Hawks are modified to inject diesel mixed with coloured dye into the jet exhaust, producing red, white or blue smoke. The system carries pure diesel for white smoke plus separate tanks of red and blue dyed diesel, and the team switches colours through the display for effect.
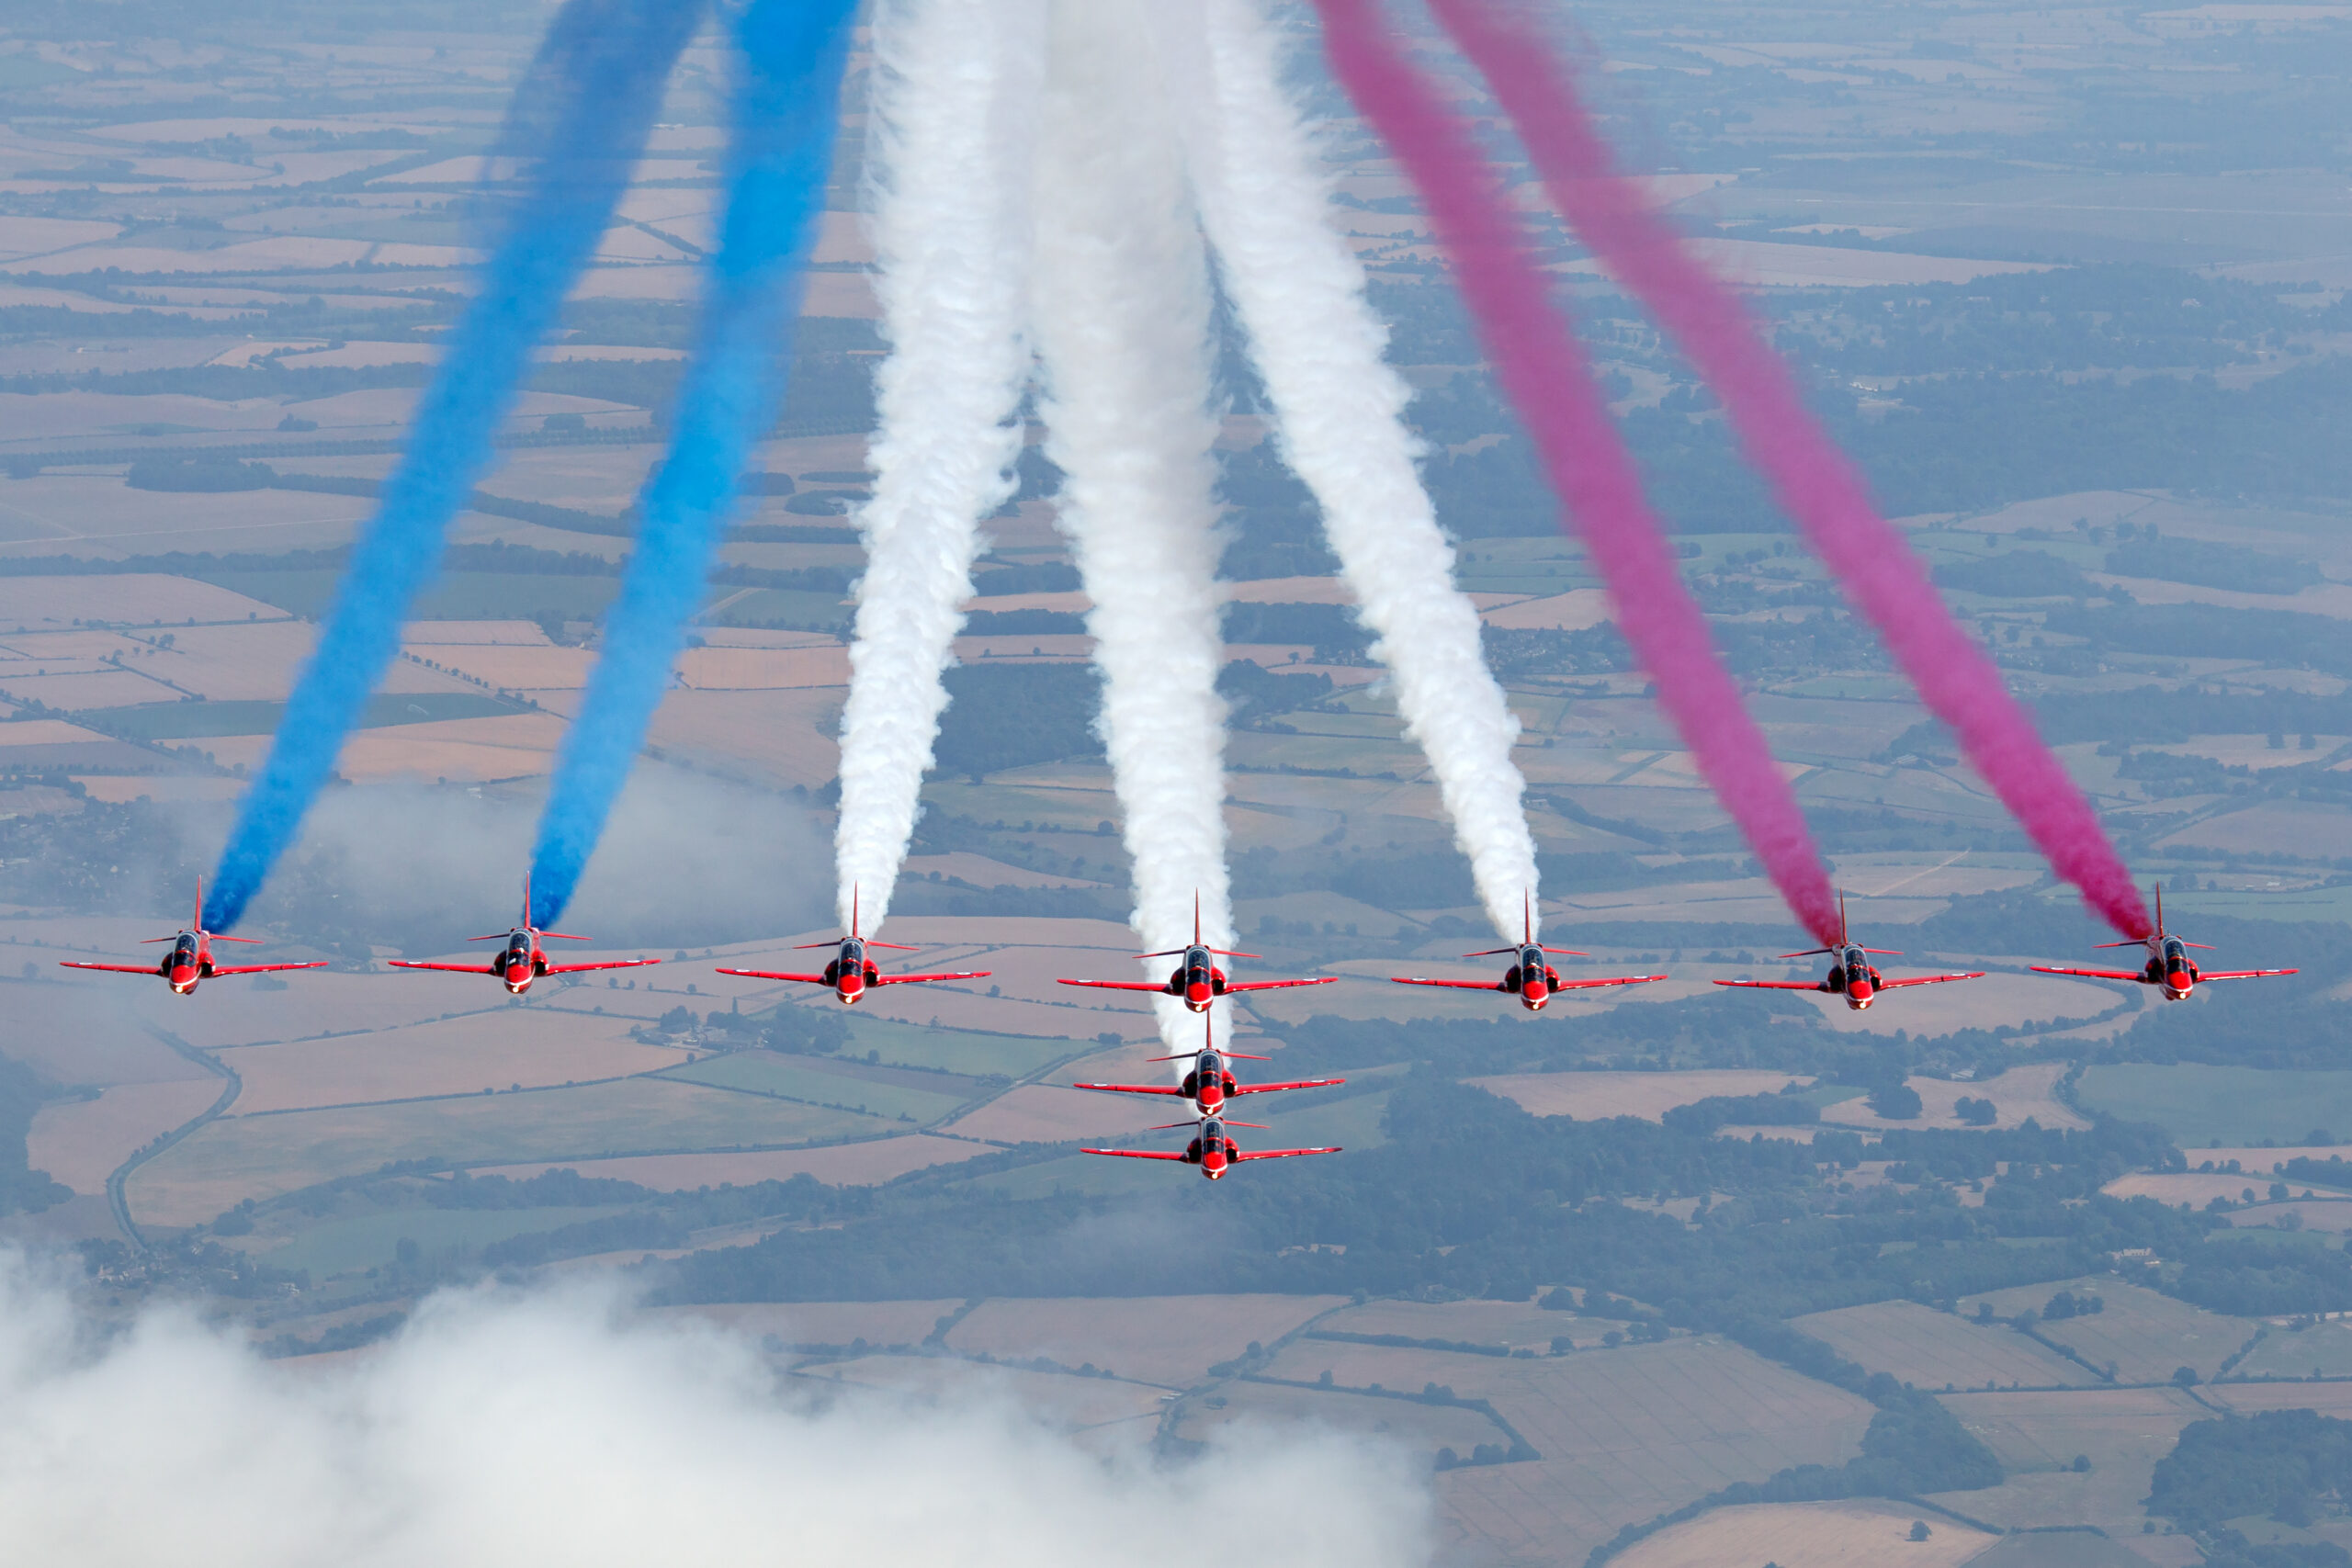
Give the smoke room in the frame
Smoke trails are part of the composition, not background clutter. When you frame a formation or a single pass, leave space on the side the smoke is trailing so the trail has somewhere to go. A common mistake is centring the aircraft perfectly and chopping the smoke off at the frame edge, which throws the balance of the picture off. Think of the smoke as a line that leads the eye to the aircraft.
Shoot the shapes the smoke draws
Some of the best smoke pictures are not of the aircraft at all, or at least not only. Loops, the heart and spear drawn by a pair, and the bomb burst where the team explodes outwards from a single point all create shapes in the sky. For these, zoom wide and include the whole shape, even if the aircraft become small. The pattern is the subject. A heart with a single jet shooting through it, the spear still being drawn, is a classic image and depends entirely on you being wide enough to fit it in.
Colour and light
White smoke is the most forgiving and reads cleanly against blue or grey. Red and blue smoke can disappear against a busy or coloured sky, so they look strongest against clean contrast. As mentioned earlier, smoke lit from behind by a low sun can glow, which is a lovely effect for the right pass, but front lit smoke against a clear sky is the dependable choice.
Timing the set pieces
Timing is the difference between a snapshot and a photograph with the Red Arrows. Because the routine is scripted, you can learn to read the run in to each manoeuvre and be ready before it happens rather than chasing it after.
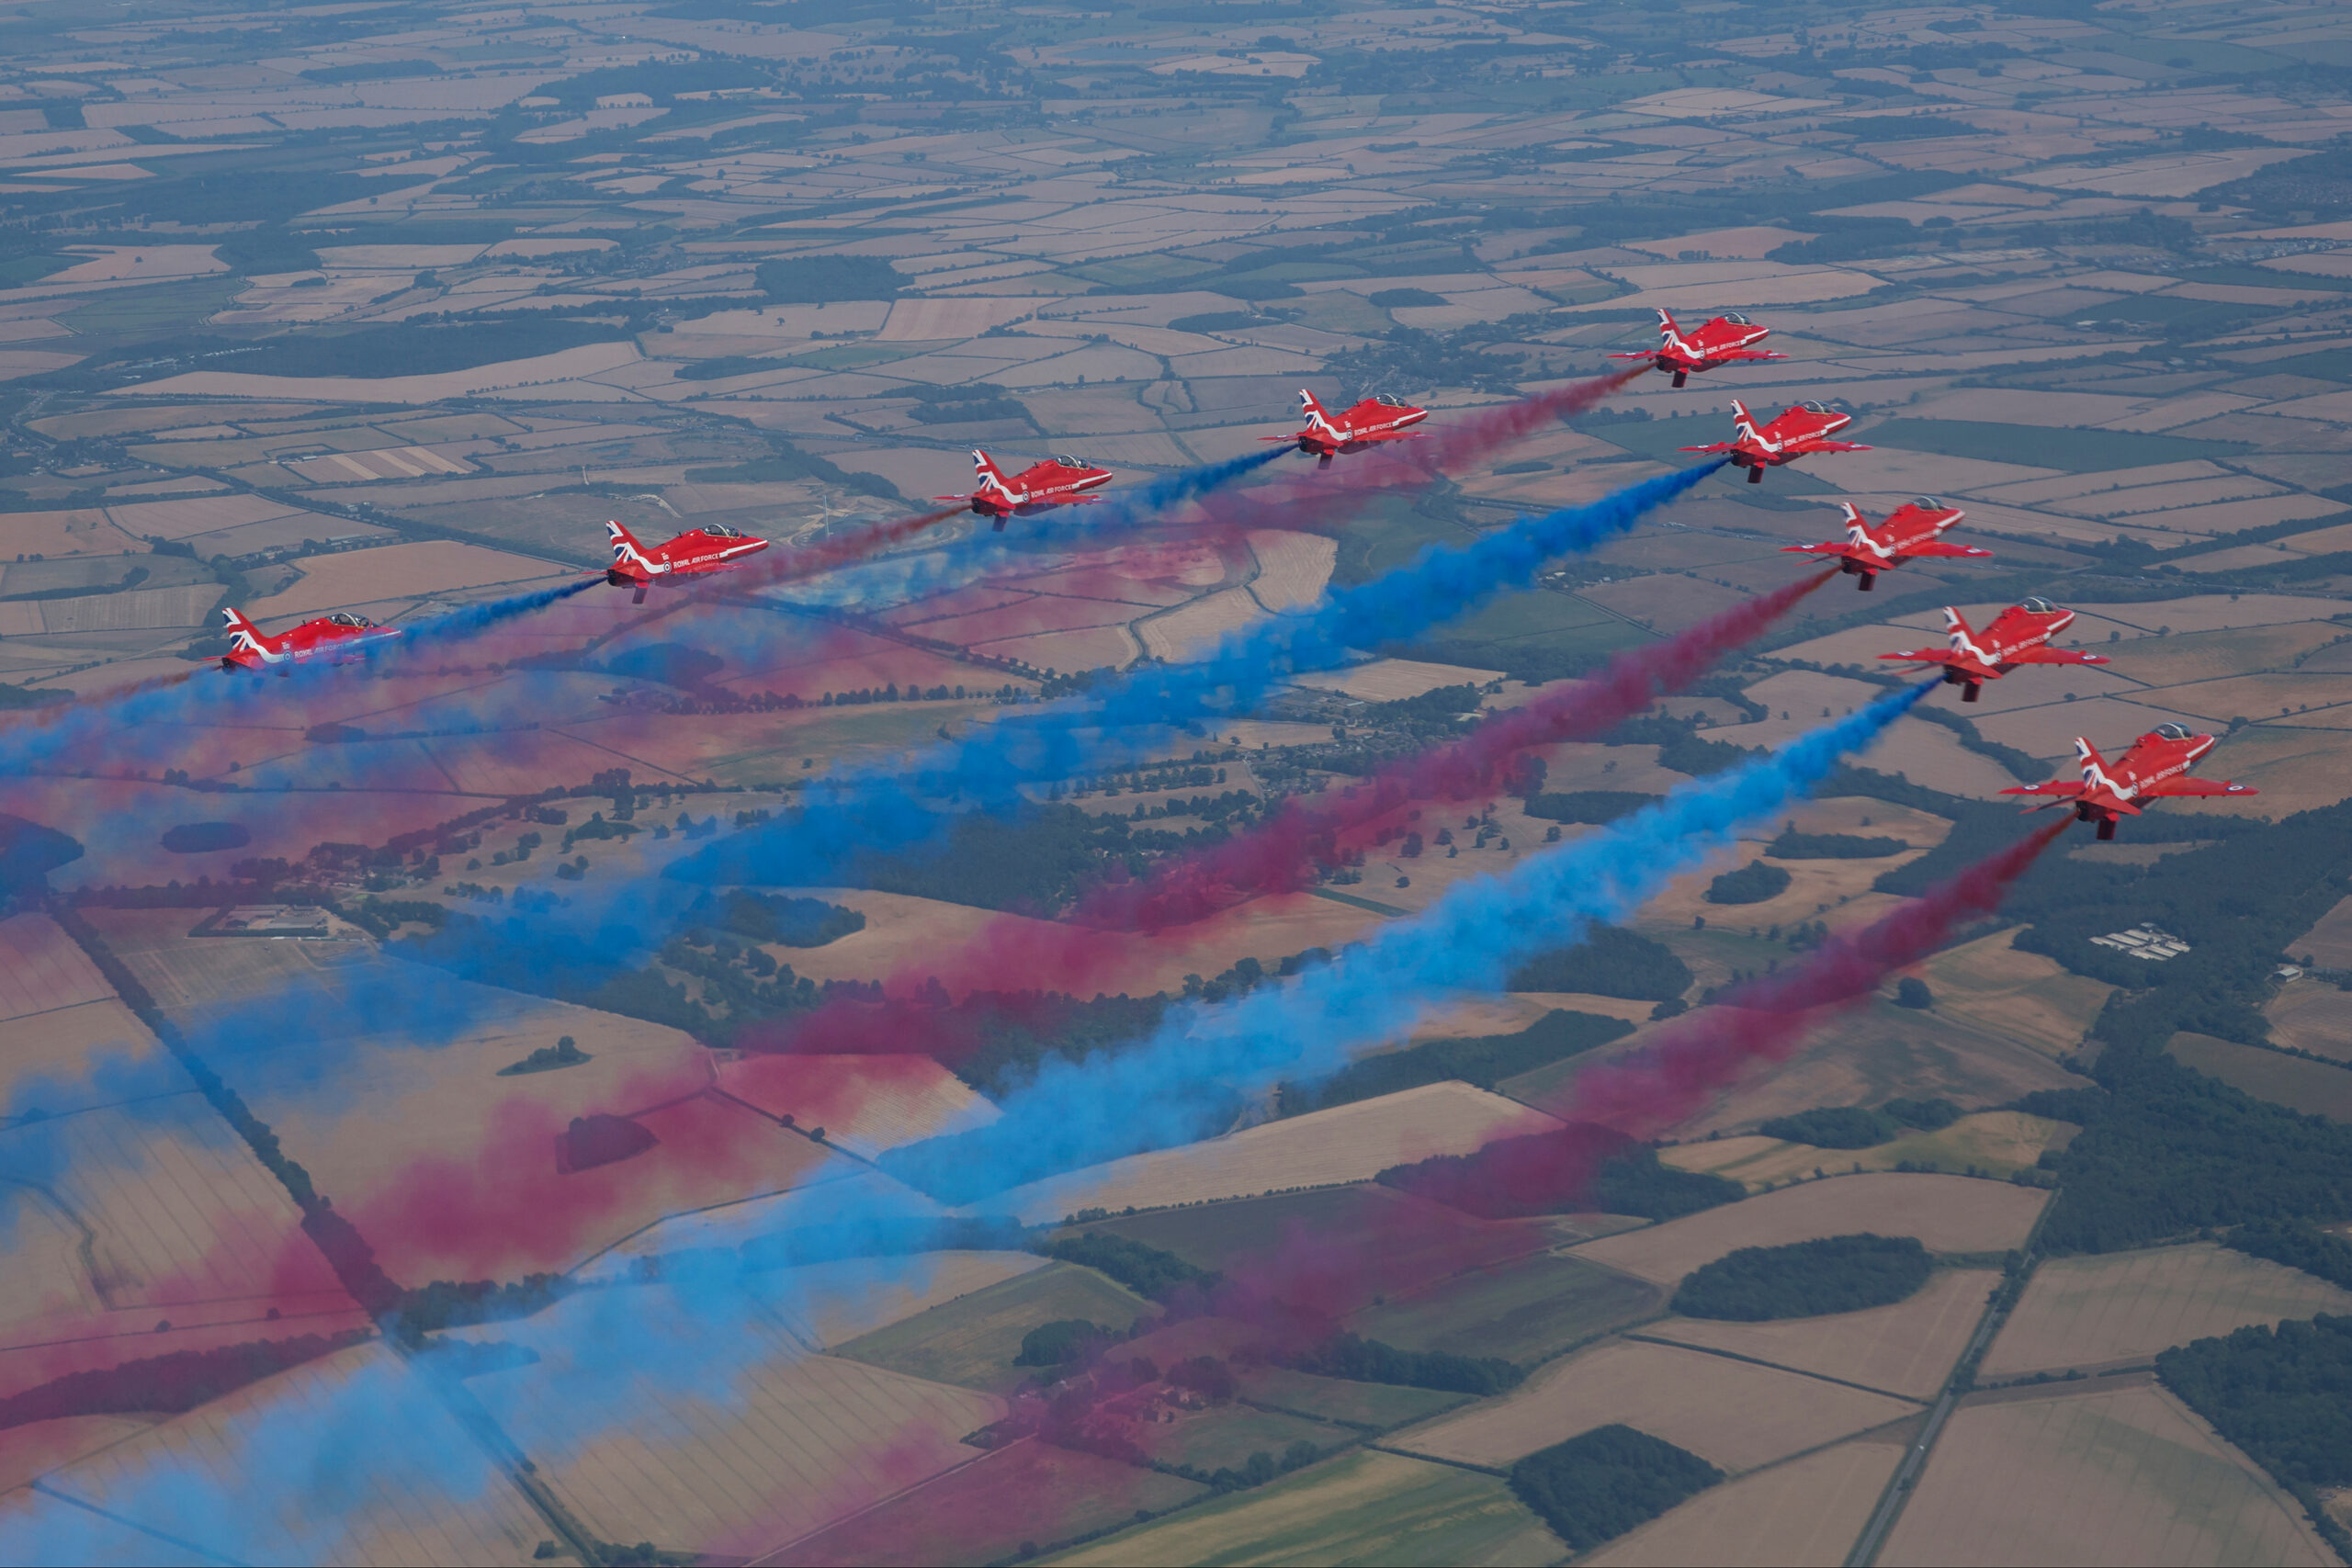
Watch the run in
Aircraft do not appear from nowhere. Before every pass there is a run in, often from behind the crowd or from one end of the line. Train yourself to look for the aircraft repositioning and to predict where they will arrive. The moment you see the team turning in towards centre, get the camera up and start tracking. The photographers who get the shot are already on the aircraft when it crosses the line, not lifting the camera as it goes by.
Use the first display as a rehearsal
If you can watch the team at one show before photographing them at another, do it. Even watching online footage of the current season’s sequence helps you learn the order of manoeuvres and the rhythm of the display. The set pieces tend to come in a consistent order through a season, so a little homework tells you when the loops, the Synchro crossing and the bomb burst are due.
Do not forget to watch
It is easy to spend the whole display with one eye shut and the other in a viewfinder, and to come away having seen nothing. Pick the two or three shots you really want, get those, and then let the camera down for a pass or two and simply watch. You will enjoy the day more, and you will understand the display better for next time. A photographer who knows the sequence inside out will always beat one who shoots everything blindly.
Flypasts versus full displays
Not every Red Arrows appearance is a full aerobatic display. The team also performs flypasts, where they fly past in formation without the aerobatics. The two call for different plans.
Flypasts
A flypast may be a single pass or a small number of passes, sometimes with very little warning and often as part of a larger event rather than a dedicated airshow. There is no second half and no Synchro work. Your whole opportunity may be one formation pass, so know the timing, know the direction, and be ready well before. Flypasts are also where the rare nine ship formation appears in 2026, so if you want the full diamond, a flypast at a national occasion is your target rather than a standard show.
Full displays
A full display runs for roughly twenty to twenty five minutes and gives you the complete two half structure, with formation work, the Synchro pair and the smoke set pieces. This is where you can work through a shot list: a clean formation shape, the squaring moment, a single pass, the Synchro crossing and a smoke pattern. Pace yourself across the display rather than burning the whole card on the opening pass.
Weather, light and haze
British weather shapes Red Arrows photography as much as anything. The team adapts its display to the conditions, and so should you.
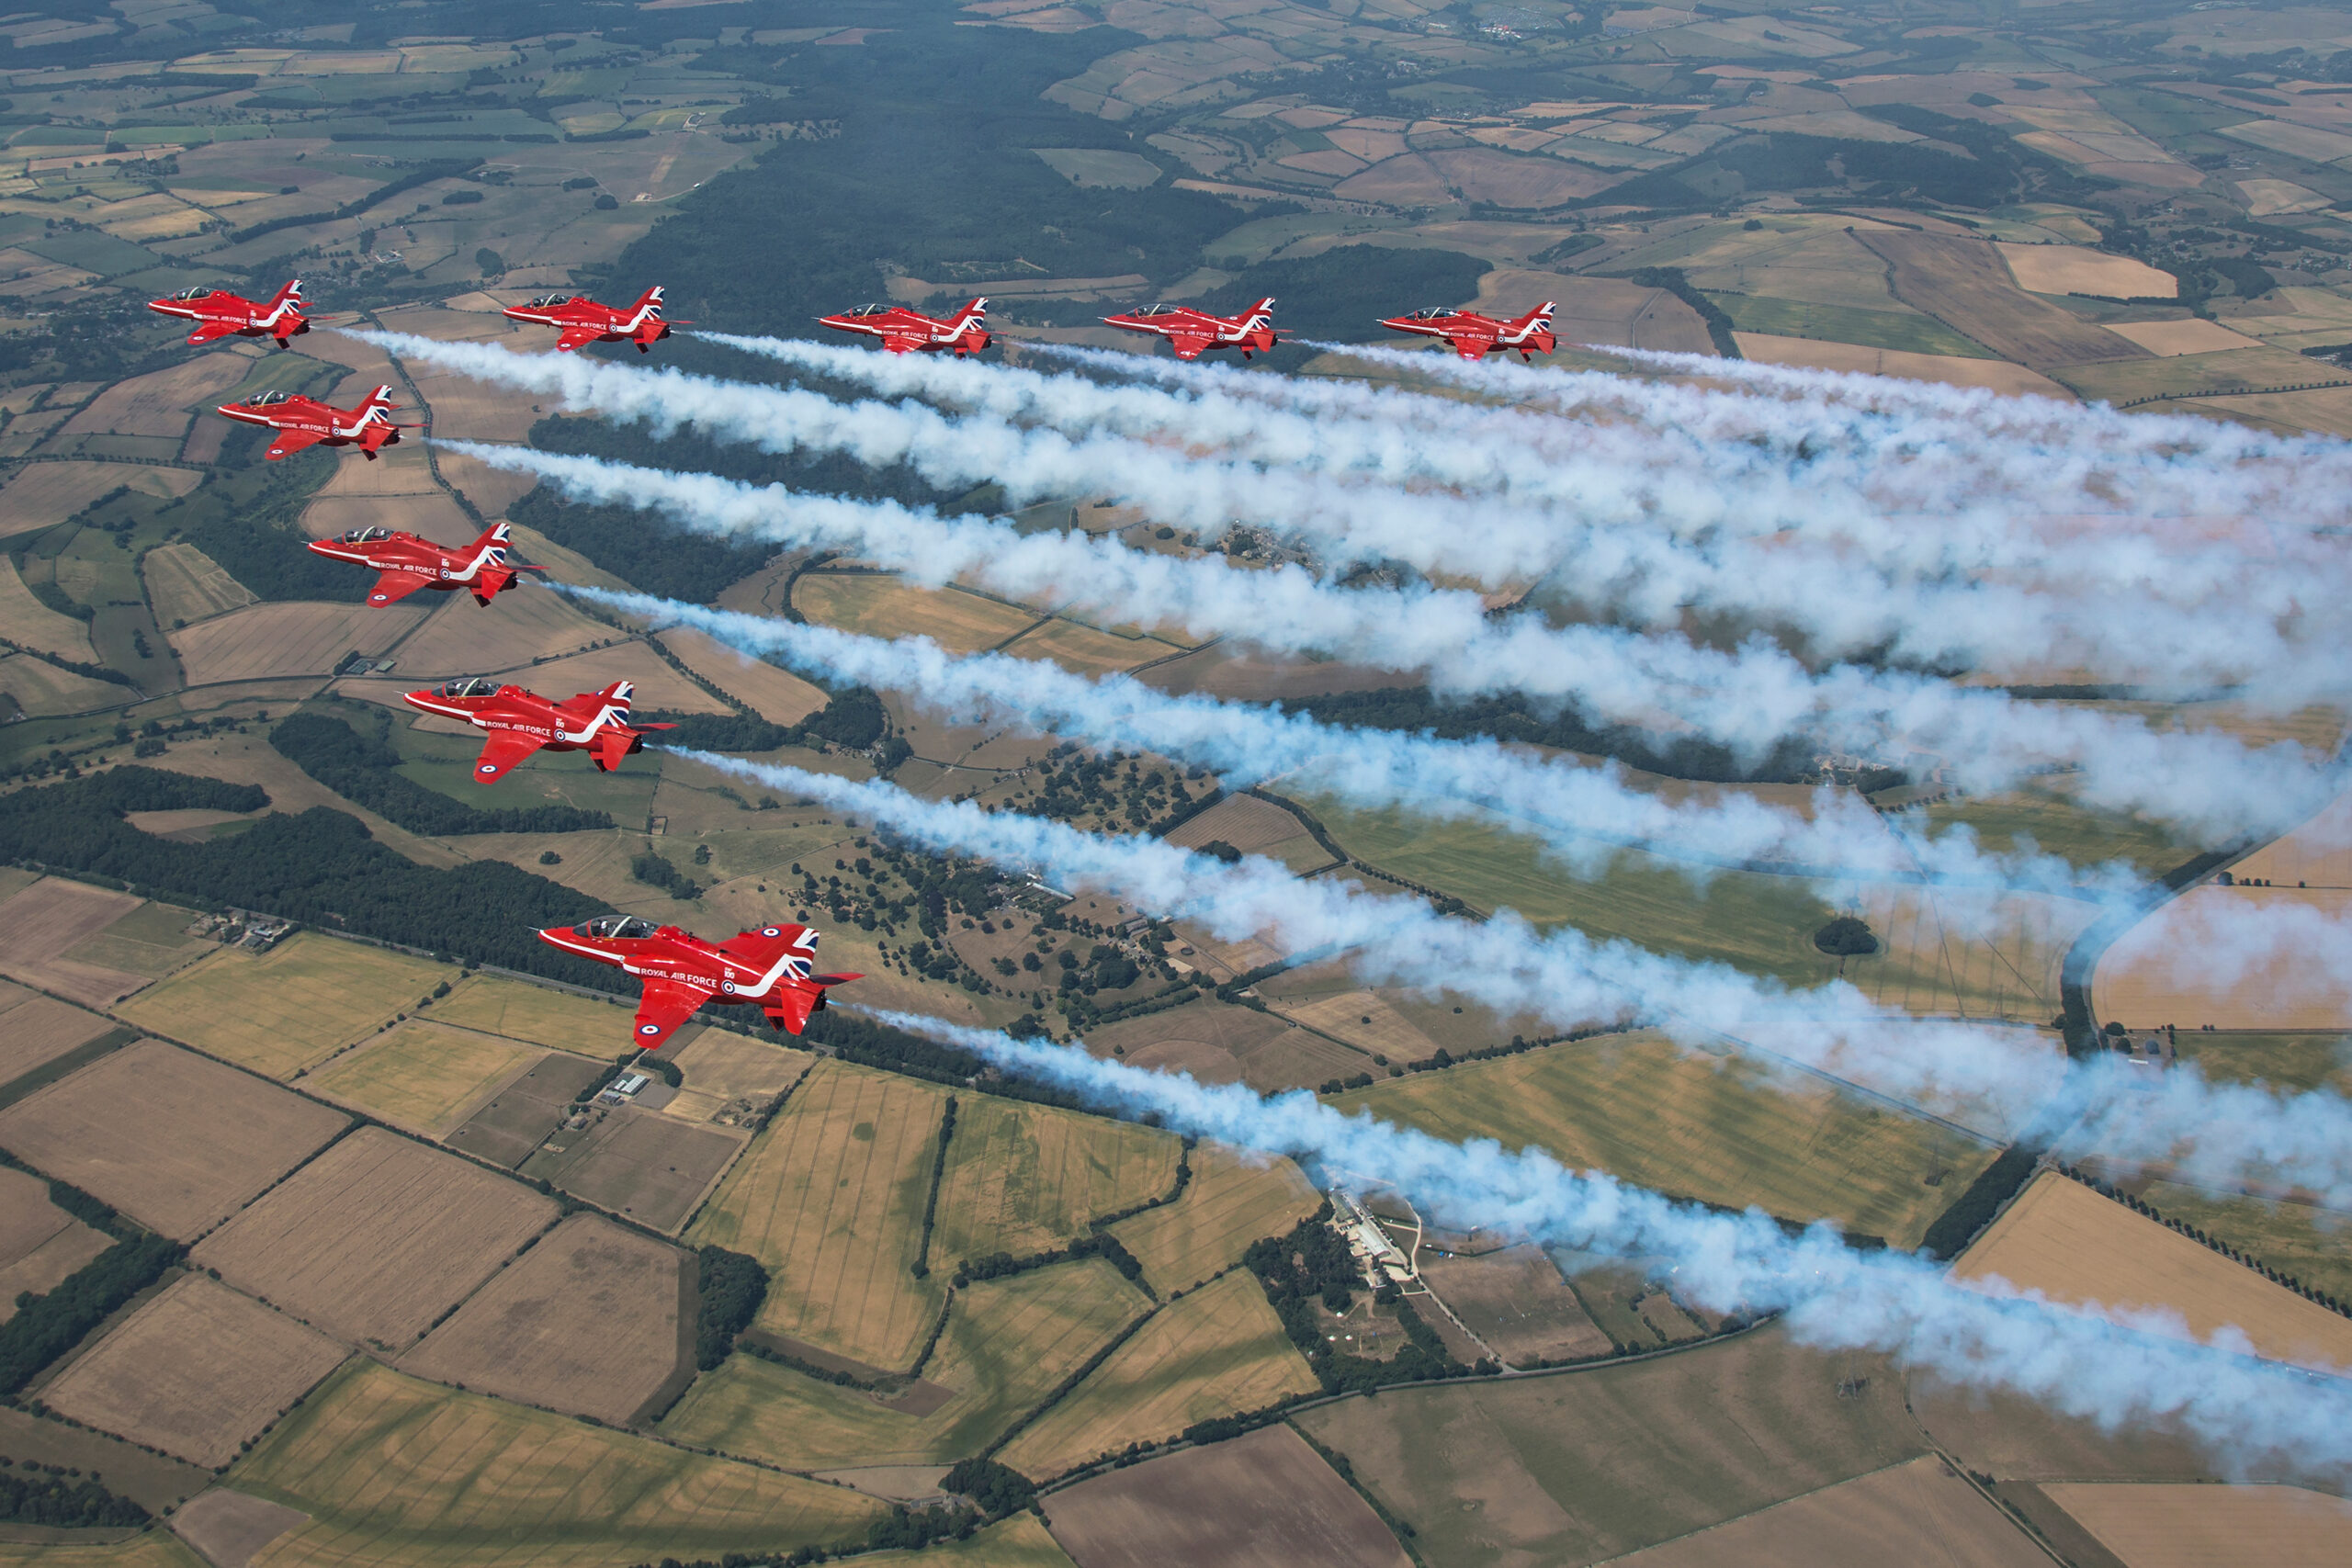
Display types and cloud
In good weather the team flies a full display with high loops. In poorer visibility they fly a rolling display, and in low cloud a flat display that stays below the cloud base with no vertical manoeuvres. This affects your pictures. A flat display keeps the aircraft lower and closer to the horizon, which can mean cluttered backgrounds but also dramatic low passes. Know which display you are likely to get from the conditions, and adjust your expectations.
Exposing against grey skies
Overcast is the most common challenge. A white sky fools the meter into underexposing, leaving the red jets dark and muddy. Add positive exposure compensation, watch your histogram, and accept a brighter sky in exchange for properly exposed aircraft. A blown white sky is easier to live with than a black aeroplane. If the cloud is broken, time your bursts for the moments the team crosses a patch of blue or brighter cloud.
Heat haze and distance
On a hot day, heat haze rising from the airfield softens distant aircraft no matter how good your technique. The aircraft that are closest and highest will be sharpest, so favour the passes that come towards you and overhead rather than the distant turns at the ends of the line. There is little you can do about haze except shoot through the clearer air, which usually means waiting for the closer passes.
Common mistakes and how to fix them
Most disappointing Red Arrows pictures fail for a handful of repeatable reasons. Recognise them and you can fix them on the day.
Shutter speed too low
Soft, smeared jets usually mean the shutter was too slow or the pan was jerky. Because the Hawks have no propeller to blur, there is no reason to drop below 1/1000 for standard shots. If your frames are soft, raise the shutter to 1/1600, steady your pan, and try again.
Aircraft dark against the sky
If the jets come out as silhouettes, the meter has underexposed for a bright sky. Add exposure compensation or switch to manual exposure. This single fix transforms overcast displays.
Formation clipped by the frame
Chopping a wingtip or the smoke off the edge comes from zooming in too far. Pull back, leave breathing room, and crop later. It is far better to have a little extra sky than to lose part of the shape.
Chasing the wrong direction
Missing the Synchro crossing usually means you were tracking one aircraft instead of watching the crossing point. Pre-focus on the point where the pair will meet, frame the gap, and fire a burst as they converge.
Single shot autofocus
If the first frame of a burst is sharp and the rest are soft, you are probably in single shot focus. Switch to continuous autofocus so the lens keeps refocusing through the pass.
Holding the shutter down for too long
Spraying hundreds of frames fills the buffer, the card and your evening edit, and rarely improves the hit rate. Short, well timed bursts at the key moments beat continuous firing.
A quick post-processing pass
A little editing finishes Red Arrows shots without overcooking them. Shoot raw if you can, because it gives you room to recover the sky and lift the reds cleanly.
Crop and straighten first
Start by straightening the horizon if there is one, and cropping to tidy the composition. This is where the breathing room you left pays off: you can crop in to balance the smoke and the aircraft without losing anything important.
Exposure, contrast and the red
Lift the shadows a touch to bring detail back into the aircraft, control the highlights in any bright sky, and add a little contrast. Be careful with saturation on the red. The team’s gloss red is already strong, and pushing it too far makes the aircraft glow unnaturally and lose detail. A gentle hand keeps them believable.
Sharpening and noise
Apply sensible output sharpening, and if you shot at higher ISO under cloud, a modest amount of noise reduction cleans the sky without smearing the detail. Our guides to a Lightroom workflow and to sharpening long lens shots go into this in more depth if you want a full routine.
Scenario by scenario settings
Here is a quick reference for the situations you will actually meet during a display, pulling together the advice above into fast decisions.
| Scenario | What to do |
|---|---|
| Bright blue sky, full display | 1/1000 at f/8, auto ISO at base, zoom wide for shapes and in for singles, sun behind you. |
| Flat overcast, flat display | Add +2/3 EV, watch for soft distant passes, favour low close passes against the ground, raise ISO as needed. |
| Synchro crossing | 1/1600 to 1/2000, pre-focus on the crossing point, frame the gap, fire a burst as they converge. |
| Smoke loop or heart | Zoom wide, include the whole shape, 1/1000 at f/8, do not crop the smoke. |
| Single fast pass | Single point on the cockpit, smooth pan, 1/1250 plus, follow through after the shutter. |
| Nine ship flypast (rare in 2026) | Know the time and direction, be ready early, frame for the full diamond with room around it. |
| Hot day with haze | Shoot the closest, highest passes, accept distant softness, lift the shutter to keep what is sharp truly sharp. |
The team appear at most of the UK coastal shows, where the display line runs out over the sea rather than along a runway. See the guide to shooting an airshow over water for what that does to reach, light and background.
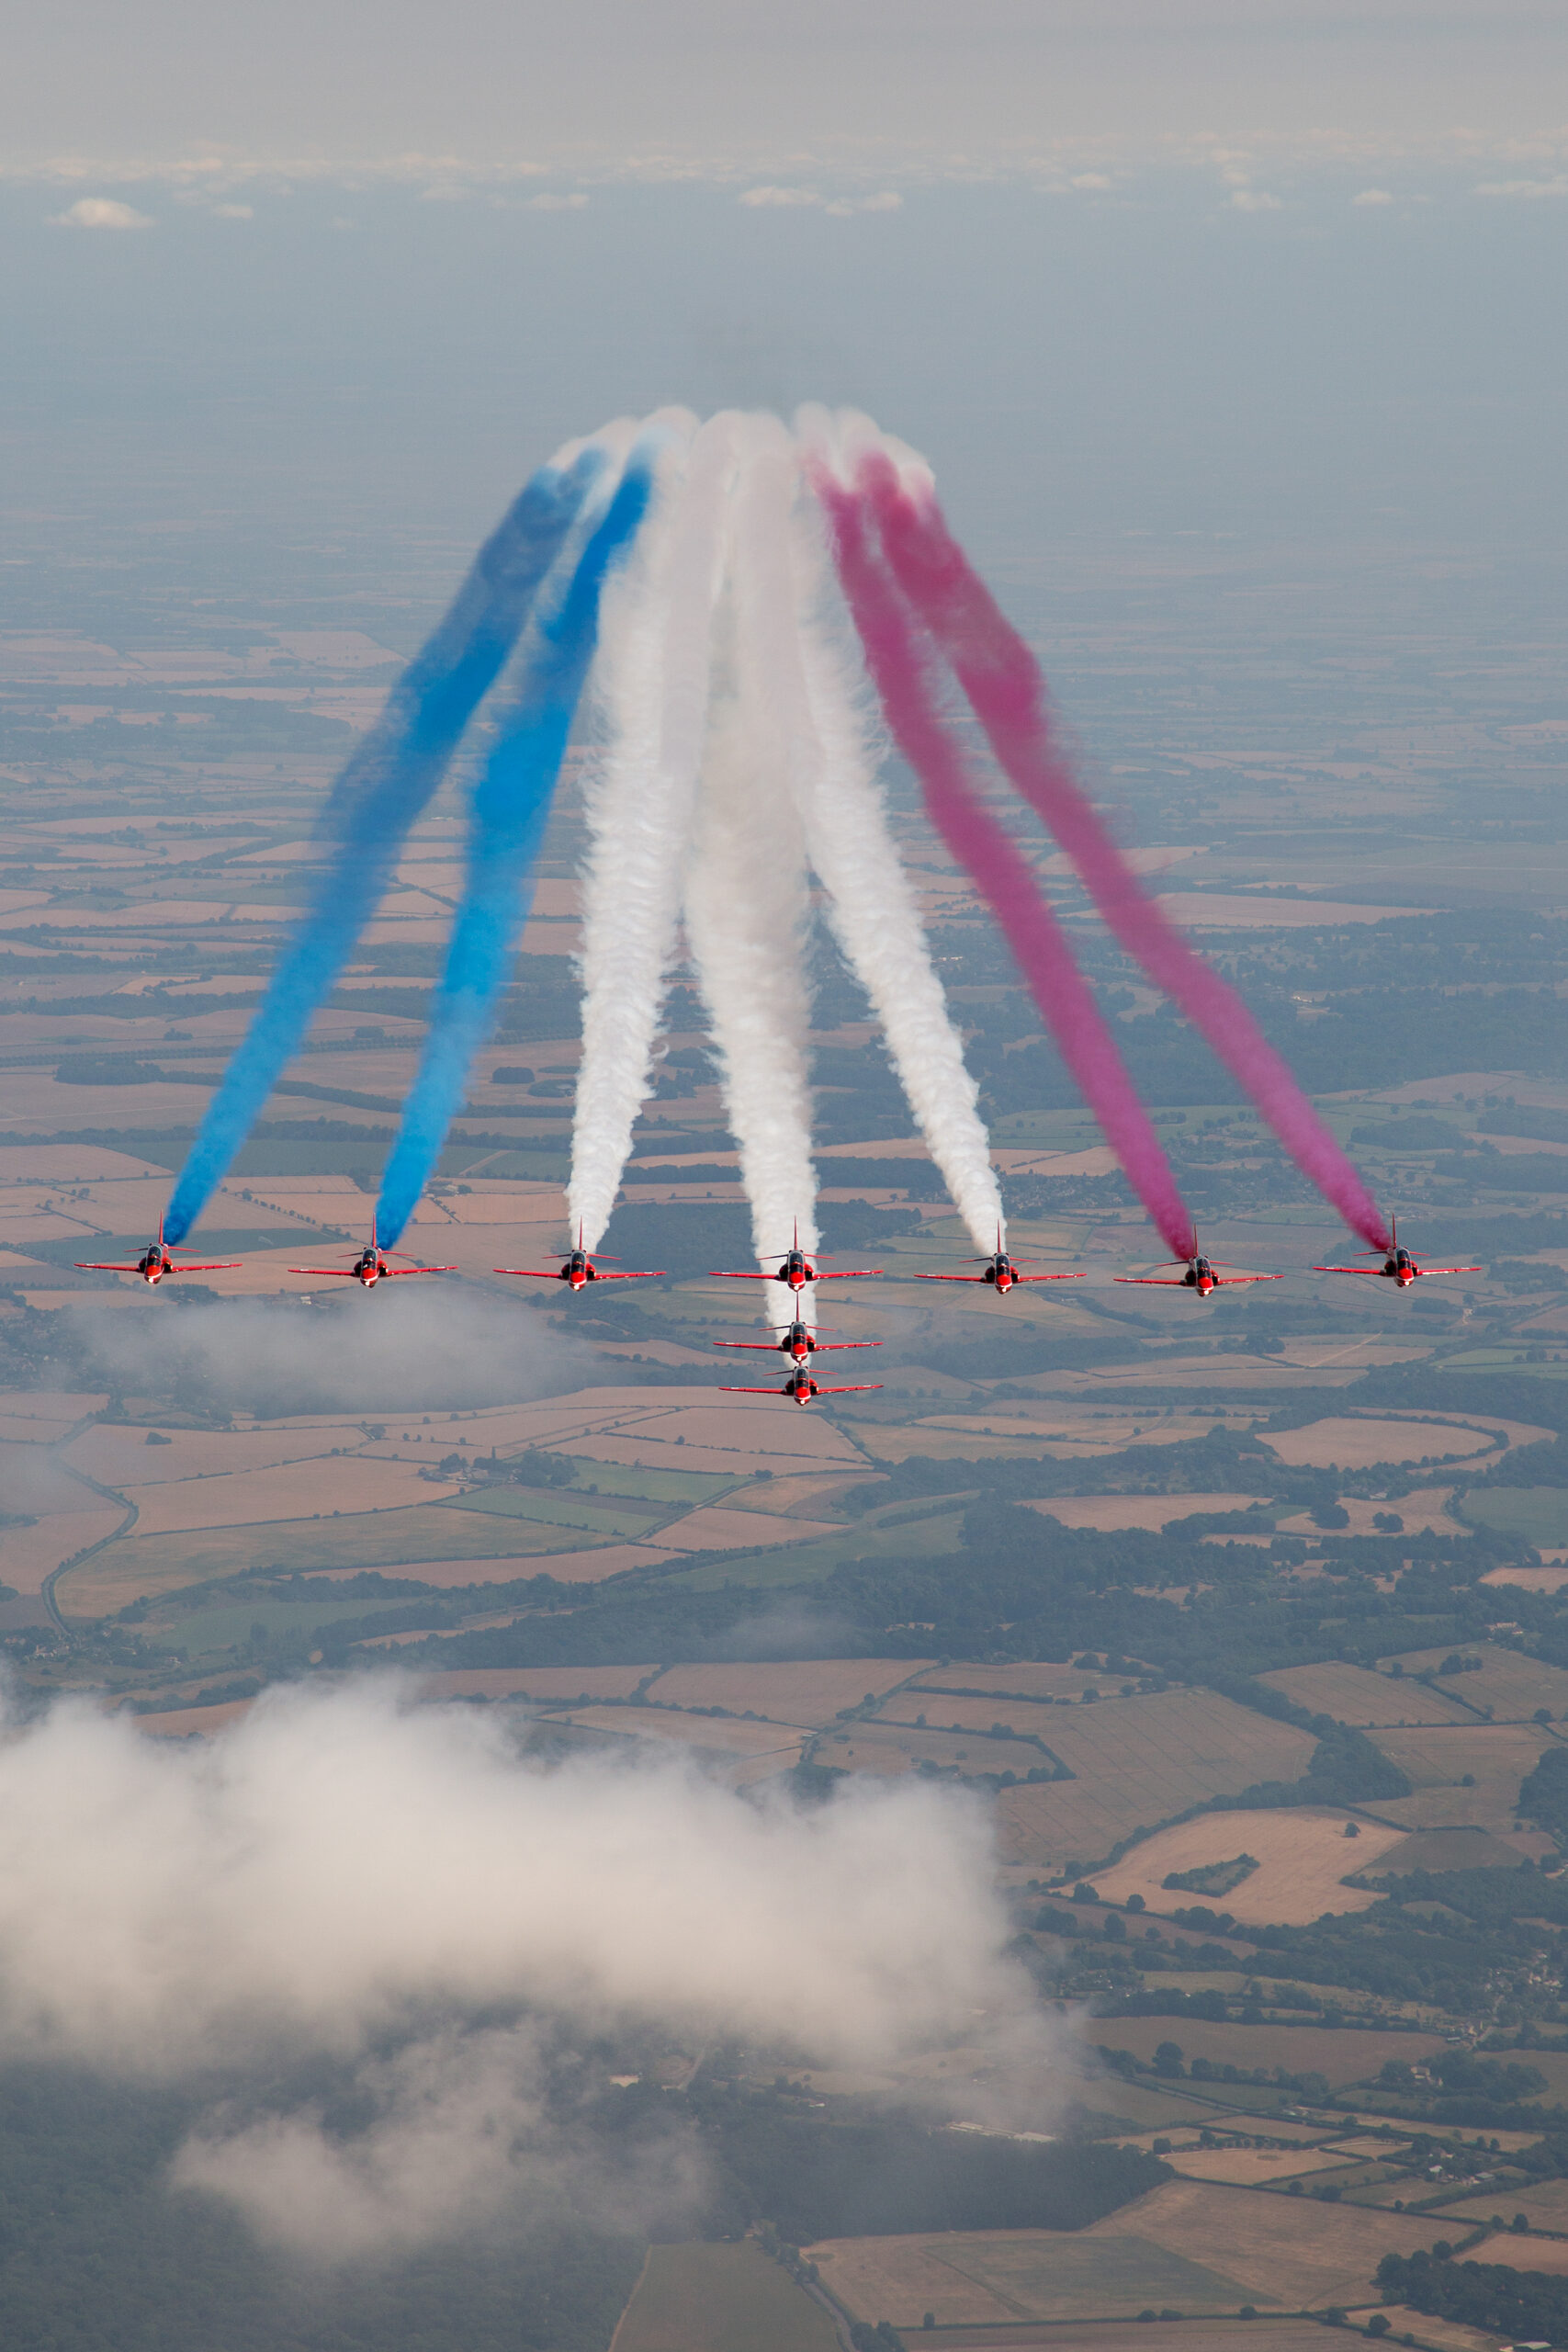
If you need Red Arrows pictures rather than the means of making your own, the companion piece is our buyer’s guide to licensing Red Arrows photographs, built on air to air frames made from a camera aircraft in 2018.
Frequently asked questions
What shutter speed should I use for the Red Arrows?
Start at 1/1000 second for formation work and raise it to 1/1600 or 1/2000 for fast singles and the Synchro crossing. Because the Hawks are jets with no propeller to blur, you can use a high shutter speed and freeze everything cleanly. Only drop to around 1/500 if you deliberately want a motion blur pan on a single aircraft.
What lens is best for photographing the Red Arrows?
A telephoto zoom in the 100 to 400mm range is ideal. The display swings between tight formation shapes, where you need to zoom out, and fast lone passes, where you need to zoom in, sometimes within seconds. A fixed prime can leave you unable to fit the whole formation in the frame. On a crop sensor body the extra reach helps with distant passes.
Why are the Red Arrows flying with seven jets instead of nine?
For 2026 the team is performing most displays with seven aircraft to conserve airframe hours and spare parts on the ageing Hawk T1 fleet, which is due to retire in March 2030. Nine aircraft are reserved for selected flypasts, with the full nine ship formation scheduled for only the King’s Birthday Flypast in June and the United States 250th anniversary celebrations in July.
How do I photograph the Synchro Pair crossing?
The Synchro Pair, Reds 6 and 7, cross in front of display centre at high speed. Rather than tracking one aircraft, pre-focus on the point where they will meet, frame the gap, and fire a burst as they converge. Watch one pass first to learn the crossing height and position, then commit to the next one.
How do I stop the jets coming out dark against the sky?
A bright sky fools the meter into underexposing, which silhouettes the aircraft. Add positive exposure compensation of about plus one third to plus one stop, or shoot in manual exposure once you have a good reading. It is better to have a slightly bright sky than a dark, detail free aeroplane.
Where should I stand at the airshow?
Aim for a spot near display centre, usually opposite the commentary position, with the sun behind you or over your shoulder. The team aims its frontal passes and the Synchro crossing at display centre, so that is where the action comes towards you. Arrive early to claim a clear view of the crowd line.
How do I photograph the Red Arrows smoke colours so they stand out?
White smoke is the most forgiving and reads cleanly against both blue and grey skies, so it is the safe choice for the strongest trails. Red and blue smoke can vanish against a busy or coloured sky, so they look their best against clean contrast, ideally a plain blue backdrop with the light falling on the trail. Frame with space on the side the smoke is trailing so the trail has somewhere to go rather than being clipped at the edge.
What frame rate and drive mode work best for the Red Arrows?
Use continuous high speed drive and fire short bursts of three to five frames at the key moments rather than holding the button down through a whole pass. Bursts let you pick the frame where the formation is squarest to you or the Synchro pair is closest and most symmetrical. A fast memory card with headroom stops the buffer stalling just as the crossing happens, so fit one rated for quick continuous shooting.
Can I photograph the Red Arrows well on an overcast day?
Yes, but a white sky fools the meter into underexposing, which leaves the gloss red jets dark and muddy, so add positive exposure compensation and check your histogram. Accept a brighter sky in exchange for properly exposed aircraft, because a blown white background is easier to live with than black aeroplanes. If the cloud is broken, time your bursts for the moments the team crosses a patch of blue or brighter cloud.
What are the best camera settings for photographing the Red Arrows?
A good default is shutter priority at around 1/1000 second for the jets, dropping to about 1/640 if you want a little movement in the smoke, with continuous autofocus in a tracking-area mode, high-speed continuous drive, and auto ISO kept as low as the light allows. Meter so the sky is not blown out, and adjust the shutter speed first as the display changes pace.
Can I photograph the Red Arrows with a phone or a small zoom?
You can get record shots, but reach is the problem. The Red Arrows often display at a distance, so a phone or a short zoom renders them as small dots, and a telephoto of at least 300mm on a crop-sensor body, or 400mm and beyond, makes far more difference than any setting. If all you have is a phone, concentrate on the smoke patterns and the crowd atmosphere rather than tight aircraft frames.
When and where can I see the Red Arrows display?
The Red Arrows display throughout the UK summer season and at events abroad, and the official Royal Air Force Red Arrows website publishes the display schedule each year, usually from the spring. Always check the schedule and the weather before travelling, because a display can be cut to a flypast or cancelled at short notice depending on conditions and aircraft serviceability.
Where to go next
Photographing the Red Arrows well comes down to knowing the display, choosing your position, and applying solid fast jet technique with confidence. Learn the two half structure, plan around seven aircraft for 2026, keep the sun behind you, and use a high shutter speed with continuous autofocus and a smooth pan. Do that and the keepers will come.
If you want to build on this, our companion guides on how to photograph fast jets, airshow camera settings and autofocus, general airshow photography tips and the best lenses for aviation photography cover the underlying technique in detail. To see how these shots look when they come together, browse the aviation galleries, and if you want to use aviation imagery commercially you can find terms on the licensing page.
The aircraft itself has a story worth knowing. Our full history of the BAE Systems Hawk, the jet behind the Red Arrows, covers its origins, variants and why the team has flown it since 1979.
