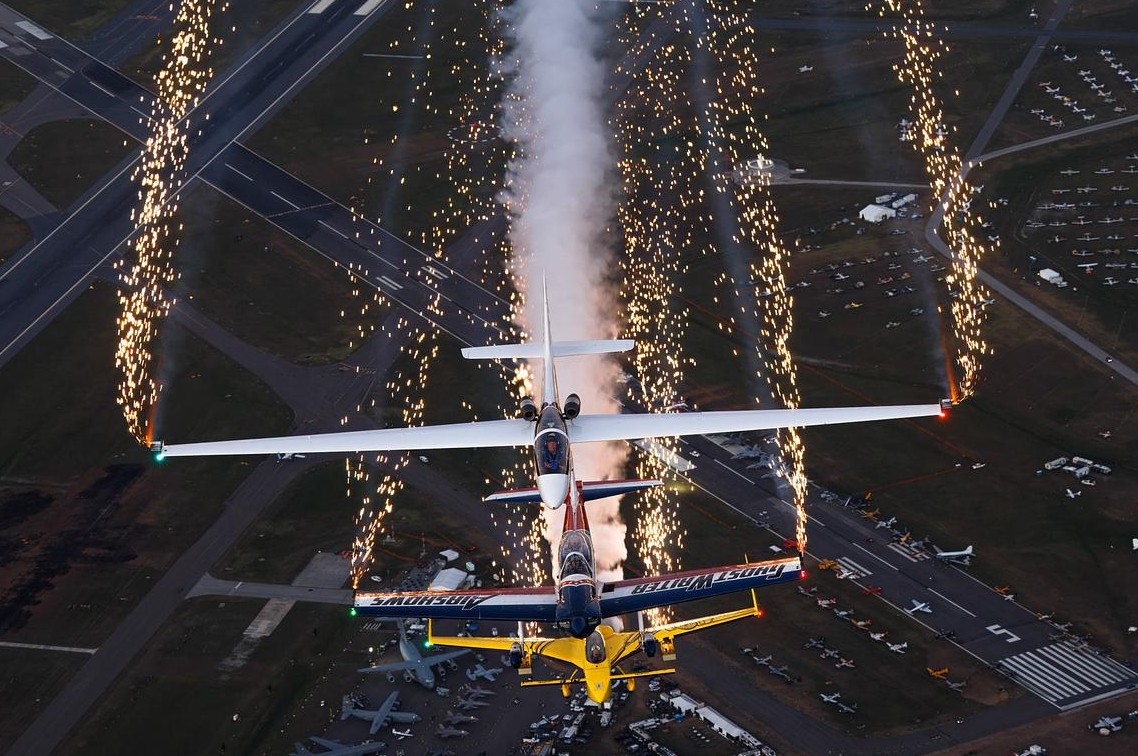
A night airshow gives you pictures you simply cannot take at any other time. An aircraft trailing sparks from its wingtips, a Spitfire lit gold against a deep blue sky, a firework shell bursting behind a display team holding formation in the dark. These are the frames people remember, and they are also the ones that most often go home as a card full of black rectangles and blurred smudges. Night flying is not the same job as a daytime show with the brightness turned down. The light is scarce, it changes fast, and the subject can be moving, static, or exploding, sometimes within the same ten minutes. This guide walks through every part of it, from the gear that actually helps to the exact settings for each kind of shot, so you can come away with the images the evening is capable of giving you.
Everything here assumes a real UK-style night event: a twilight or after-dark flying slot, aircraft carrying lights or wing pyrotechnics, and usually a firework finale to close the show. Much of it applies equally to a static night photo shoot at a museum, which is the calmest and most useful place to learn the craft. Where daytime advice still holds, such as panning technique or metering against a bright sky, it is linked rather than repeated. Read it once before your first night show, then treat the settings tables as a field reference.
What this guide covers
- What night airshow photography really means
- The three kinds of night subject
- Gear that earns its place after dark
- Why night is harder than it looks
- Core settings for moving lit aircraft
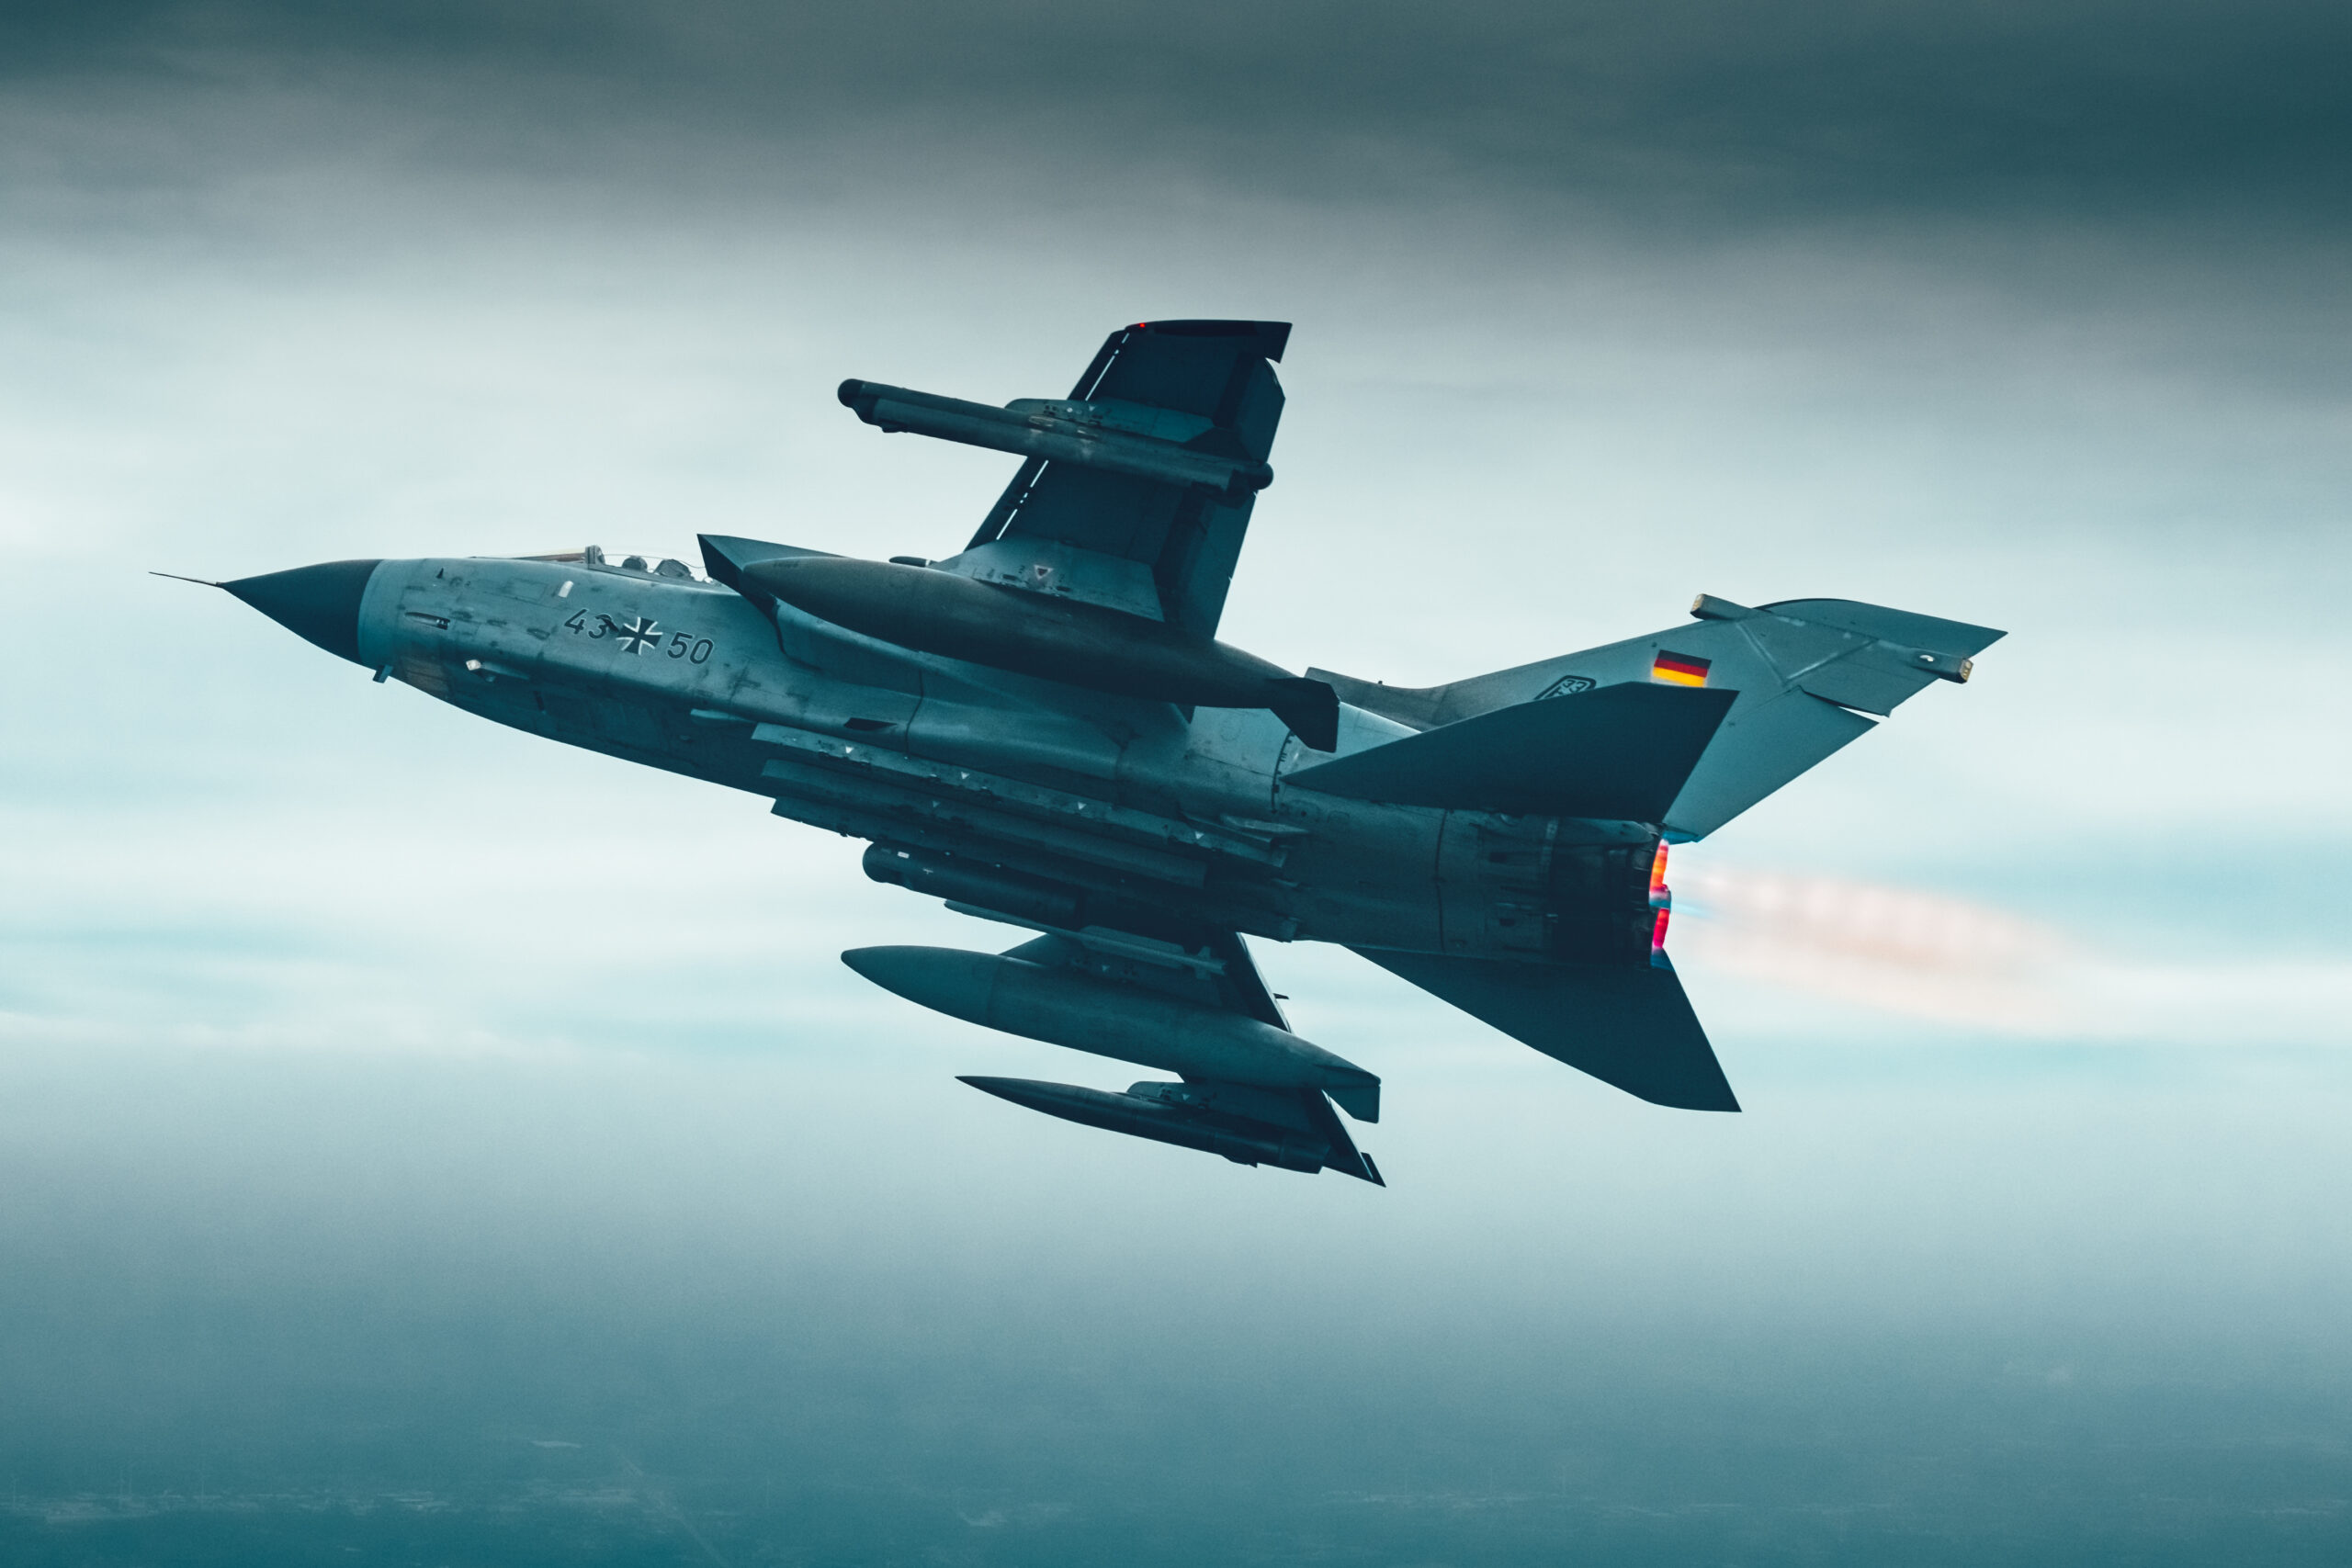
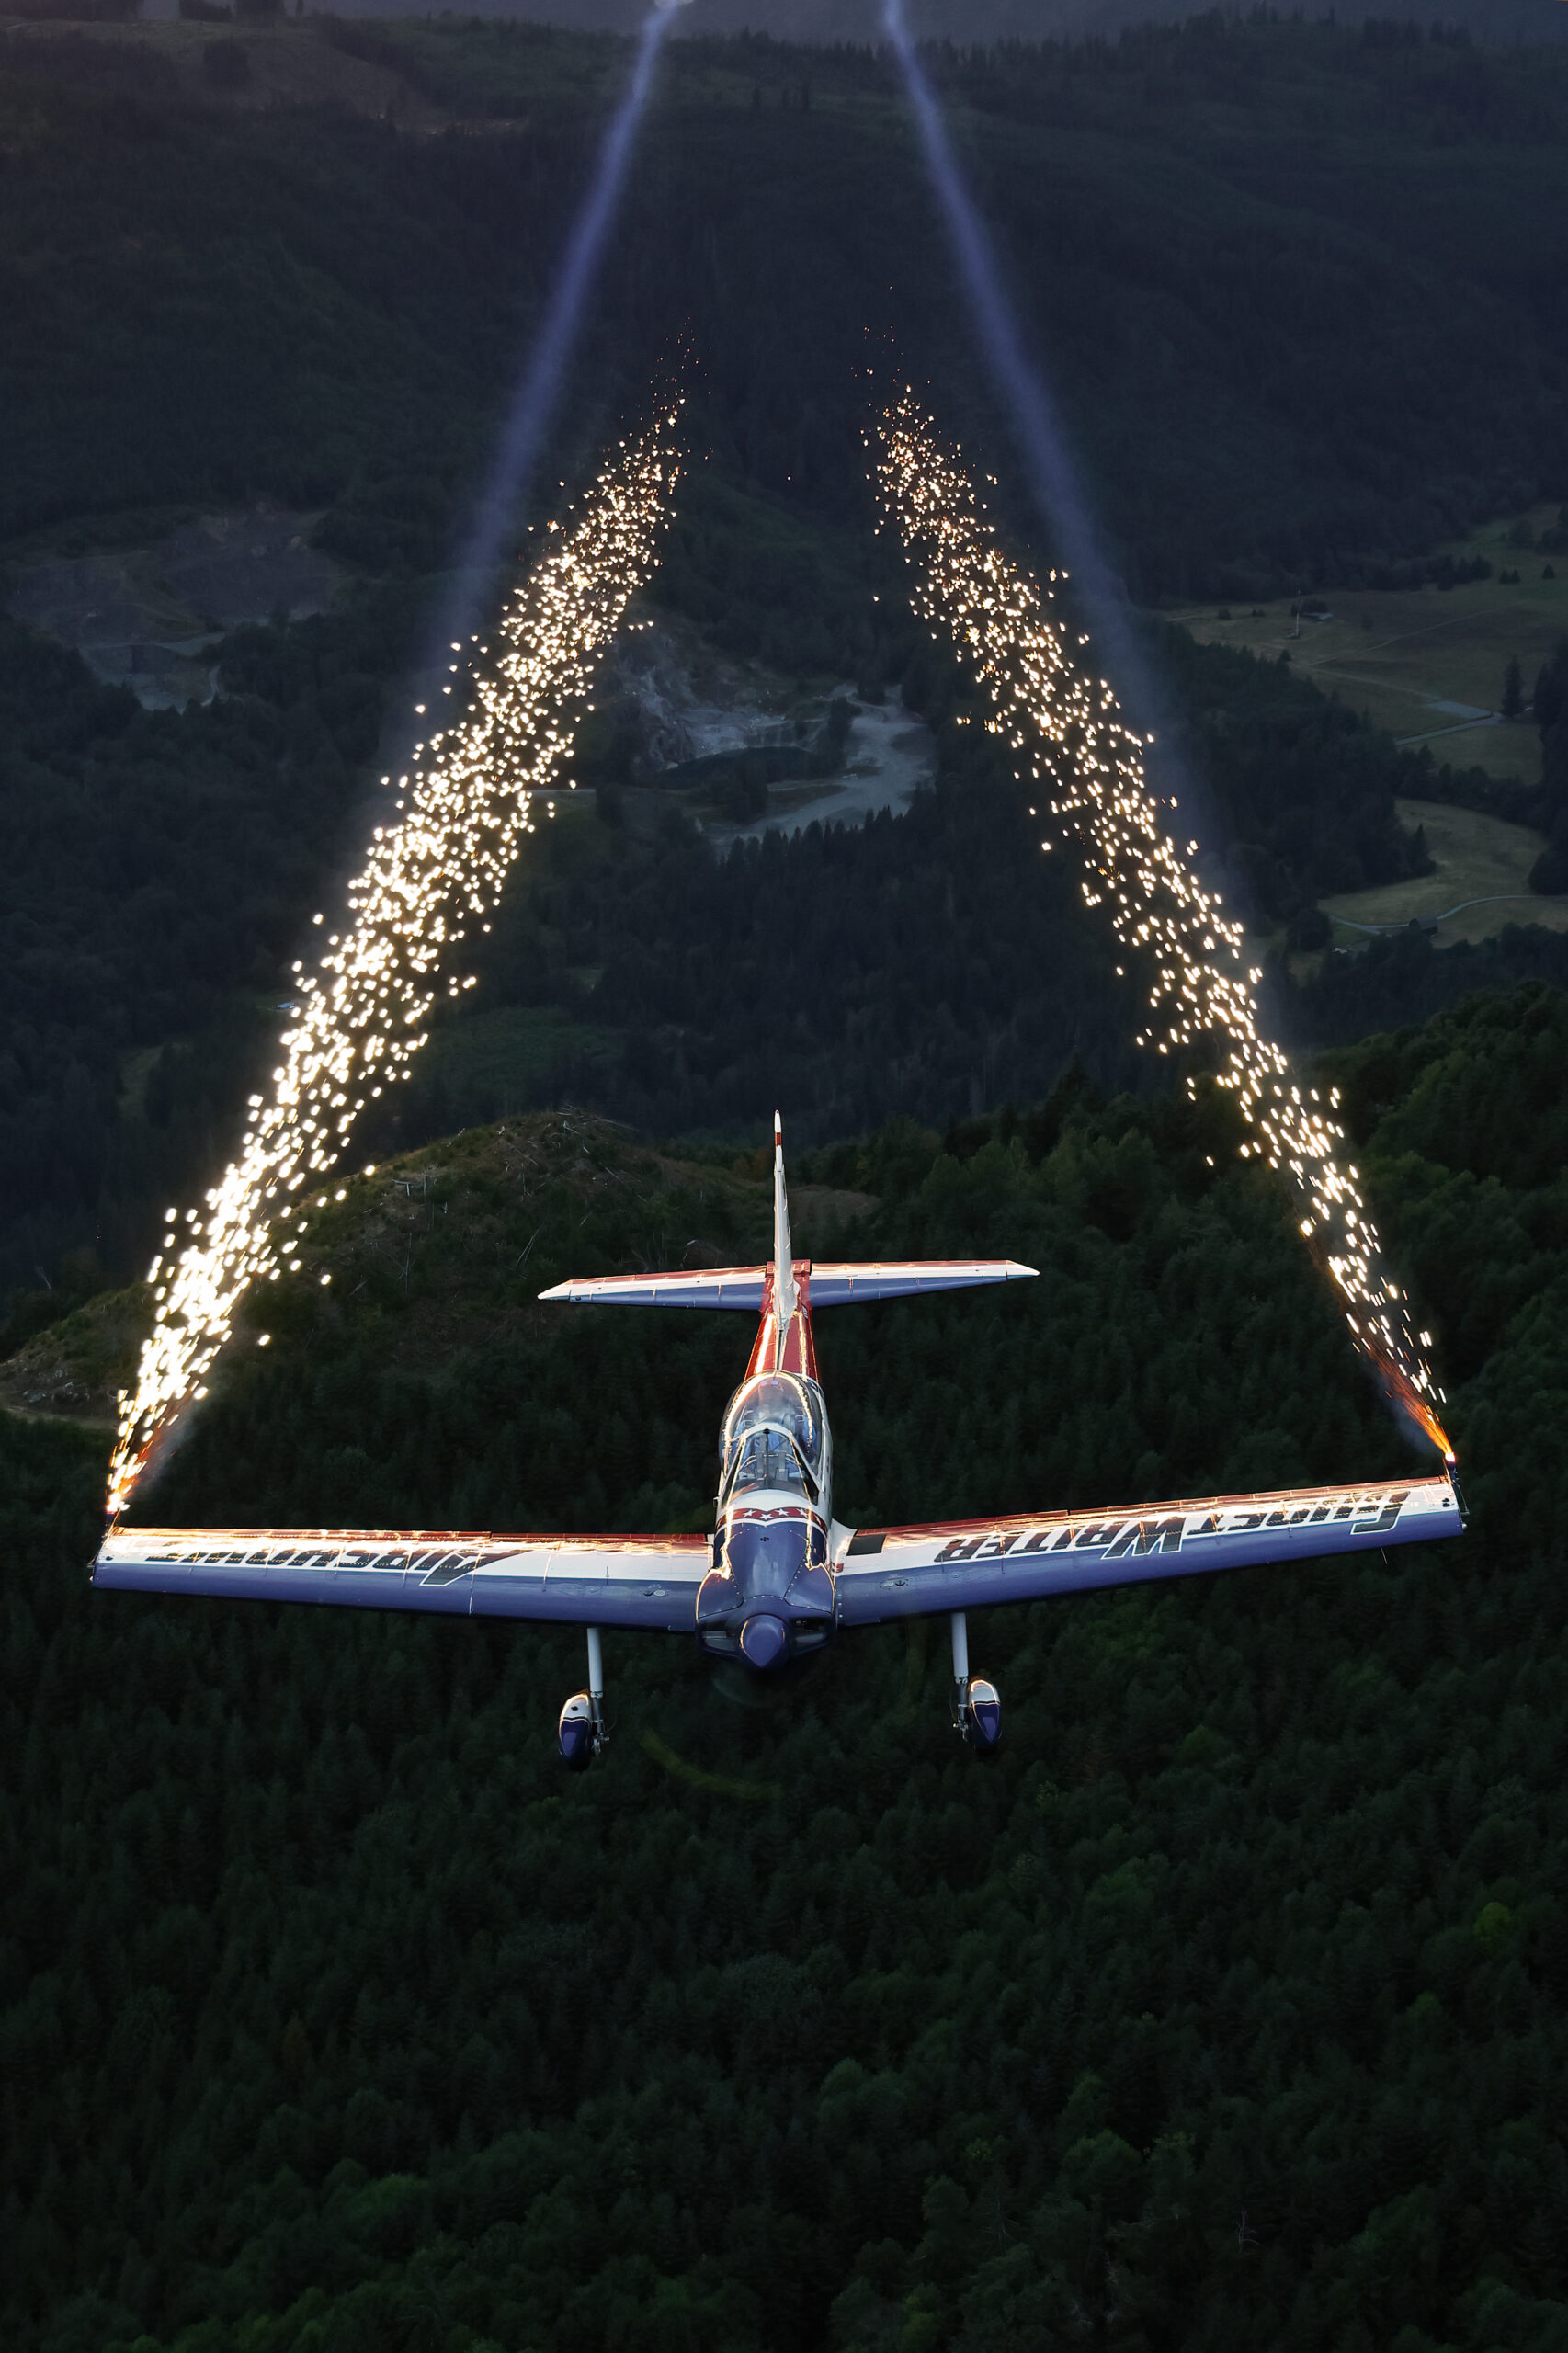
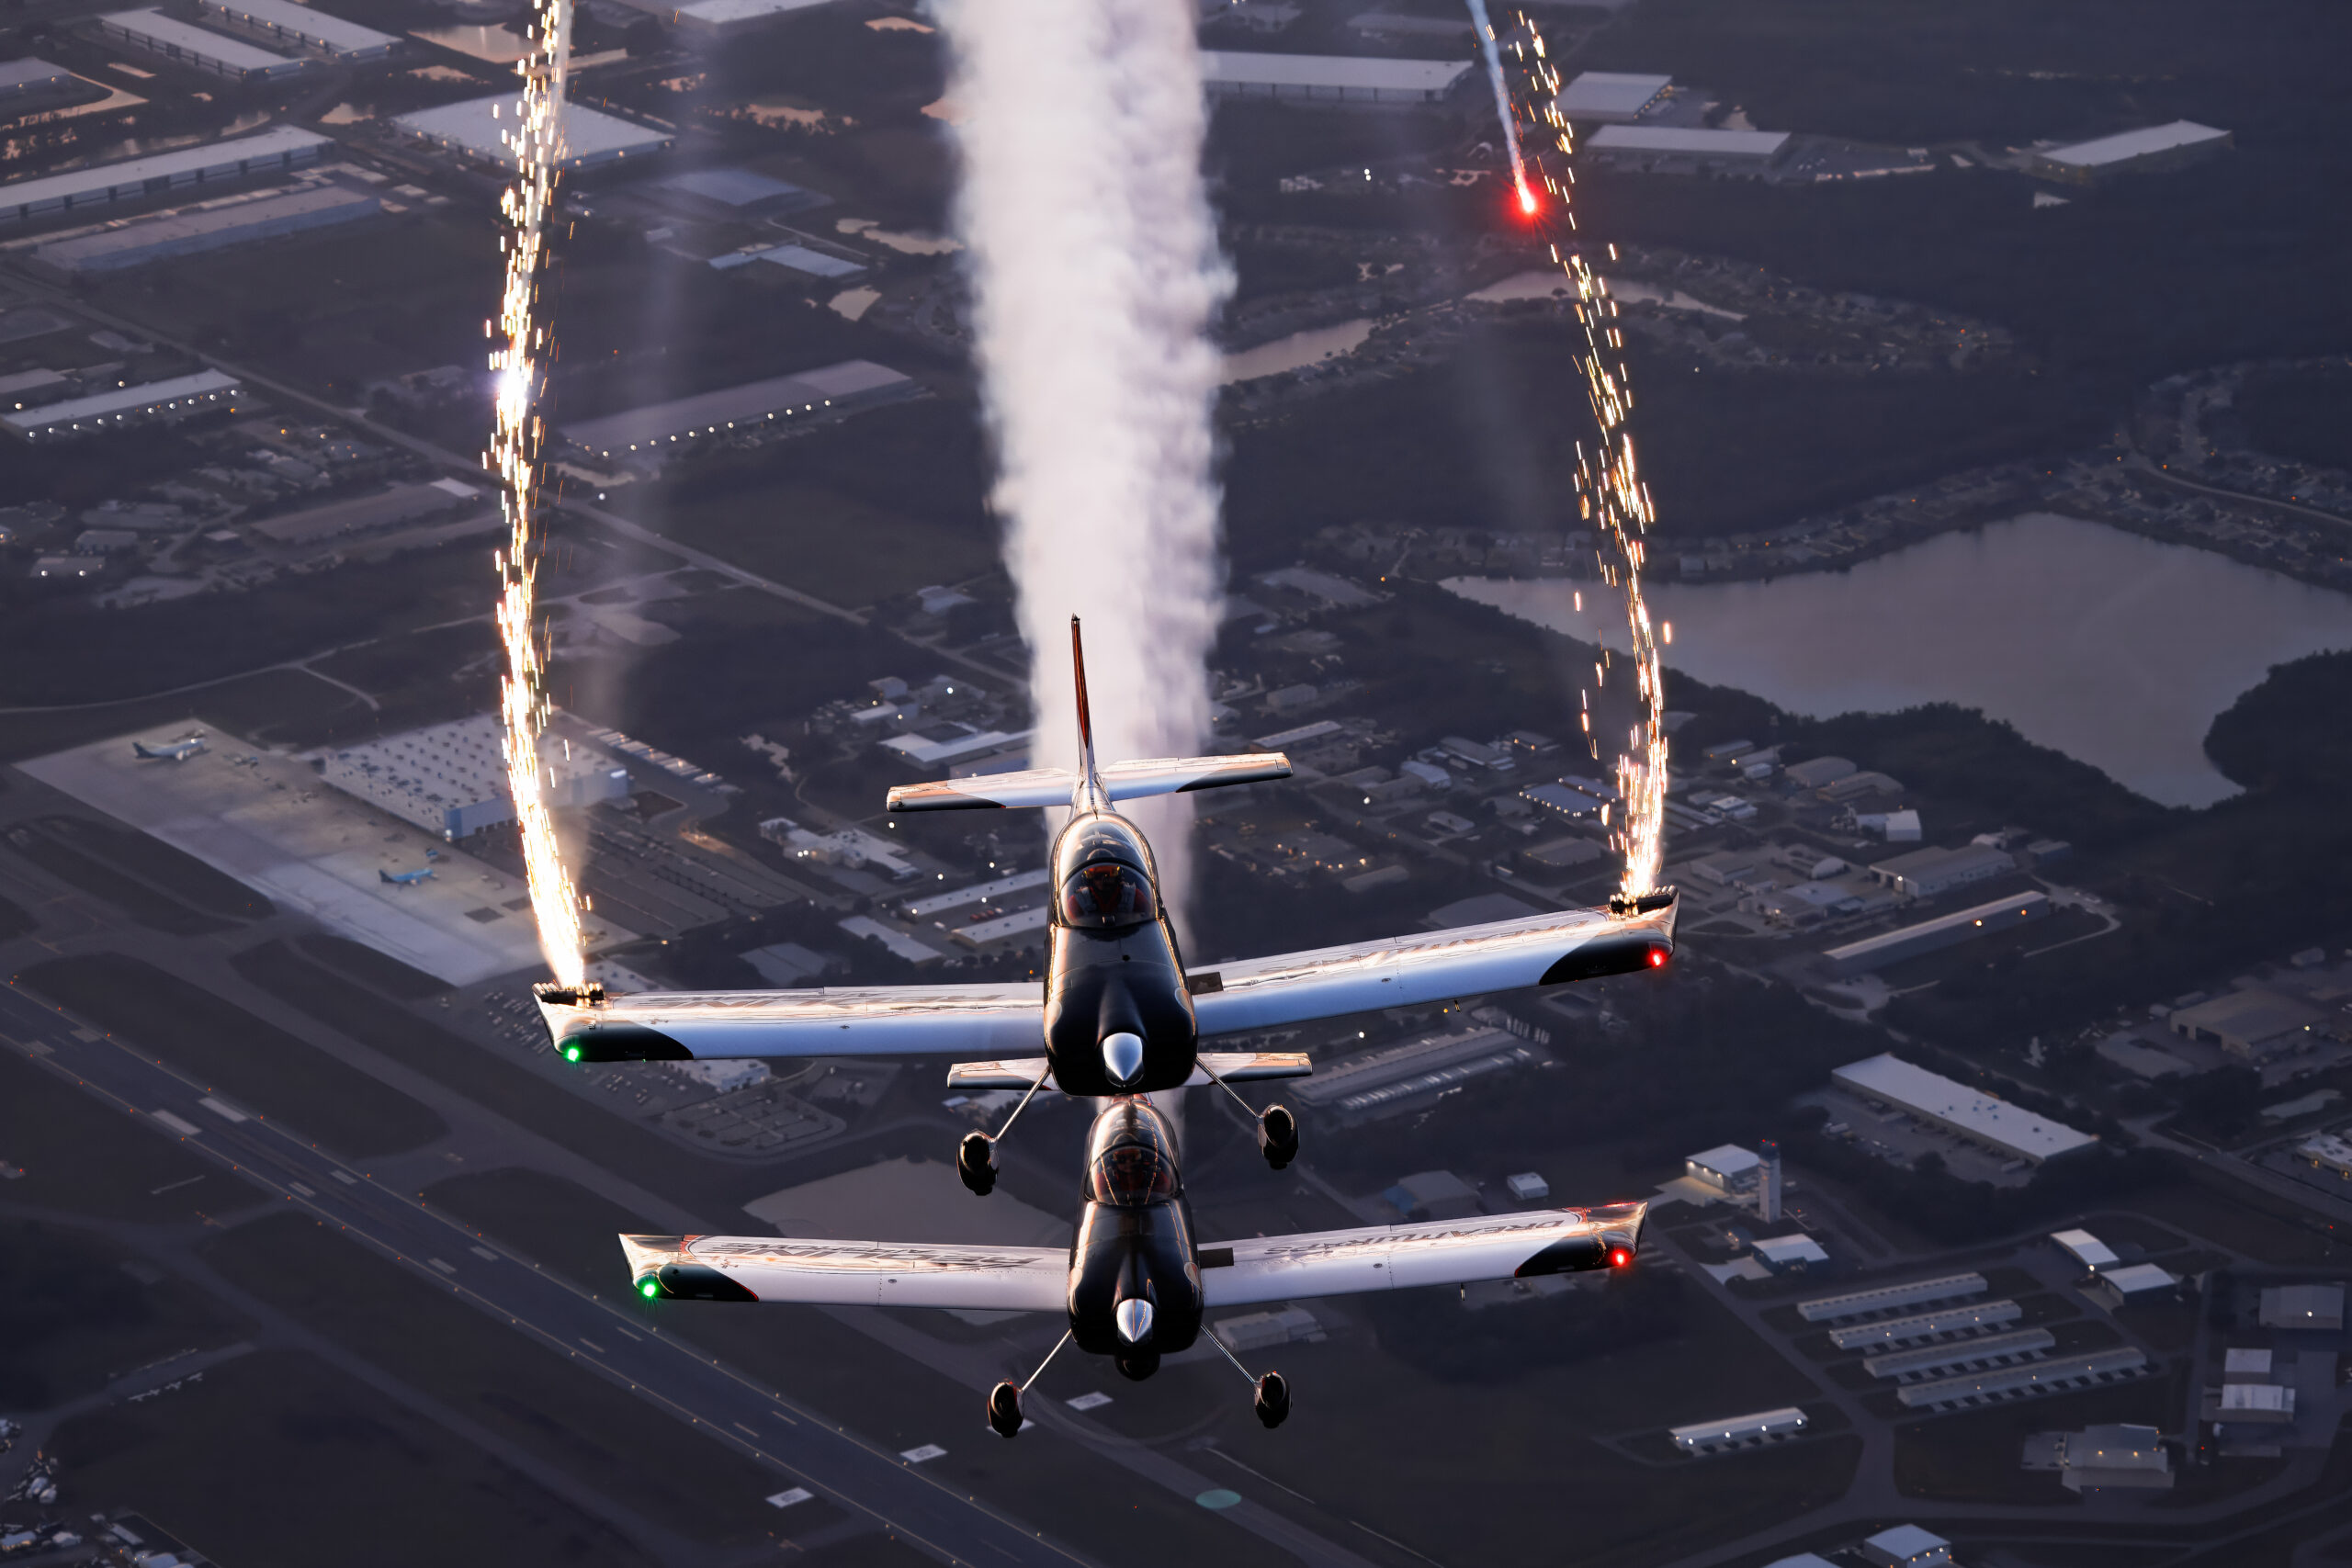
- Shooting wing-mounted pyrotechnics and light trails
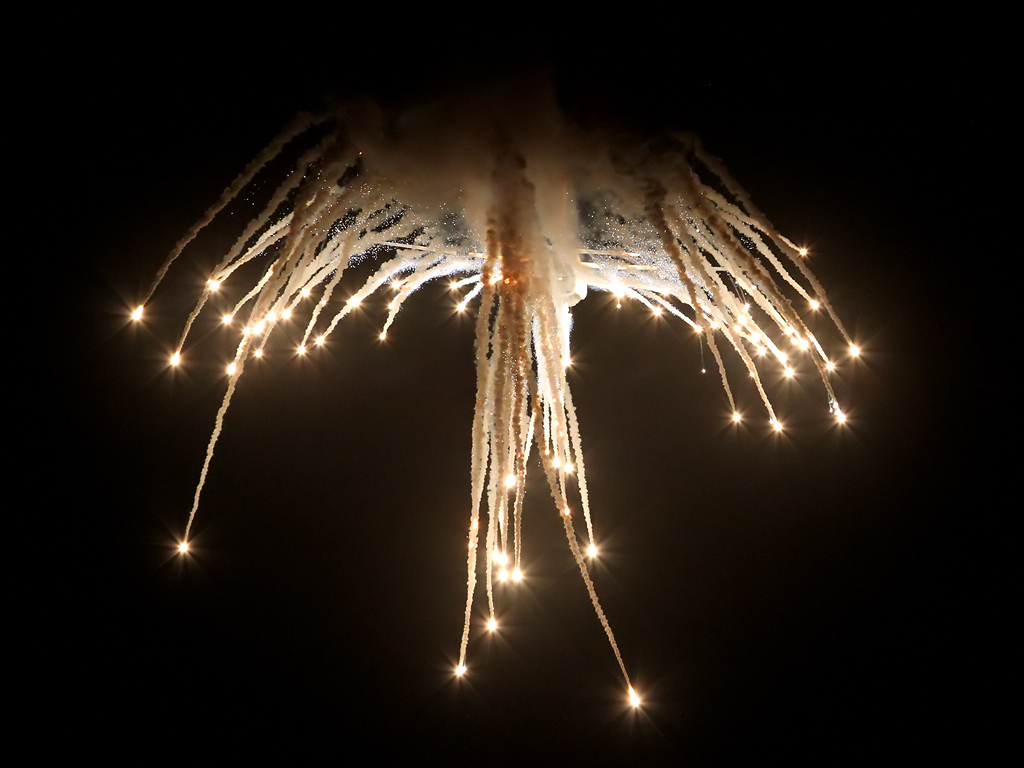
- The fireworks finale
- Static night shoots: the best place to learn
- Focusing in the dark
- Metering and exposure after dark
- White balance and colour
- Composition at night
- Working the blue hour
- A shot-by-shot plan for the evening
- Common mistakes and how to avoid them
- Editing night airshow shots
- UK night airshows and where to practise
- Frequently asked questions
What night airshow photography really means
The phrase covers a wider range of situations than most people expect, and the differences matter because each one wants a different technique. At one end sits the twilight display, flown in the last of the daylight when there is still colour in the sky and the aircraft carries navigation lights or small pyrotechnic charges. At the other end sits full darkness, where the only things visible are the lights on the airframe, the glow of a jet exhaust, wing-mounted sparks, and the fireworks. In between is the blue hour, the short window after the sun has gone but before the sky turns black, and that window is where the best night aviation images are usually made.
Understanding this is the single most useful thing you can do before an event. A photographer who treats the whole evening as one continuous scene will get the exposure wrong for most of it, because the sky can lose four or five stops of brightness in the space of twenty minutes. The sky at the start of a twilight slot behaves almost like a late golden-hour scene, and the advice in the guide to shooting aviation in low light applies directly. By the finale you are effectively doing fireworks photography with an aircraft in the frame. The skill is recognising which phase you are in and changing your approach to match it, rather than fighting the camera to hold one fixed set of numbers.
The three kinds of night subject
Almost everything you will point a camera at during a night event falls into one of three groups. Getting clear about which is in front of you decides your shutter speed, your support, and even where you stand.
Moving lit aircraft
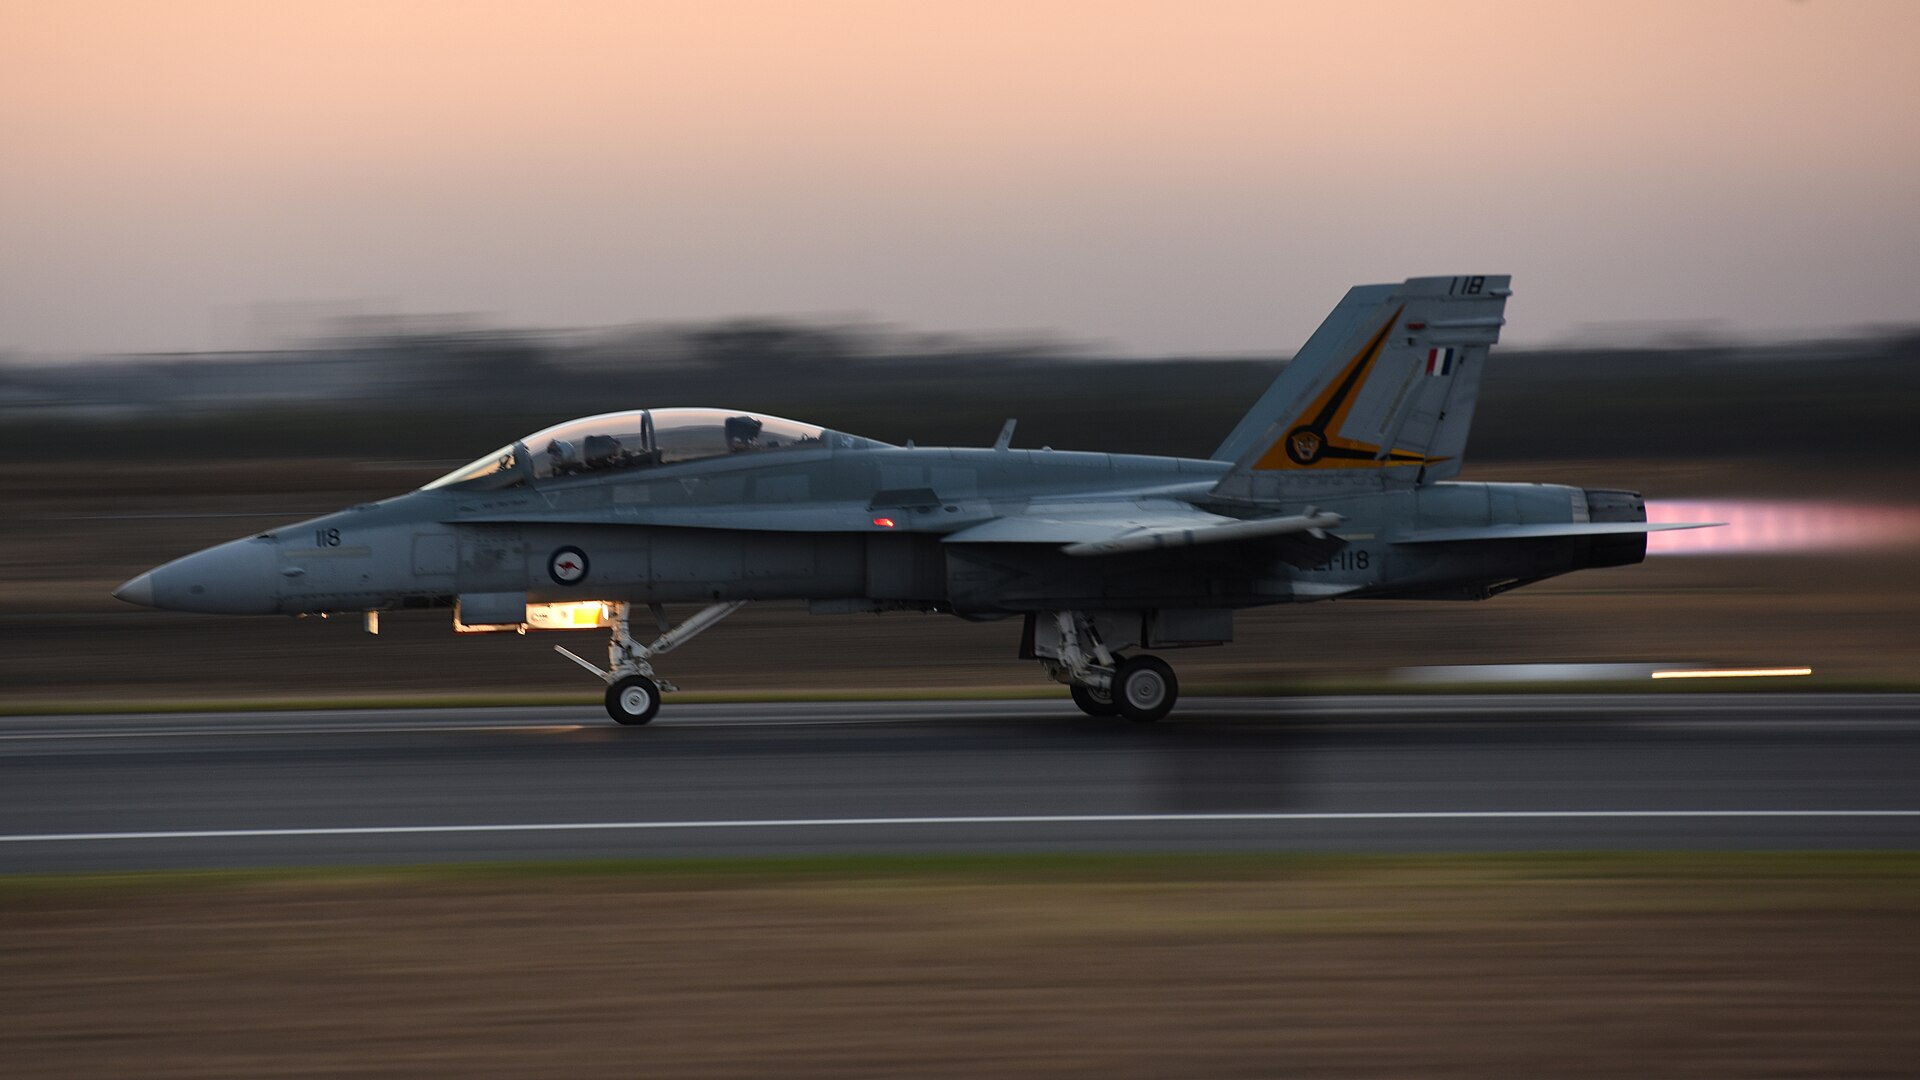
These are aircraft still flying the display: a lit Spitfire making passes, a jet with its exhaust glowing, a formation team carrying LED strips or navigation lights. They move, so they need a shutter speed fast enough to keep the airframe reasonably sharp, and they usually need to be followed by hand or on a monopod. This is the hardest of the three because you are asking for a sharp moving subject in almost no light.
Pyrotechnics and light trails
Here the aircraft carries burning pyrotechnic charges on the wingtips or tail, throwing a stream of sparks as it flies. The interesting part of the image is the trail, and a trail is made by letting the light move across the frame during the exposure. That means a slightly longer shutter than you would use to freeze the aircraft, which is the exact opposite instinct to daytime work.
Fireworks and ground pyro
The finale, and any set-piece fireworks, behave like a standard fireworks shoot. The camera must be locked down on a tripod, the ISO drops right back, the aperture closes to the middle of the range, and the shutter stays open for whole seconds. If an aircraft is parked or holding in the frame during this, so much the better, but the exposure is set for the fireworks first.
Gear that earns its place after dark
Night flying punishes weak equipment more than daytime does, but you do not need the most expensive kit on the flight line. You need a small number of things that are really suited to low light, and the discipline to leave the rest in the bag.
Camera body
The single most useful quality in a body for this work is clean output at high ISO. Full-frame sensors have a real advantage here because their larger photosites gather more light, so a full-frame camera at ISO 6400 will usually look cleaner than a crop-sensor camera at the same setting. That said, a modern crop body with good noise handling is perfectly capable, especially once you accept that a little grain in a night frame is normal and not a fault. A quiet or silent electronic shutter is a bonus during the calmer static shoots.
Lenses
Maximum aperture matters more at night than any other lens quality. A fast telephoto that opens to f/2.8 lets in four times as much light as an f/5.6 zoom, which can be the difference between a usable shutter speed and an unusable one. Fast glass is expensive, so a sensible compromise is a lens that holds f/4 across its range, or a fast prime such as an 85mm or 135mm f/1.8 for the closer passes. For the fireworks and wide twilight scenes you want a standard or wide zoom, because the finale often fills more of the sky than a long lens can hold. If a fast telephoto is out of reach, the guide to using a monopod for long lenses explains how support can partly make up for a slower aperture.
Support
You will want both a tripod and a monopod, and you will use them at different times. The tripod is non-negotiable for the fireworks finale and static ground shots, where exposures run into whole seconds. The monopod earns its place during the flying, where it steadies a heavy lens while still letting you pan and tilt to follow an aircraft. A locked tripod head cannot track a moving jet smoothly, so do not try to fly the display off a tripod.
The small things
A remote release or the camera’s two-second self-timer stops you shaking the camera during long exposures. A head torch with a red mode lets you see your dials without ruining your night vision or annoying the people around you. Spare batteries matter because cold evenings drain them faster, and live-view focusing at night eats power. A lens cloth deals with the dew that settles on the front element as the temperature drops, which is a very common and very frustrating way to lose the back half of an evening.
Why night is harder than it looks
It helps to understand exactly what is working against you, because every night technique is a response to one of these problems. The first is simply the lack of light. A daytime airshow might let you shoot at 1/1000 second at f/8 and ISO 400 without a thought. Take almost all of that light away and you are forced to trade something: a slower shutter that risks blur, a wider aperture that thins your depth of field, or a higher ISO that adds noise. There is no free option, only the least bad one for the shot in front of you.
The second problem is contrast. A lit aircraft or a firework is a small, intensely bright object surrounded by near-black sky. Your camera’s meter, which wants to turn everything into a mid grey, sees mostly darkness and tries to brighten the whole scene, blowing the highlights to white in the process. This is the same trap covered in the guide to metering for bright skies, only inverted, and the answer is the same: take control away from the meter and set exposure yourself.
The third problem is movement in the dark. To freeze a moving aircraft you want a fast shutter, but a fast shutter needs light you do not have. To gather enough light you want a slow shutter, but a slow shutter blurs the movement. Every setting choice for a flying subject at night is a negotiation between these two, and the right answer depends on how much the aircraft is moving and how sharp you are willing to accept it. The fourth and quietest problem is focus, because the systems that lock instantly in daylight hunt helplessly on a point of light against black. Solve those four and you have solved night photography.
Core settings for moving lit aircraft
This is the demanding one, so it is worth being methodical. Work in manual exposure. Auto and semi-auto modes are fooled by the dark sky and will hunt wildly from frame to frame, giving you an unusable mix of over and underexposed shots. In manual you set an exposure that suits the aircraft and it stays put no matter how much black surrounds it.
Shutter speed
Start at around 1/250 second. That is slow enough to gather some light but fast enough to keep a moving airframe acceptably sharp if your panning is smooth. If the aircraft is a fast jet crossing the frame, you may need 1/400 or faster and will have to accept a higher ISO to get it. If it is a slower warbird flying a gentle line, you can drop to 1/125 or even 1/60 with good panning, which buys you a stop or two of precious light. The slower you go, the more your technique has to carry the shot, so practise your panning in daylight first using the method in the guide to photographing fast jets.
Aperture
Open up. This is one of the few times in aviation photography where you deliberately shoot near wide open, because you need every scrap of light. On an f/2.8 lens, shoot at f/2.8 or f/3.2. The thin depth of field is rarely a problem at these distances, since a display aircraft is far enough away that it sits comfortably within focus even at a wide aperture.
ISO
Let ISO be the variable that balances the exposure. Set your shutter and aperture for the shot you want, then raise ISO until the aircraft is correctly exposed. In practice this often lands somewhere between 1600 and 6400, and on darker passes you may go higher. Do not be afraid of it. A slightly noisy but sharp and well-exposed frame beats a clean but blurred or dark one every time, and modern noise reduction in editing handles a lot.
| Subject | Shutter | Aperture | ISO (typical) | Focus |
|---|---|---|---|---|
| Fast jet, lit or glowing exhaust | 1/400 – 1/640 | f/2.8 – f/4 | 3200 – 12800 | Manual, set on early pass |
| Warbird or prop, gentle passes | 1/125 – 1/250 | f/2.8 – f/4 | 1600 – 6400 | Manual, set on early pass |
| Formation team with LED or nav lights | 1/200 – 1/320 | f/2.8 – f/4 | 2000 – 8000 | Manual, focus on lead |
| Helicopter with lights | 1/125 – 1/200 | f/2.8 – f/4 | 1600 – 6400 | Manual |
Shooting wing-mounted pyrotechnics and light trails
Wing pyrotechnics are the signature shot of a night display. An aircraft flies with burning charges on its wingtips or tail, and as it moves it draws a ribbon of sparks across the sky. The whole appeal of the image is that ribbon, and a ribbon is a record of movement, which means you want the light to travel across the sensor during the exposure. This flips the usual aim. Instead of freezing the aircraft you deliberately let a little time pass so the trail can draw itself.
Finding the shutter speed
Somewhere between 1/60 and 1/15 of a second is the useful range for most pyrotechnic passes. At the faster end the trail is short and the aircraft stays fairly sharp. At the slower end the trail becomes a long sweeping streak but the airframe itself softens into a suggestion. Neither is wrong, they are different pictures, and it is worth shooting a spread across the range so you can choose later. A common and effective result comes from around 1/30 second with a clean pan, which gives a readable trail while keeping enough of the aircraft’s shape.
Panning still matters
Even though you want some blur in the trail, you still pan with the aircraft. Panning keeps the airframe as sharp as the slow shutter allows while the sparks, which fall away behind and below the flight path, stretch into their streak. If you hold the camera dead still and let the whole aircraft blur, you usually just get mush. Follow the aircraft, keep the movement smooth, and squeeze the shutter through the pass rather than stabbing at it.
Exposure for pyro
Burning pyrotechnics are bright, far brighter than the lit airframe, so they can blow out to featureless white if you expose for the darker aircraft. Pull your exposure back a little to protect the colour and texture in the sparks. It is better to let the aircraft body sit slightly dark, since it will often be lit by the pyro anyway, than to lose all detail in the streak that is the point of the shot. Check the back of the camera after the first pass and adjust before the next one, because there are usually several passes and the first is your rehearsal.
The fireworks finale
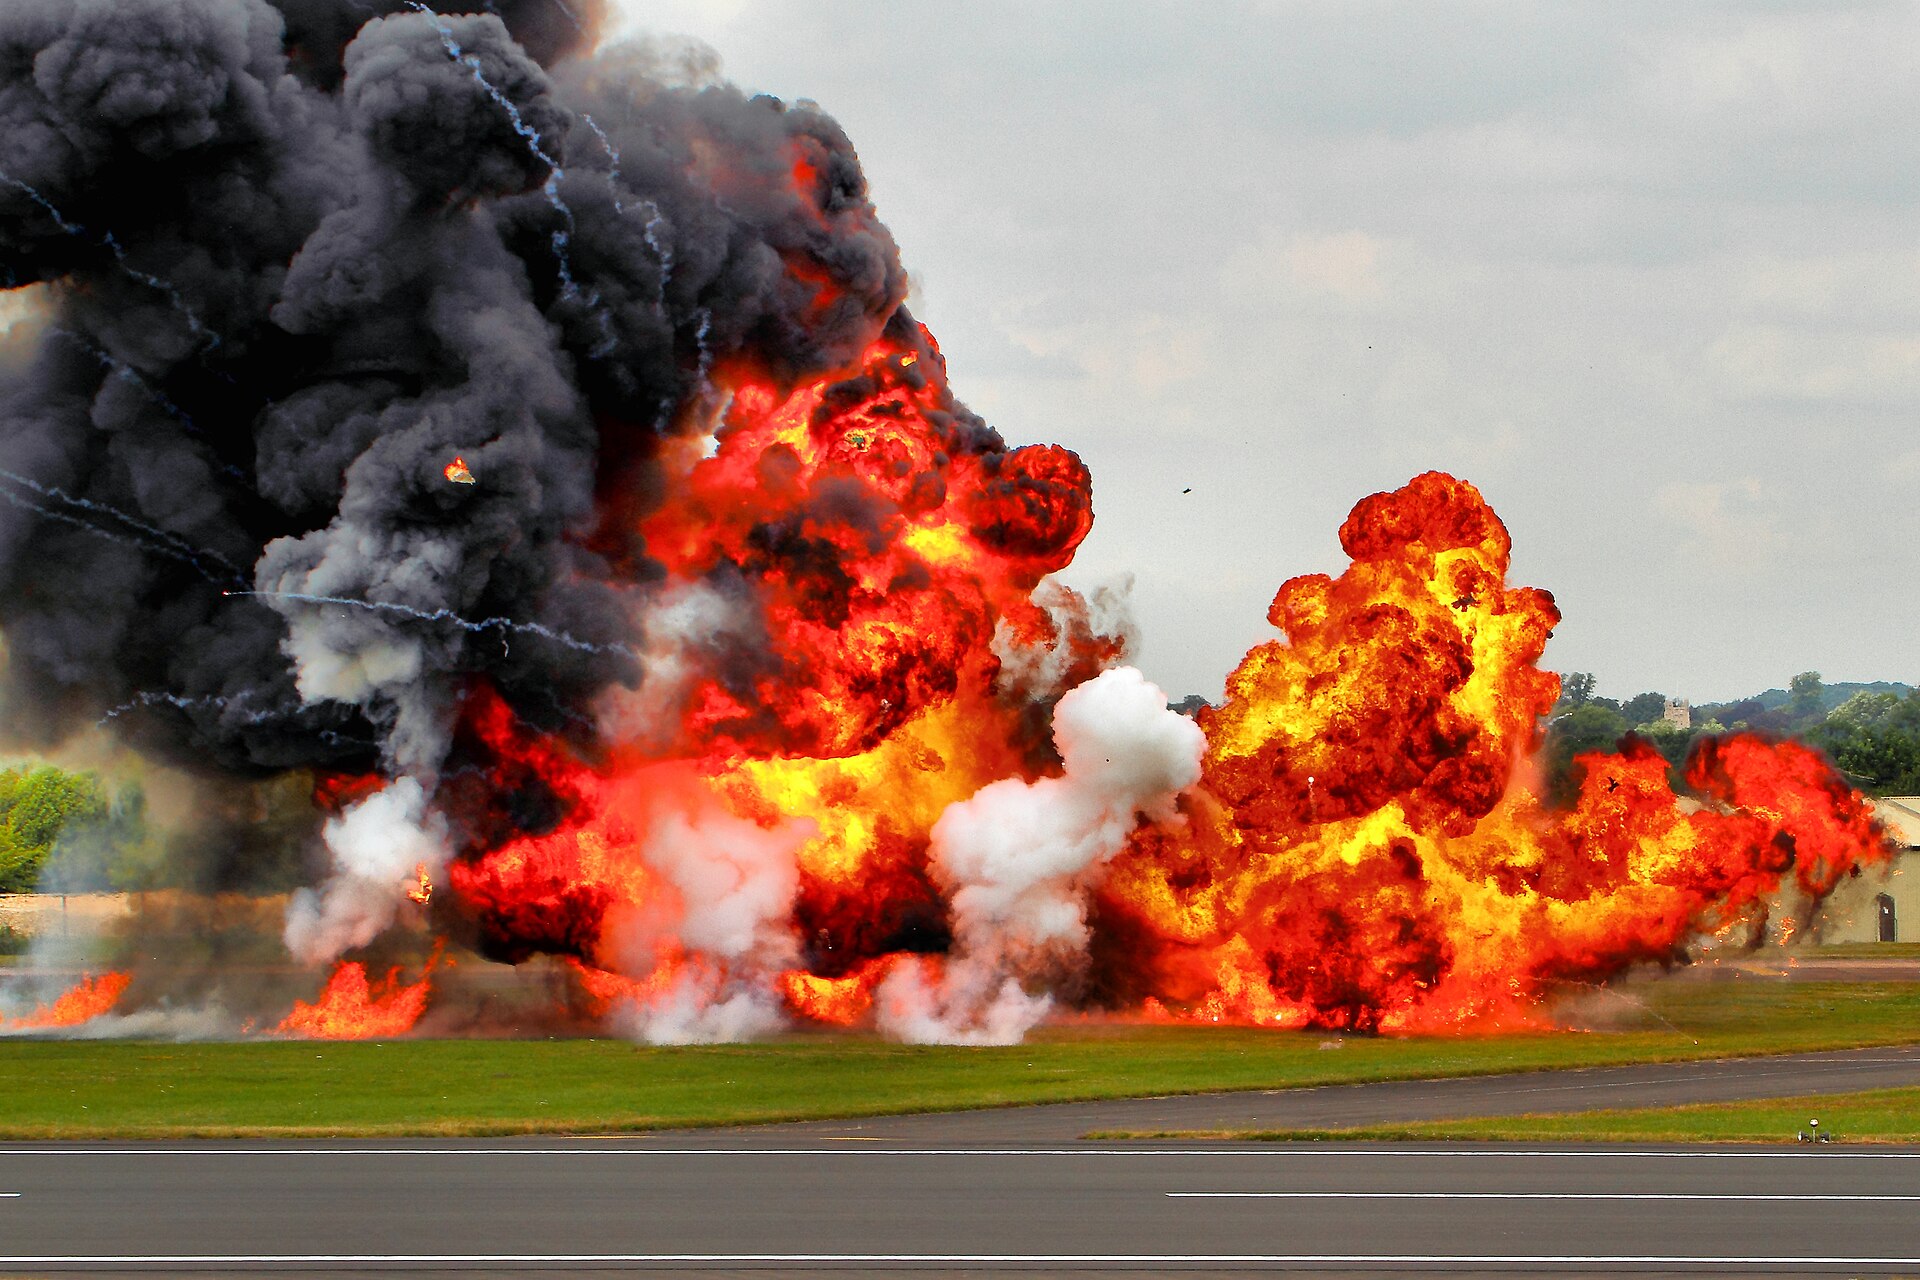
When the fireworks start, everything changes. This is no longer aviation photography with a dark sky, it is fireworks photography, and it rewards a completely different set of choices. The good news is that fireworks are far more forgiving than moving aircraft, because the camera is locked down and you have time to work.
Lock the camera down
Put the camera on a tripod and leave it there. Fireworks exposures run from one to several seconds, and nothing handheld survives that. Compose for where the shells will burst, leaving room in the top of the frame because fireworks always climb higher than you expect, and include the ground line, the crowd silhouette, or a parked aircraft to give the bursts a sense of place. A firework floating in pure black is pretty for one frame and dull by the third.
Settings that work
Drop the ISO right back to 100 or 200. Fireworks are bright and low ISO keeps the trails clean and the colours saturated. Close the aperture to the middle of the range, around f/8 to f/11, which keeps the streaks crisp and stops the brightest bursts blowing out. For shutter, use one to five seconds, or bulb mode if your camera has it so you can hold the shutter open for the length of a burst and release it when the light fades. Manual focus set to infinity, checked on one test frame, keeps everything sharp without the lens hunting in the dark.
| Goal | Shutter | Aperture | ISO | Support |
|---|---|---|---|---|
| Short, contained bursts | 0.5 – 1 sec | f/8 – f/11 | 100 – 200 | Tripod |
| Classic trailing streaks | 2 – 4 sec | f/8 – f/11 | 100 | Tripod |
| Multiple shells in one frame | 4 – 8 sec (or bulb) | f/11 – f/16 | 100 | Tripod, remote |
| Aircraft held in frame with pyro | 1 – 3 sec | f/8 | 200 – 400 | Tripod |
Timing the shutter
The rhythm is to open the shutter just as a shell begins to climb and close it after the burst opens. With a remote and bulb mode you can watch the sky and time each frame by hand, which gives far better results than firing blind on a fixed interval. If a burst is too bright, shorten the exposure or close the aperture a stop rather than dropping ISO further. If you want denser, busier frames with several bursts overlapping, hold the shutter open longer or use a piece of black card held over the lens between bursts to build a multi-shell frame on one exposure.
Static night shoots: the best place to learn
If you have never shot in the dark, the best possible starting point is not a live display at all. It is an organised static night shoot, where aircraft are parked and lit and you can take your time. Museums and event companies run these regularly, sometimes with aircraft floodlit, sometimes with engines running and reheat lit, and often with a smoke machine and controlled lighting to add atmosphere. Because nothing is moving fast and there is no crowd pressure, you can learn how your camera behaves after dark without the panic of a display slipping past.
What to work on
Use the time to practise the fundamentals that a live show will not give you space for. Learn where your lens focuses in the dark and how to set it manually. Learn how far you can push ISO before the noise bothers you. Experiment with long exposures on a static airframe, painting it with a torch or letting the ambient floodlight build the exposure over several seconds. Try shooting the same aircraft at f/2.8 and at f/11 to see how depth of field and star effects on the lights change the feel.
Working with mixed light
Static shoots throw a mixture of light sources at you: orange sodium floodlights, white LED panels, coloured gels, and the deep blue of the sky behind. This is excellent training for white balance, because you have to decide what you want the scene to look like rather than accepting whatever the camera guesses. Shoot raw, set a manual white balance that keeps the aircraft looking natural, and let the background sky fall where it will. The lessons transfer directly to the live event, where the same mixed-light judgement is needed under far more time pressure.
Focusing in the dark
Focus is where most night frames are lost, and the reason is simple. Autofocus works by finding contrast, and a bright point of light on a black sky gives it almost nothing to lock onto, so it hunts back and forth and fires at the wrong moment. The professional habit is to take the decision away from the camera.
Manual focus, set once
For flying aircraft, switch to manual focus. On an early pass, while there is still a little light, use live view zoomed in to nail focus on the aircraft or on a bright distant light, then leave the focus ring alone for the rest of the display. Because the aircraft stays at roughly the same distance during its passes, that single setting holds for the whole slot. A strip of gaffer tape over the focus ring stops it creeping as you handle the lens.
Infinity for fireworks
Fireworks are effectively at infinity, so set the lens there and confirm with a test frame at 100 per cent magnification. Be careful, because many modern lenses focus slightly past the infinity mark, so you cannot simply wind the ring to its stop and trust it. Take one real exposure of an early shell, zoom in on the back screen, and adjust until the trail is a crisp line rather than a fuzzy smear. Once it is right, do not touch it.
When autofocus can help
There are moments where autofocus still earns its keep. During the blue hour, while there is enough light and contrast on the airframe, continuous autofocus with a single point placed on the aircraft can track well, just as it would late in the day. As the sky darkens and the aircraft becomes only its lights, that window closes and manual focus takes over. Knowing when to make that switch is part of reading the evening.
Metering and exposure after dark
The camera’s meter is not your friend in these conditions, so it helps to lean on tools that tell you the truth. The most valuable of these is the histogram. Where the rear screen makes every night frame look brighter than it really is, because your eyes are adapted to the dark, the histogram shows exactly where the light sits. For a lit aircraft you want the airframe’s tones sitting comfortably in the middle to right of the graph without the highlights piling up against the right edge, which would mean the brightest lights have clipped to pure white.
Protect the highlights
The brightest parts of a night scene, whether a landing light, a reheat plume, or a firework, hold no recoverable detail once they clip. Everything else can be lifted in editing, but a blown highlight is gone. So expose to keep those brightest points just under clipping and accept that the shadows will be dark. Turning on the highlight clipping warning, the blinkies, gives you an instant visual check on the back of the camera without having to read the histogram in detail.
Use manual, but think in stops
Because you are in manual, every adjustment is a deliberate move of a set number of stops. If a frame is a stop too dark, you know exactly what to change: open the aperture a stop, halve the shutter speed, or double the ISO, depending on which of those you can afford to give. Thinking in stops rather than nudging dials at random makes you far quicker between passes, which matters when a display gives you only a handful of chances. The underlying principles here are the same ones set out in the guide to the best camera settings for airshows, carried into much lower light.
White balance and colour
Night scenes are full of competing colours, and the camera’s auto white balance will try to average them into something bland. Shoot raw and you keep full control, but it still pays to get close in camera so the back-screen preview is honest. A daylight or a fixed value around 4000 to 4500 Kelvin is a sensible starting point for the blue hour, keeping the sky its natural deep blue while stopping the aircraft going too cold and grey.
Let the sky stay blue
One of the most common night editing mistakes is neutralising the sky until it turns a muddy grey. The rich blue of twilight is part of what makes these images work, so resist the urge to correct it away. Set your white balance for the aircraft and any warm pyrotechnic light, and let the sky keep its colour. If anything, a slightly cooler sky against warm sparks makes for a stronger, more separated image.
Mixed sources during pyro
When pyrotechnics are burning, they throw warm orange and gold light that mixes with whatever cool ambient remains. There is no single correct white balance for a frame with both, so choose which matters more. Usually the pyro is the subject, so favour a balance that keeps the sparks looking like fire rather than washed-out yellow. Because you shot raw, you can fine-tune this per image later without losing anything, which is one more reason never to shoot night events in JPEG only.
Composition at night
Darkness strips a scene down to its brightest elements, which is both a challenge and a gift. With most of the clutter of a daytime airfield swallowed by the dark, a night frame can be beautifully simple: a lit aircraft, a trail of sparks, a band of coloured sky. That simplicity only works if you compose deliberately, because there is little in the frame to hide a weak arrangement.
Give the light room
Whether it is a spark trail or a firework, the bright element needs space to breathe. Leave room in the direction the aircraft is travelling and above where the fireworks will burst, so the light has somewhere to go and does not crash into the edge of the frame. A trail that runs off the side of the picture feels cramped, while the same trail with air around it feels like flight.
Anchor the shot with the horizon
A pure black background gives no sense of place or scale. Whenever you can, include something to ground the image: a strip of colour along the horizon during the blue hour, a silhouette of trees or crowd, or a parked aircraft catching the light. During the earlier twilight passes this is easy because there is still tone in the sky. As it darkens you have to work harder for it, which is one more reason the blue hour is so valuable. The general principles of framing and negative space carry straight over from daytime work, so the habits built shooting in golden and blue hour light pay off directly here.
Working the blue hour
If there is one thing to take from this guide, it is to treat the blue hour as the prize. This is the roughly twenty to forty minute window after sunset when the sky is a deep, saturated blue but has not yet gone black. During this window the sky still holds enough light to expose alongside the aircraft, so you get colour in the background and detail in the airframe at the same time, something that becomes impossible once full darkness arrives.
Why it matters so much
In full dark, the gap in brightness between a lit aircraft and the black sky is enormous, and you can only ever expose for one. In the blue hour that gap is small enough to hold both. The aircraft is lit, the sparks read against colour rather than void, and the whole image has depth. It is the same reason evening light is so prized in daytime aviation work, extended into the edge of night. The window is short and the light drops fast, so you have to be set up and ready before it starts rather than fumbling with settings as it slips away.
Riding the light down
As the blue hour progresses, keep adjusting. Every few minutes the sky loses light, so a frame that was correct at the start will be a stop dark ten minutes later. Watch your histogram and lift ISO or slow the shutter gradually to keep pace. Think of it as riding the light down from dusk into dark, changing one setting at a time rather than being caught out by how quickly the scene changes. By the time the firework finale arrives you will usually be in full darkness and switching to the tripod-and-low-ISO fireworks approach.
A shot-by-shot plan for the evening
It helps to walk in with a plan for how the evening unfolds, because a night event moves through distinct phases and each wants a different approach. The exact timings vary with the season and the show, but the shape is reliable.
Before the flying
Arrive early, in daylight if you can. Scout your position for a clean view of show centre and an uncluttered patch of sky, and note where the sun is setting and where the fireworks are likely to be set off. Set up the tripod for later, check your batteries and cards, and take a few daylight frames to confirm focus and exposure baselines. This is also the time to find the horizon line you will use to anchor your dark frames.
Twilight and blue hour
As the first aircraft launch into fading light, you are close to golden-hour territory. Autofocus may still work, the sky has colour, and you can shoot much as you would late in a daytime show. As the light drops into the blue hour, switch to manual focus set on an early pass, open your aperture, and start riding ISO up to hold the exposure. This is your richest window, so work it hard.
Full dark and pyrotechnics
Once the sky is black and the aircraft are only their lights and sparks, you are into pure night technique. Manual focus locked, exposure set to protect the pyro, shutter chosen to draw the trail you want. Shoot several frames per pass and check the back of the camera between passes to correct.
The finale
For the fireworks, move to the tripod, drop ISO to 100, close to f/8 to f/11, and switch to multi-second or bulb exposures timed to the bursts. If aircraft are held in the frame, compromise slightly towards their exposure, but let the fireworks lead. When it is over, resist packing up instantly. The smoke-lit sky and any aircraft taxiing back can give quiet, atmospheric frames that most of the crowd will already have turned their backs on.
| Phase | Sky | Focus | Support | Priority |
|---|---|---|---|---|
| Pre-flight | Daylight | Autofocus | Handheld | Scout, baseline settings |
| Twilight | Bright, colour | Autofocus or manual | Handheld or monopod | Colour in sky and aircraft |
| Blue hour | Deep blue | Manual, set early | Monopod | Both aircraft and sky exposed |
| Full dark | Black | Manual, locked | Monopod | Trails and lights, protect pyro |
| Finale | Black plus fireworks | Manual, infinity | Tripod | Fireworks lead exposure |
Common mistakes and how to avoid them
Almost every failed night frame comes from a short list of avoidable errors. Knowing them in advance is the fastest way to improve.
Leaving the camera on auto
Any automatic exposure mode is fooled by the dark sky and will swing wildly from shot to shot. Work in manual so your exposure holds. This one change fixes more night problems than any other.
Trusting autofocus in the dark
Point-light autofocus hunts and misfires. Set focus manually on an early pass or on a distant light and lock it. If your frames are consistently soft despite a fast shutter, focus is almost always the culprit.
Underexposing and rescuing later
It is tempting to shoot dark and lift the shadows in editing, but that drags up noise and colour blotches from the murk. Expose properly in camera, keeping the brightest lights just under clipping, and you will have far cleaner files to work with. The one thing you cannot rescue is a blown highlight, so watch those.
Trying to freeze the fireworks
A fast shutter turns a firework into a frozen dot with none of the trailing beauty that makes it worth photographing. Slow down to whole seconds and let the light draw itself. Fireworks are the one time all night where a long shutter is exactly right.
Chimping instead of shooting
The rear screen is seductive in the dark, but every second spent staring at it is a pass missed. Check the histogram once or twice to confirm your exposure, then keep your eye to the viewfinder. There are only so many passes in a slot, and they do not come back.
Forgetting the dew and the cold
As the temperature drops, moisture settles on the front element and quietly softens every frame, and batteries fade faster than you expect. Wipe the lens between passes and keep a spare battery warm in an inside pocket. Small things, but they save whole evenings.
Editing night airshow shots
Night files reward careful editing more than almost any other kind of aviation image, because so much of the frame is dark and there is room to shape it. The aim is to enhance the atmosphere that was there, not to invent light that was not.
Start with the raw file
Always process from raw. A night JPEG bakes in white balance and tone decisions that you will almost certainly want to change, and it throws away the shadow and highlight latitude you rely on to balance a high-contrast scene. From raw you can recover a firework that was slightly too bright, lift an aircraft out of the shadow, and set the sky colour precisely.
Balance the contrast
Pull the highlights down to bring back any detail in the brightest lights, and lift the shadows just enough to reveal the aircraft’s shape without turning the black sky into grey soup. The blacks should generally stay really black, because a night sky that is truly dark makes the bright elements sing. Resist the urge to brighten the whole image, which flattens exactly the drama you are after.
Noise and sharpening
High-ISO night frames carry noise, and modern noise reduction, including the AI-based tools now built into most editors, handles it well. Apply it before sharpening, and be gentle, because heavy noise reduction smears the fine detail in a spark trail or an airframe. Sharpen with a light hand and mask it so you are not sharpening the empty sky. The workflow is the same discipline you would use on any long-lens image, and the principles in your general aviation editing routine carry straight across.
Colour and finish
Warm up the pyrotechnics a touch so the sparks read as fire, keep the twilight sky its natural deep blue, and check that no colour cast has crept across the whole frame from the mixed lighting. A subtle vignette can help hold the eye on the lit subject. The goal throughout is a clean, believable image that looks like the evening felt, not an over-cooked one that announces itself as heavily processed.
UK night airshows and where to practise
Britain has a strong tradition of evening and night flying, and knowing where to point yourself makes a real difference to how much practice you can get. The events fall into a few types.
Evening flying with a firework finale
Several established shows now run evening sessions that end with pyrotechnics. Shuttleworth at Old Warden is the best known for atmosphere, with its Flying Proms evening pairing live orchestral music, evening flying and a firework finale, and several of its other 2026 shows carrying evening slots alongside the daytime displays. These vintage-aircraft evening events, flown low over a grass field in fading light, are close to ideal for learning because the aircraft are slow, the light lingers, and the finale gives you fireworks to practise on.
Dedicated night air displays
Purpose-built night flying with LED-lit aircraft and wing-mounted pyrotechnics has featured at UK seafront festivals, most famously the Bournemouth Air Festival, which pioneered its after-dark Night Air displays with illuminated aircraft streaming sparks against the twilight. Coverage of these seafront events has been less certain recently, with Bournemouth’s festival paused and its future uncertain, so always check the current year’s programme before planning a trip rather than assuming an event is running.
Static night photo shoots
For pure practice, nothing beats an organised static night shoot at an aviation museum or heritage collection. Specialist event companies run evening and night photography sessions where historic aircraft are floodlit, sometimes with engines and reheat running, and photographers are given time and space to work. These sessions are where most night aviation specialists learned their craft, and they run through the darker months when there are no flying displays at all. If you want to build night skills quickly, book one of these and treat it as a workshop.
Making your own opportunities
You do not need a formal event to practise the underlying skills. A local bonfire-night fireworks display teaches you everything about long-exposure fireworks technique. An evening at the end of an airfield during the long summer days lets you shoot aircraft into the blue hour. Even street lights and passing traffic will teach you how your camera focuses and meters in the dark. Every hour spent working in low light before a night show pays back when the real thing arrives.
When you do come home with frames you are proud of, they can be more than a personal record. Strong, distinctive night aviation images are exactly the kind of work that stands out in a portfolio and sells, and you can see the range of finished aviation work in the Piemags aviation galleries. If you would like to use any of that work, or license your own in a similar way, the licensing options set out how it works.
Night displays produce images that stand out in a library precisely because so few people shoot them well. Our guide to building an aviation photography portfolio covers where work like this fits.
Frequently asked questions
What camera settings should I use for a night airshow?
It depends which of two very different jobs you are doing. For lit aircraft still flying, work in manual at around 1/250 second, the widest aperture your lens offers, and raise ISO from roughly 1600 to 6400 until the aircraft is correctly exposed. For the firework finale, move to a tripod, drop to ISO 100 to 200, close to f/8 to f/11, and use a shutter of one to five seconds or bulb. Decide which you are shooting before you touch a dial, because the two want almost opposite settings.
Do I need a tripod for night airshow photography?
Yes, but not for everything. A tripod is essential for the fireworks finale and for static ground shots, where exposures run to whole seconds. For aircraft that are still flying you are better off handheld or on a monopod, because you need to pan smoothly to follow them and a locked tripod head cannot do that. Most night photographers carry both and switch between them as the evening moves from flying to fireworks.
How do I focus on aircraft in the dark?
Switch to manual focus. Autofocus needs contrast, and a bright light on a black sky gives it almost none, so it hunts and misfires. On an early pass while there is still some light, use live view zoomed in to set focus on the aircraft or a distant light, then leave the ring alone, taping it if it tends to creep. For fireworks, set the lens to infinity and confirm on a test frame at full magnification, since many lenses focus slightly past the infinity mark.
What shutter speed freezes fireworks versus blurs them?
You cannot really freeze a firework, because the light itself is moving through the sky, and freezing it would only give you a dot. A short exposure of around half a second gives short, contained bursts. Two to five seconds draws the long trailing streaks most people want and can catch several shells in one frame. Start at one to three seconds and lengthen or shorten to taste, using the aperture to control overall brightness.
Can I photograph a night airshow with a kit lens or my phone?
A kit zoom will handle the fireworks and the wider twilight scenes perfectly well if you put it on a tripod and shoot in manual, but its small maximum aperture makes fast-moving lit aircraft really difficult, since you cannot gather enough light at a usable shutter speed. A modern phone in its night or long-exposure mode does a surprisingly good job on fireworks and on static aircraft, but it cannot reach or track a distant flying display, so it complements a proper camera rather than replacing it.
Why are my night airshow photos blurry or noisy?
Blur usually comes from one of two things: a shutter too slow for a moving subject, or focus that has drifted off the aircraft. Fix the first by matching your shutter to how much the aircraft is moving, and the second by focusing manually and locking it. Noise usually comes from pushing ISO higher than the shot needed, or from underexposing and lifting the shadows later. Shoot raw, expose to keep detail in the aircraft, and only raise ISO as far as the shutter speed forces you to.
How do I stop dew forming on my lens during a night airshow?
Dew settles on the cold front element as the temperature drops after sunset, and it quietly softens every frame from then on. Wipe the glass between passes with a lens cloth and check it often, because it is easy to lose the back half of an evening without noticing. For a longer session a small lens warmer band, the kind astrophotographers use, keeps the element just above dew point, and simply keeping the lens capped between acts helps too.
Is a full-frame camera worth it for night airshows, or will my crop sensor manage?
A full-frame sensor gathers more light per pixel, so it will usually look cleaner at high ISO, which matters when you are pushing to 6400 and beyond for lit aircraft. That said, a modern crop body handles night work perfectly well once you accept that a little grain is normal and lean on noise reduction in editing. The bigger gains come from a fast aperture lens and good exposure discipline, so do not feel you need to buy a new body before your first night show.
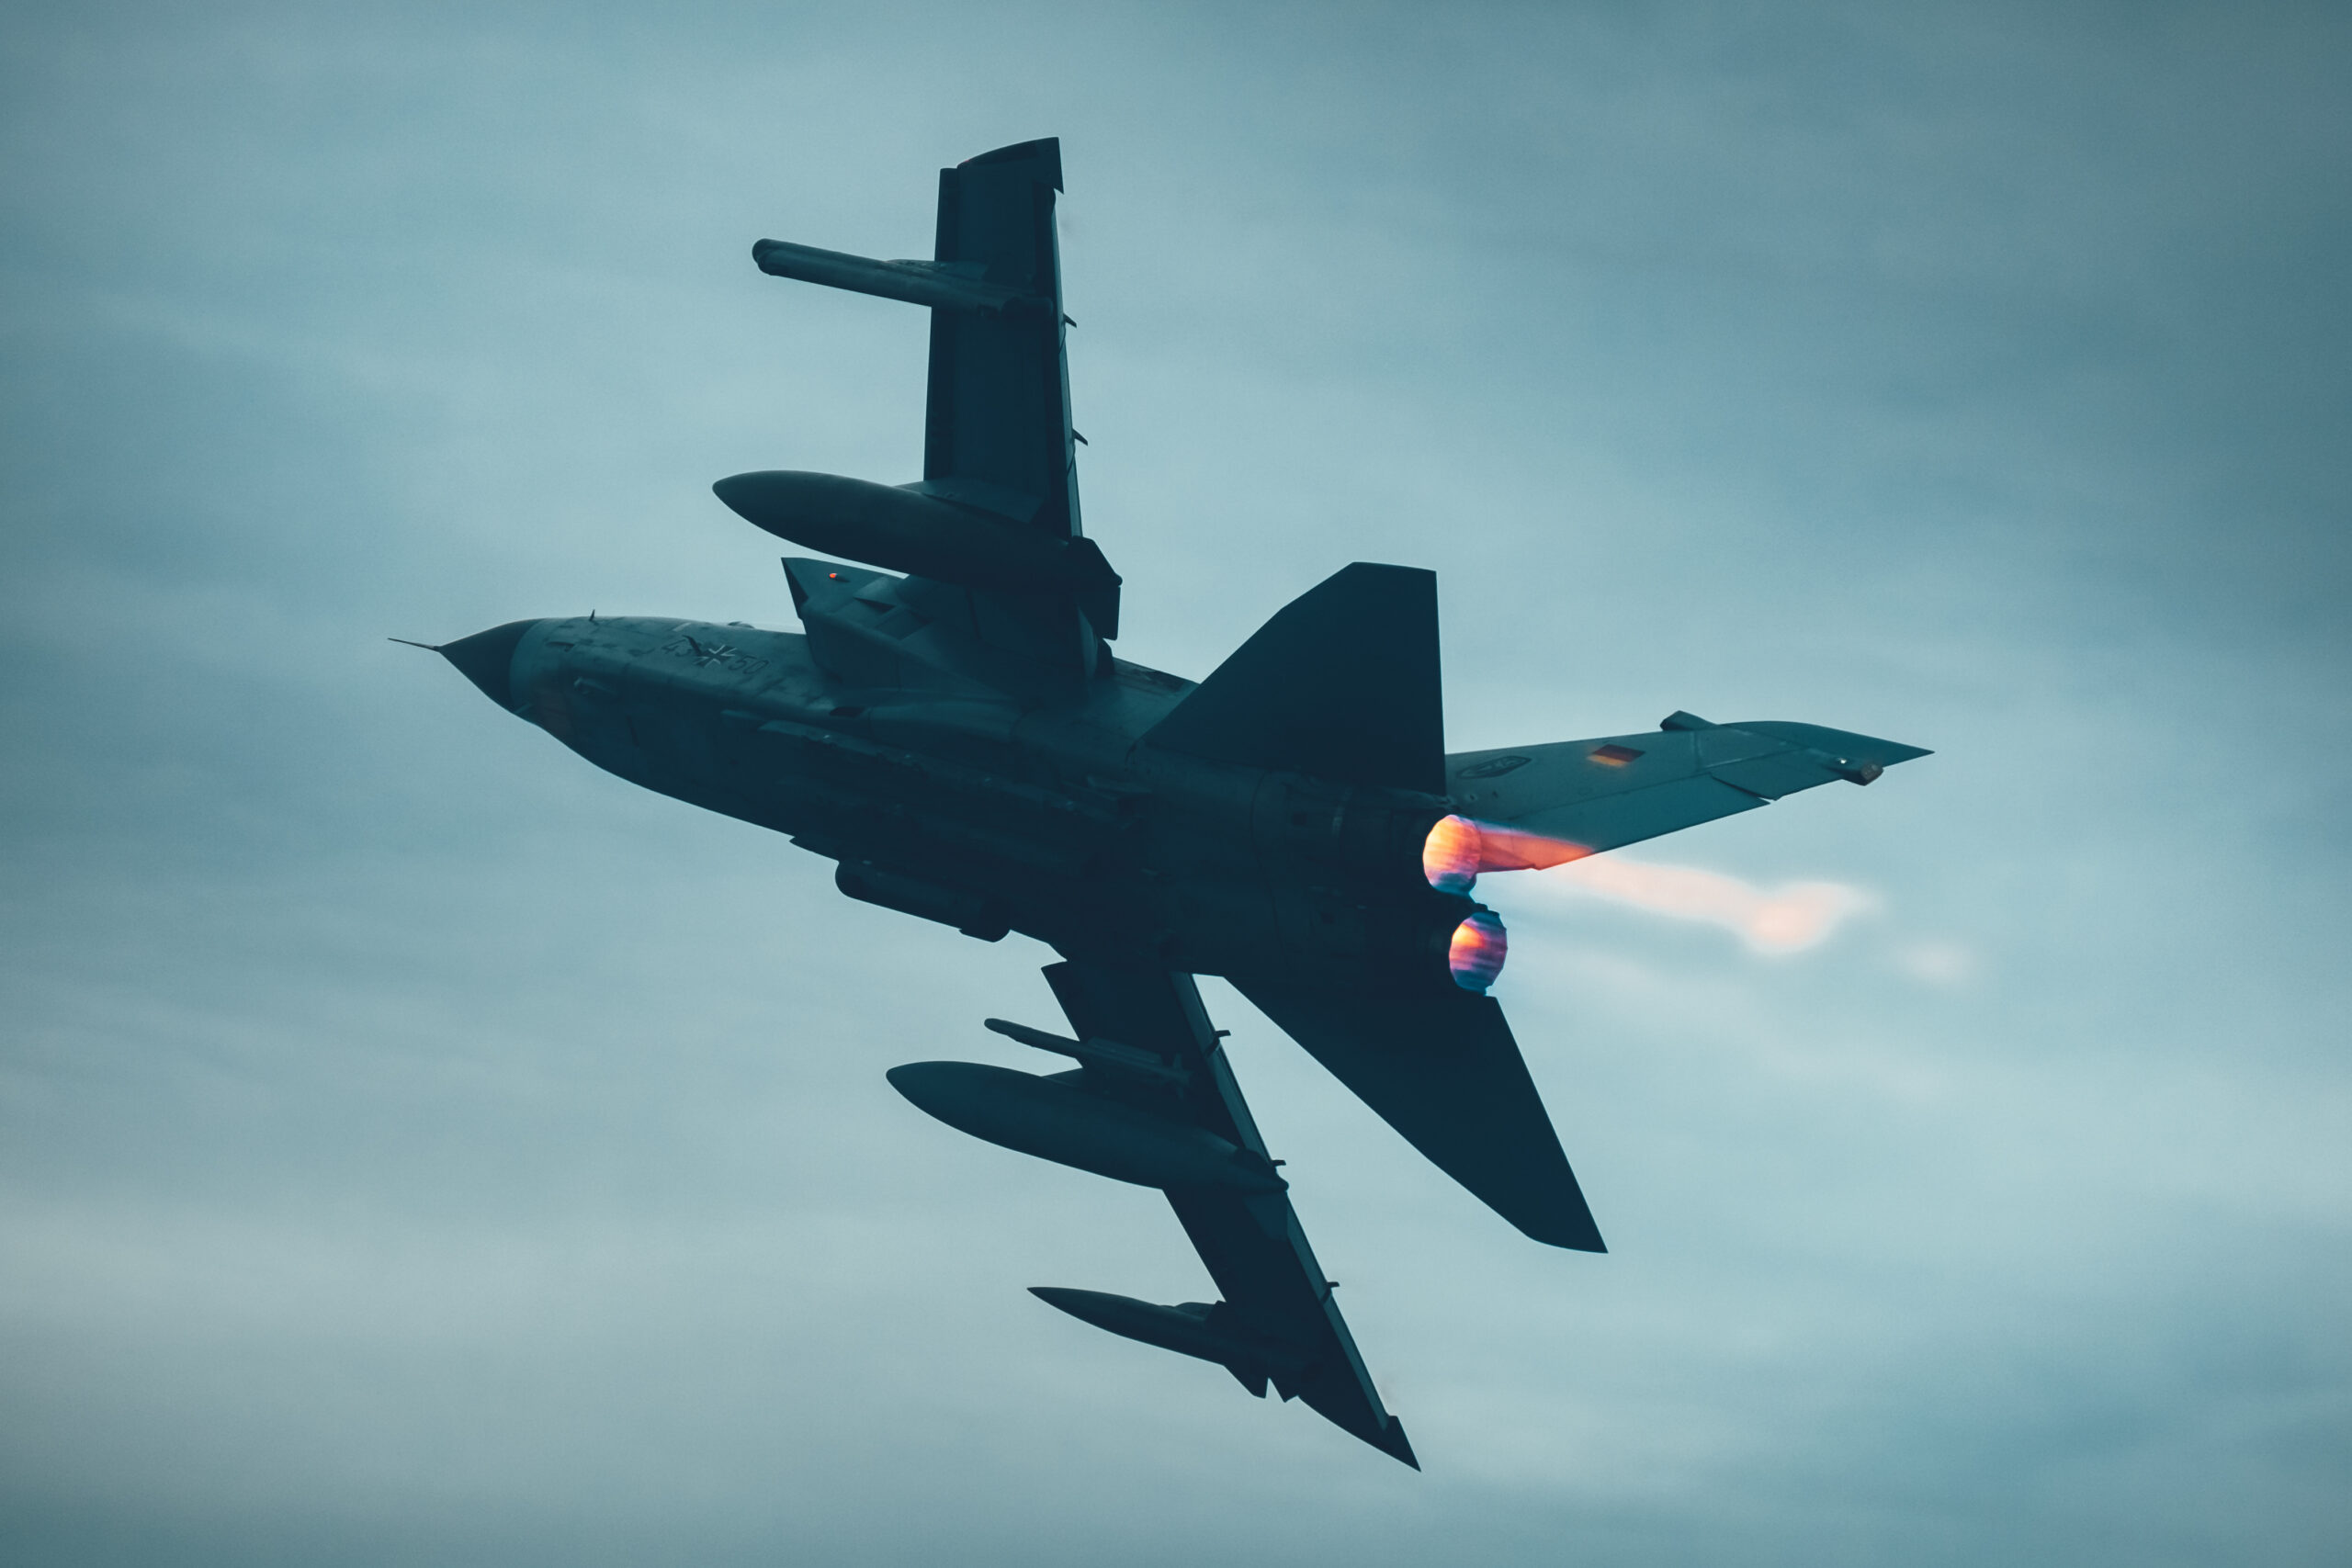
How do I photograph a jet lighting its afterburner at night?
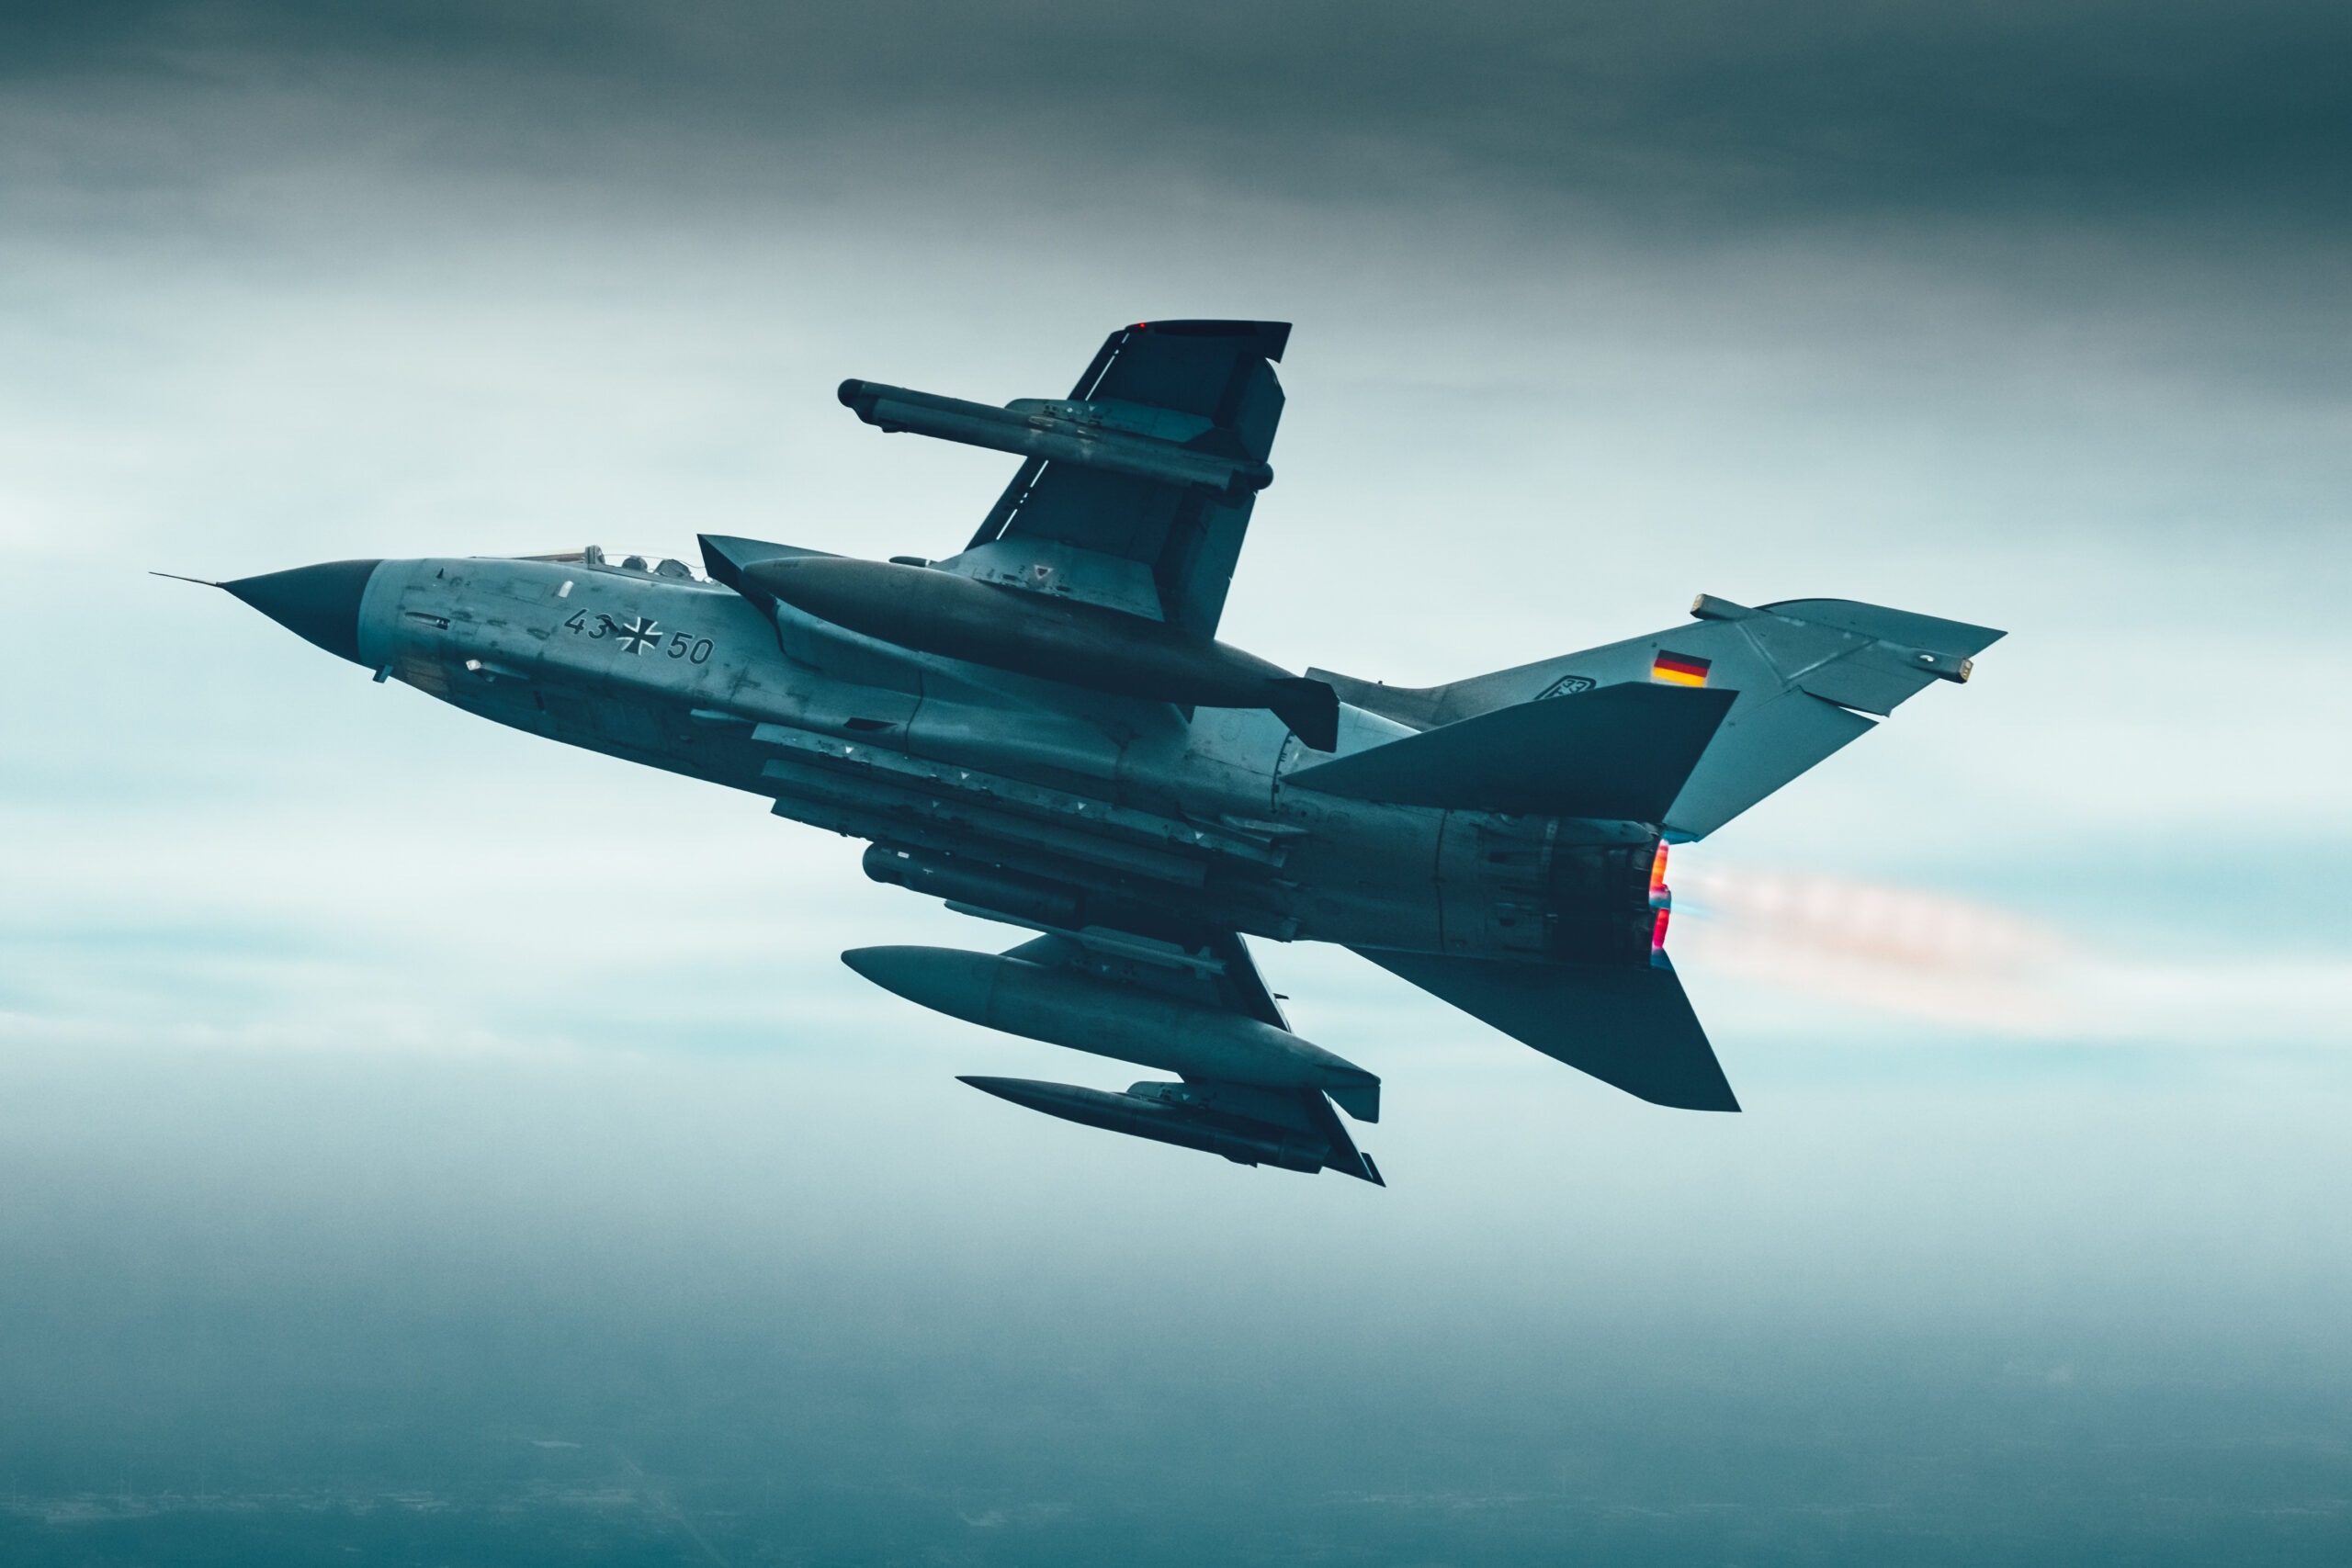
The reheat plume is intensely bright against a dark sky, so expose to protect that highlight or the flame will clip to featureless white and lose all its colour and structure. Pull your exposure back until the plume holds detail and let the airframe sit darker, since it is often lit by the burner glow anyway. A shutter around 1/250 to 1/400 keeps a moving jet sharp, and checking the histogram and highlight warning after the first pass lets you fine-tune before the next run.
Night airshows ask more of you than any daytime show, but they give back images that no daytime show can. Learn to read the phases of the evening, set your exposure yourself, focus by hand, and treat the blue hour as the gift it is, and you will come away with the frames that made you want to stay out in the dark in the first place.
The hour before the night display belongs to silhouettes. Our guide to backlighting and silhouettes in aviation photography covers the sunset half of the evening in full.
If you want somewhere to practise this that publishes its night flying dates weeks in advance, see our guide to RAF Coningsby.
