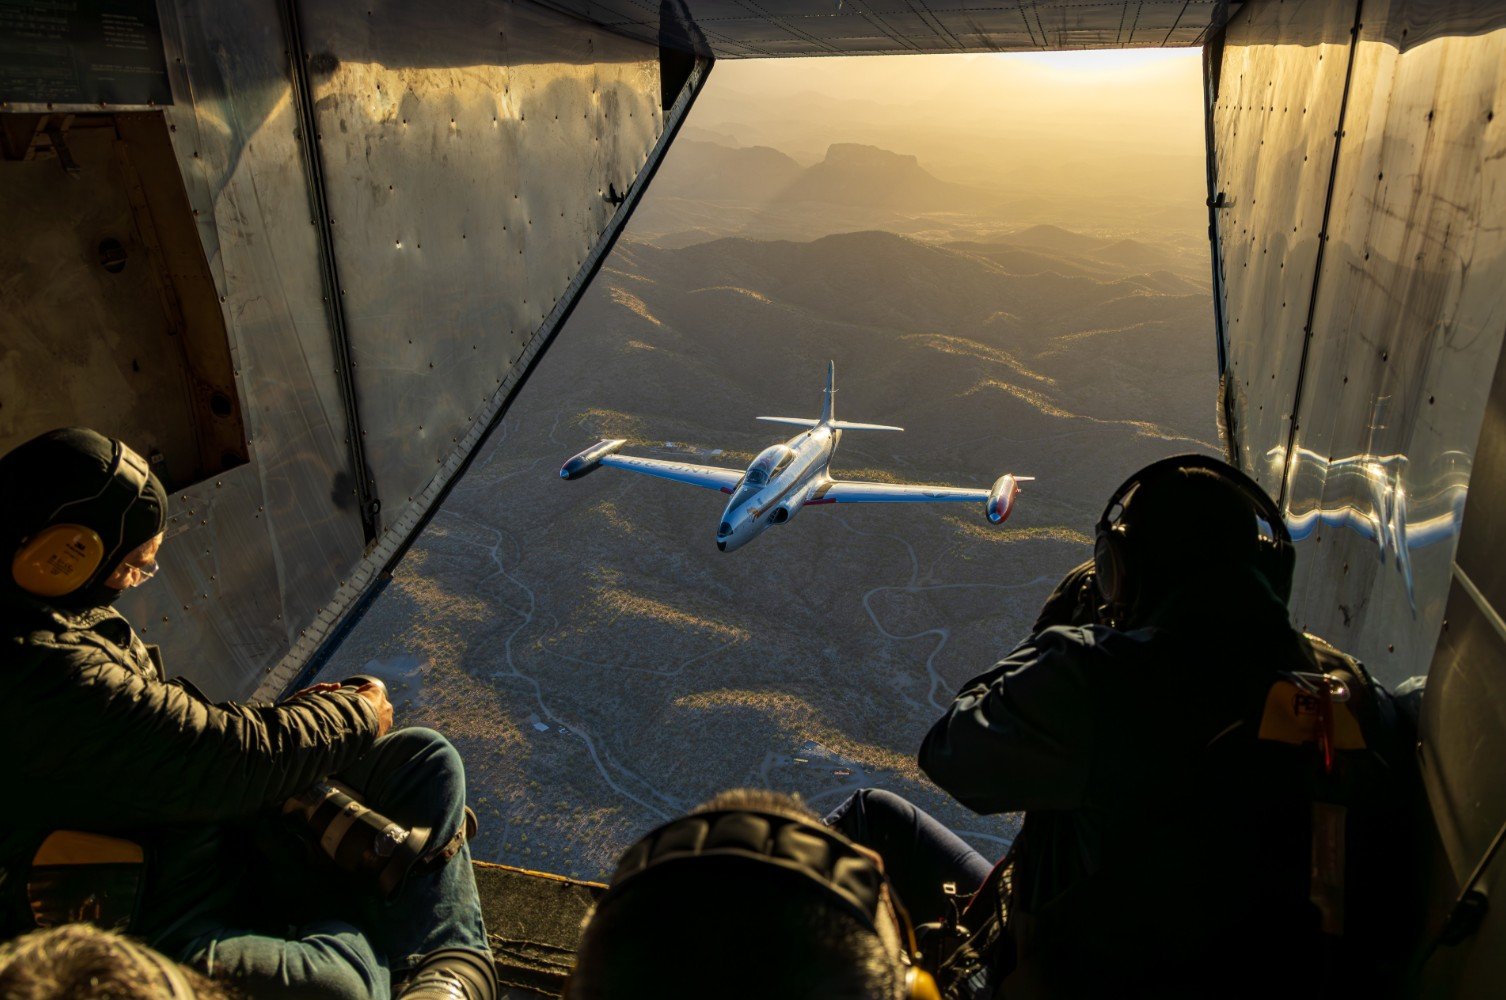
Air-to-air photographs are the ones that stop people scrolling. Air-to-air photography means shooting one aircraft from another in flight, usually with a slower shutter speed to blur the propeller or rotor, a camera aircraft flying tight formation, and careful planning for light and safety. A fighter pulling vapour off its wings with cloud streaming past, a Spitfire banking into low evening light, a formation tucked in so tight the wingtips look welded together. They look impossible to make, and the honest answer is that they are difficult, but not in the way most people think. The flying is the hard part. The photography, once you know what the camera ship and the crew need from you, follows a fairly small set of rules. This guide walks through how these shots are actually made, from the brief on the ground to the settings on the body, so you understand the craft even before you ever get a seat.
Most aviation photographers start on the ground at airshows and spend years there before they ever fly. That is normal, and the ground skills carry straight across. If you can already pan a fast jet down the crowd line and keep the propeller blurred on a warbird, you have most of what air-to-air asks for. What changes is the platform moving underneath you, the safety culture that surrounds formation flying, and the fact that you cannot reposition your feet or swap a lens when the subject is twenty feet off the wing. This is a guide to the basics done properly, written for the photographer who wants to understand the discipline rather than just admire the results.
What this guide covers
- What air-to-air photography actually is
- The camera ship and the subject aircraft
- Safety first: the brief that makes it possible
- The gear you actually need
- Camera settings, with a full reference table
- Light, the sun and choosing a heading
- Formations and choreography
- Composition from a moving platform
- Shooting through canopies, doors and open windows
- Editing air-to-air frames
- How to get into air-to-air without owning an aircraft
- Common mistakes and how to avoid them
- Frequently asked questions
What air-to-air photography actually is
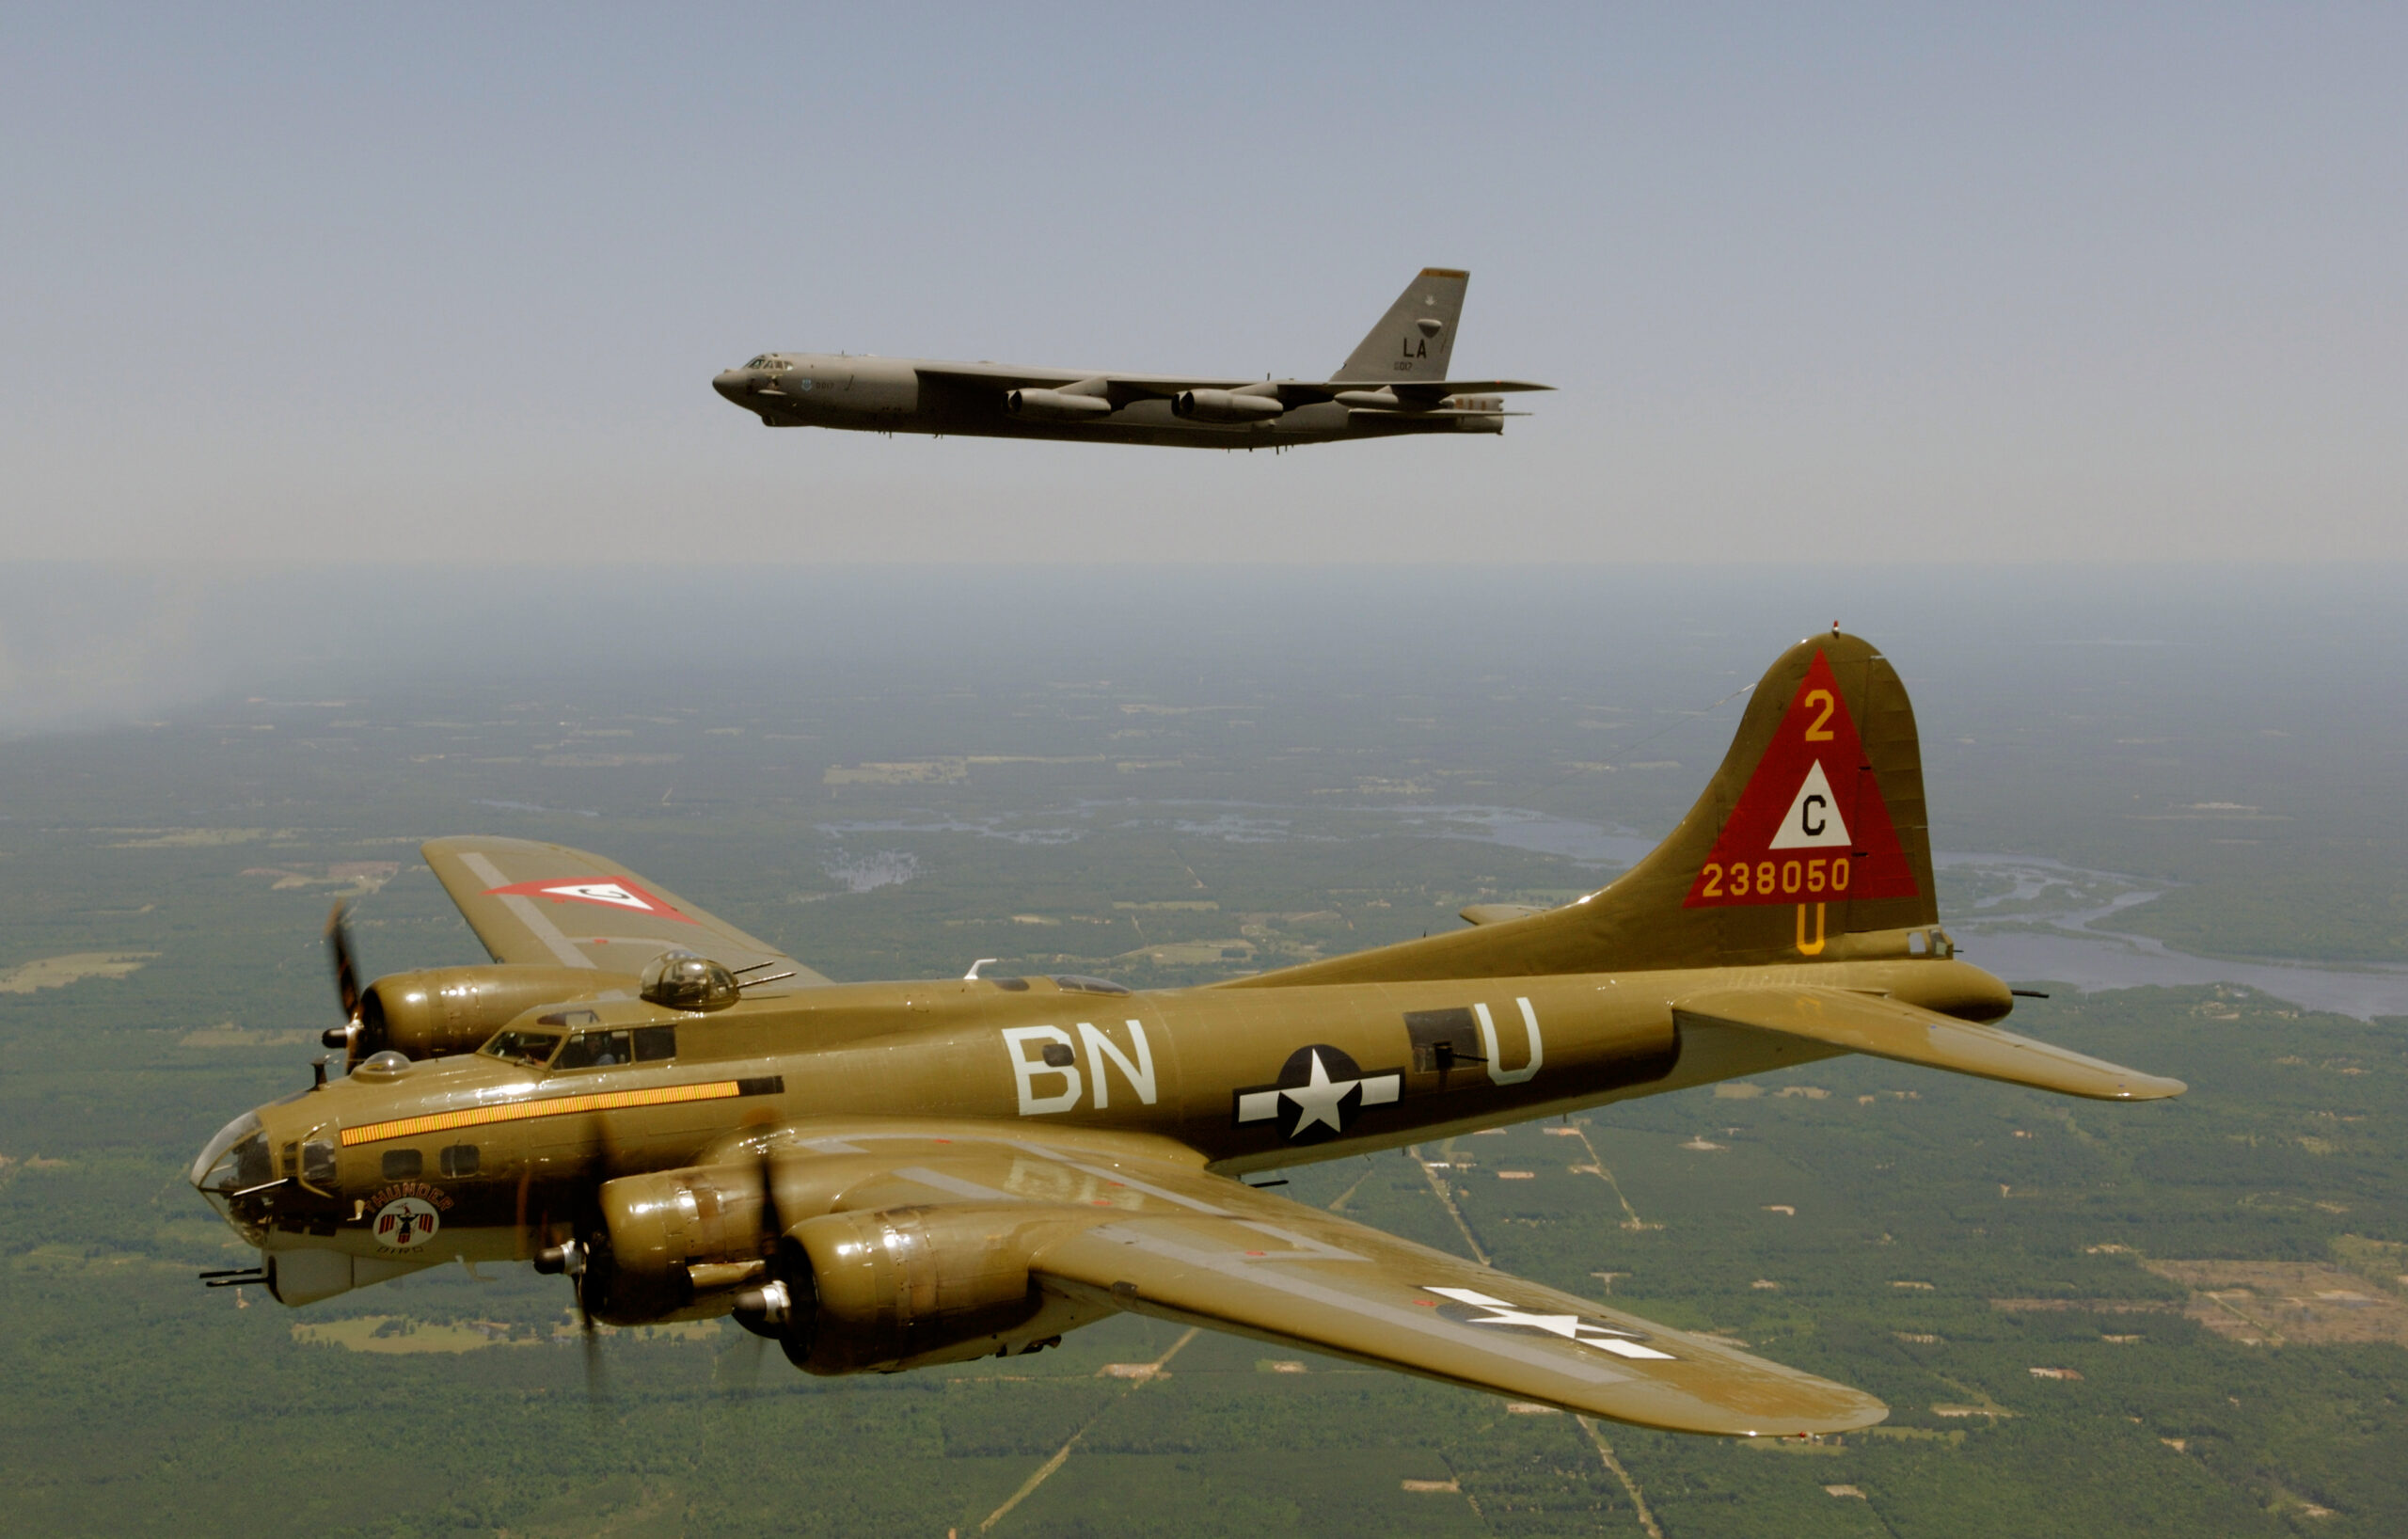
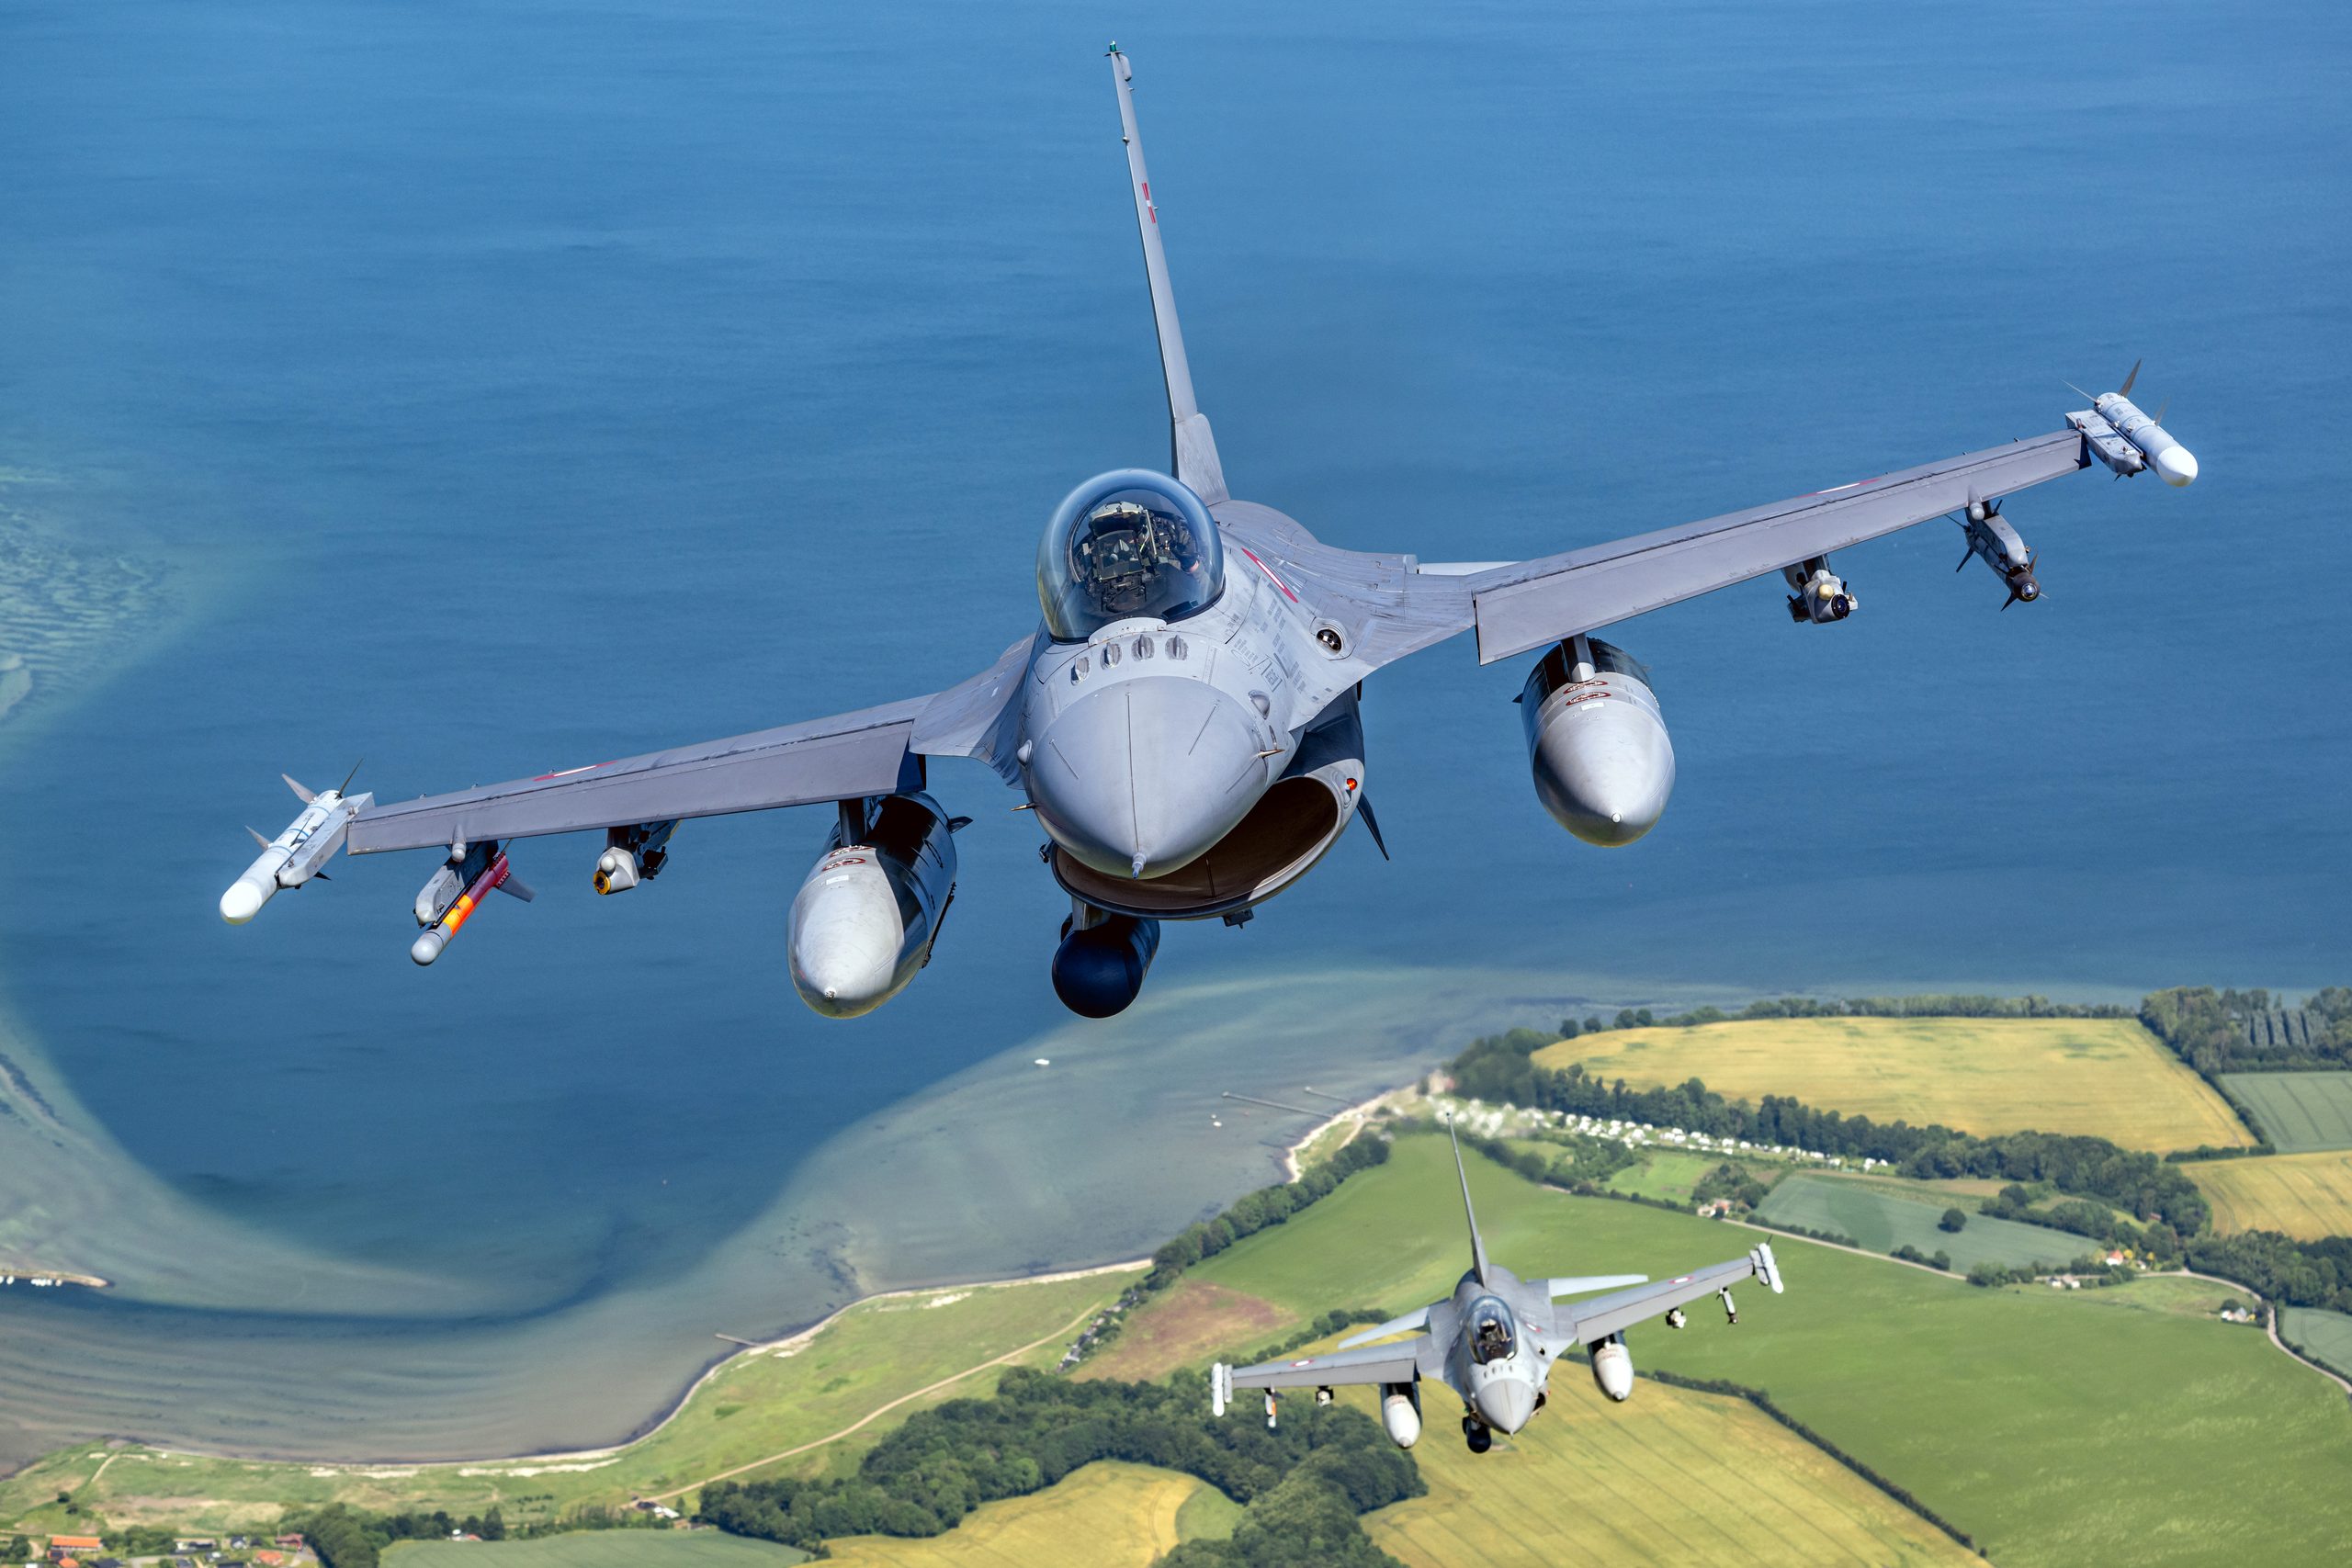
Air-to-air photography is the practice of photographing an aircraft in flight from another aircraft flying alongside it. One aircraft carries the photographer and is usually called the camera ship or photo ship. The other is the subject. The two fly in formation, which means they hold a fixed position relative to each other while both move through the air at speed. That formation relationship is the whole game. It lets the photographer choose the angle, control how the subject sits against the sky or the ground, and keep the aircraft at a workable distance for the lens fitted to the camera.
This is a different thing from aerial photography, where the subject is the landscape and the aircraft is just the vantage point. In air-to-air the aircraft is the star. It is also different from the ground-based work you do at an airshow, where you stand still and the aircraft sweeps past you in a couple of seconds. From the camera ship the subject is more or less parked next to you, which sounds easier and in some ways is, but the platform you are sitting in is banking, climbing and bouncing through turbulence the whole time.
The reason the results look so good comes down to control. On the ground you photograph whatever pass the display pilot chooses to fly, in whatever light the day gives you. In the air the team plans the light, the background and the geometry in advance. They fly a heading that puts the sun where it should be, they pick a height that gives clean cloud or clear ground behind the subject, and they hold a position that suits the photographer. Nothing is left to luck. That planning is why a good air-to-air frame has a presence that a long-lens grab from the crowd line rarely matches.
The camera ship and the subject aircraft
Understanding the two aircraft and how they relate to each other is the foundation for everything else. Get this clear and the settings and composition fall into place.
The camera ship
The camera ship is whatever aircraft the photographer is flying in. It needs three things: a clear sightline to the subject, a speed range that matches the subject, and a crew comfortable flying formation. A fast jet cannot be photographed cleanly from a light trainer that tops out at 120 knots, so the platform has to fit the subject. For warbirds and light aircraft the camera ship is often another piston aircraft of similar performance. For jet subjects it might be a jet trainer or a larger aircraft with a suitable hatch or door.
The clear sightline is the part photographers underestimate. A side window with a thick scratched pane, a strut in the way, or a wing that cuts across the subject all limit what you can do. The best platforms have a removable door, an open hatch, a bubble canopy or at least a large clean window positioned where the photographer can shoot square through it. Helicopters with a door removed are popular because they give an unobstructed view and can slow right down, although they bring their own vibration and rotor-wash issues.
The subject
The subject is the aircraft you are there to photograph. It holds station on the camera ship, usually slightly behind and to one side, in a position the pilots have agreed. The subject pilot does most of the precise flying because it is easier for the trailing aircraft to adjust to the lead than the other way round. That is why subject pilots in particular need solid formation experience. They are the ones making the small constant corrections that keep the aircraft exactly where the photographer wants it.
The distance between the two aircraft is closer than most people guess. Often it is only a few wingspans, sometimes less. That is why air-to-air work tends to need much wider lenses than ground photography. You are not reaching out across half a mile of sky, you are filling the frame with something sitting just off your wingtip. We will come back to lenses, but keep that picture in mind: the subject is close, and getting closer is a flying decision, not a zoom decision.
Single subject versus formation
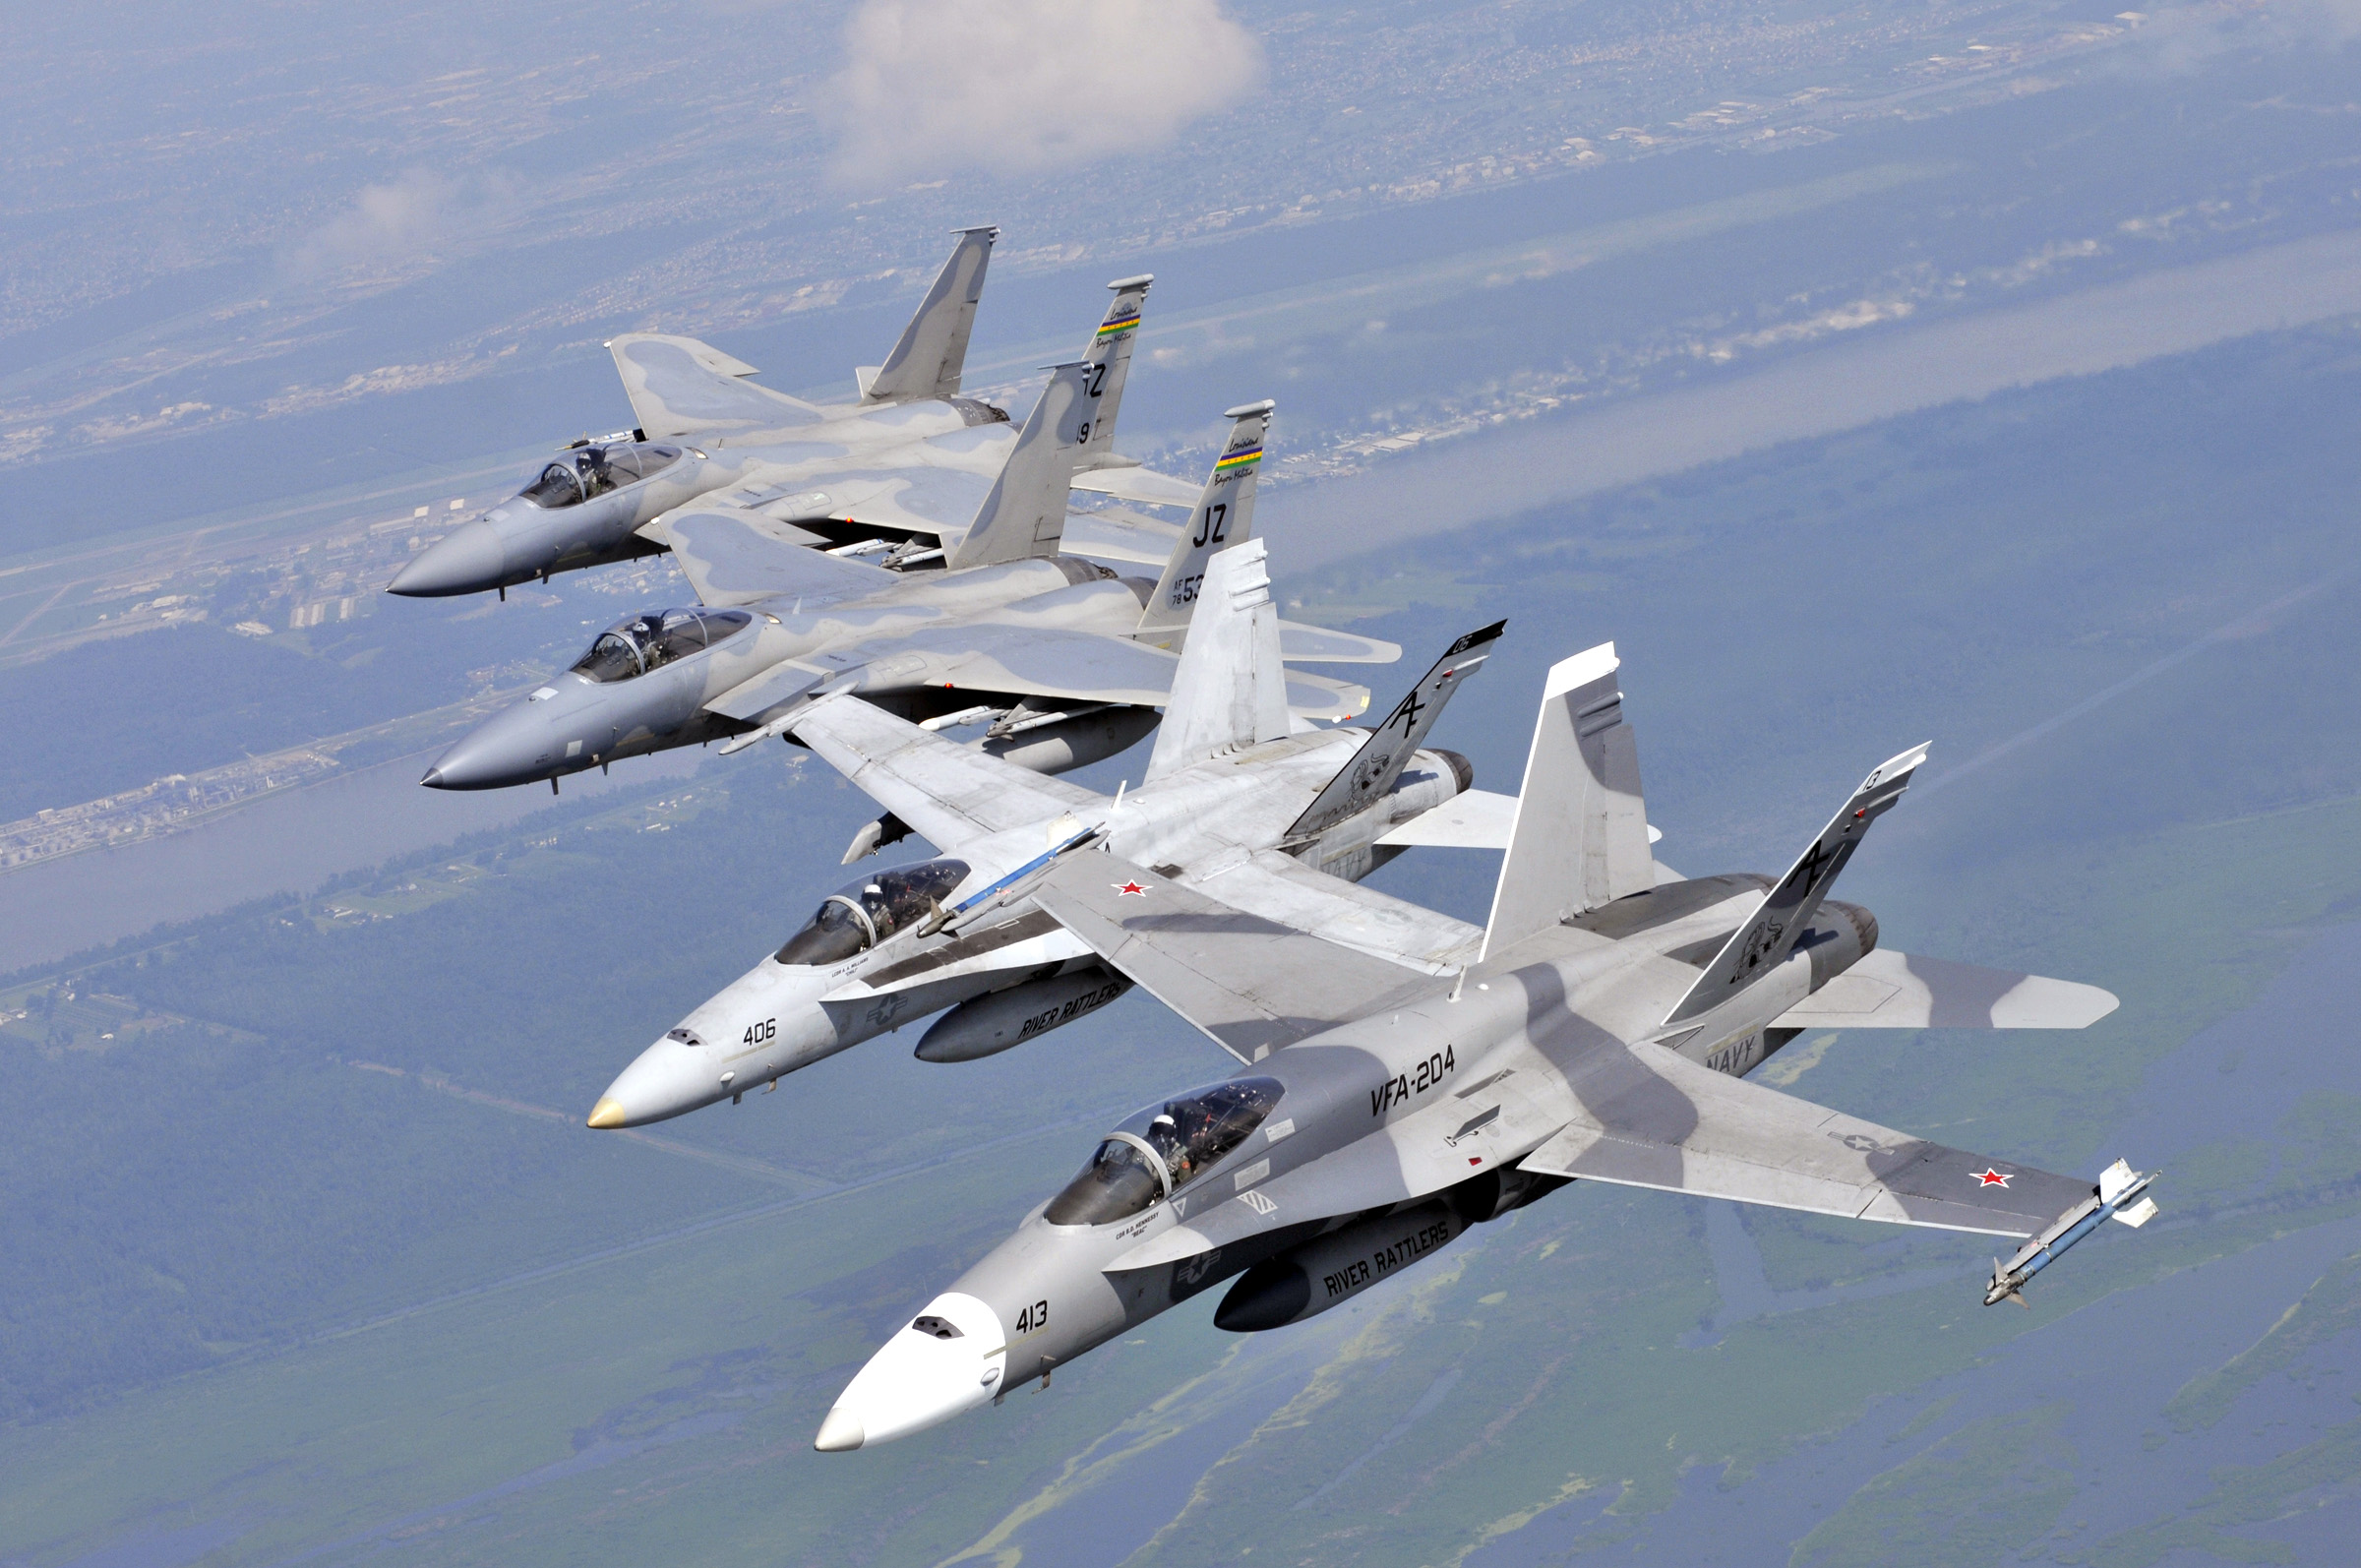
A single aircraft is the simplest brief. One subject, one position, and the photographer concentrates on light and framing. Multiple aircraft raise the difficulty sharply. A pair or a four-ship has to hold formation with each other as well as with the camera ship, and the photographer has to think about how the shapes overlap. A loose formation gives you separation between aircraft but spreads them across the frame. A tight formation reads as a single graphic block but hides parts of the trailing aircraft. None of this is wrong, it is just a choice you make in the brief, and we cover formations properly further down.
Safety first: the brief that makes it possible
Nothing in this guide matters if the flying is not safe. Formation flying puts two aircraft deliberately close together at speed, often low and sometimes manoeuvring hard. The margin for error is small. Every serious air-to-air shoot is built on a thorough brief and crewed by current, formation-qualified pilots. As the photographer you are a passenger. Your pictures are never worth pushing a crew past what they are comfortable with, and a good photographer is the easiest person in the aircraft to ignore when something needs attention.
The ground brief
Everything is agreed on the ground before anyone starts an engine. A proper brief covers the plan for the sortie and the safety framework around it. The crews set radio frequencies for air-to-air communication so the camera ship and subject can talk directly. They agree the route, the heights, the speeds and the formations. They establish what happens if anyone loses sight of the other aircraft, which is the single most important emergency procedure in formation work: lost sight means immediate separation on a briefed heading and height, then re-join only when everyone has visual contact again.
The photographer has a part in this brief too. You explain what you are hoping to get, the angles and the light you want, and the crews tell you what is realistic. Maybe the position you imagined puts the sun straight into the lens, or asks the subject pilot to fly somewhere uncomfortable. Better to find that out on the ground with a model aircraft in your hand than to waste fuel discovering it in the air. Agree a simple language for directions in flight, because shouting complex instructions over an intercom while bouncing through turbulence does not work. Clock references and plain words like “move forward”, “step down”, “tuck in” beat anything elaborate.
Securing yourself and your kit
If you are shooting from an open door, an open hatch or with a canopy back, you and everything you carry must be secured. The photographer is held in by an approved harness attached to a hard point in the airframe so there is no chance of falling out under G or in turbulence. Cameras go on straps rated for the job, and many photographers add a second tether so a dropped body cannot leave the aircraft. A camera that departs the airframe can strike a tailplane or get ingested by an engine, so this is a flight safety issue as much as a kit one.
Loose items are the enemy. Anything that can come off will come off in a slipstream. Rings, watches and loose glasses come off before the flight or get secured. Lens caps, spare batteries and cloths live in zipped pockets, not loose on a lap. Hats with anything flapping get left behind. The rule is simple: if it is not attached, it does not come.
Communication and the photographer’s discipline
In the air the photographer talks to the camera ship crew, who relay to the subject if needed, or the photographer talks to the subject directly on the agreed frequency if the brief allows. Keep it calm and minimal. The pilots are flying a demanding formation and do not need a running commentary. Call the moves you need, confirm you have the shot, and let them concentrate. If you ever feel uneasy about a position, say so plainly. No one will think less of you for it, and a crew that knows the photographer will speak up can relax and fly better.
The gear you actually need
Air-to-air does not demand exotic equipment. In fact it asks for less reach than airshow work, because the subject is so close. What it does demand is reliability, a sensible single-lens choice and a body set up so you are not fiddling with menus while the light is perfect. If you are still building a kit for aviation generally, our guide to the best lenses for aviation photography is a good place to start, but the priorities shift a little in the air.
Camera bodies
Almost any modern camera with good continuous autofocus and a fast frame rate will do the job. Air-to-air rewards reliable tracking and a deep buffer more than huge resolution. A camera that holds focus on a moving subject against a busy background, and keeps shooting without stalling, is worth more here than a few extra megapixels. Two bodies are common among working photographers, not for backup alone but so each can carry a different lens, because you do not change lenses in the air.
Lenses: the one-lens rule
This is the rule that surprises ground photographers most. You do not change lenses in flight. With a door off or a window open the airflow will pepper an exposed sensor with dust and grit in seconds, and a dropped lens is a flight hazard. So you commit to one lens per body and shoot the range it gives you. Because the subject is close, that lens is usually far wider than people expect. A 24-70mm or 24-105mm zoom covers tight formation and close passes. A 70-200mm is the classic single choice when the subject sits a little further out, and the popularity of the fast 70-200 for this work is no accident. A mid-range superzoom that spans roughly 24 to 200mm gives the most flexibility on a single body, at some cost in outright sharpness.
The takeaway is to pick the zoom that matches the planned distance and accept its limits. If you only have one body, lean towards the wider zoom, because it is far easier to crop a wide frame later than to discover the subject will not fit at the closest, most dramatic distance. A polariser is usually left off because it costs light and complicates shooting through glass, though some photographers use one carefully when reflections are a problem.
Straps, supports and the small things
A strong strap rated for the camera and lens is essential, ideally with a secondary tether. You hand-hold everything. Tripods and monopods have no place in a small cockpit or doorway, and image stabilisation does the steadying work instead. Set lens stabilisation to the mode designed for panning or general handheld use if your lens offers a choice, and on some systems an active mode helps with the constant vibration of an airframe. Pack a couple of microfibre cloths in a zipped pocket for wiping glass and spray, charge every battery, and format your cards before you fly so you are not deleting frames at altitude.
Camera settings for air-to-air
The settings logic is the same one you use on the ground, with the dial pushed in a particular direction by the close distance and the moving platform. The biggest single decision is shutter speed, because it controls whether your propeller looks alive or dead, and most beginners get it wrong by shooting far too fast.
Shutter speed for propeller aircraft
A propeller frozen solid looks broken. The aircraft appears to be hanging in the sky with its engine stopped, and the image dies. You want the propeller blurred into a disc, or at least a clear arc, so the aircraft reads as flying. That means a slow shutter speed by action-photography standards. For most single-engined propeller types, somewhere around 1/200 to 1/250 second gives a convincing blur while still being slow enough to suggest motion. Push slower, towards 1/125 second or below, and the disc becomes fuller and more dramatic, at the cost of more frames lost to camera shake and aircraft movement.
The working method is to start at 1/250 second, check the back of the camera, and then slow down as far as you can still hold cleanly. Shoot bursts rather than single frames, because at these speeds a proportion of shots will be soft and you want several to choose from. Our detailed look at propeller blur and the right shutter speed goes deeper into the numbers for different aircraft, and the same logic applies in the air, just with the added challenge of a moving platform.
Shutter speed for jets
Pure jets have no propeller, so the constraint disappears. You can use a fast shutter speed, 1/1000 second or quicker, to freeze the aircraft sharply and counter the vibration of the camera ship. There is no penalty for freezing a jet because there is no rotating part that needs blur. The exception is anything with a visible turbine fan or, on some types, you may want a touch of blur in a rotor or prop on a mixed formation. For a clean jet, fast and sharp is the safe default. Our guide to photographing fast jets covers the panning and tracking side, which still matters when the jet is manoeuvring relative to your platform.
Helicopters and rotor blur
Helicopters demand the slowest speeds of all. The main rotor turns relatively slowly, so to blur it into a full disc you often need 1/100 second or slower, sometimes down towards 1/60 second for types with fewer blades. That is genuinely difficult to hold from a vibrating platform, which is why helicopter air-to-air separates the patient from the lucky. Stabilisation, good technique and a high frame rate all help. Expect a lower hit rate and shoot accordingly.
Aperture and depth of field
You generally want the whole aircraft sharp, nose to tail, so a middle aperture around f/8 is a sensible default. It gives enough depth of field to keep a three-quarter view crisp from spinner to tail while staying in the sharp part of most lenses. You can open up in poor light if you must, accepting that the nearest and furthest parts of the aircraft may soften, and you rarely need to close down past f/11 because the subject is at a fairly constant distance and diffraction starts to cost sharpness.
ISO and auto ISO
With shutter speed locked for the look you want and aperture set for depth of field, ISO becomes the variable that balances the exposure. Many photographers run auto ISO with a sensible ceiling, so the camera holds the chosen shutter and aperture and lifts ISO as the light changes when the formation turns through different angles to the sun. Modern sensors handle moderate ISO cleanly, and a slightly noisy sharp frame beats a clean blurred one. Set a maximum you are happy with and let the camera work within it.
Autofocus and tracking
Use continuous autofocus so the camera keeps adjusting as the distance between the two aircraft breathes in and out. Subject tracking or a small group of focus points works well, and many recent cameras can lock onto an aircraft automatically. Against a plain sky autofocus has an easy life. Against cluttered ground it can hunt, so a tracking mode that sticks to the subject earns its keep. The principles are the same ones in our airshow camera settings and autofocus guide, carried into the air.
Settings reference table
Use this as a starting point, then adjust to taste and to the light. The shutter speeds assume you want natural blur on rotating parts.
| Subject | Shutter speed | Aperture | Drive / AF | Notes |
|---|---|---|---|---|
| Single-engine warbird or light prop | 1/200 to 1/250 s | f/8 | Continuous AF, burst | Slow further for a fuller disc once you can hold it |
| Multi-engine prop | 1/160 to 1/250 s | f/8 | Continuous AF, burst | Watch that all propellers blur evenly |
| Helicopter | 1/60 to 1/125 s | f/8 | Continuous AF, burst | Hardest to hold; expect a lower hit rate |
| Jet | 1/1000 s or faster | f/8 | Continuous AF, burst | Freeze it; no rotating part to blur |
| Mixed formation | 1/200 to 1/250 s | f/8 to f/11 | Continuous AF, burst | Compromise towards the slowest prop in the group |
Light, the sun and choosing a heading
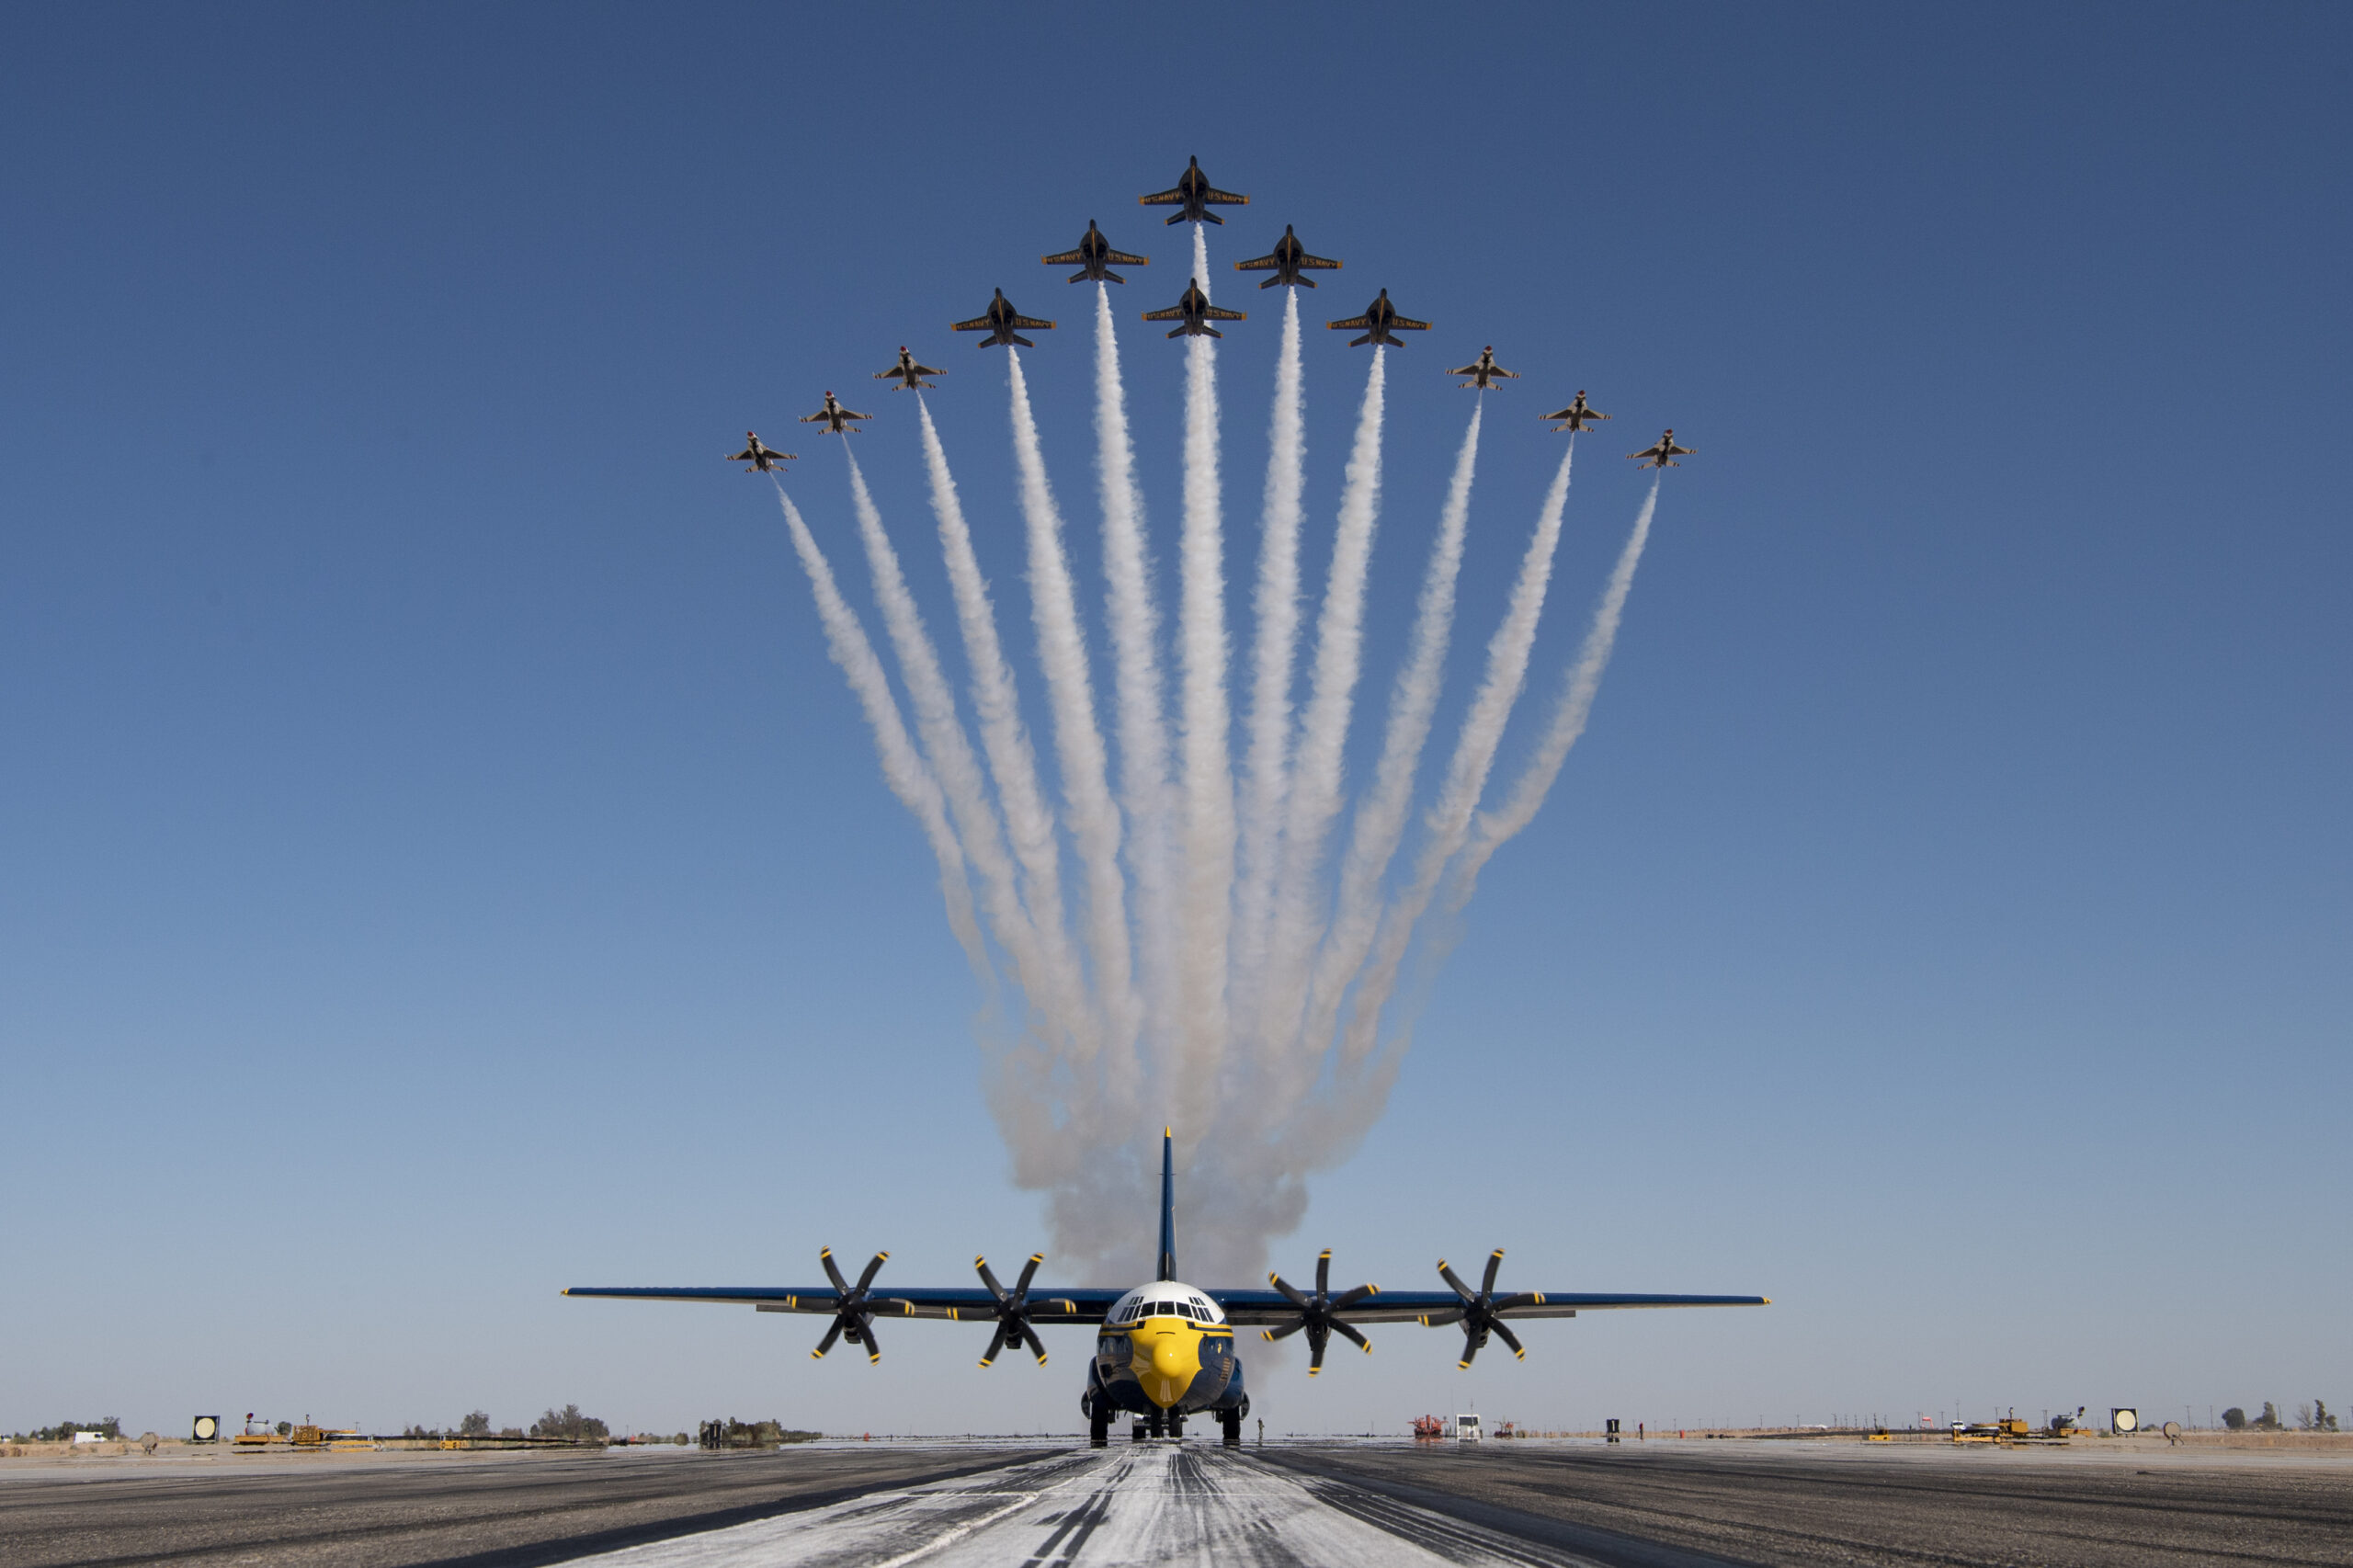
On the ground you take the light the day gives you. In the air the team chooses it. Because the camera ship and subject can fly any heading, they can put the sun exactly where it does the most good. This is one of the real advantages of air-to-air, and it is worth understanding so you can ask for the right thing in the brief.
Time of day
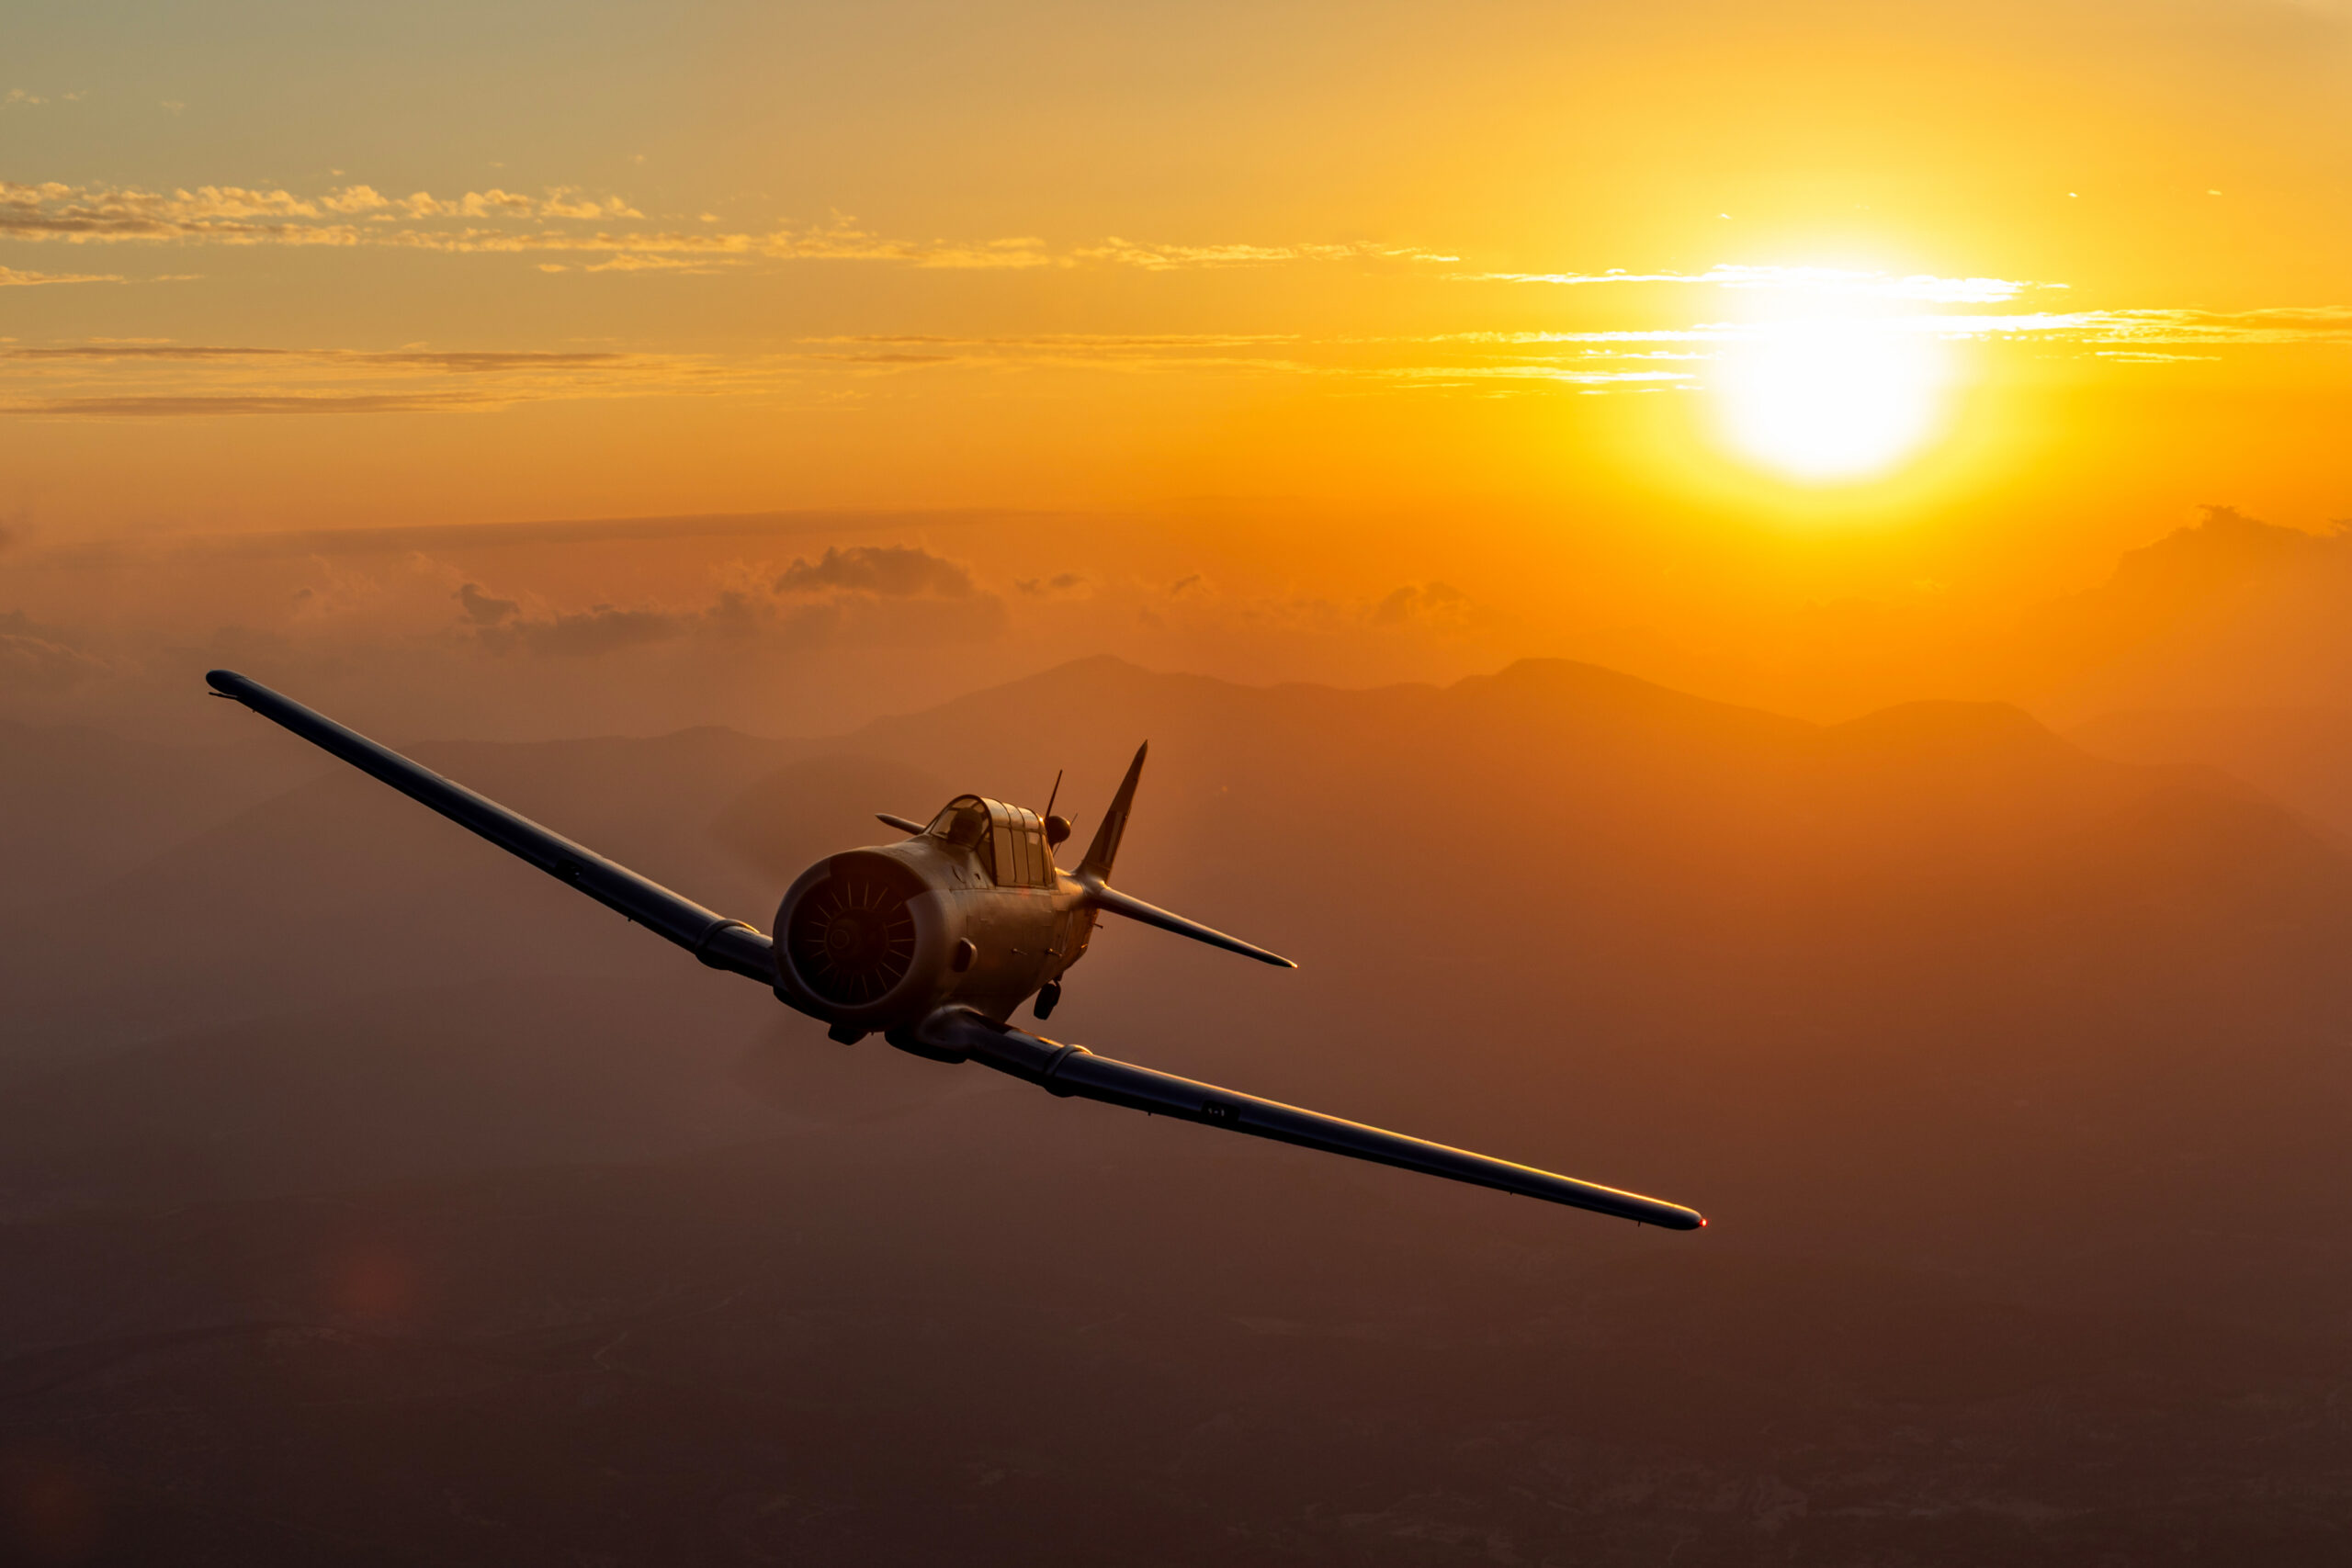
The best air-to-air light is the same light that flatters everything else: the hours after sunrise and before sunset. Low sun rakes across the aircraft, picks out panel lines and rivets, and wraps the shape in warm tone. It throws long modelling shadows that give the fuselage form rather than flattening it. Midday sun sits high overhead, flattens the aircraft, and drops hard shadows under the wings and tail that are hard to recover. If the schedule allows, shoots are planned for the golden windows at each end of the day. Our piece on shooting aviation in low and dramatic light around display teams shows what that warmth does to an aircraft.
Where the sun should sit
For classic, evenly lit air-to-air the sun usually sits behind the camera ship or off to one side, so it falls on the side of the subject facing you. The team flies a heading that achieves this, and because they are orbiting they can keep returning to the same favourable angle. Side light is often more interesting than flat front light because it gives the aircraft shape. Backlight, with the sun behind the subject, is a more advanced look that can produce rim-lit, dramatic silhouettes and glowing exhaust, but it needs careful exposure to avoid losing the aircraft into shadow.
Backgrounds
Height controls your background. Climb above a cloud layer and you get clean white tops or blue sky behind the subject. Drop down and you can place the aircraft against textured ground, a coastline or a town, which adds context and scale. A cluttered background can fight the aircraft, so part of the planning is choosing a height and area that gives the backdrop you want. A subject against plain sky is the easiest to expose and the cleanest to edit. A subject against landscape tells more of a story but asks more of your autofocus and your processing.
Formations and choreography
When more than one subject is involved, the shoot becomes choreography. The formations are not random, they are chosen in the brief to give a particular look, and knowing the common ones helps you ask for what you want.
Echelon
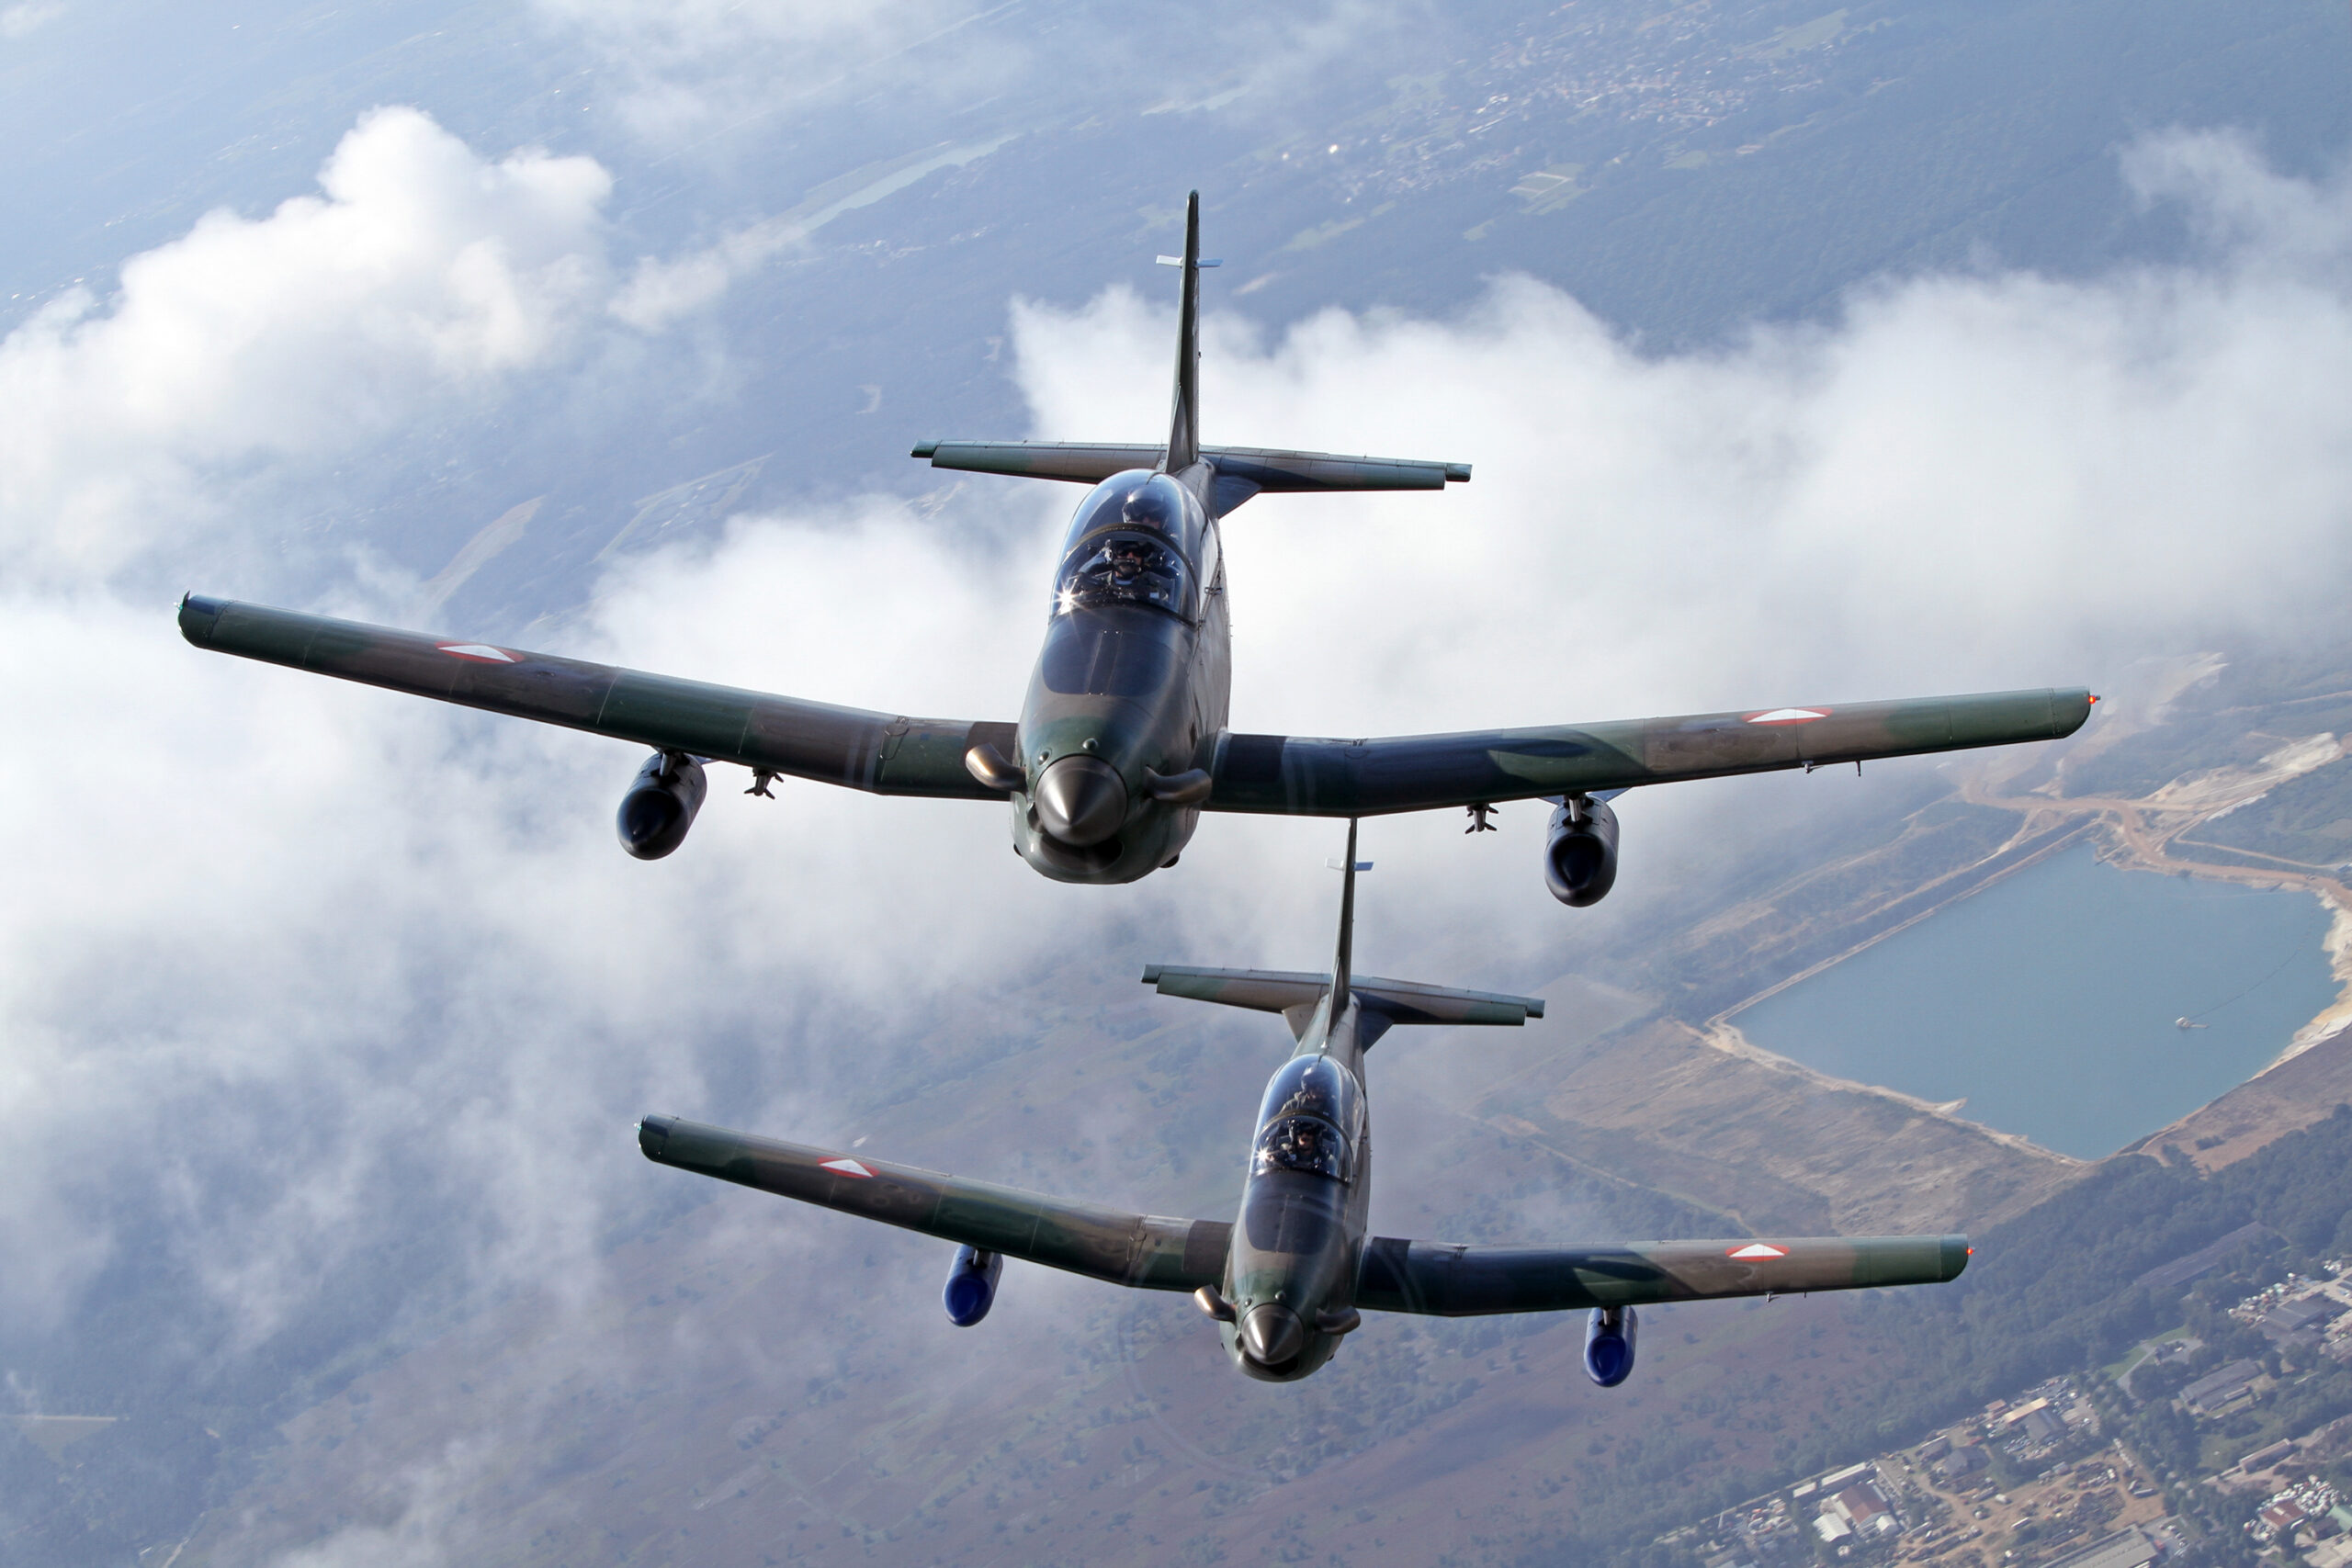
Echelon is the workhorse formation for air-to-air. The aircraft are stepped diagonally, each one behind and to the side of the one ahead, like a flight of stairs. It reads cleanly from the camera ship because every aircraft is visible and separated, and it photographs well from slightly above or below. If you only learn one formation by name, make it this one.
Line astern, vic and box
Line astern stacks the aircraft one behind another, which from the side gives a receding line and from head on hides the trailing aircraft. A vic places a leader with two wingmen swept back, a shape familiar from wartime photographs. A box of four makes a compact diamond that reads as a single graphic unit. Each gives a different feel and a different set of overlaps, and the right one depends on the story you want and the number of aircraft you have.
Working the formation
With multiple aircraft, small changes in your angle change which aircraft overlap and which separate. A few feet of step up or down from the camera ship can open a gap between two subjects or close it. This is why directions to the pilots matter so much, and why you agree a simple language in the brief. You are sculpting the relationship between shapes, and the pilots are your tools for doing it. Patience pays: hold a position, shoot a burst, refine, and repeat. The keepers usually come after a few cycles of adjustment, not on the first pass.
Composition from a moving platform
Composition in the air follows the same instincts as good aviation photography anywhere, with the twist that you cannot move your feet. You frame with the lens you have and the position the formation gives you, so thinking ahead matters.
Give the aircraft somewhere to go
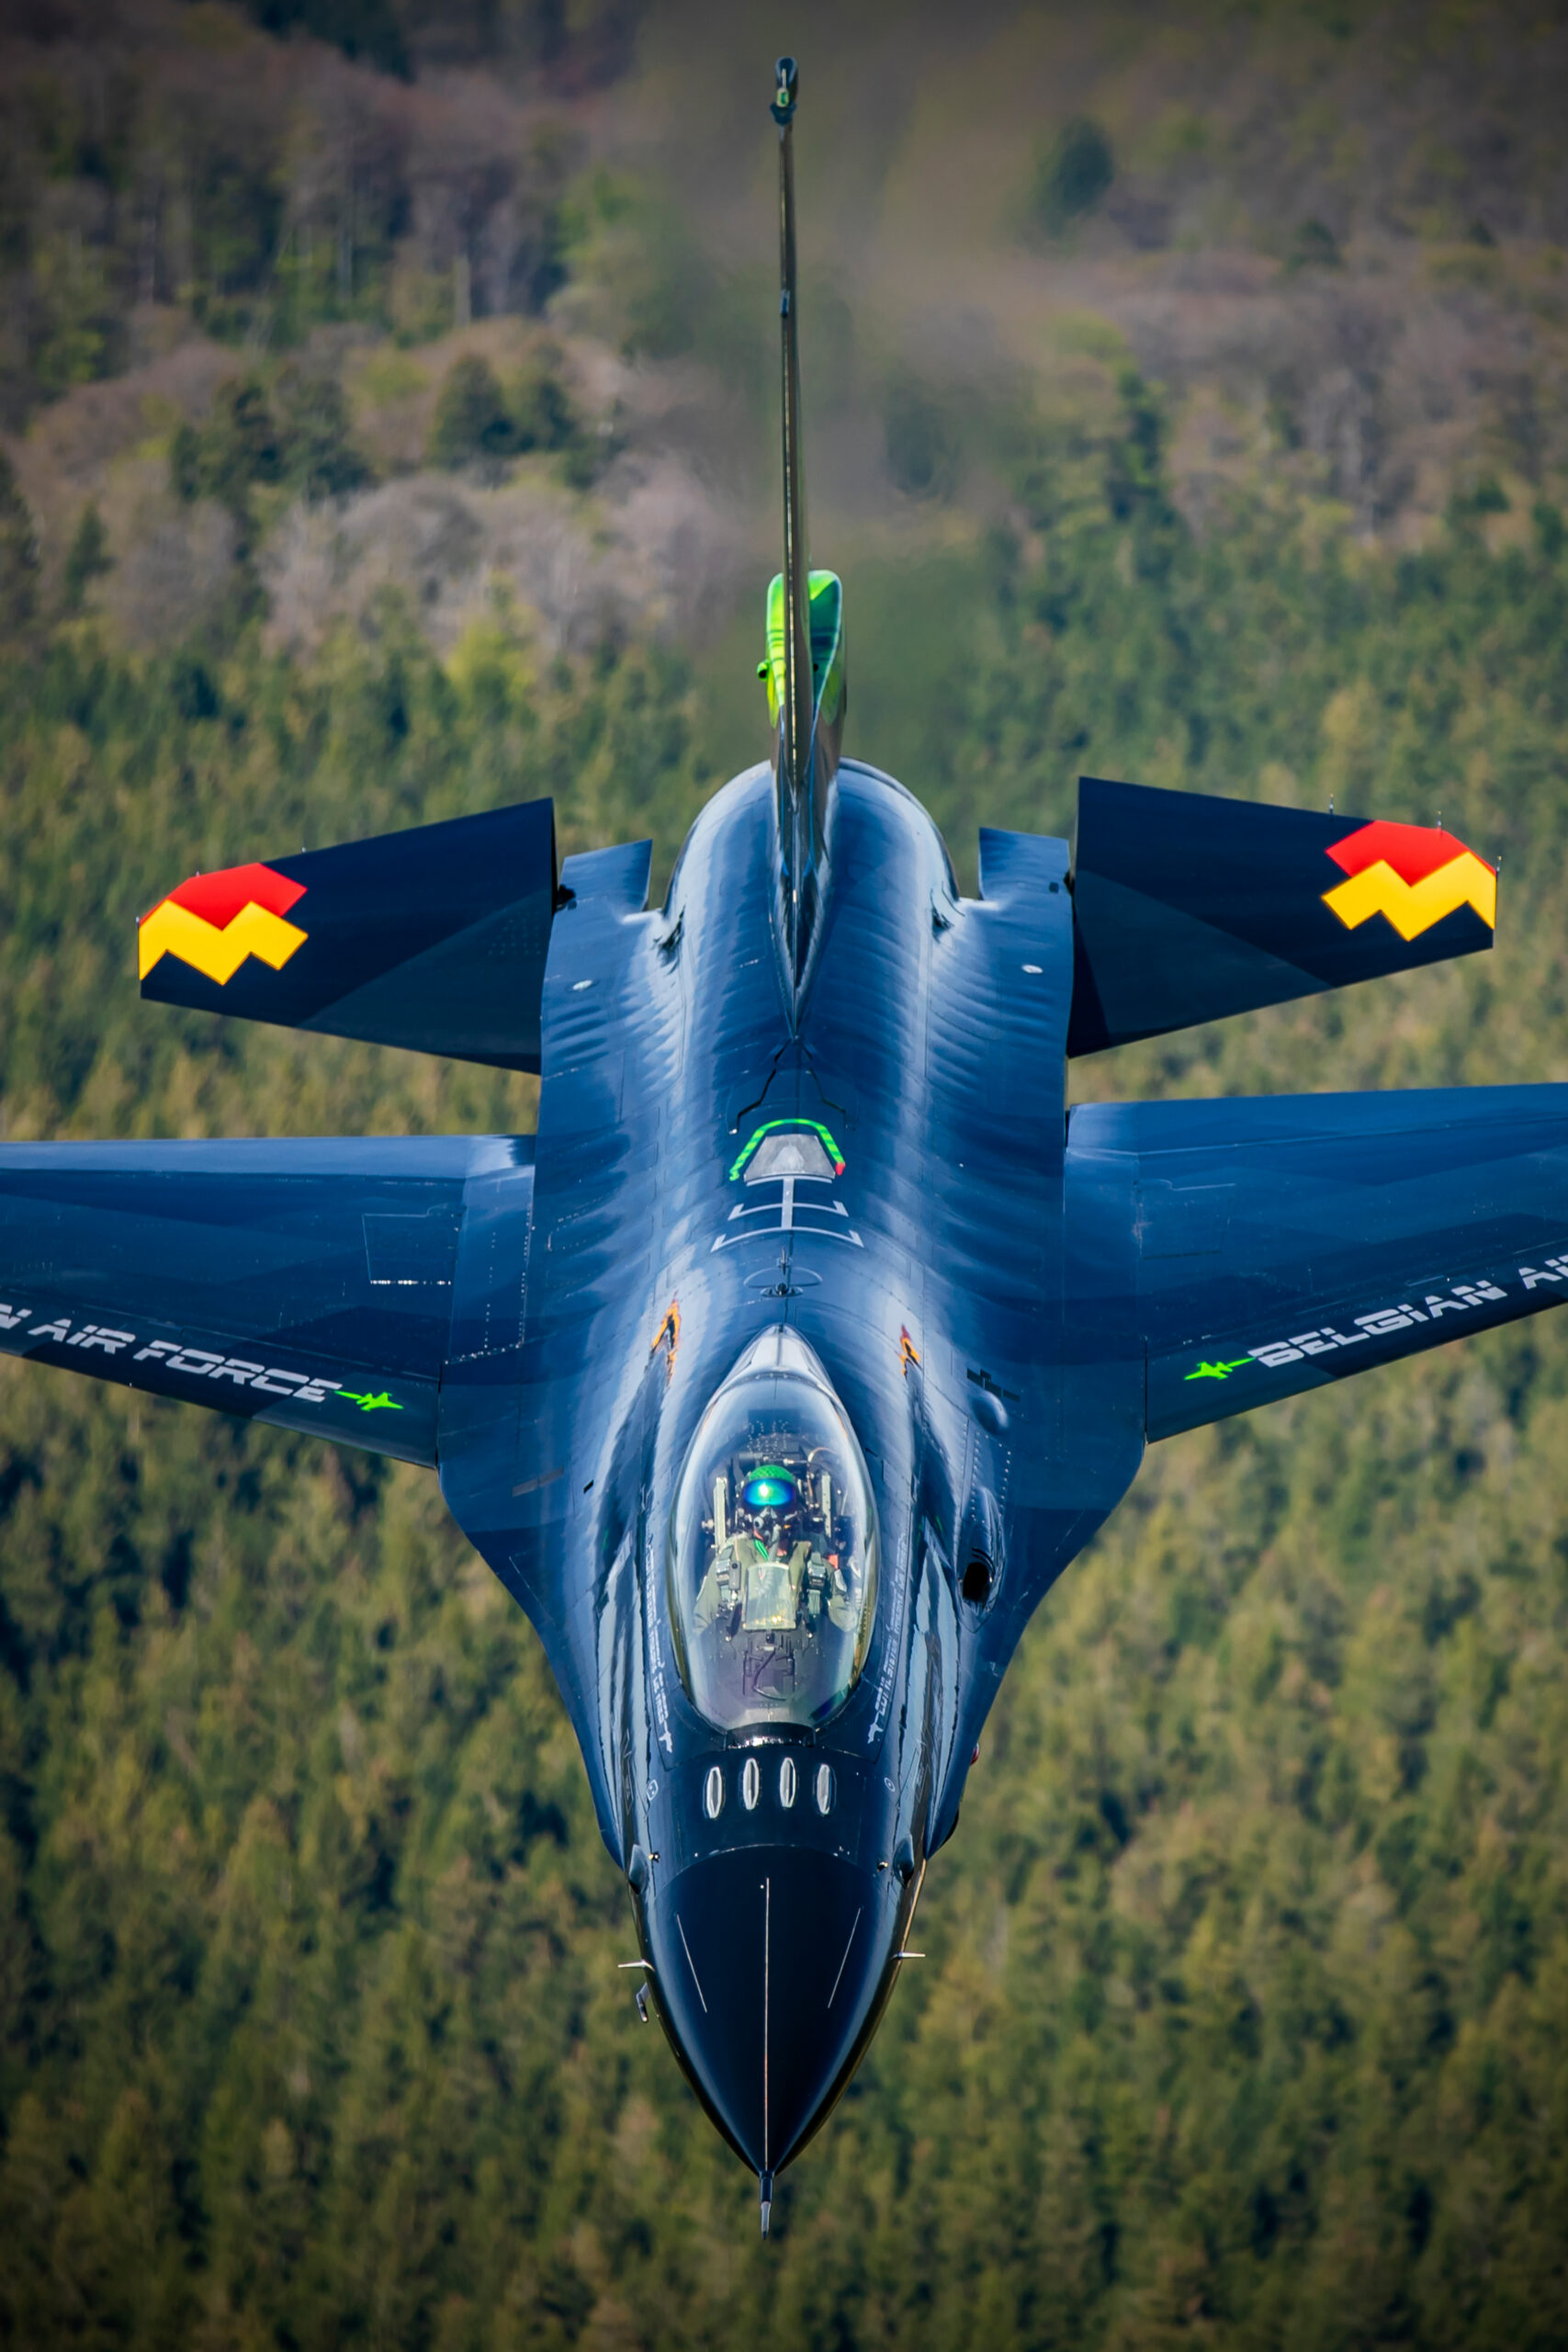
Leave space in the frame ahead of the aircraft, in the direction it is travelling, so it has room to fly into rather than being jammed against the edge. A nose pressed to the frame edge feels trapped. A little breathing space in front feels like motion. This is the single most reliable compositional habit in aviation work and it applies just as much from a camera ship.
Angles that flatter
A three-quarter front view, where you see the nose, one side and a hint of the top or bottom, is the most flattering angle for most aircraft because it shows the shape in three dimensions. Pure side-on profiles are clean and good for showing markings, and they suit warbirds and airliners well. Shooting slightly down on the subject puts it against the ground and shows the top surfaces and upper wing. Shooting slightly up puts it against sky and shows the belly. None is wrong, and a good sortie gathers several, but the three-quarter view is the dependable hero shot.
Backgrounds and the horizon
Watch the horizon. Because your platform is banking, the horizon will tilt through the viewfinder constantly, and it is easy to come home with every frame leaning. You can level later in editing, but a wonky horizon costs resolution when you straighten and crop, so try to catch the aircraft when the world is roughly level, or commit to a deliberate diagonal that suits a banking subject. Keep an eye on what sits behind the aircraft too, because a distracting cloud or a piece of your own airframe creeping into the corner can ruin an otherwise strong frame.
Shooting through canopies, doors and open windows
How you get your view of the subject shapes the whole shoot. The cleanest results come from an unobstructed opening, but that is not always available or safe, so you often work through glass.
Open doors and hatches
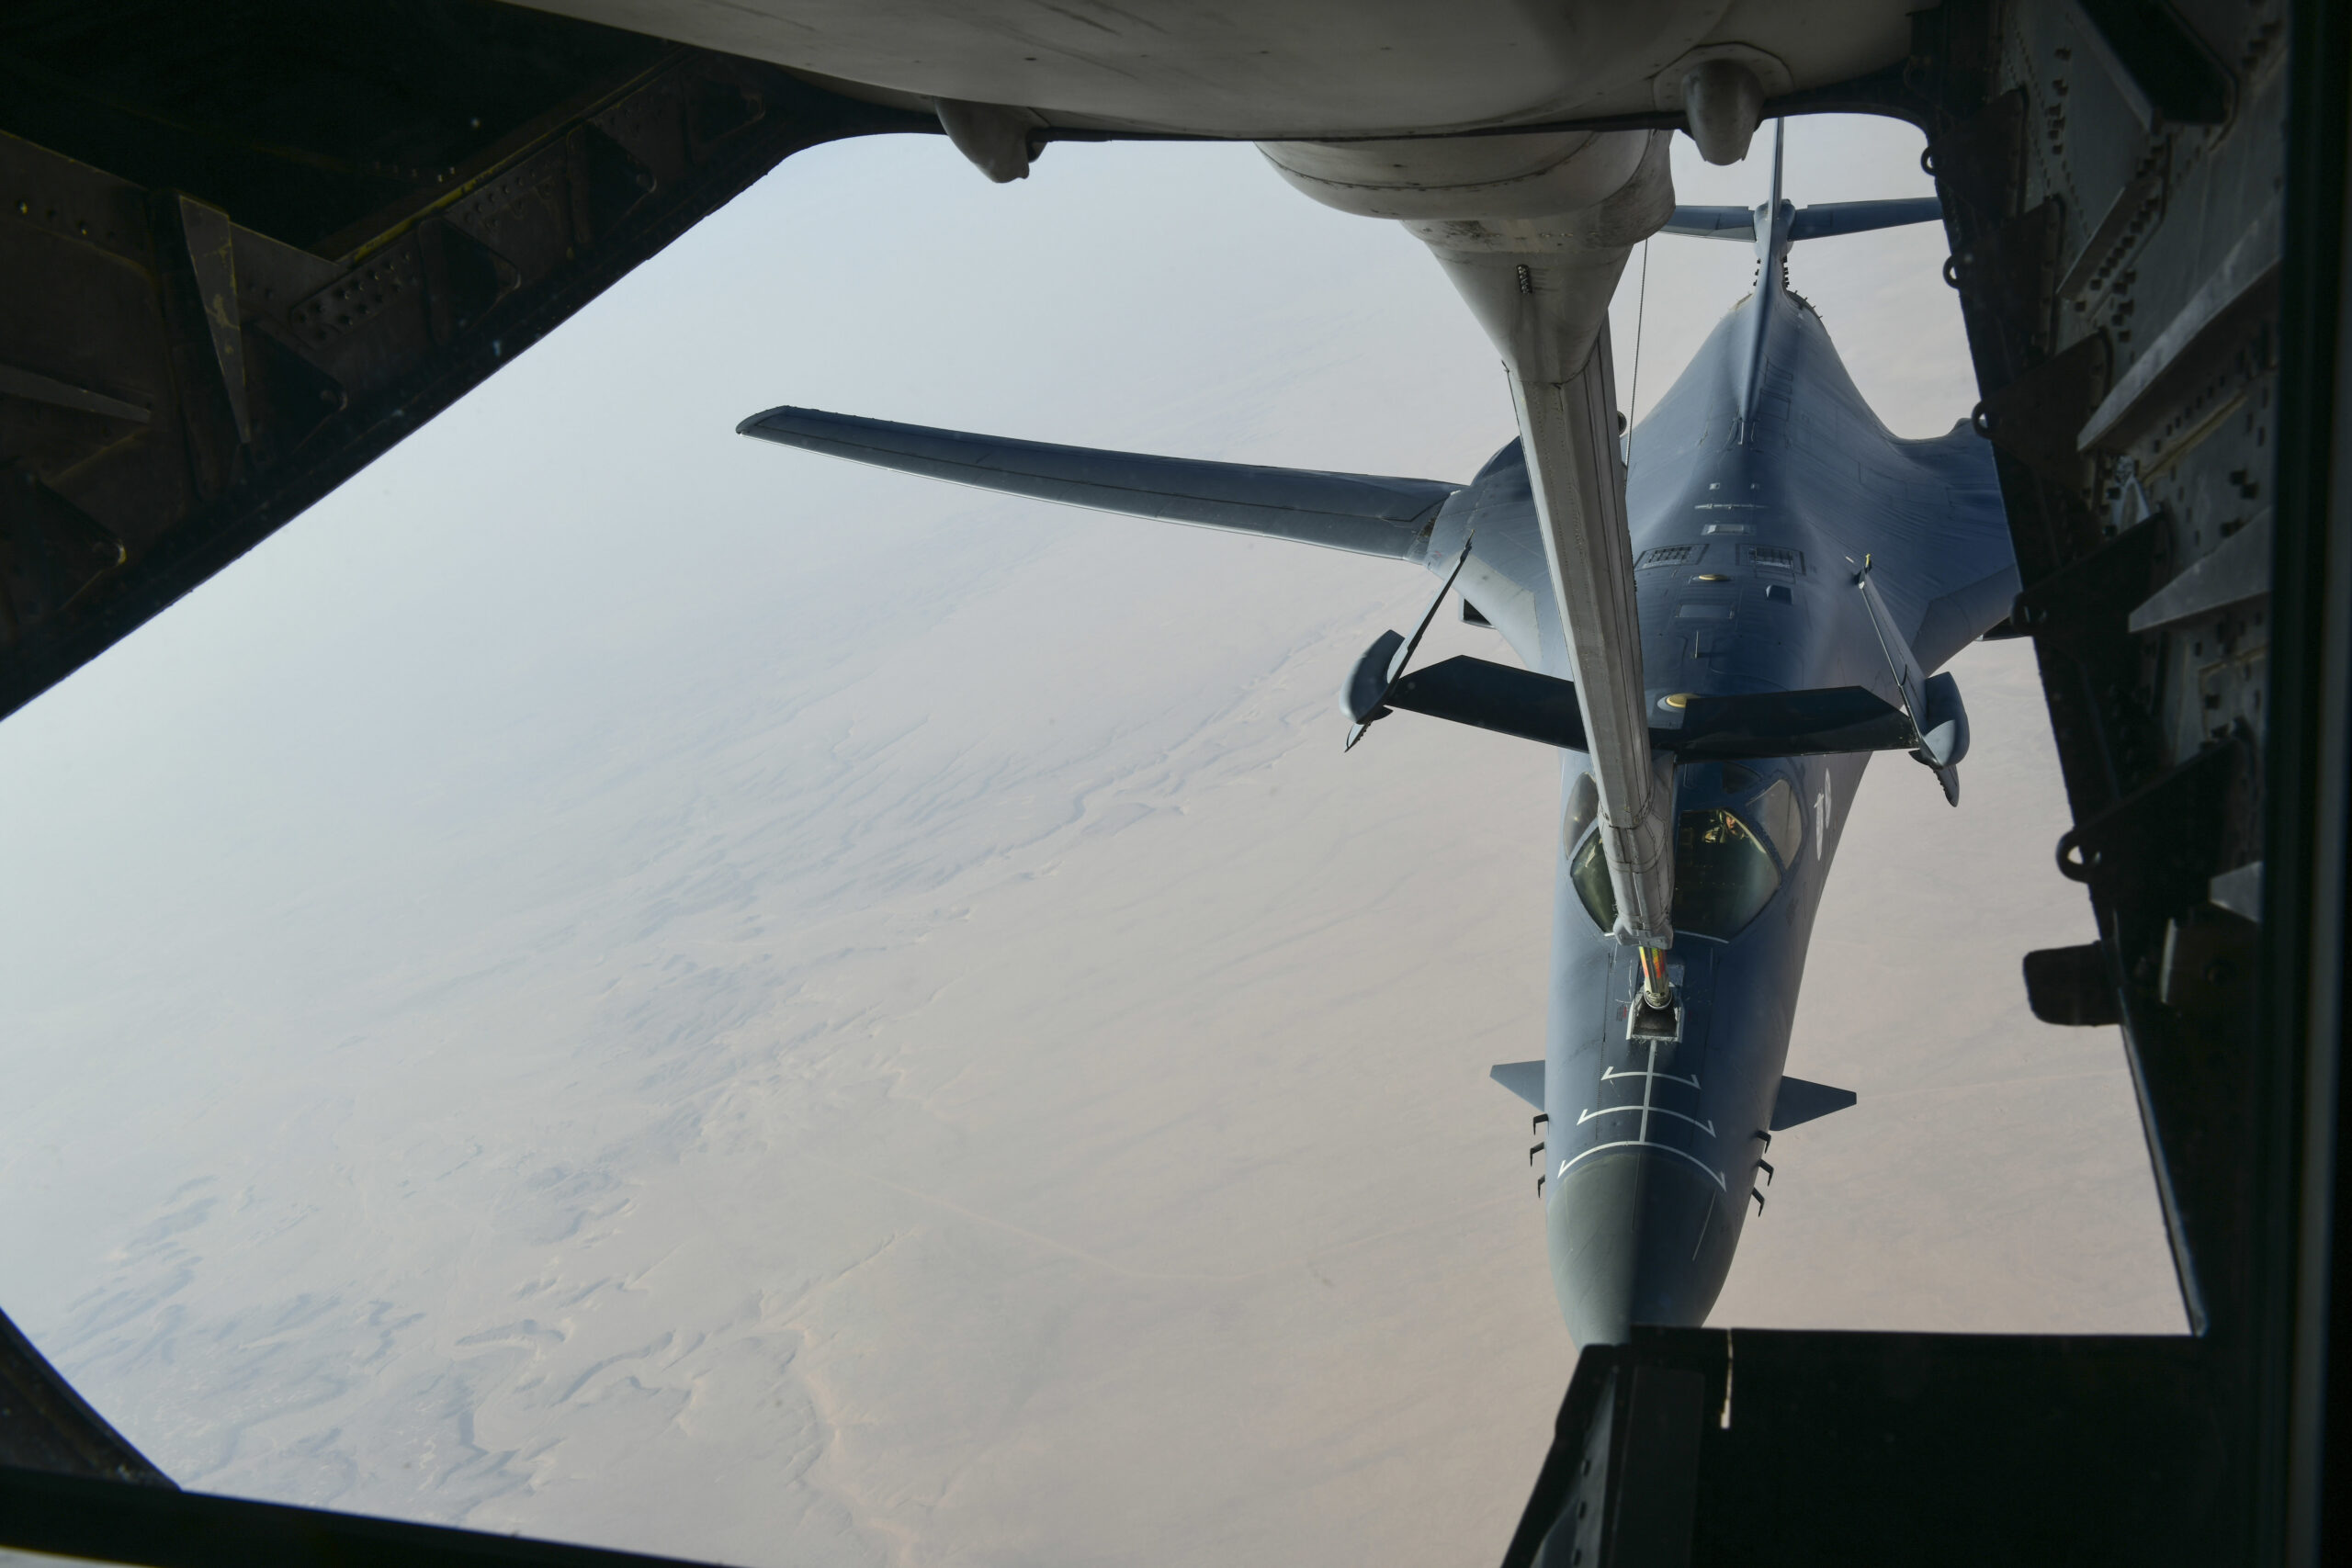
An open door, a removed door on a helicopter, or an open hatch gives the best image quality because nothing sits between the lens and the subject. There is no glass to soften the image, no reflections to fight, and no distortion. The price is wind, cold, noise and the absolute requirement that you and your kit are secured. This is the configuration most professional air-to-air uses, and it is why the harness and tether discipline covered earlier is not optional. Keep the lens inside the slipstream where you can, because pushing a long lens into fast air both shakes it and risks it being snatched.
Through the canopy or window
Often you shoot through a canopy or a closed window, and that is fine if you work with the glass rather than against it. Shoot through the cleanest part of the pane, and keep the lens as square to the glass as you can, because shooting at a steep angle through glass adds distortion and softness. Get the front of the lens close to the glass to cut reflections, and a rubber lens hood pressed gently to the surface helps both with reflections and with keeping the angle square. Wear dark clothing so your own reflection does not bounce back off the inside of the canopy, and ask passengers behind you to do the same if they can.
Vibration and how to beat it
The airframe vibrates, and that vibration is the enemy of sharpness. Do not brace the lens hard against the airframe, because that transmits engine and airflow vibration straight into the camera. Instead support the lens with your hands and let your body act as a soft mount, the way you would when panning on the ground. Image stabilisation handles the rest. A slightly faster shutter speed than you might use on the ground helps counter vibration for jets, though for props you are still limited by the need to blur the disc, so technique and burst shooting carry more of the load there.
Editing air-to-air frames
Good air-to-air frames usually need only modest editing, because the planning did the heavy lifting. The aim is to present the aircraft cleanly, not to rescue a weak frame. A consistent, light workflow gets the best from your keepers.
The core adjustments
Start by straightening the horizon, since you will have plenty of tilted frames from a banking platform. Crop to refine the composition and to remove any stray airframe parts or distractions that crept into the corners. Set white balance to suit the light, warming the golden-hour frames a touch and keeping the midday frames neutral. Lift shadows gently if the underside of the aircraft is dark, and pull highlights back if the sky or a light-coloured fuselage is close to clipping. The goal is an aircraft that looks natural and three-dimensional, not flat or over-processed.
Sharpening, noise and detail
Long-lens frames through air and sometimes glass can be a little soft, so careful sharpening helps, applied to the aircraft rather than the sky. If auto ISO climbed in poor light, a measured pass of noise reduction cleans the sky without smearing detail on the aircraft. Do not over-sharpen, because halos around the wings against a bright sky look harsh and artificial. A light touch reads as crisp, a heavy hand reads as processed.
Cleaning up the sky
Air-to-air frames sometimes pick up sensor dust spots, especially after shooting with a door off, or a distant speck of another aircraft or bird in the background. A quick pass with the healing tool across a plain sky removes these and is entirely legitimate housekeeping. Removing major elements is a different matter and depends on how you intend to use the image, particularly if you plan to sell it, which brings us to the next point.
How to get into air-to-air without owning an aircraft
Here is the question every reader is really asking: how do I actually do this when I do not own an aircraft and cannot fly formation myself? The good news is that almost nobody who shoots air-to-air owns either aircraft. There are several realistic routes in, and they all start from the ground.
Organised photo flights
The simplest route is to pay for a seat on an organised air-to-air sortie. Various operators and aviation events run these, putting paying photographers in a camera ship to shoot a warbird or a formation that has been arranged for the purpose. The flying, the safety and the subject are all handled, and you turn up with your camera and your settings sorted. It is the fastest way to get the experience and to come home with frames, and it teaches you what the discipline feels like before you try to arrange your own.
Clubs, groups and warbird operators
Aviation is a social world, and relationships open doors. Warbird groups, vintage aircraft clubs and formation display teams all need good images of their aircraft, and a photographer who has shown they are reliable, safe and easy to work with is an asset. That reputation is built on the ground first, by photographing at airshows and fly-ins, getting your images to the owners, and being the person who delivers good work without fuss. Over time, invitations to fly follow. Our airshow photography tips are a sensible starting point for building that ground game.
Owners who want images of their aircraft
An aircraft owner often wants striking photographs of their pride and joy and has no way to make them happen alone. If you can bring the photography to their flying, you have the basis of a shoot. This is where being able to organise a safe sortie, with a suitable camera ship and current formation pilots, becomes as valuable as your camera skills. Many long air-to-air careers started with one owner, one good set of images, and word spreading from there.
Patience and the long game
Air-to-air rewards people who treat it as a craft to grow into rather than a box to tick. Build your ground skills until panning and exposure are second nature, learn the safety culture by being around formation flying, and become someone crews want in their aircraft. The flying opportunities tend to come to photographers who have earned trust, not to those who simply ask. If you want to see the kind of results this approach produces over time, the Piemags Aviation galleries show what a long-term commitment to the subject looks like.
Common mistakes and how to avoid them
Most air-to-air disappointments come from a small number of repeated errors. Knowing them in advance saves a lot of wasted frames.
Freezing the propeller
The most common mistake by far is shooting too fast and freezing the propeller, leaving the aircraft looking dead in the sky. Slow down. Set 1/250 second or below and accept that you will lose some frames to softness in exchange for a propeller that looks like it is turning. This single change improves more air-to-air shots than anything else.
Bringing too long a lens
Ground photographers arrive with the 500mm or 600mm that serves them at airshows, then find the subject is so close they cannot fit it in. Air-to-air is a wide-lens game. Bring the mid-range zoom and leave the big telephoto behind, or keep it on a second body for the rare distant shot.
Forgetting the horizon
A banking platform tilts the world through your viewfinder, and it is easy to come home with every frame leaning at a different angle. Be aware of it, catch the aircraft when the horizon is roughly level where you can, and straighten carefully in editing where you cannot.
Treating it as a photography problem first
The biggest mistake of mindset is to think of air-to-air as a photography challenge with some flying attached. It is a flying operation with some photography attached. The crews, the brief and the safety culture come first, and the photographer who understands that is the one who gets invited back. Get the priorities right and the pictures follow.
Not thinking about how the images will be used
If you hope to sell or license your air-to-air work, think about rights and releases before you fly, not after. Knowing who owns the aircraft, what permissions exist and how the images may be used keeps everything clean. The Piemags approach to licensing aviation photography shows how images are made available properly, and it is worth understanding that side if you want your best frames to earn their keep.
Frequently asked questions
- Do I need my own aircraft to do air-to-air photography?
- No. Most people who shoot air-to-air do not own either aircraft. The usual routes are paying for a seat on an organised photo flight, getting to know a local formation or warbird group, joining a club that runs photo sorties, or building a relationship with an owner who wants images of their aircraft. You bring the camera skills, they provide the platform and the flying.
- What shutter speed should I use for air-to-air?
- It depends on the subject. For propeller aircraft aim for blurred discs, which usually means 1/200 to 1/250 second, slower if you can hold it steady. For helicopters go slower still, often 1/100 second or below so the rotor blurs into a full disc. For pure jets you can use 1/1000 second or faster because there is no propeller to worry about. Always set the slowest speed you can hold cleanly to keep ISO down and the propeller looking natural.
- Which lens is best for air-to-air work?
- A single mid-range zoom is the standard answer. A 24-70mm or 24-105mm covers tight formation work, while a 70-200mm is the classic choice when the subject sits a little further out. You do not change lenses in flight, so pick one zoom per body and accept the range you have. Wider than you expect is common, because the subject is often only a few wingspans away.
- Is air-to-air photography dangerous?
- Formation flying carries real risk, which is why every serious shoot starts with a thorough brief and uses current, formation-qualified pilots. The photographer is a passenger and should never distract the crew or ask for a position the pilots are not happy with. Treat the safety brief as the most important part of the day. Good images are never worth pushing a crew outside their limits.
- How do I get sharp shots through a canopy or window?
- Shoot through the cleanest glass you can, keep the lens square to the surface to reduce distortion, and avoid resting the lens on the airframe so vibration does not transfer. A lens hood and dark clothing cut reflections. If a door or window can be safely removed or opened, an unobstructed view is always better, but only when the crew has briefed and approved it.
- What is the best time of day for air-to-air?
- Early morning and the last couple of hours before sunset give low, warm light and long shadows that model the aircraft nicely. The harsh overhead light of midday flattens shape and creates hard shadows under the wings. Photographers and pilots plan headings around the sun so the light falls on the subject from the side or slightly behind the camera ship.
- How much does an air-to-air photo flight cost?
- It varies widely. Organised air-to-air sorties arranged through warbird operators or photographic events can run from a few hundred to well over a thousand pounds, depending on the aircraft, the flight time and whether you are sharing the camera ship. Many photographers get their first air-to-air frames at organised events rather than by booking privately.
- What harness or tether do I need for an open-door air-to-air shoot?
- For any open-door or open-canopy flight you must be secured to the aircraft with a proper harness, and your camera tethered, both fitted and checked by the operator. Never rely on your own kit alone; the crew will brief and rig you, and nothing should be able to fall from the aircraft.
- Can I sell or license air-to-air photos I take?
- Usually yes, but check first. Many operators and organised shoots allow personal and editorial use but place conditions on commercial sale, and some ask to approve images. Agree the terms before you fly so you know exactly what you can do with the results.
Where to go from here
Air-to-air photography looks like magic from the outside and turns out, on the inside, to be a careful craft built on safe flying, a thorough brief and a handful of settings you can learn on the ground. Master panning and exposure at airshows, understand why the propeller needs to blur and the jet does not, get comfortable with a single wide zoom, and learn the safety culture by being around formation flying. Do that, become someone crews trust, and the seats start to appear. The shots that stop people scrolling are within reach of any committed aviation photographer who is willing to put the groundwork in first.
